Instagram message belongs to Communication blocks. The block is available for Triggered scenarios only.
Instagram message block allows you to send automatic messages to Instagram users via an omnichannel automation scenario.
Use this block to:
- Automate communication on Instagram. Send automatic messages with text, links, and buttons.
- Attract and engage leads. Send lead magnets, free checklists, discount codes, ebooks, quizzes, product options and recommendations via DM. This keeps the conversation going beyond the post itself.
- Introduce leads to your other marketing channels. Invite users to share their email or follow a link to your Telegram bot to always stay connected.
💡 Instagram blocks — Keyword and Message — are available exclusively for Instagram business accounts. You can switch to a business account, using Instagram official guidelines.
Set up Instagram message block
Add the Instagram message block to the workspace from the toolbar menu below or by right-clicking the workspace.
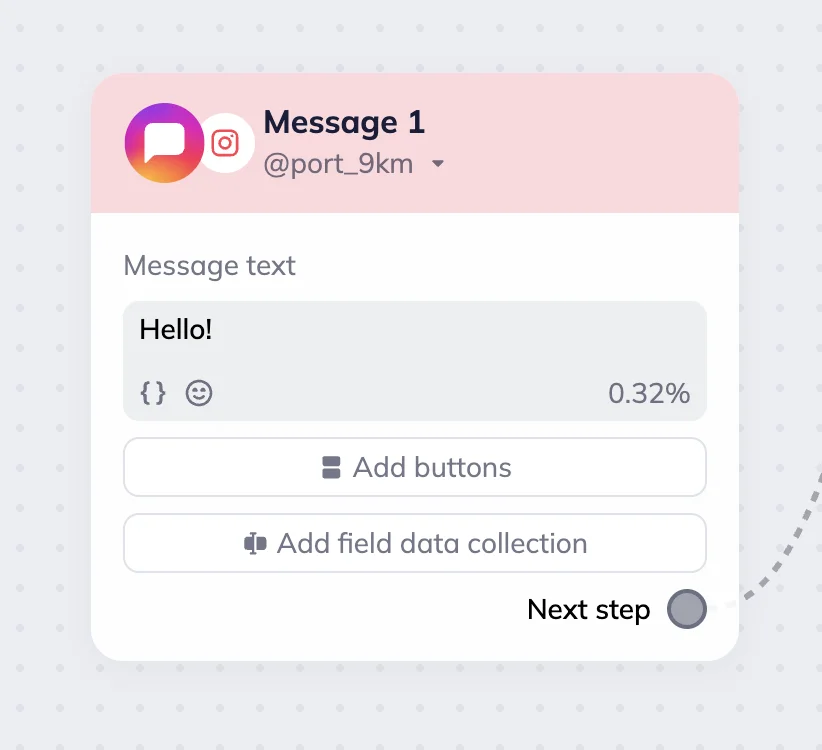
Next, select a connected account using the “Select an Instagram” button.
💡To connect a new Instagram account, click on the “Connect new Instagram account” link in the “Select an Instagram account” dropdown menu. In the Instagram authorization pop-up window, enter your Instagram login and password.
If the connection is successful, you’ll see a notification message “Instagram account [your account name] has been connected”.
Then, add your message to the Message text field (1). The message length can’t exceed 4,096 characters.
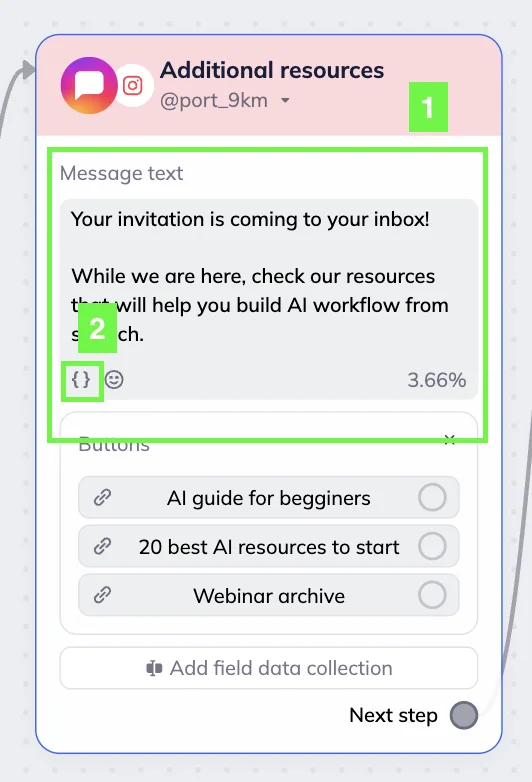
You can personalize your message by clicking the “Merge tags” icon (2) — { } (braces). In the dropdown menu, select any custom field or create a new one using the “Create new field” button.
You can also add emoji by clicking on the Emoji icon in the Message text field.
Note that Meta only allows you to send messages within a 24-hour window after a user interacts with your account. Messages sent outside that window won’t be delivered.
Non-followers need to opt in to keep receiving messages — they have 24 hours from your first message to do so. To give them time, add a Delay block before any follow-up messages; around 24 hours is a practical choice.
In either situation — an expired 24-hour window or a non-follower who didn't opt in — the scenario stops advancing for that user.
Add buttons
You can add a button that the user can click on for a quick answer. For example, instead of “Hey Charles, how can we help you with your skiing gear?”, you can create a shortcut message with buttons “Gear repair” and “New order”.
There are two types of buttons:
- Quick answer — in this case, the user clicks the button and the system proceeds with further steps in the scenario.
- Link— in this case, the button contains a link, so the user is redirected to a website when clicking the button.
To create a button, click “Add buttons”. In the pop-up window with button settings enter a text for your button and — if needed — a link. Click “Save” to save your button.
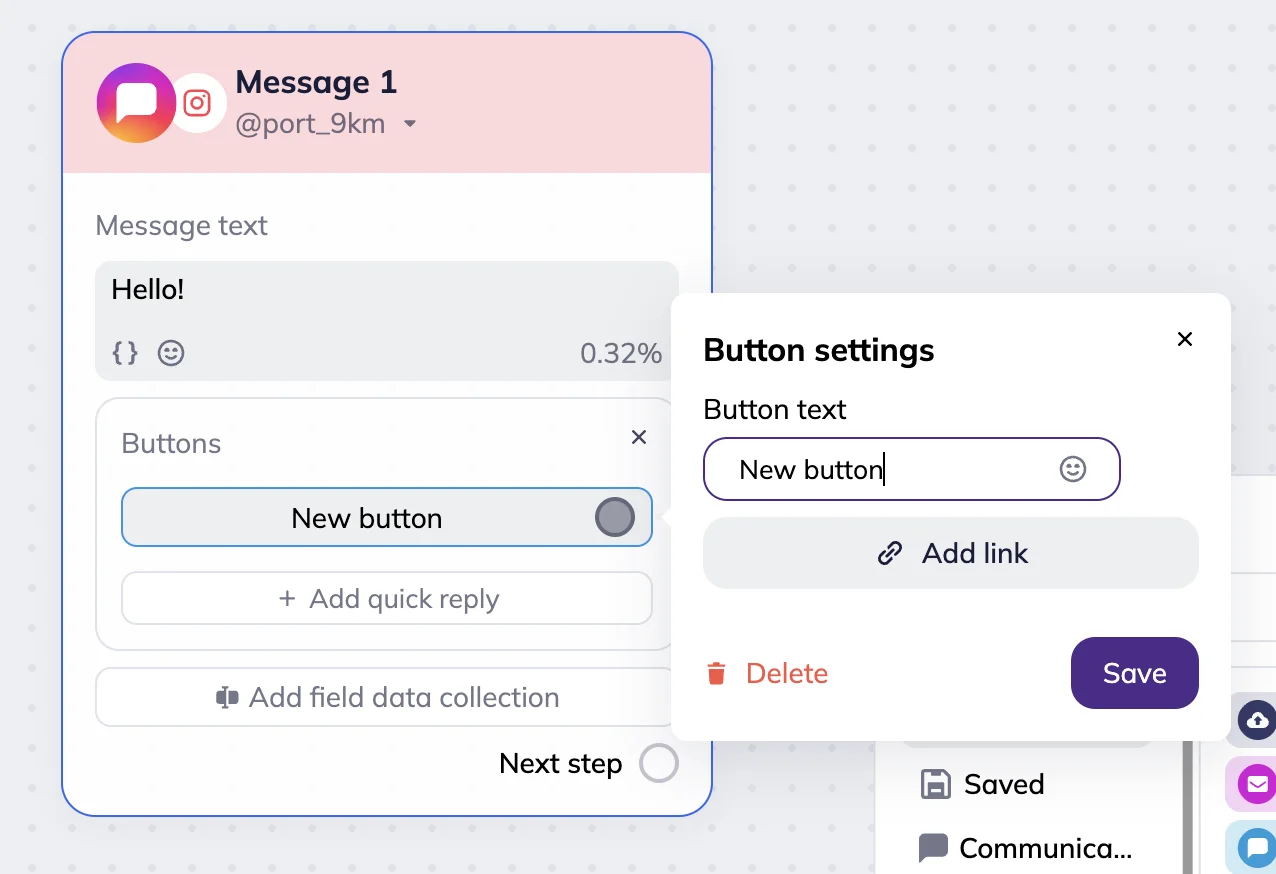
If you want to delete the button, click on it → Click the “Delete” icon.
If you set up a link button, you can track clicks. To do that, in the Button settings use the “Track link clicks” toggle.
Set up data collection
Instagram message block allows you to collect lead or customer data — for example, emails, phone numbers, etc. To do this, you need to set up custom fields that store customer data in the contact card.
If you are collecting data, your leads will receive a direct message on Instagram asking them for the data of your choosing after they send you the keyword.
💡 To create a new custom field directly from the block’s settings, click the “Add field collection” button in the Instagram message block → click “Collect customer answer to the field” → click the “Create new field” button at the bottom of the list. Fill out:
- Field name — appears in menus when selecting a custom field, and in the contact card.
- Variable — is used in emails, subscription forms, and Telegram messages as a merge tag. Use Latin letters, numbers, and underscores without spaces to create a variable. Note that the first character must be a letter.
- Field type — defines the format of data this field will store. You can choose a string (single-line text up to 255 characters), a number, a text, a Yes/No checkbox, a radio button, or a date.
Click the “Create” button. A new field will be automatically added to the field list in the block’s dropdown menu. It will also be added to the contact cards.
To collect data, click the “Add field collection” button → Choose field from the dropdown menu → Add an error message that will be sent if the information given by the lead or subscriber is incorrect.
Instagram message block example
Need a scenario idea to start? Use our Instagram lead-magnet scenario template or Instagram discount scenario template 🙂
Let’s say we want to automatically greet leads who DMs the keyword to collect their email to send them a 10% discount.
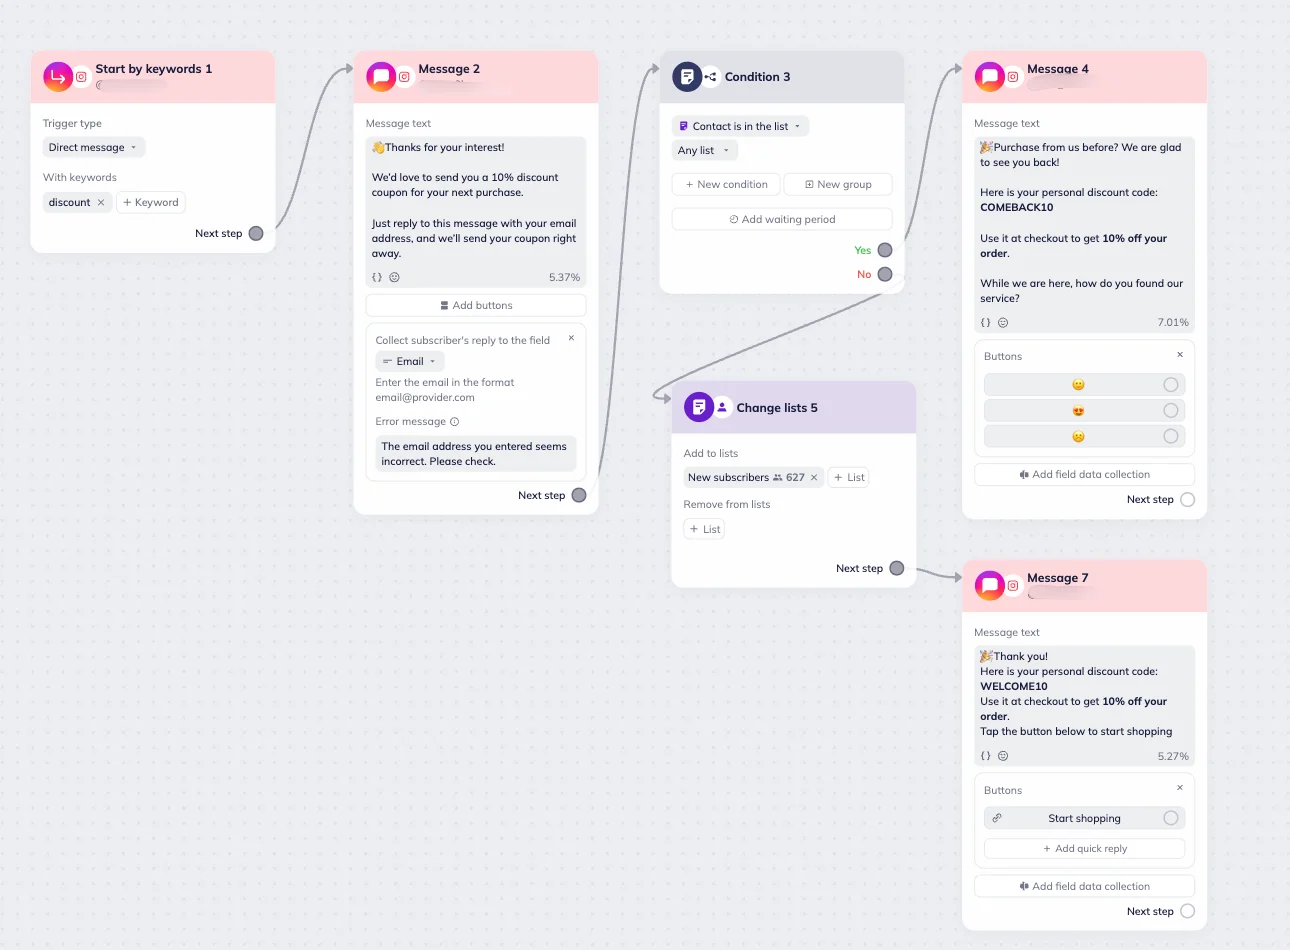
We create a Triggered scenario with the Instagram keyword trigger. When someone sends the word “discount” to our direct messages, they enter the scenario.
Next, we add the Instagram message block. In the block settings, we write a short message. For Field data collection we pick the custom field Email from the list. This way, the lead’s response with their email will be saved directly into their contact card.
We also set up a Condition block to check whether or not this is a new contact. If the email already exists in our contact list, we send a coupon to the customer with a suggestion to rate their experience. If this is a new lead, they are automatically added to the “New subscribers” list and sent a second Instagram message with a coupon. To make navigation easier, we also add a quick reply button in the second message with a link to the website. This way, we not only greet new contacts automatically but also collect their data.