Contact list trigger belongs to Trigger blocks. The block’s functionality is different for Triggered and Bulk scenarios.
The Contact list trigger block runs a scenario when a contact is added to a selected list or when you select a list to perform bulk actions on the contacts in it.
Use this block to:
- Launch automated scenarios when a new contact is added to a list
- Perform bulk actions on selected contact lists
- Update or manage tags for large groups of subscribers
The block works differently for two types of scenarios:
Triggered — designed for transactional, retention, and other automated communications. In this case, each subscriber enters the scenario whenever the trigger event happens. For instance, a Triggered scenario can start after a first purchase — every new client receives a receipt and a series of onboarding messages.
In Triggered scenarios, you select the list(s) that will trigger your scenario when contacts are added. You can also specify the source from which your subscribers are added to the selected list or lists — by contact import or by subscribing via Double Opt-In.
Bulk — designed for time-bound campaigns and bulk actions on contacts. For example, you can use a bulk scenario for a once-a-year sale, where all subscribers enter the flow at the same time. You can also use it when you need to change many contact tags at once.
In Bulk scenarios, you add specific lists to trigger the scenario.
To choose the scenario type, click on the arrow icon in the Scenarios section of the main menu. Alternatively, you can click Scenarios in the main menu and switch between the Triggered and Bulk tabs on the Omnichannel automation scenarios page.
Contact list trigger in Triggered scenarios
To create a Triggered scenario with the Contact list trigger block, go to Triggered scenarios — either click on the arrow icon in the Scenarios section of the main menu or on the Trigger tab on the Omnichannel automation scenarios page → “New campaign” button → The scenario builder will open.
Add the Contact list trigger block to the workspace from the toolbar menu below or by right-clicking the workspace.
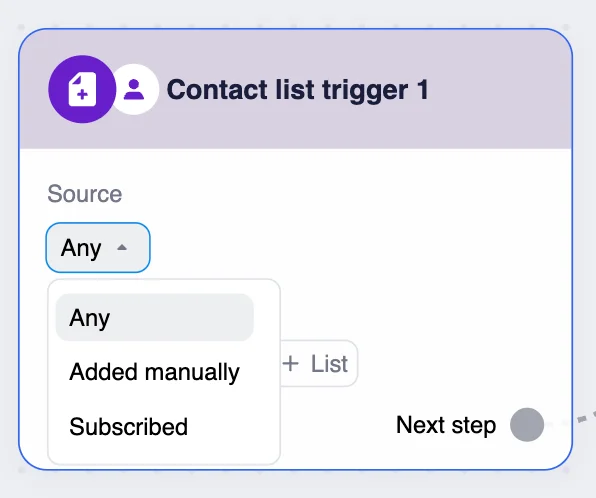
Next, choose a source:
Any — runs the scenario for all the subscribers added to the lists you’ve chosen, no matter the source.
Added manually — runs the scenario if you add the contact to the selected list:
- manually (through the contact card or import),
- via bulk import,
- by copying or moving them to the list,
- via API (without using Double Opt-In).
Subscribed — runs the scenario if the subscriber confirms their subscription via double opt-in by clicking the link in the confirmation email.
After the source is selected, click the “+ List” button and choose a list or lists from the dropdown menu. For a quick search, start typing the name of the list. You can see all the added lists in the block.
Contacts must be added to the list after the scenario is launched; otherwise, they won’t enter the scenario.
The trigger can be set to respond to multiple lists at once. In this case, the scenario launches when a contact is added to at least one of the lists. Use the “+ List” button to add additional lists.
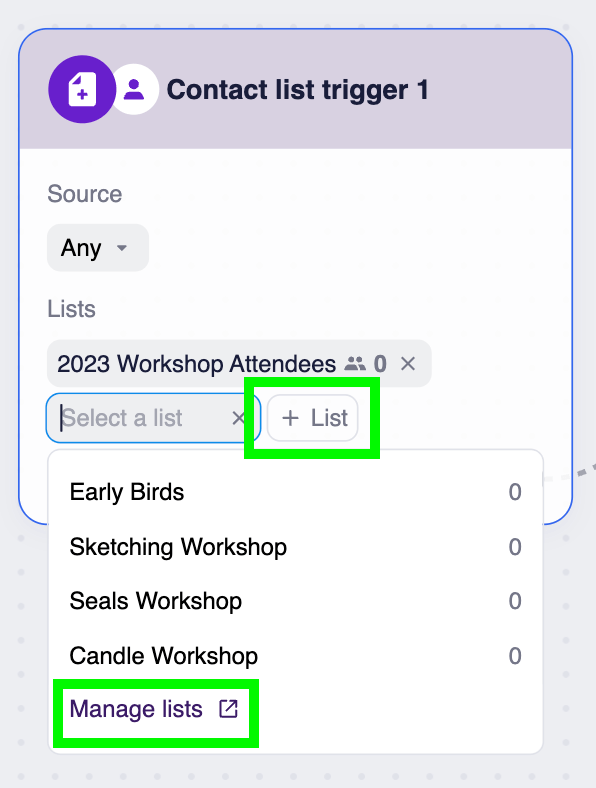
If you want to create a new list, click the “Manage lists” link in the list selection dropdown menu. You will be redirected to the Lists page in a new browser tab. After you create a new list, it will automatically appear in the list selection dropdown menu.
Example
Let’s say a fitness studio wants to welcome every new client who signs up for their newsletter. For this purpose, they create a Triggered scenario with the Contact list trigger set to “Subscribed” and the “New Clients” list. Next, they add the Email block with the welcome email. The Condition block is set up with a 3-day waiting period, and the additional Email block with the success stories from existing clients.
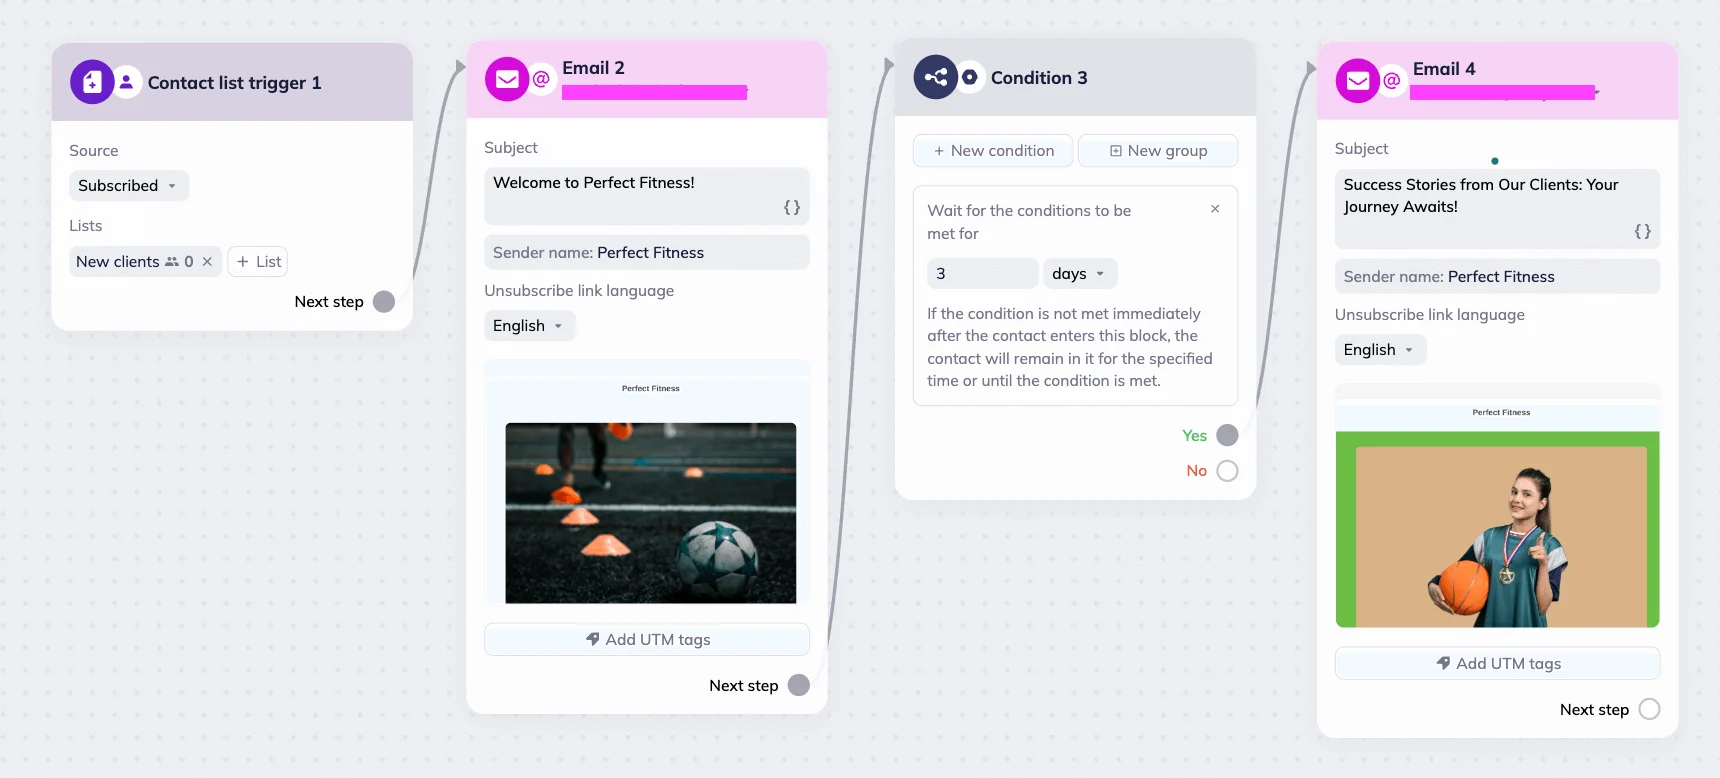
When someone subscribes and confirms their email, the scenario starts automatically. The subscriber receives a welcome email with details about the studio and a free class offer. After three days, the system sends a follow-up email with client success stories.
Contact list trigger in Bulk scenarios
To create a Bulk scenario with the Contact list trigger block, go to Bulk scenarios — either click on the arrow icon in the Scenarios section of the main menu or on the Bulk tab on the omnichannel automation scenarios page → “New campaign” button → The scenario builder will open.
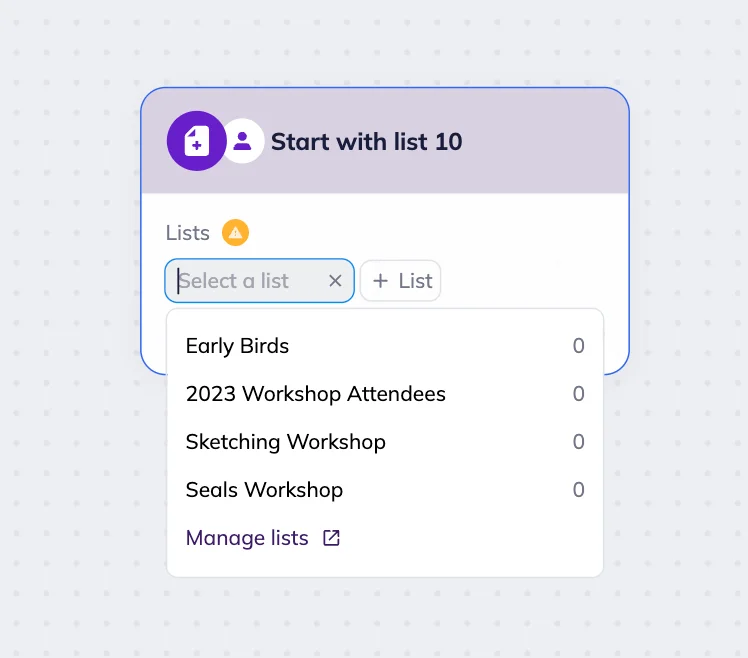
The Contact list trigger’s block’s default name in Bulk scenarios is “Start with a list”.
Add the “Start with list” trigger block to the scenario builder’s workspace from the toolbar menu below or by right-clicking the workspace.
To select lists of contacts, click the “+ List” button. Then choose the desired option from the dropdown menu in the block. For a quick search, start typing the name of the list. Note that you can’t select multiple lists at once. To add additional lists, click the “+ List” button again.
Subscribers should be added to the selected list or lists before you start the automation.
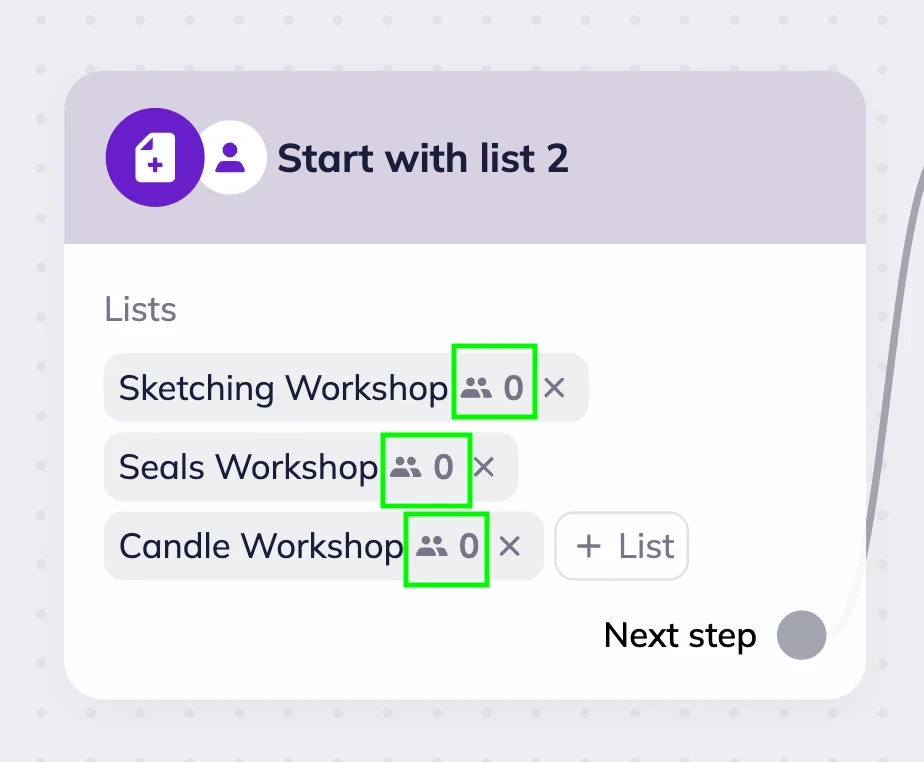
When you’ve added a list, you can see its name and the number of subscribers in it in the block.
If you want to create a new list, click “Manage lists” in the list selection dropdown menu.
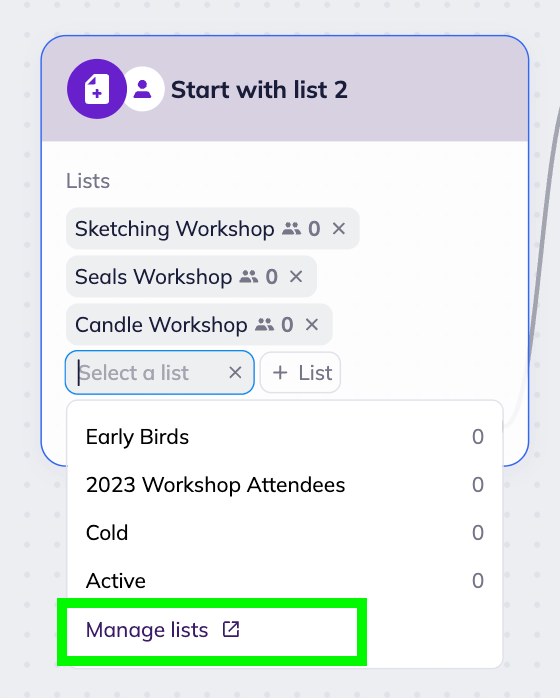
You will be redirected to the Lists page in a new browser tab. After you create a new list, it will automatically appear in the list selection dropdown menu.
Example
Let’s say an online craft school wants to invite its most loyal subscribers to join a new course. To segment them out, the school can add a new tag to those who attended multiple classes throughout the year.
To do this, they chose the “Start with the list” trigger block and selected all the workshops from the last season — sketching, candle-making, etc. Next, they added a Condition and “Change tag” block: if a subscriber attended all three workshops, they will be tagged “Top Crafters”. Those with the tag will receive “Look out for the 'Craft Magic' season 2” email with the announcement and a link to the list of future classes and speakers. For that, the school added the Email communication block. Then, the Condition block with YES and NO branches was set up.
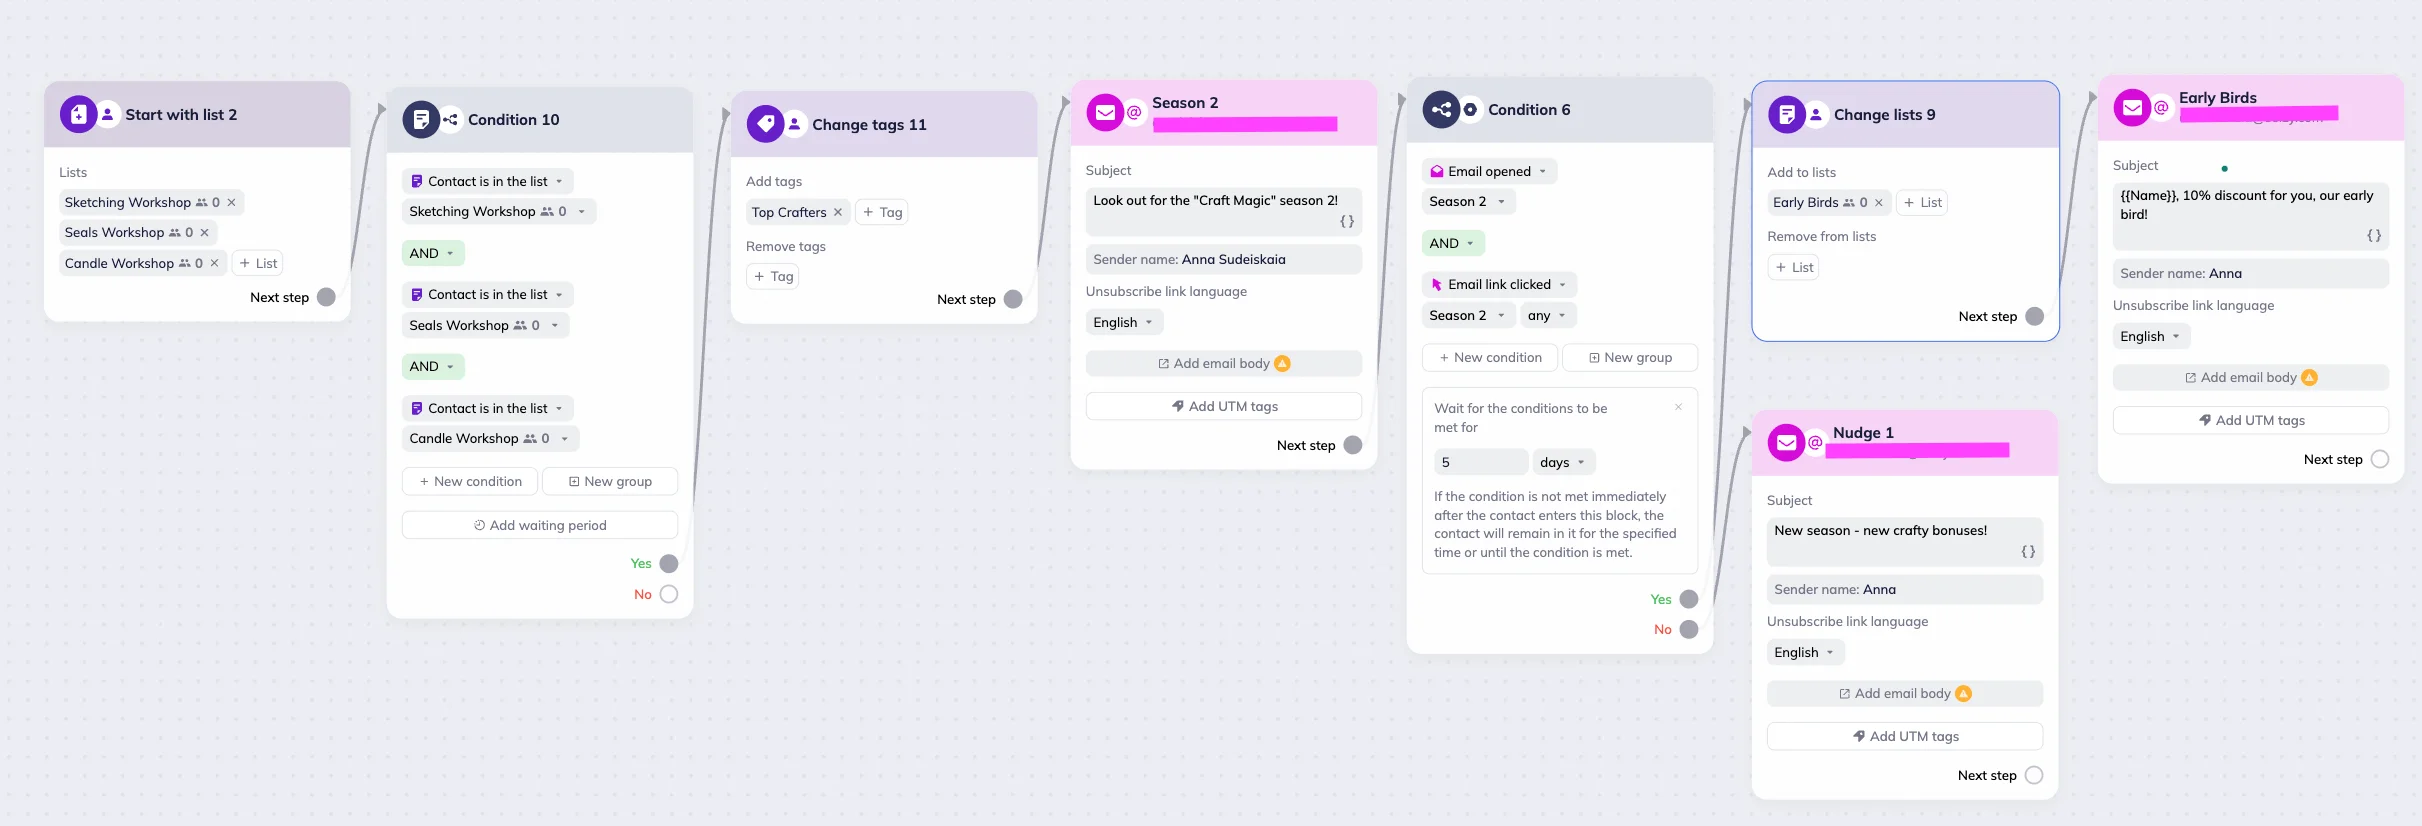
If a subscriber opens the email AND clicks any link in the email during the next 5 days, the system will follow the YES branch. It will automatically add subscribers to the “Early Birds” list and remove them from all of the workshop lists. So after the initial announcement, subscribers in the “Early Birds” list will receive an email inviting them to register for the course and offering a discount.
On the other hand, for those who don’t open the new season announcement email or click any link in it within 5 days, the system will follow the NO branch. These subscribers will receive an email with bonus offers, prompting them to further engage with the course content.


