Segment trigger belongs to Trigger blocks. The block’s functionality is different for Triggered and Bulk scenarios.
The Segment trigger block runs a scenario when a contact is added to a segment or when you select a segment to perform bulk actions.
Use this block to:
- Launch automated scenarios when a new contact is added to a segment
- Perform bulk actions on the selected segment
The block works differently for two types of scenarios:
Triggered
Designed for transactional, retention, and other automated communications. In this case, each subscriber enters the scenario whenever the trigger event happens. For instance, a Triggered scenario can start after a first purchase — every new client receives a receipt and a series of onboarding messages.
In Triggered scenarios, you select the segment(s) that will trigger your scenario when contacts are added. Each segment is checked independently — if a contact belongs to any of the chosen segments, the scenario starts for that contact.
Bulk
Designed for time-bound campaigns and bulk actions on contacts. For example, you can use a bulk scenario for a once-a-year sale, where all subscribers enter the scenario at the same time.
In Bulk scenarios, you add a specific segment to trigger the scenario.
To choose the scenario type, click on the arrow icon in the Scenarios section of the main menu. Alternatively, you can click Scenarios in the main menu and switch between the Triggered and Bulk tabs on the Omnichannel automation scenarios page.
Segment trigger in Triggered scenarios
In Triggered scenarios, contacts must be added to the segment after the scenario is launched; otherwise, they won’t enter the scenario. Each segment is checked independently — if a contact belongs to any of the chosen segments, the scenario starts for that contact.
To create a Triggered scenario with the Segment trigger block, go to Triggered scenarios — either click on the arrow icon in the Scenarios section of the main menu or on the Trigger tab on the Omnichannel automation scenarios page → “New campaign” button → The scenario builder will open.
Add the Segment trigger block to the workspace from the toolbar menu below or by right-clicking the workspace.
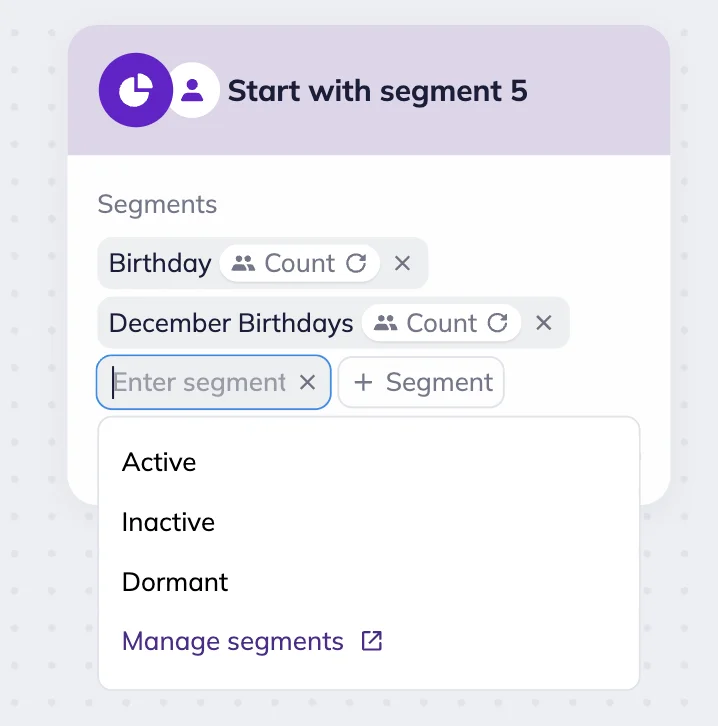
Next, click the “+ Segment” button and choose a segment or segments from the dropdown menu. For a quick search, start typing the name of the segment. You can see all the added segments in the block.
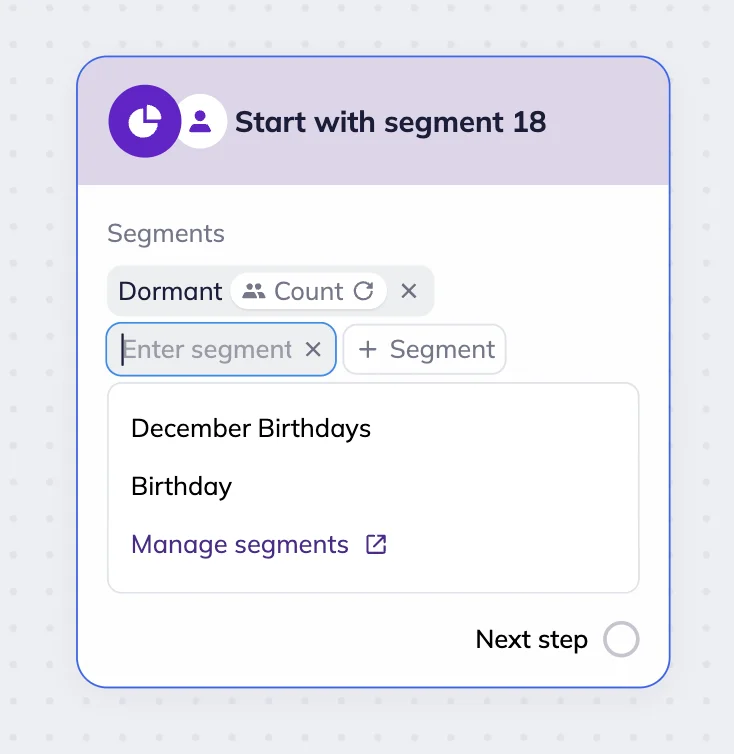
If the segment you need is not there, you can create a new one by clicking on the “Manage segments” link in the “+Segment” dropdown menu. You will be redirected to the Segments page. After you create a new segment, it will automatically appear in the dropdown menu.
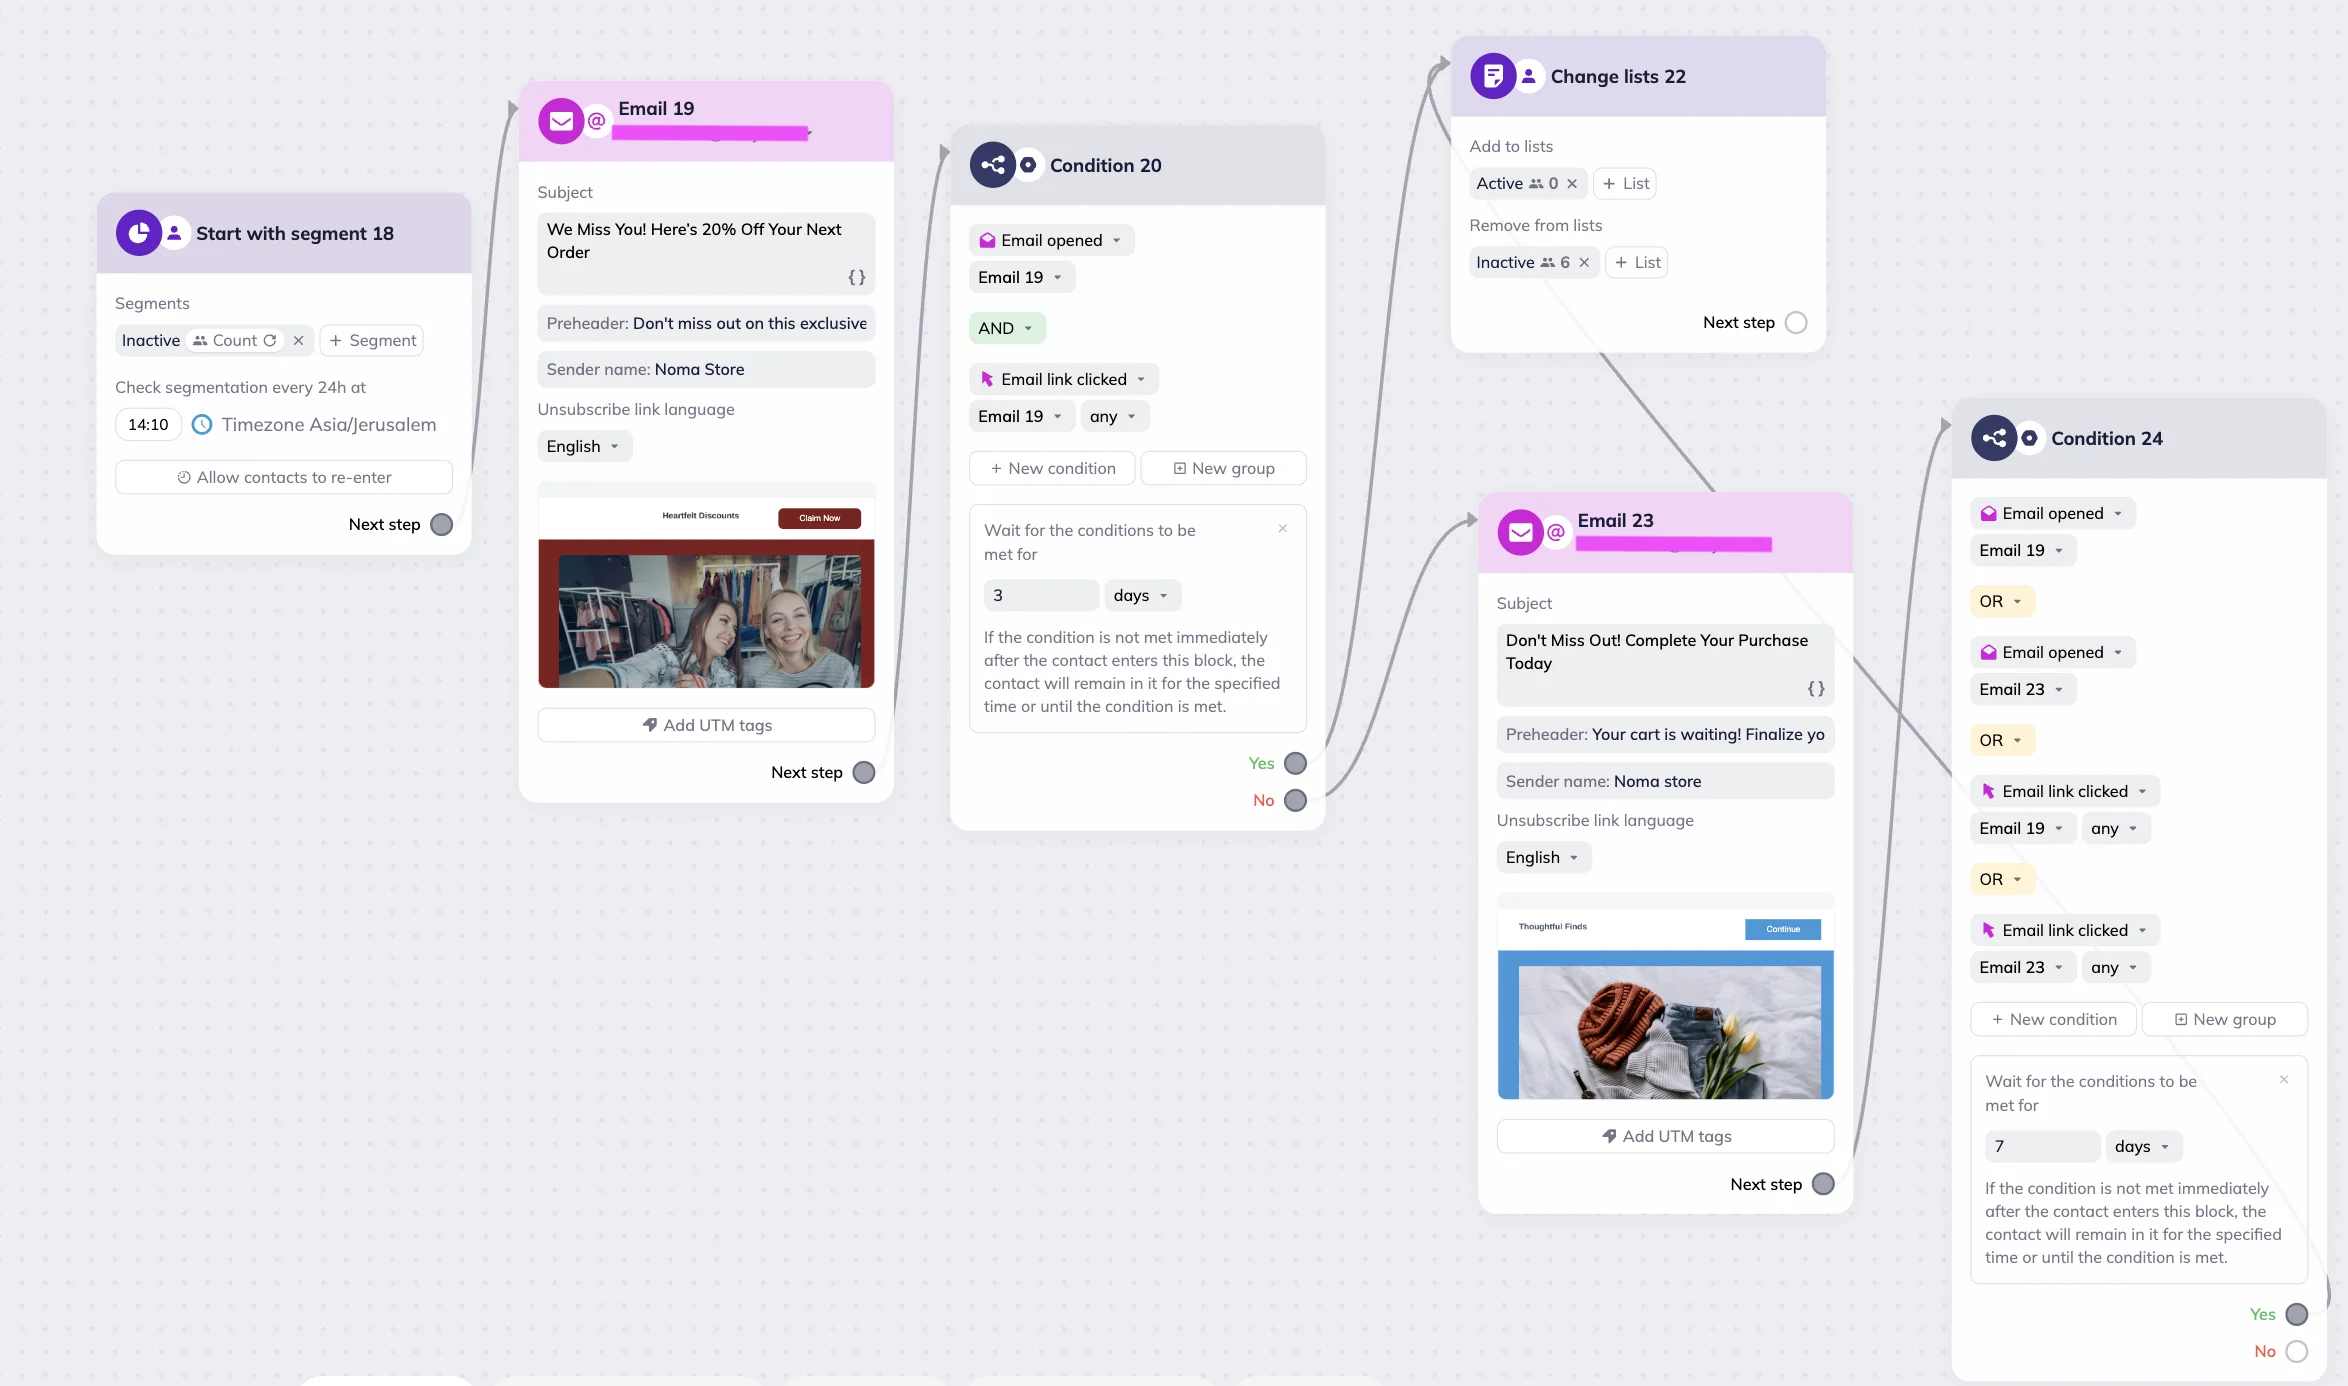
Example: Win-back email campaign for inactive subscribers
Let’s say we want to win back inactive subscribers. We created the “Inactive” segment for those who haven’t opened an email in the last three months. To save time, you can use a preset segment.
Next, in the Triggered scenario, we set up a Segment trigger and selected the “Inactive” segment. Contacts who enter this segment receive the first reactivation email: “We Miss You! Here’s 20% Off Your Next Order.”
If a subscriber doesn’t open or click the email within a few days, they receive “Still Thinking It Over?” follow-up message with a short survey link. If they remain inactive after 10 days, the system starts a win-back promo sequence with a stronger incentive before we remove them from the list.
Segmentation check time
The system automatically checks whether contacts enter the segment once every 24 hours, sometime between 6 AM and 10 PM according to your timezone. You can customize the check time.
For example, you want the system to check your segment every day at 10 AM. Each morning at that time, the system looks for new contacts in the segment — those contacts will automatically enter the scenario.
Allow contacts to re-enter scenario
By default, each contact enters the scenario only once. To change this, enable contact re-entry in the block settings.
With the re-entry setting, you can allow the same contact to re-enter the scenario after the specified period of time. This way, contacts who were removed from the segment and then added back won’t trigger the scenario again until the re-entry waiting period has passed.
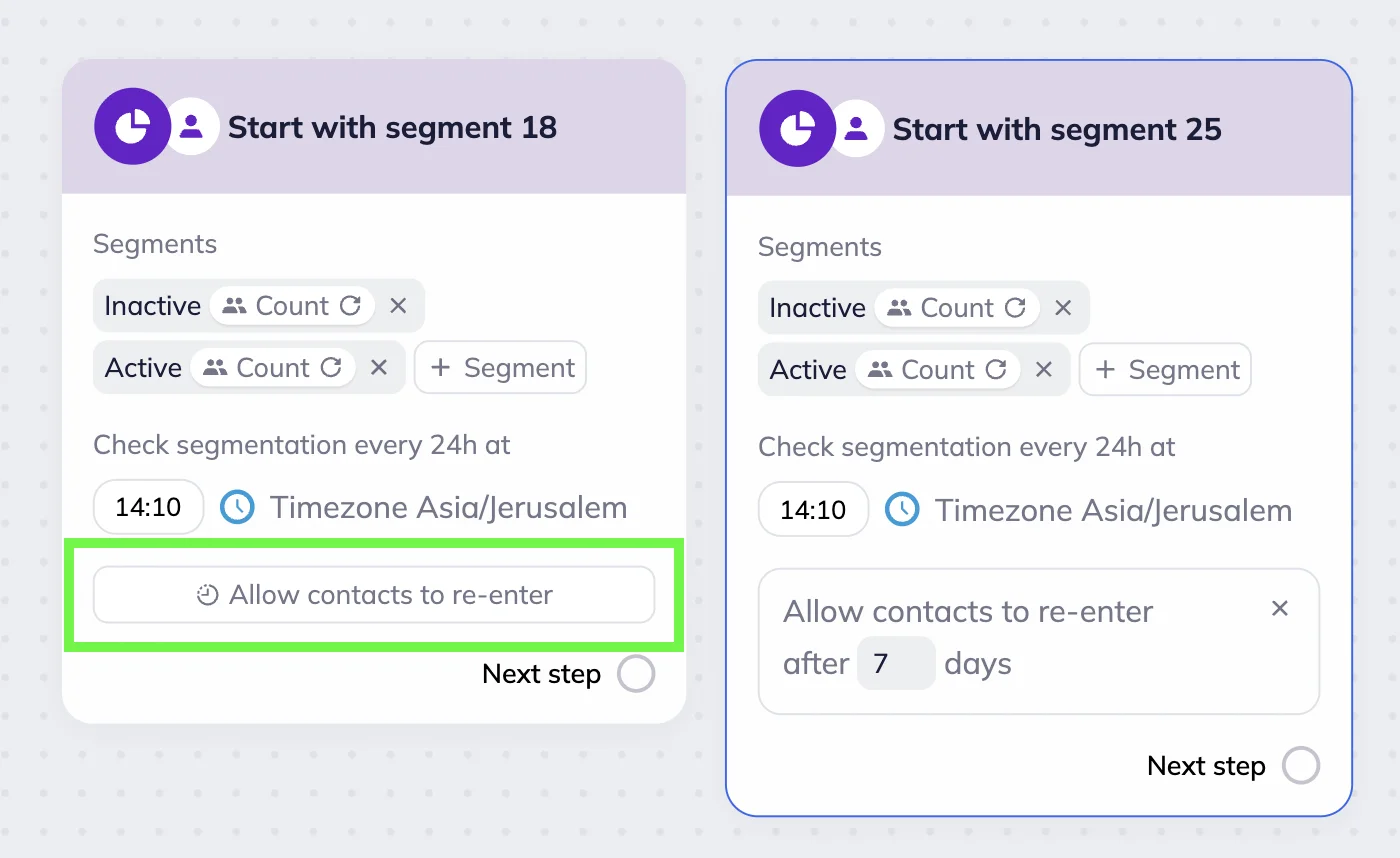
To set up the re-entry, click the “Allow contact to re-enter” button and enter the number of days for the waiting period (up to 999 days).
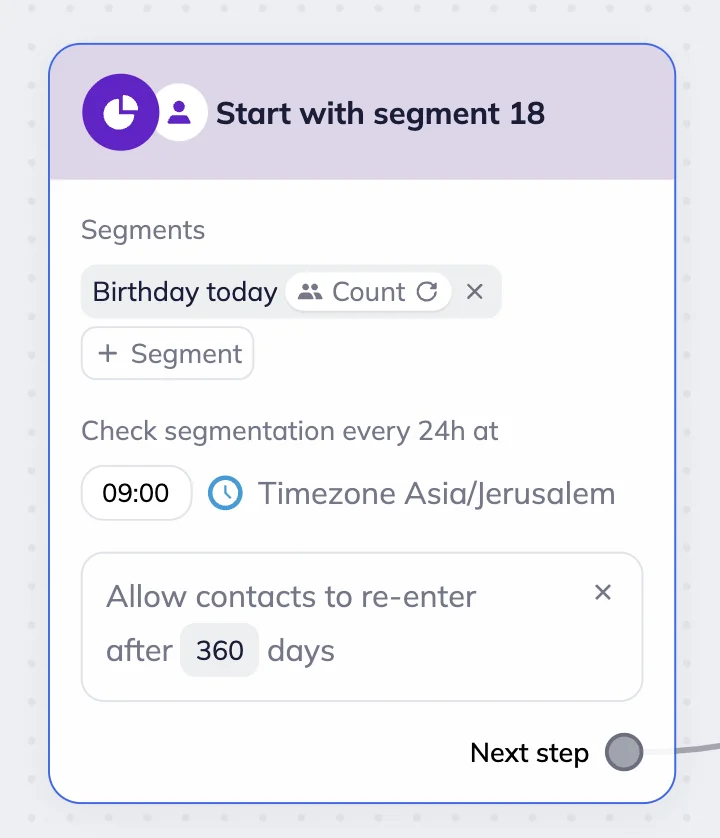
Example: Birthday email scenario
Let’s say you want to send subscribers a birthday email every year. These subscribers belong to the “Birthday today” segment. To save time, you can use a “Birthday today” preset segment. You set the segmentation check time to 09:00 and allow re-entry every 360 days.
Each time a contact enters the “Birthday today” segment and the 360-day re-entry period has passed, they receive a birthday email. Next year, when their birthday comes again and the re-entry period is over, they’ll automatically receive another birthday communication.
Segment trigger in Bulk scenarios
In Bulk scenarios, subscribers should be added to the selected segment or segments before you start the automation. Each segment is checked independently — if a contact belongs to any of the chosen segments, the scenario starts for that contact.
To create a Bulk scenario with Segment trigger block, go to Bulk scenarios — either click on the arrow icon in the Scenarios section of the main menu or on the Bulk tab on the omnichannel automation scenarios page → “New campaign” button → The scenario builder will open.
Add the Segment trigger block to the workspace from the toolbar menu below or by right-clicking the workspace. Next, click the “+ Segment” button and choose a segment or segments from the dropdown menu. For a quick search, start typing the name of the segment. You can see all the added segments in the block.
If the segment you need is not there, you can create a new one by clicking on the “Manage segments” link in the “+Segment” dropdown menu. You will be redirected to the Segment page. After you create a new segment, it will automatically appear in the dropdown menu.
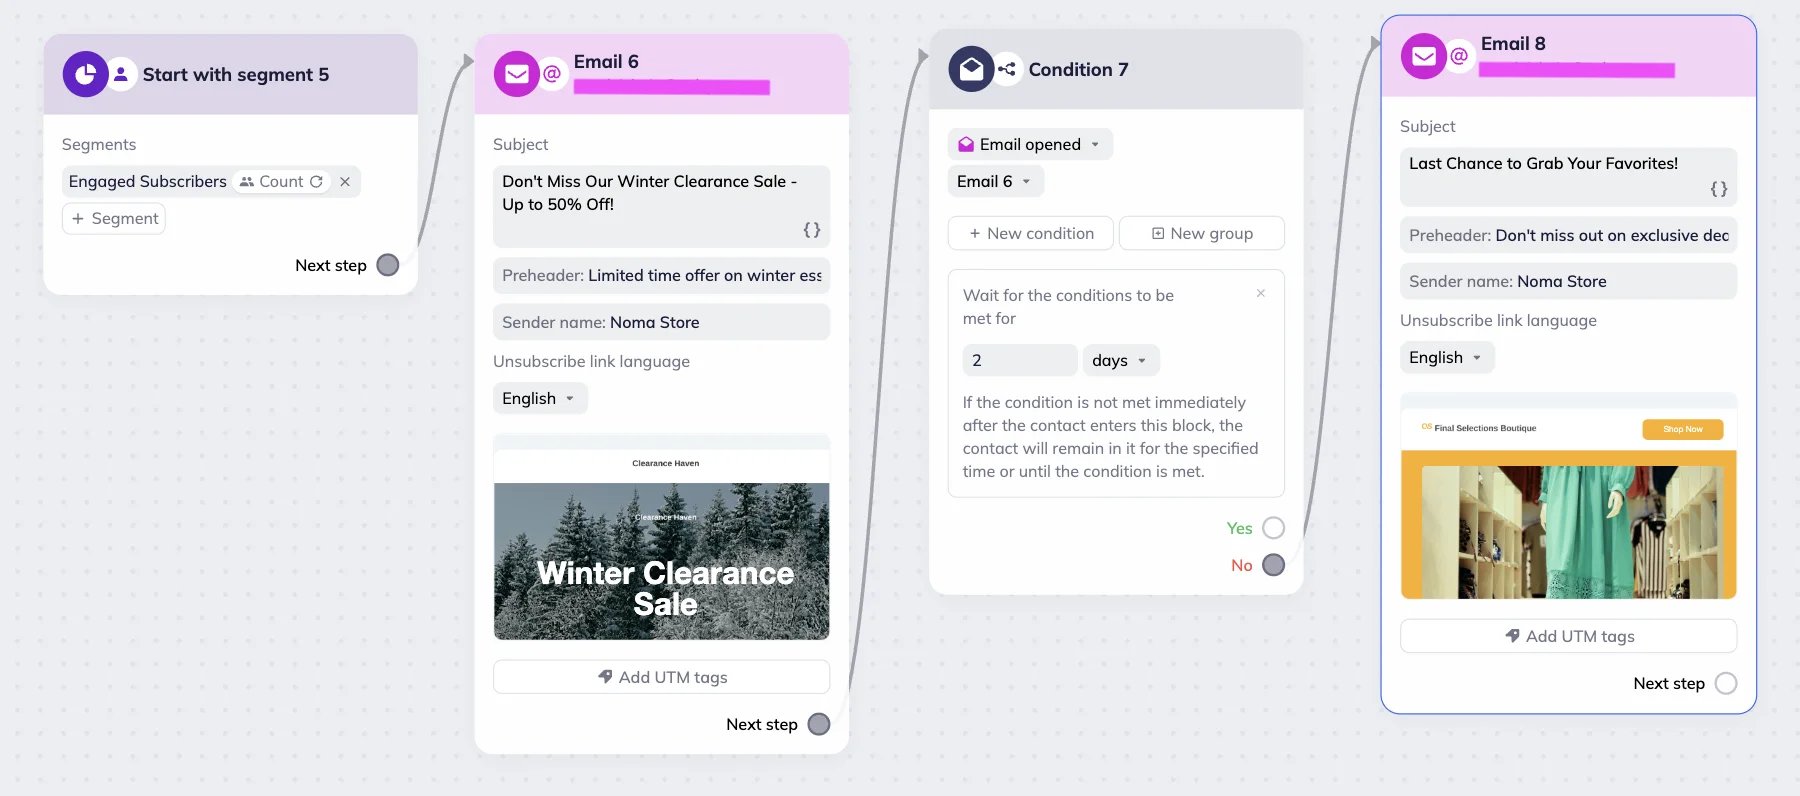
Example: Seasonal sale campaign
Let’s say we want to create a seasonal sale campaign for highly engaged contacts. To do this, we created the “Engaged subscribers” segment, which includes those who opened emails or clicked links in the past 30 days. To save time, you can use a preset segment.
Next, in a Bulk scenario, we set up a Segment trigger and selected the “Engaged subscribers” segment. All contacts in this segment receive the first email: “Winter Clearance Sale — Up to 50% Off.”
We then added a Condition block with a 2-day waiting period. Those who don’t click the first email within that time receive a follow-up message — “Last Chance To Grab Your Favorites!”
Segment trigger with multiple segments
Both in Triggered and Bulk scenarios, the trigger can be set to respond to multiple segments at once. In this case, the scenario launches when a contact is added to at least one of the selected segments.
Use the “+ Segment” button to add additional segments. To remove a segment, click the x icon next to it.
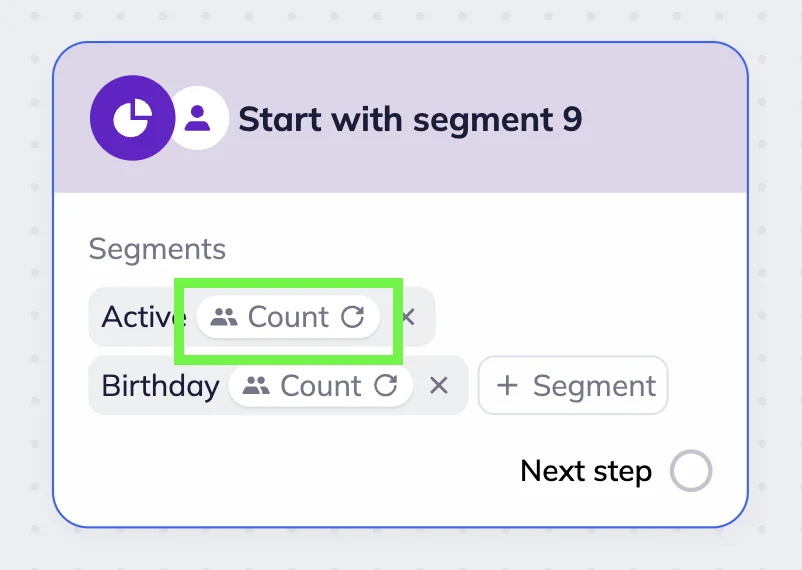
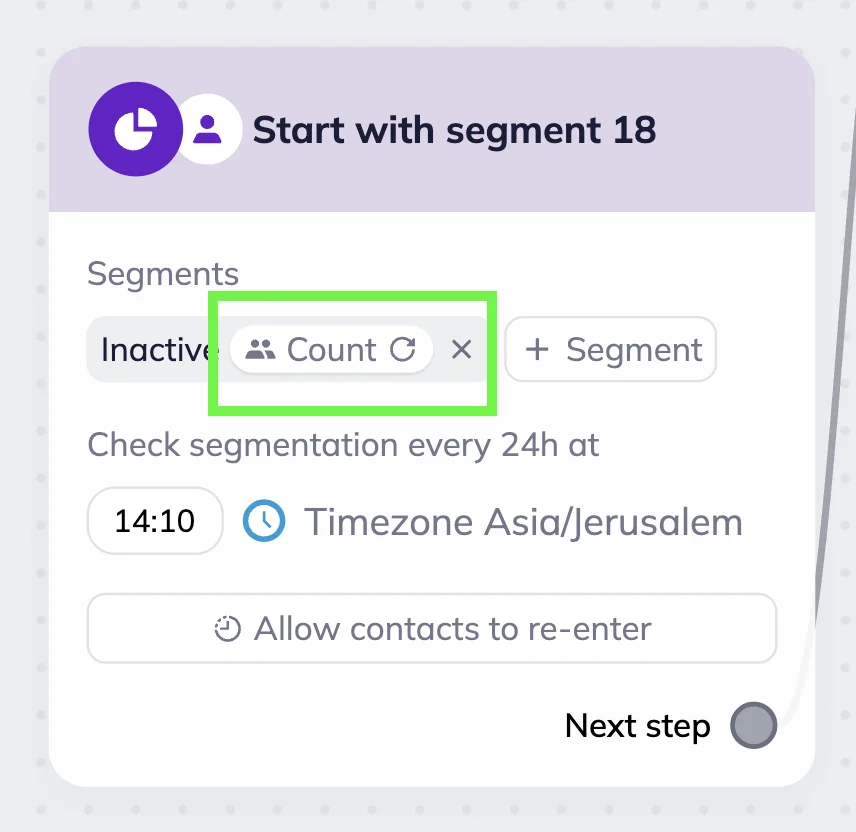
To check how many subscribers are in a segment, click the “Count” button. The result will stay until you refresh the page or click the button again to update the count.
Here is how count looks like in the Segment trigger block for Triggered scenarios.
And here’s how count looks like in the Segment trigger block for Bulk scenarios.