This article describes the old Selzy email builder. You can find information about key features of the new email builder in the overview article available in English.
If you need help with the functionality described in this article but in the new builder and can’t find it in the overview article, please contact our Support Team.
Selzy Support Team is available for all users 24/7.
Email preheaders, also known as email preview texts, are short lines of text that email recipients see in their Inboxes next to the subject line.

If you don’t provide any preheader text, email service providers and email clients may pull different pieces of email content into the preheader line. As a rule, these are the first 150 characters (with spaces) from your email, including the alt text for images.
Preheader is an important part of email design; an effective preheader is a great way to improve email engagement rates. Preheaders can help you tell subscribers what your email is about and compel them to open the email.
Preheaders can be generated from the first lines of text within the email or coded using HTML. In the latter case, the preheader will not be visible in the email body.
Generate preheader text using the first lines of the email
Structure your email so that the first few lines of the body text give recipients an enticing preview of what the email is about.
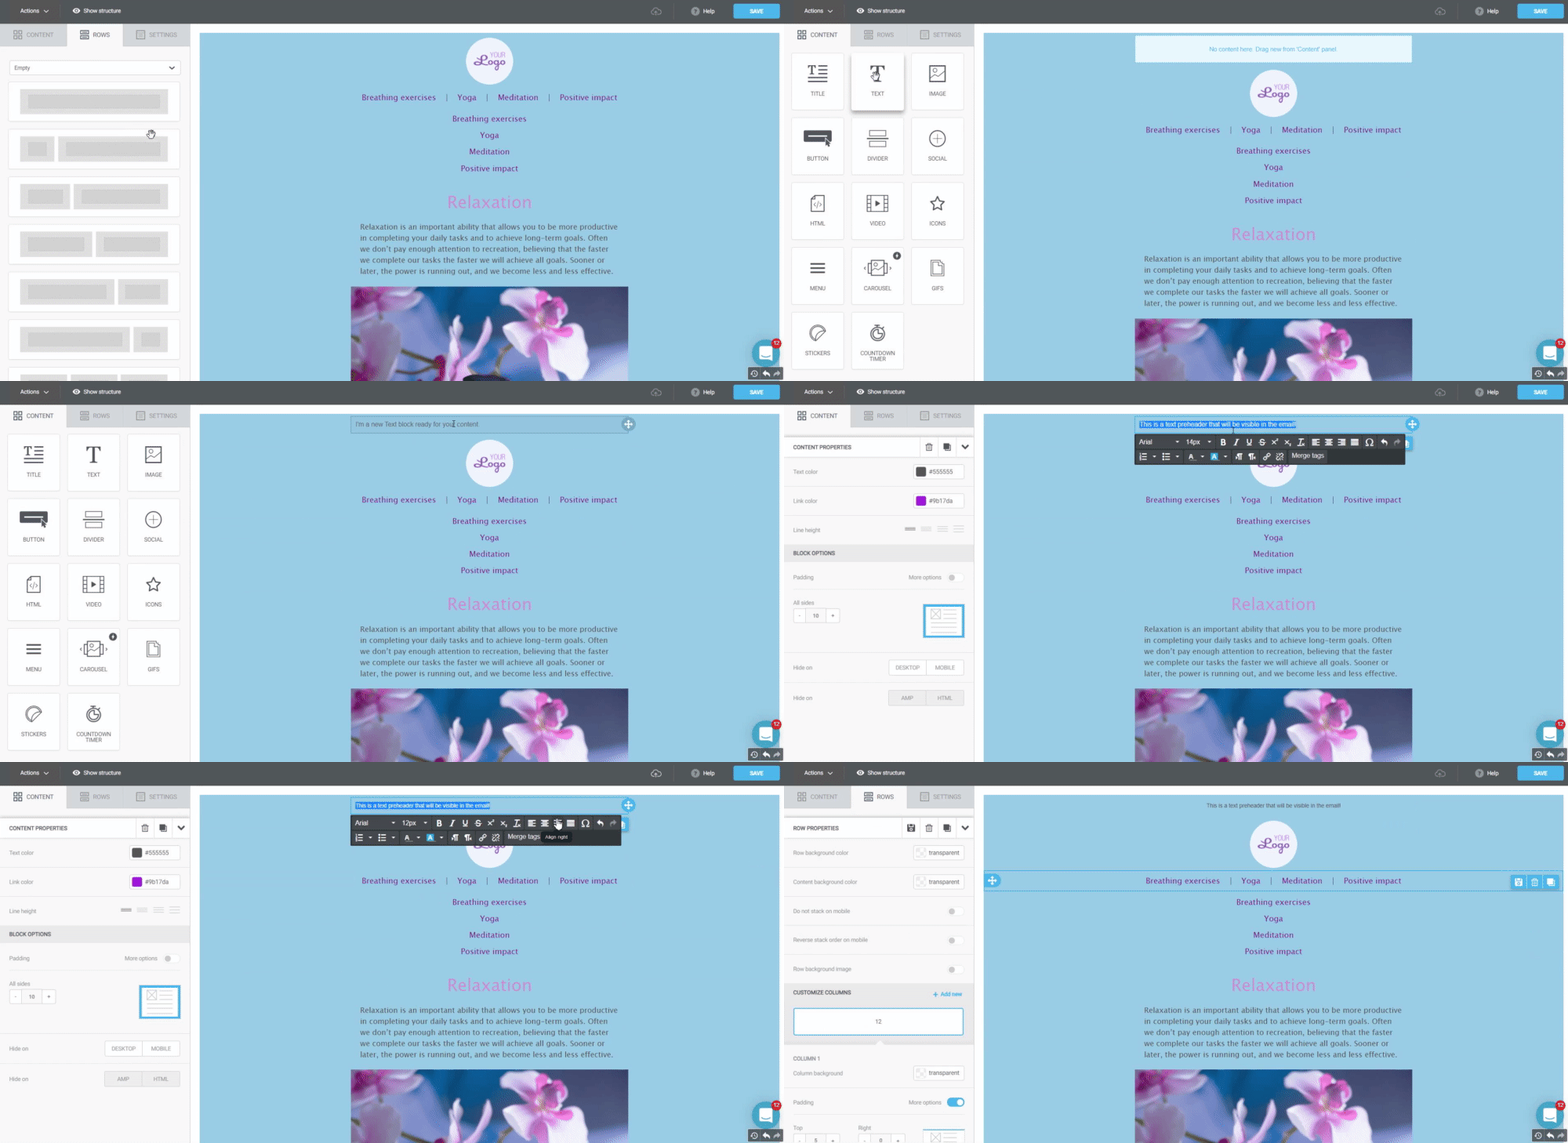
Place the Text content block at the very top of the email and fill it in with the preheader text.
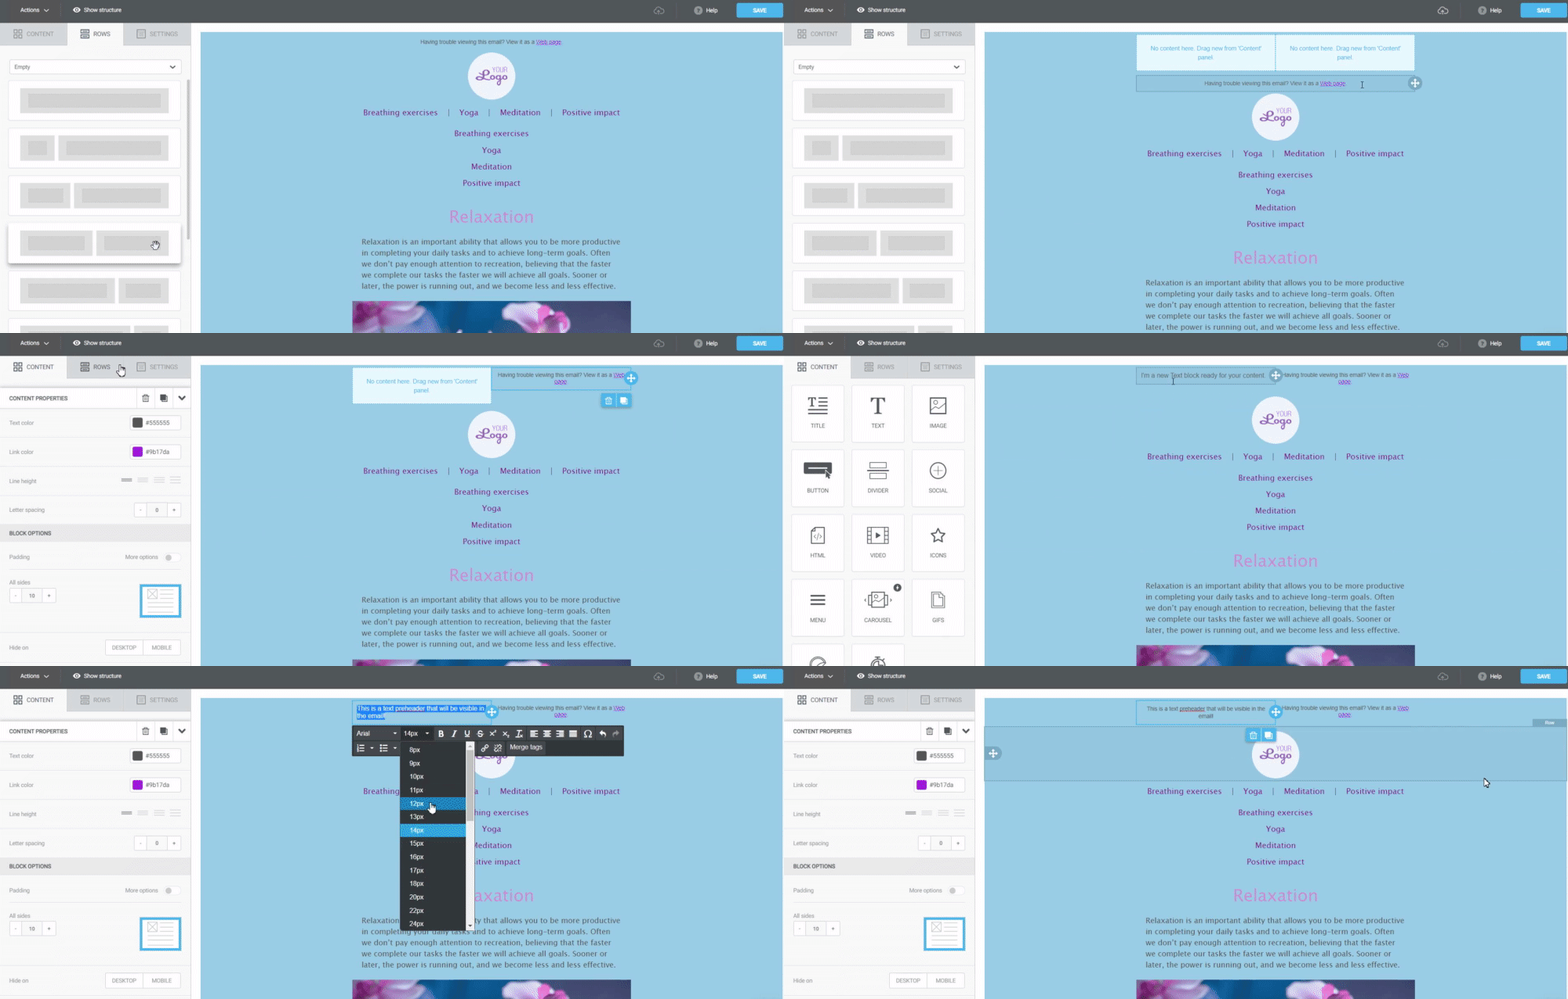
You can place your preheader next to the 'view this email in your browser' link by using a two-column content row. Add the preheader text to the left column and the ‘view in browser’ link to the right one.
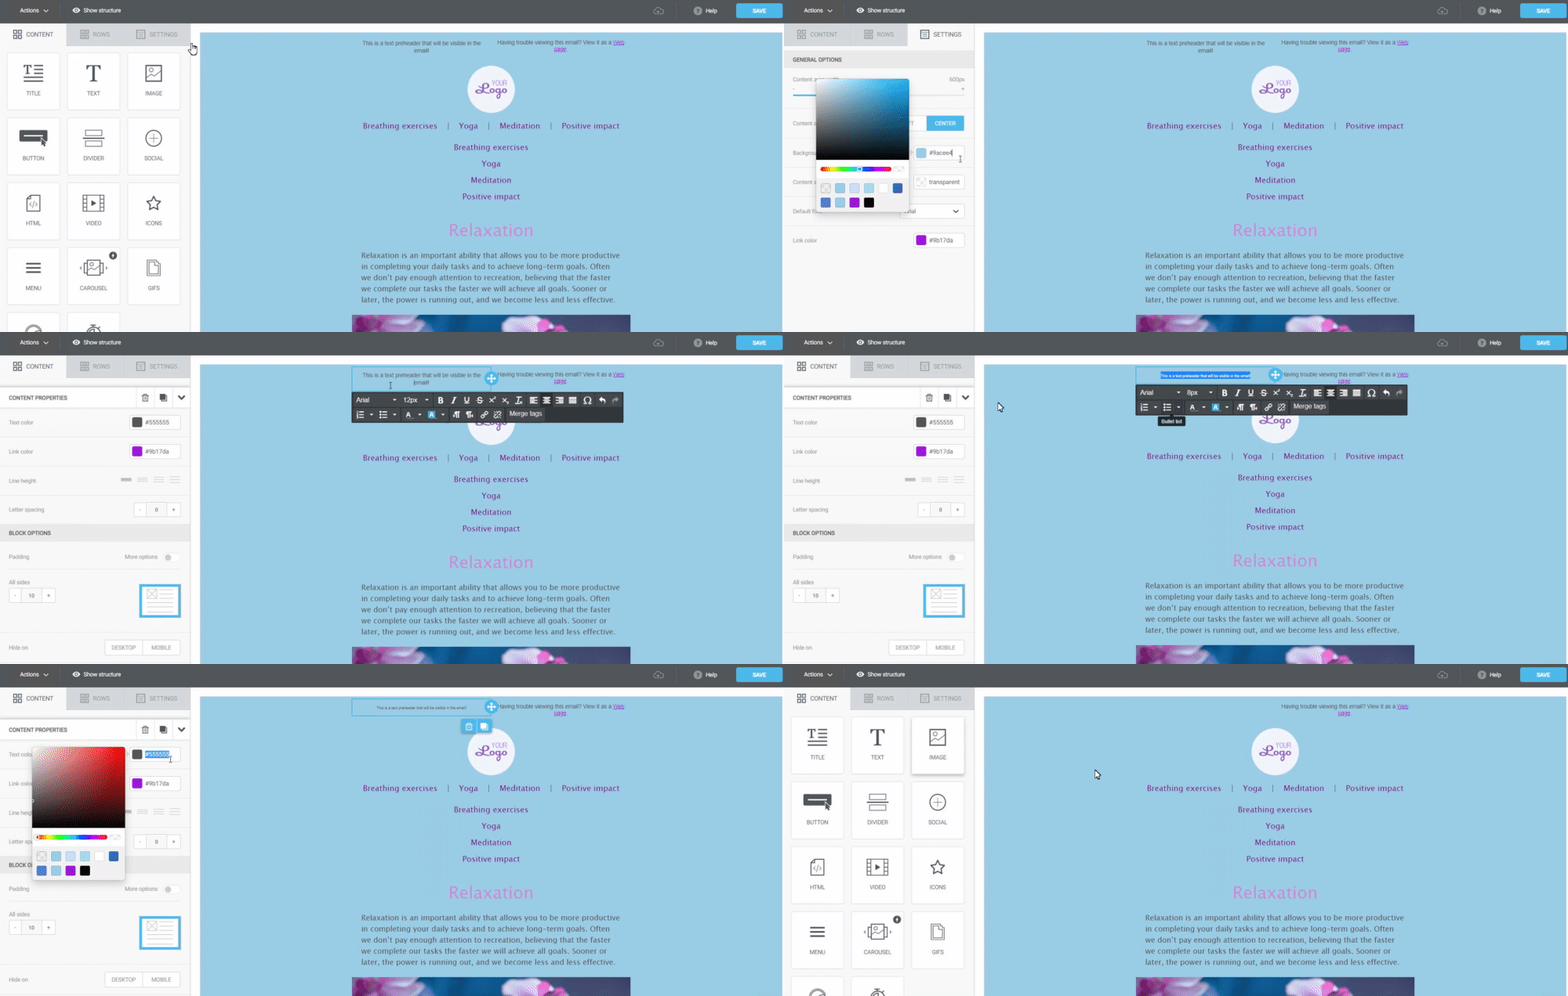
You can make your preheader invisible by setting the text font to its smallest size and the same color as the email background. In this case, email recipients will see the preheader in their Inboxes, but it won’t be visible in the email body.
Here’s what the email will look like in the Inbox:

Adding a preheader in the block builder
You can add a hidden preheader in the Block Builder using default rows. To do this, click on the Rows tab, choose “Default” and drag the “Hidden preheader” row to the beginning of your email. This preheader will be seen right next to the subject of your email but won’t be seen in the email itself.
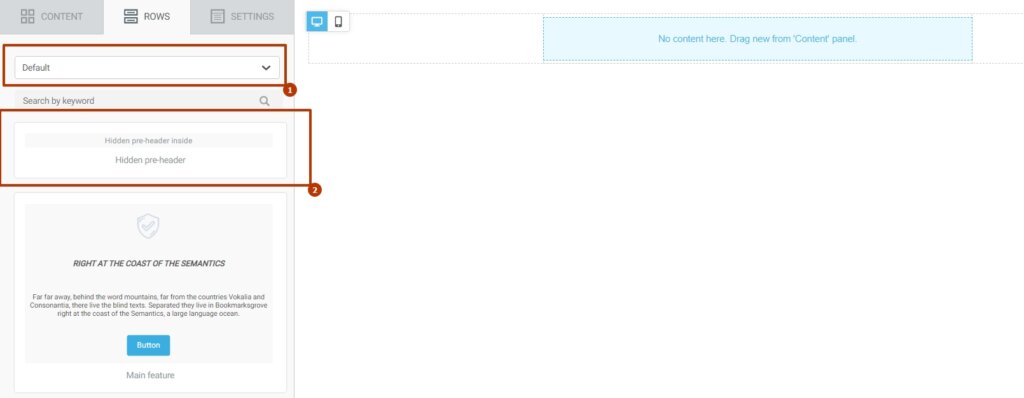
To change the text in the preheader, click on the added block and choose Configure HTML in the block properties on the left-hand side.

In the opened-up window, click on Source. In the code, delete the first row and give a new text for the preheader instead of the selected one in the second row.

Adding a preheader using HTML
In the email builder, add the HTML block to the top part of the email and fill it in with the following code:
<div style="display:none;font-size:1px;color:#333333;line-height:1px;max-height:0px;max-width:0px;opacity:0;overflow:hidden;">
Preheader text
</div>
This code will help you to add a preheader text that is l only visible in the Inbox. The text will not be displayed in the email body itself.
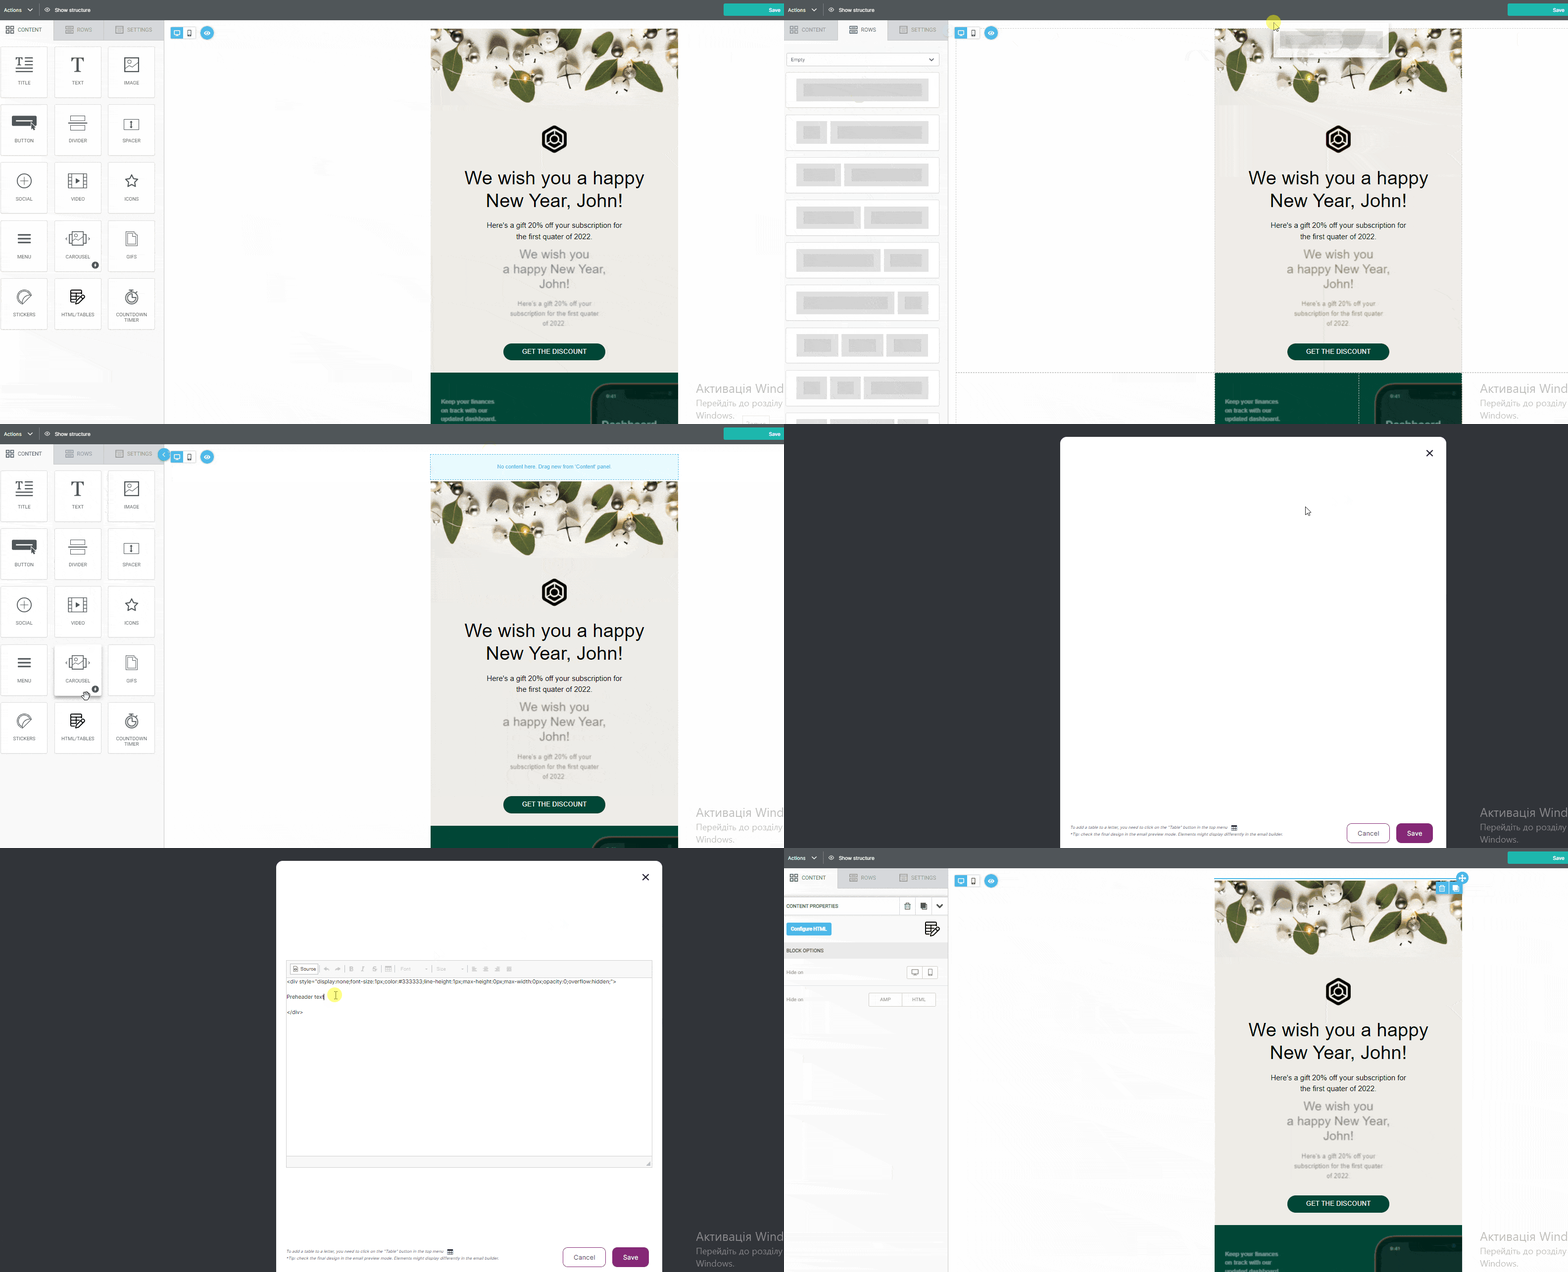
Since preheader text length varies across email providers and clients, it may happen that the client pulls some extra text content from the email body to add to your preview text.
To avoid this, use the following code for your HTML block:
<table>
<tbody>
<tr>
<td>
<div style="display: none; max-height: 0px; overflow: hidden;">Preheader text</div>
<div style="display: none; max-height: 0px; overflow: hidden;"> ‌ ‌ ‌ ‌ ‌ ‌ ‌ ‌ ‌ ‌ ‌ ‌ ‌ ‌ ‌ ‌ ‌ ‌ ‌ ‌ ‌ ‌ ‌ ‌ ‌ ‌ ‌ ‌ ‌ ‌ ‌ ‌ ‌ ‌ ‌ ‌ ‌ ‌ ‌ ‌ ‌ ‌ ‌ ‌ ‌ ‌ ‌ ‌ ‌ ‌ ‌ ‌ ‌ ‌ ‌ ‌ ‌ ‌ ‌ ‌ ‌ ‌ ‌ ‌ ‌ ‌ ‌ ‌ ‌ ‌ ‌ ‌ ‌ ‌ ‌ ‌ ‌ ‌ ‌ ‌ ‌ ‌ ‌ ‌ ‌ ‌ ‌ ‌ ‌ ‌ ‌ ‌ ‌ ‌ ‌ ‌ ‌ ‌ ‌ ‌ ‌ ‌ ‌ ‌ </div>
</td>
</tr>
</tbody>
</table>
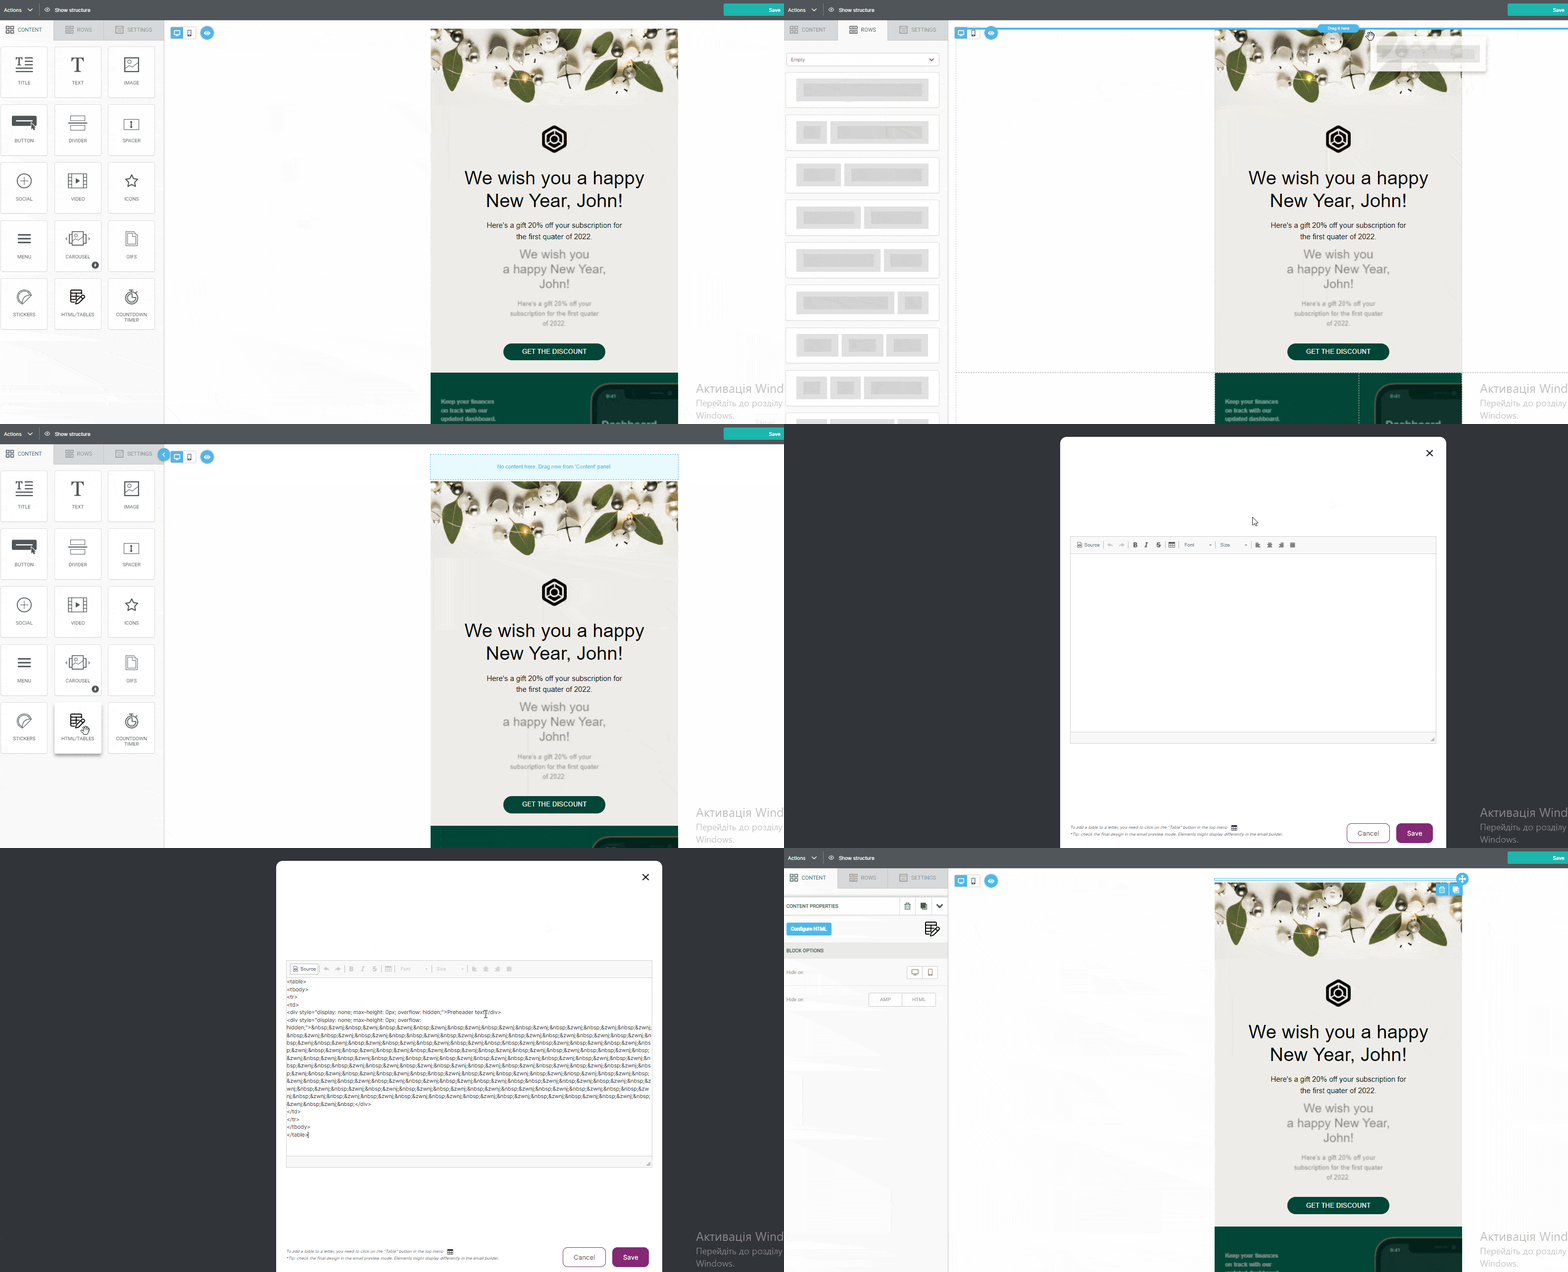
The string ‌ is a non-breakable space that will be seen after your preheader instead of some unrelated text from the email. In this case, only the text you’ve given in the HTML block will be shown as a preheader.

If you want your email to have no preheader at all, just delete the first block <div> and leave the second one only, with non-breakable space.
Useful links:
Build a Layout Using Rows
Save and Reuse Email Elements
Preview Emails Before Sending

