If you don’t want to spend time creating default email elements such as headers, footers, and unsubscribe blocks, you can save and reuse them in your future emails. In our example, we will create a footer with a signature, social media links, and an unsubscribe link.
How to save a content row as a template
Create a row and add the blocks you need. In our example, this is a signature block, a title, social media block, and an unsubscribe block.
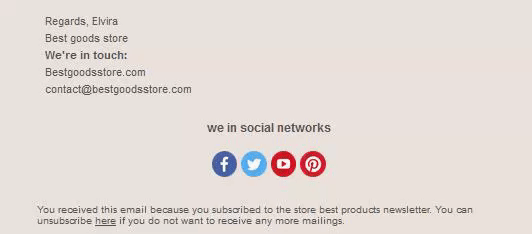
In our example,all four content blocks belong to a single row. You can move all the blocks together as an entire row, alternatively you can add more content blocks or remove the ones you don't need.
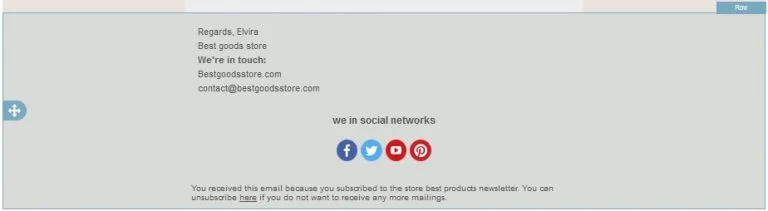
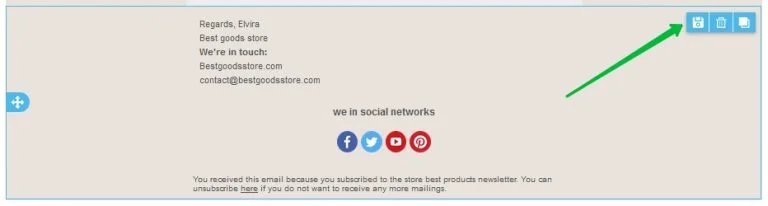
Once the content row is ready, select the row and click the Save icon in the top right corner of the row.
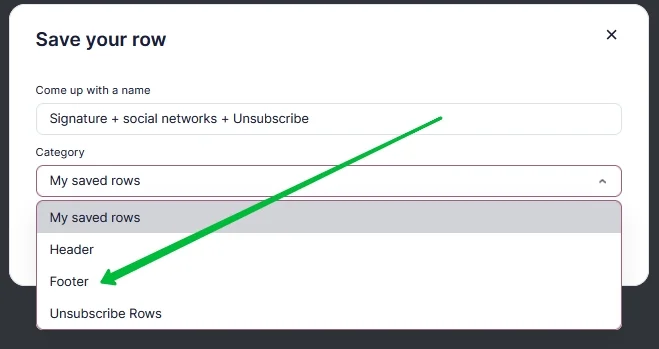
In the pop-up modal, name your content row. Make sure to create a unique name using keywords, so you can easily find it in the future.
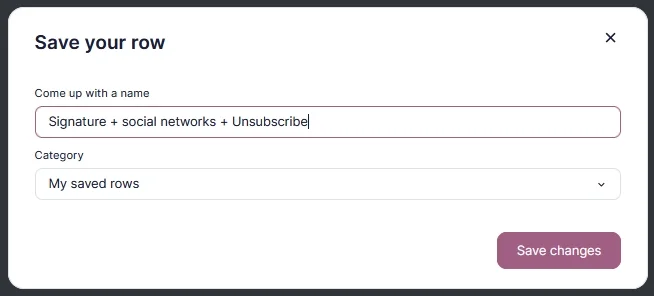
In the drop-down list, choose where you want to save your template. By default, Selzy has 4 categories where you can save your content rows:
- My saved rows — any content row you wish to save. These may include, for example, product recommendation blocks or a title.
- Header — email headers and their elements, including your organization's logo, company title, and contact info.
- Footer — footer elements: contacts, social media links, signatures, and any other references of your email.
- Unsubscribe rows —this is the section for unsubscribe links.
Since we havecreated an email footer, let’s save it in the Footer category.
The row has been saved. Now, let’s add it to the email.
How to insert saved rows
To add a saved row to an email, go to the Rows tab in the left-pane menu. Click the drop-down menu at the top of the tab.

In the drop-down menu, choose the category you want to add a row from.
The Empty category at the top of the list contains blank rows you can use to create a template from scratch. Down the list, you can see "My saved rows", Header, Footer, and Unsubscribe Rows categories.
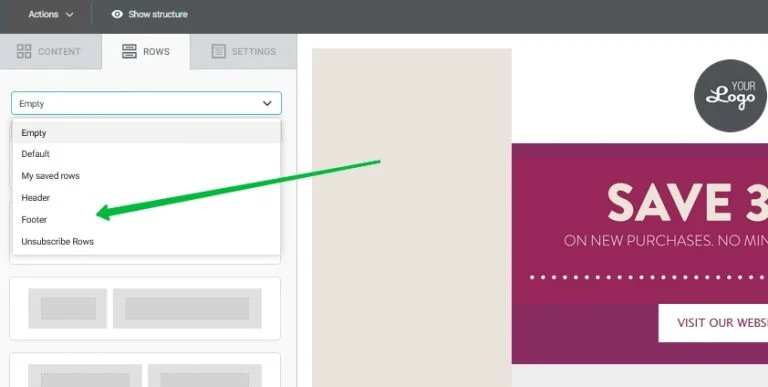
Choose the category to where you’ve saved your template. In our case, that would be the Footer.

The Footer category contains our newly created content row. Please note that the name of the block is displayed at the bottom, and there is also a search bar that you can use to easily find the row you need by name, especially when there are multiple content blocks in the category blocks and they don't fit on the screen.
Drag and drop the row into the desired location in your email layout. You can first place the row anywhere in the letter and then drag it to wherever you want. Take a look at an example: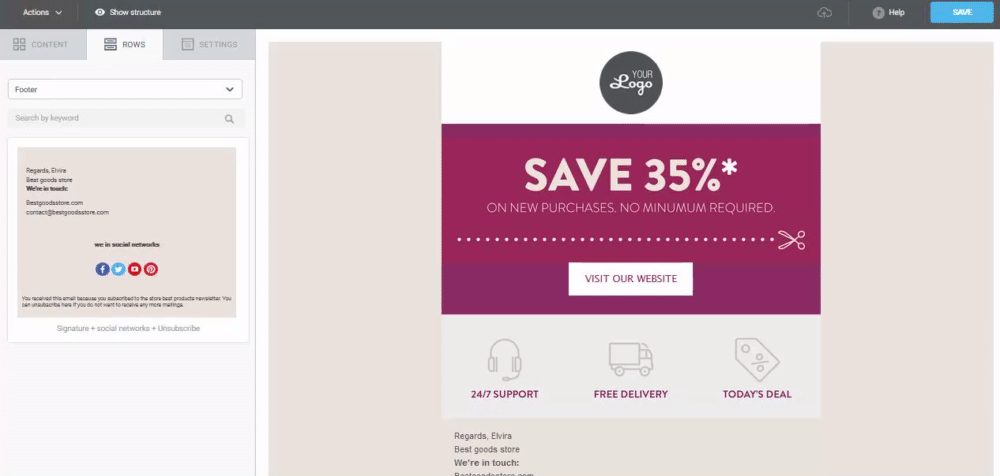
All done — the content row has been saved as a template.
Saving and reusing content rows will help you speed up your campaign creation process in the future. You will only need to spend time creating unique content for each email, and have your regular header, footer and unsubscribe links readily available in a few clicks.
Here are some other ideas that might be convenient to add to the saved blocks:
- email rating block,
- customer feedback form;
- social links;
- highlights of the store's advantages,
- Browse catalog buttons.
Useful links:
Key Features of the Selzy Builder
Customize Fonts and Colors in Your Email
Build a Layout Using Rows
Add and Edit Text, Insert Link
Insert an Image
Add Links to Social Media Websites
Embed a Video
Embed a Gif Image
Add a Preheader
Preview Emails Before Sending