The AI email builder is currently in Beta and is available only to a portion of Selzy users. It is also the builder used for creating and editing emails in Selzy’s new omnichannel automation scenarios. If you would like to get access to the AI email builder, contact our Support team.
Getting started with the AI builder in Selzy
Similar to the main flow — in the beta one, you can create an email from scratch or use one of our templates. Once you create your own templates or send campaigns created in the AI builder, you will also be able to choose from them.
When you create a new email from scratch, by default, the builder will open in the Build mode in Desktop view, with the right-side settings panel displaying the Blocks > Common blocks tab. You will find the Styles settings and AI Assistant under the Build mode icon.

The central part of the builder is taken up by your working space, which, at the same time, works as an Email Preview. So, unlike in the main builder, you do not have to switch contexts to see what an email will look like for your recipients.
You can switch the Device View or go to the Code mode at the top of the screen.
You can also switch between views by dragging the Email Preview space sideways.
At the 425 px width, the settings will switch to mobile view. The icon on the side gets switched from Desktop to Mobile, and you can notice a change in the color — from dark purple to green.
When switching the view, whether by clicking the icons or by dragging the preview area, you do not make any changes in the email code. Switching the view just allows you to see what your email will look like on different devices: smartphones with larger and smaller screens, tablets, widescreen monitors, etc.
In the topbar menu, you can set Subject and Preheader, control changes, go back to the Dashboard, or continue to the next step of the flow.
All the changes are saved automatically, but you can also press Save in the top right corner of the screen or enter the keyboard shortcut Ctrl/Cmd+S.
In the same area of the screen, you will find the Undo (Ctrl/Cmd+Z) and Redo (Ctrl/Cmd+Shift+Z) buttons and will be able to send a test email.

Creating emails from a template
In the AI Email Builder, you create email templates used in Selzy’s new omnichannel automation.
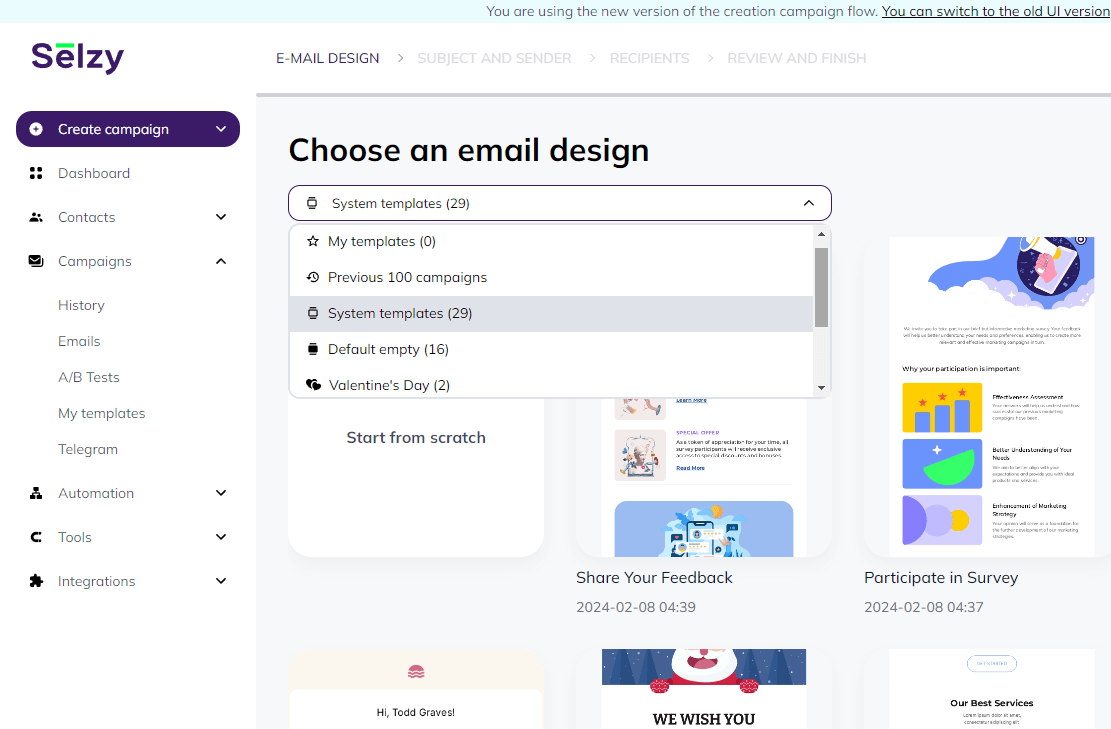
To create a new email campaign from a template, choose one of the templates in the Choose an email design step in the Create campaign flow. You can either scroll down the page and choose whichever you like or use a filter to display only one category of templates.
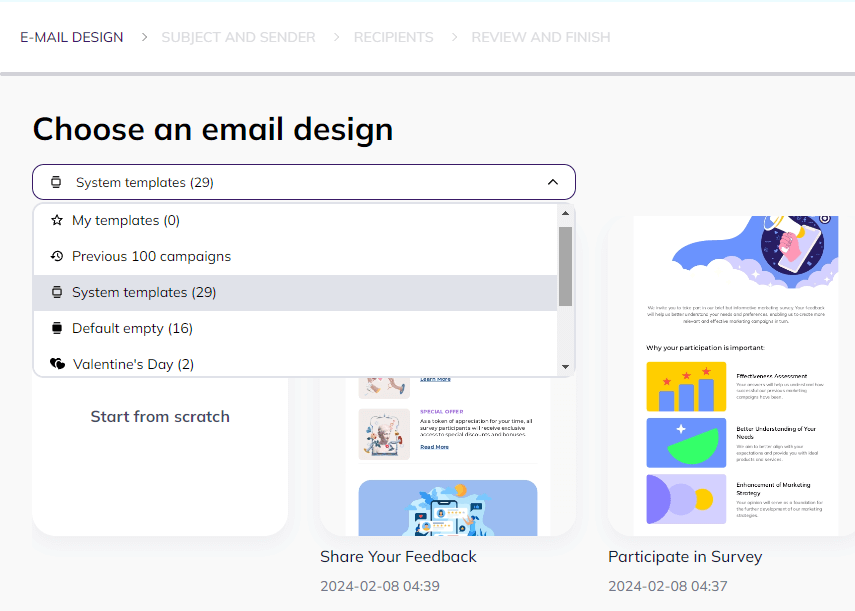
The Default empty templates are built from the Common blocks available in the builder. They have minimalistic designs and different layouts suitable for various scenarios.
Other templates each have a distinct style, providing a ready-made design solution. They are organized by themes.
Before opening each template in the builder, you can preview both desktop and mobile versions.

You can also use arrows to check out other templates without leaving the template preview mode.
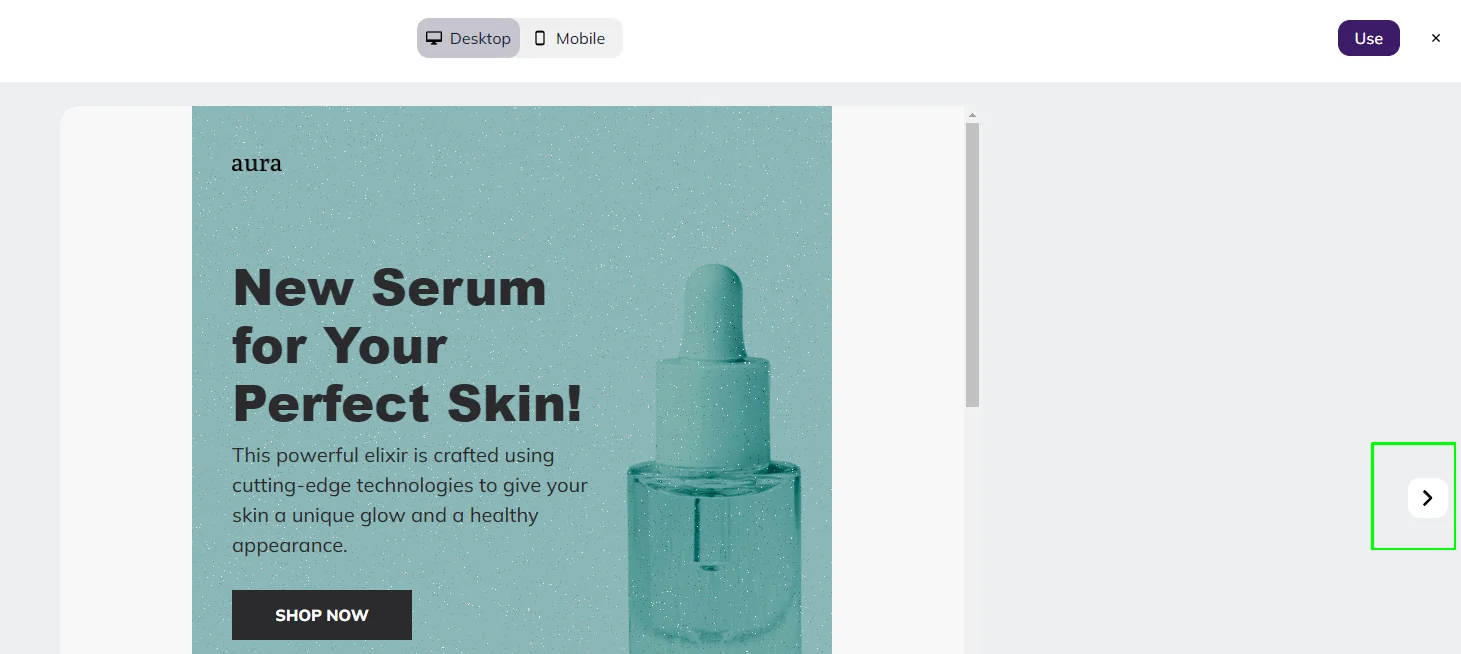
Once opened in the builder, both default and pre-designed templates are fully customizable.
Import and export email templates
In Selzy’s AI email builder, you can import and export email templates. These features let you reuse, share, transfer from one account to another, or back up templates without recreating them manually.
Import an email template
To import an email template, create a new campaign from scratch. In the email builder, click the Import icon in the top bar and select the file containing your template.
Supported import file formats include HTML, EML, and ZIP.
In the example below, we downloaded an email template and then imported it as a ZIP file.
Export an email template
To export an email template, go to Campaigns → Emails and select the campaign you want to export. You’ll be redirected to the email builder.
Click the Export button in the top bar and choose the file format for your template.
Supported export file formats include ZIP, Code, Clipboard, Text, Outlook, PDF, and PNG.
Email layout components
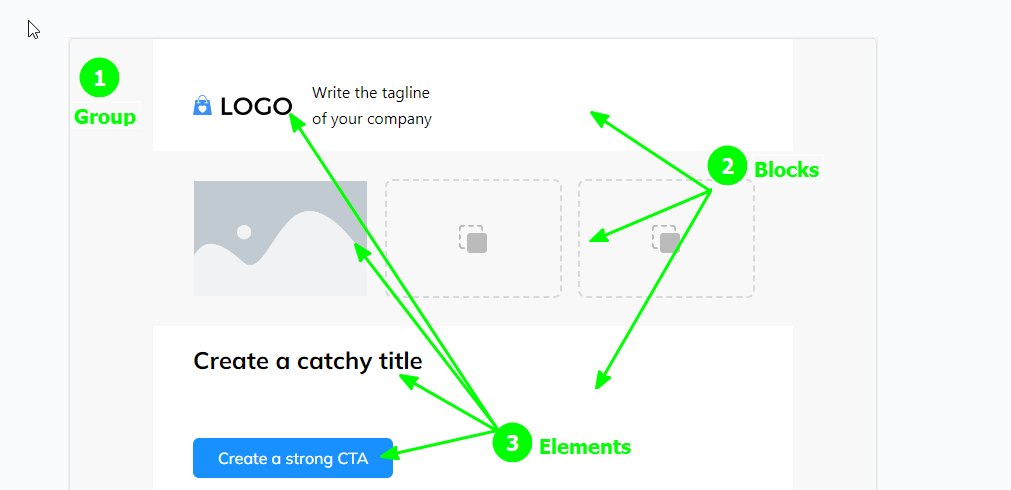
The AI builder has three types of email layout components that go into each email: Groups, Blocks, and Elements.
To display and manage the settings of each component, put a cursor on the corresponding component and click. The settings will appear in the right-side menu panel.

The value of configured settings, including the default presets, will be visible right away. To configure others, press the plus sign (+). The default presets are there to speed up the process for you, but naturally, you can change their values to your liking.
If you want to clear the setting’s value, press the minus sign (-).
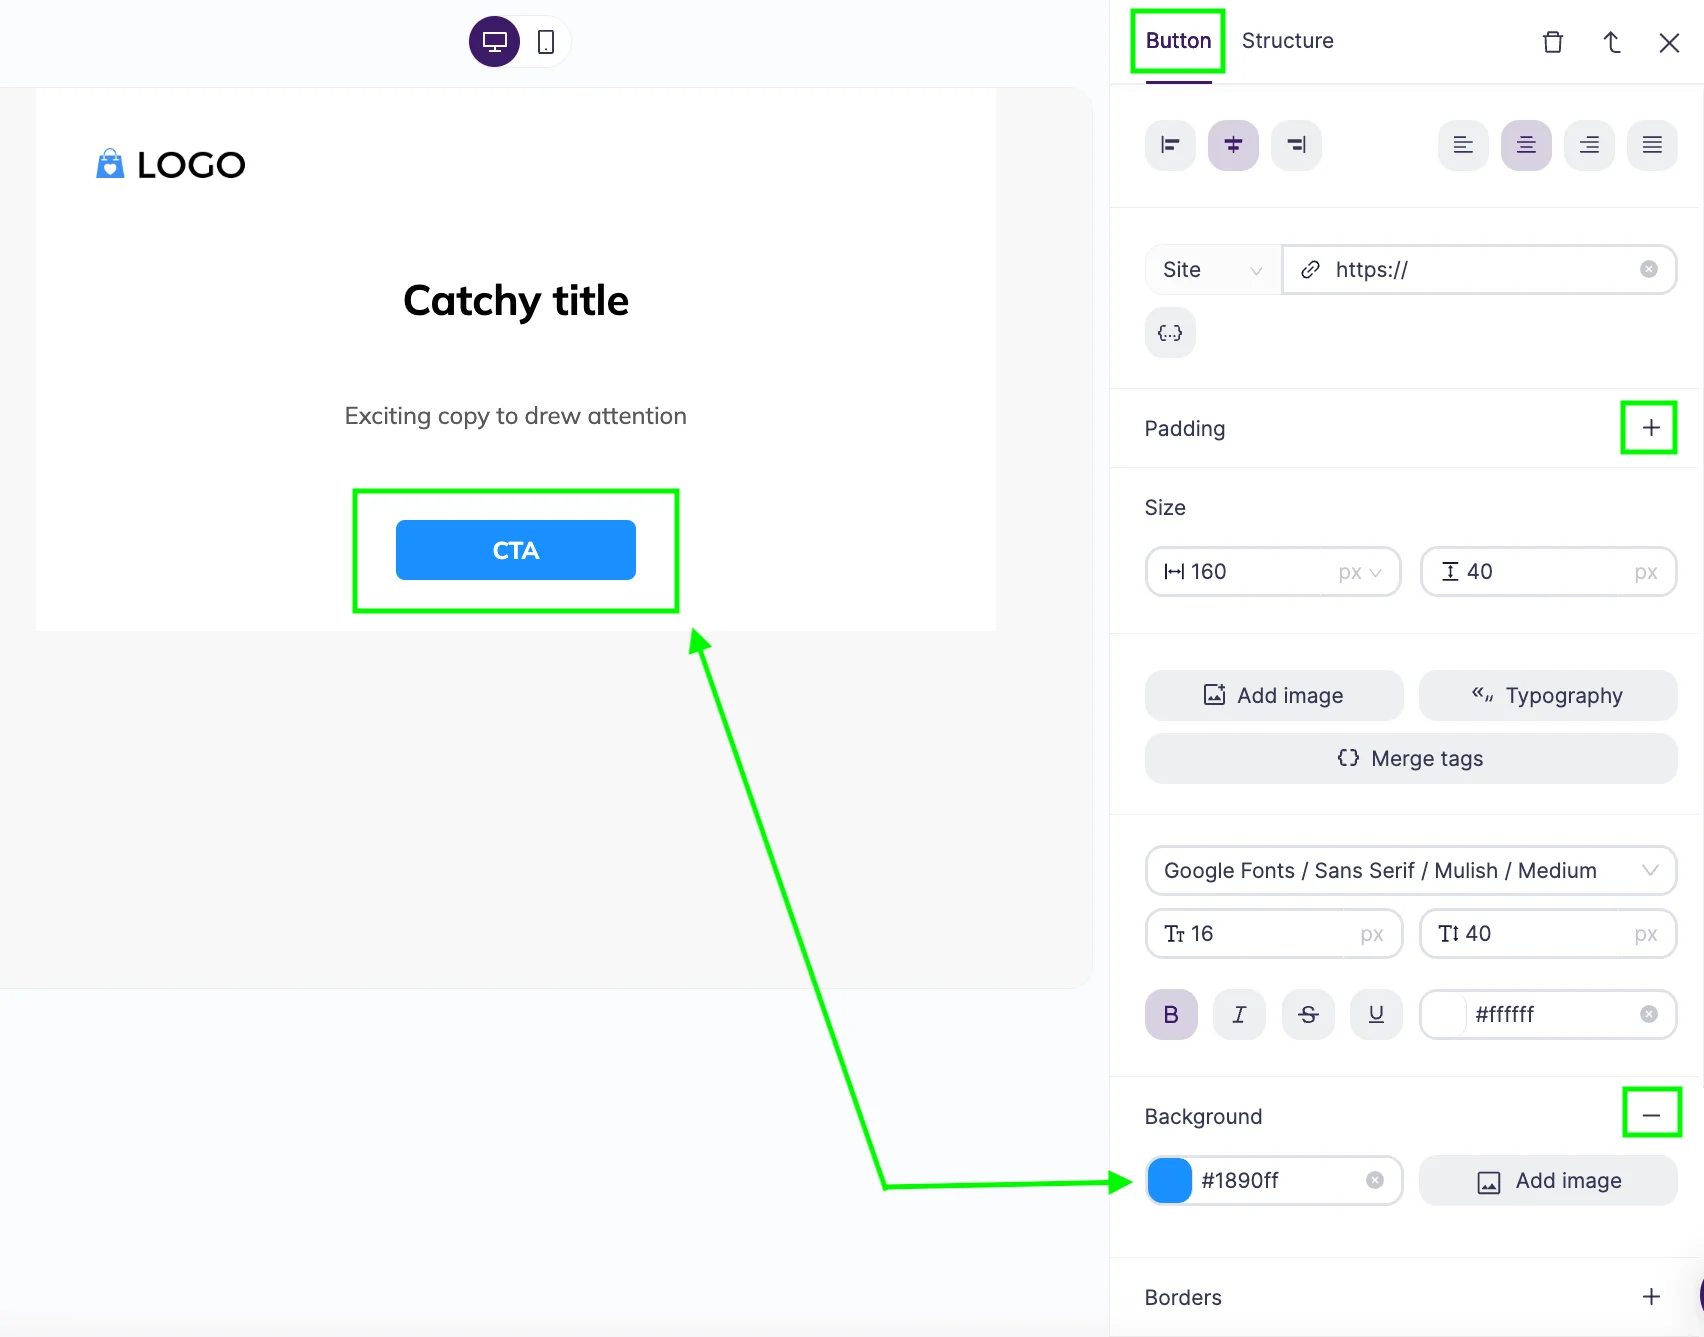
The minus sign (-) will also hide the detailed settings, leaving only the name visible. If you want to just hide the detailed settings without clearing the values, click on the setting’s name.
Groups
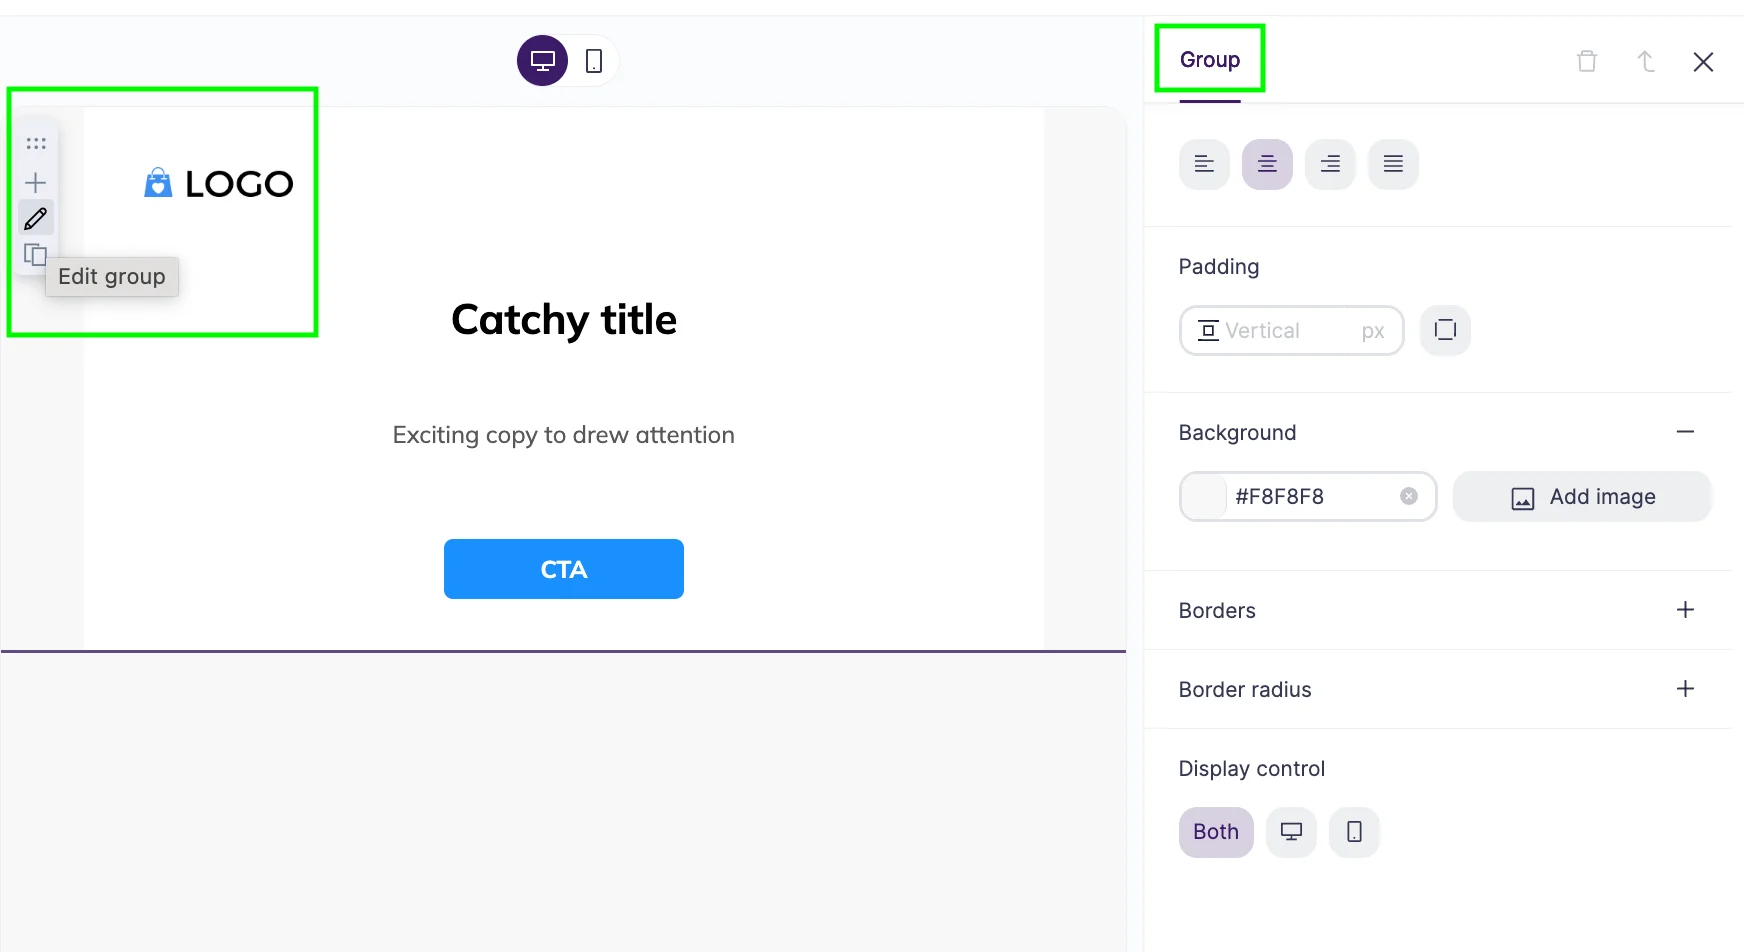
Groups contain Blocks and control settings like email background and email content paddings, and alignment.
In one email, you can have one or multiple groups. In most cases, one group will do, but if you want to visually separate the footer from the rest of your email, like in the screenshot below, you need to create two groups and set them up separately.
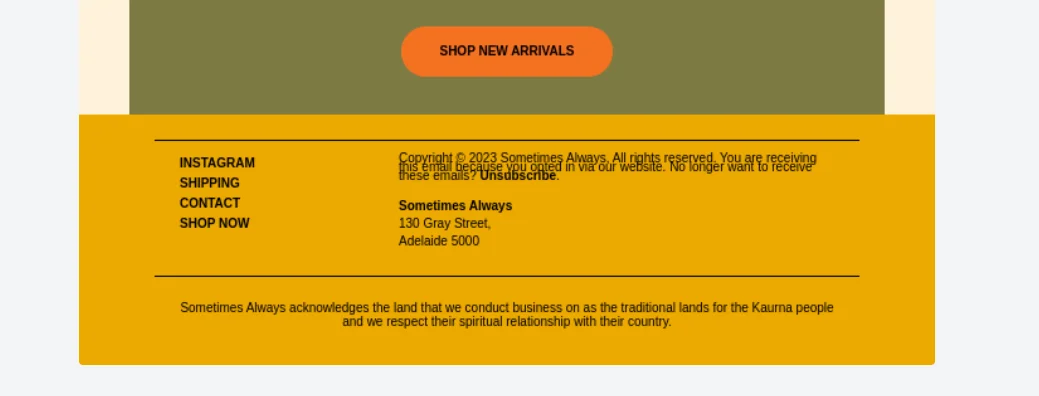
Source: Really Good Emails
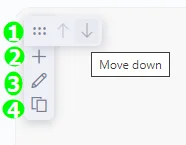
Actions with groups: You can Add a new group (2), Clone the existing group (4) to keep all the same settings, or Edit (3). You can also Reorder groups (1) by dragging and dropping them or using arrows.
Blocks
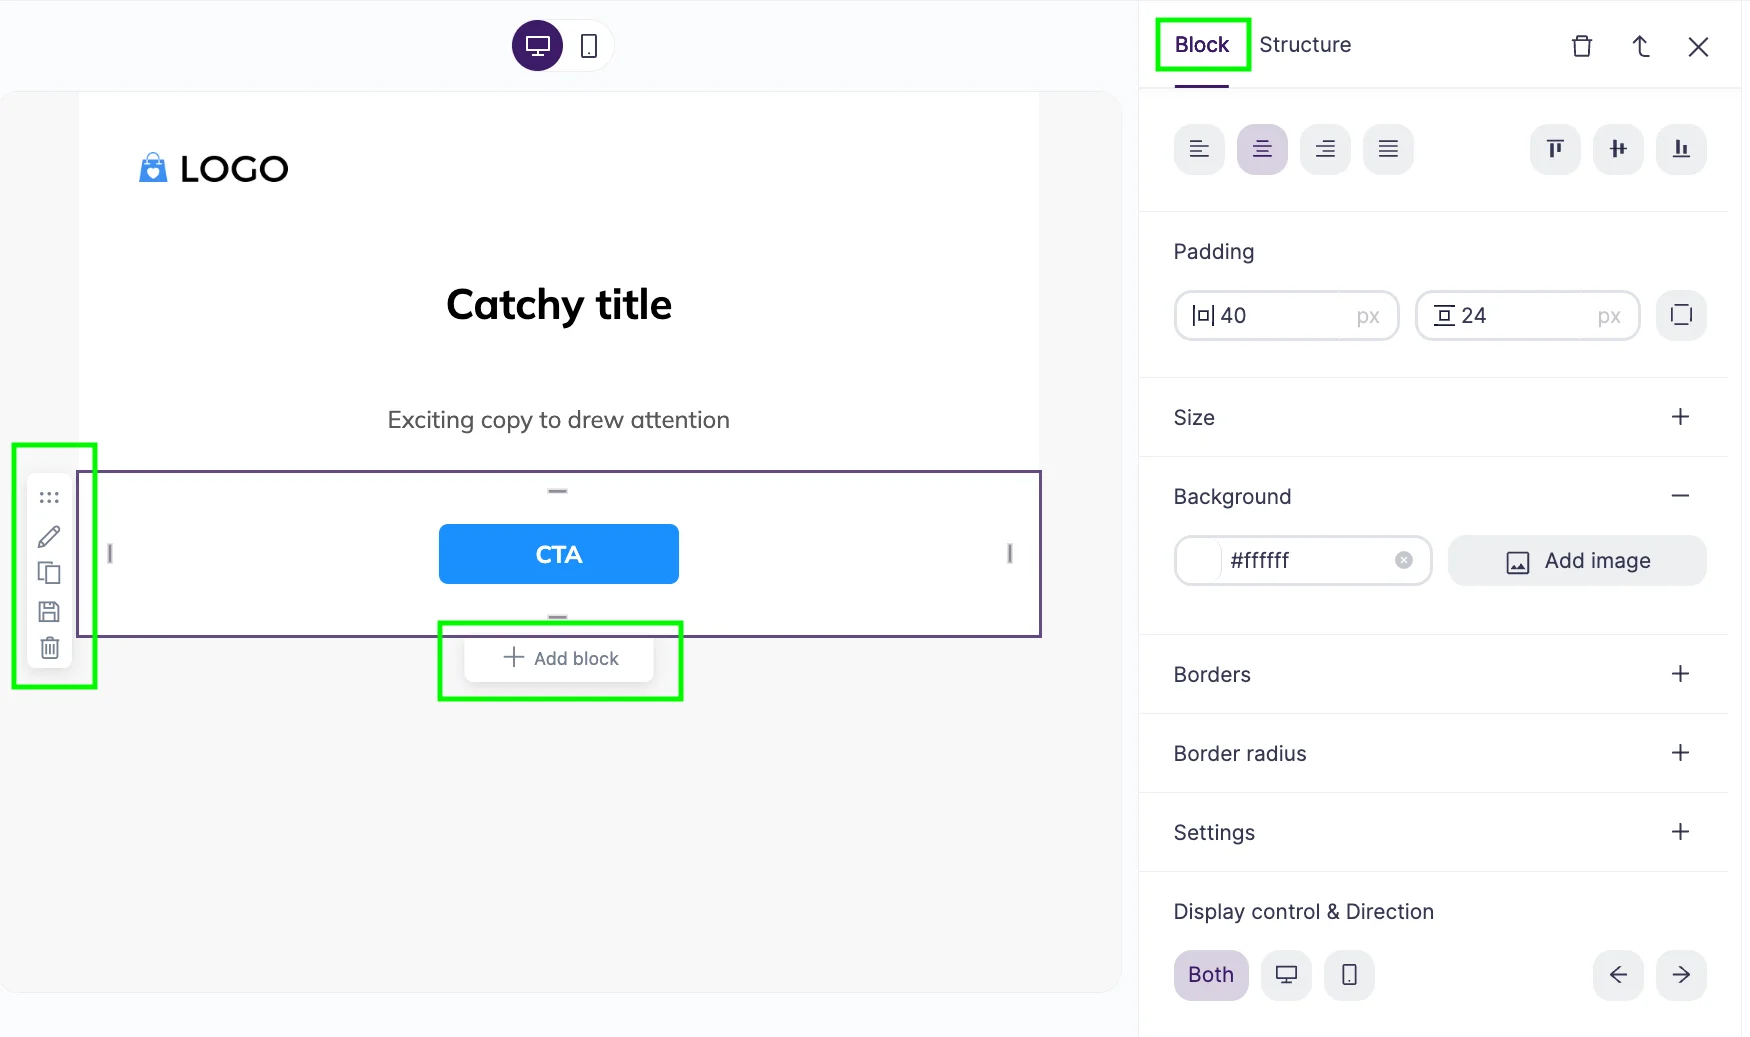
Blocks contain Elements and control settings that configure the content part of an email.
When designing an email, you can choose to work with Empty blocks or Common blocks.
Empty blocks only define the size and the number of the content boxes — Columns.
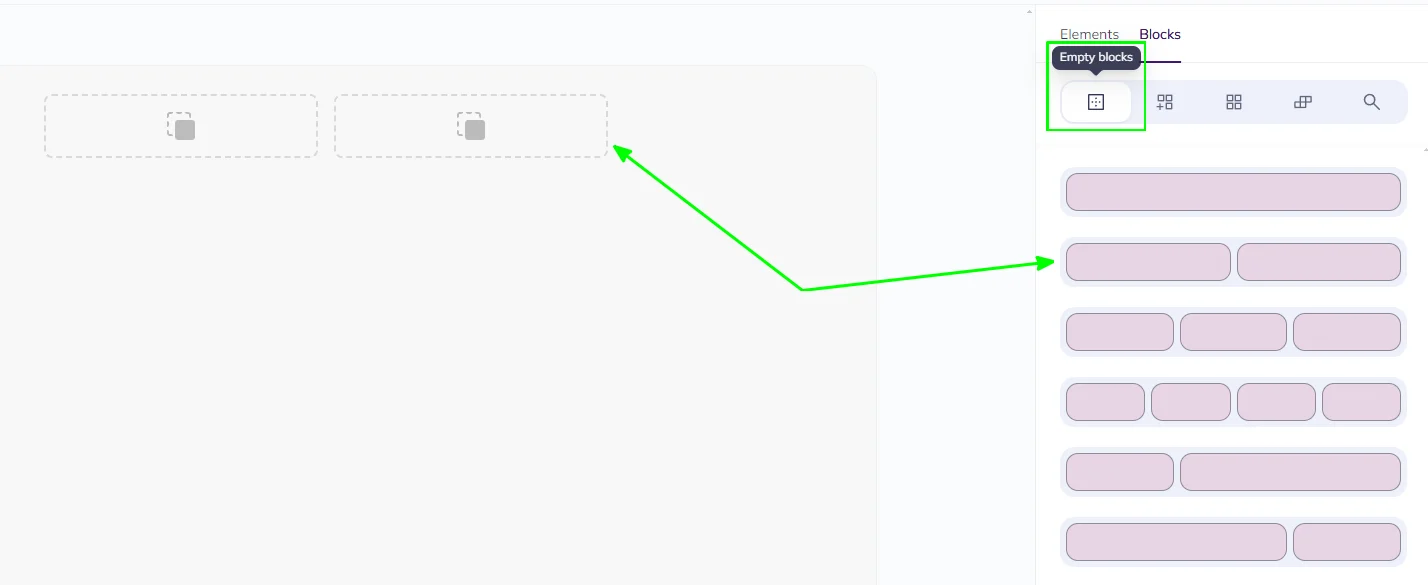
Common blocks have preset elements and a somewhat uniform design to allow you to mix and match them without tweaking settings too much and, therefore, to save you time.
There are over 60 common blocks currently available in the builder. They are organized by type so that you can easily find them.
A full-size preview is available upon hovering over a block in the list.

To add a block from the list, you can either click on it, and then it will appear under the last selected block, or drag it to the working space and drop it where you find it fit.
Other actions with blocks:
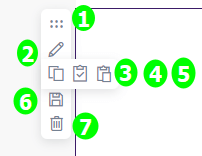
(1) Reorder
Drag and drop inside the email or move up and down with arrows.
(2) Edit
(3) Clone
A copy of the cloned block will appear right under it.
(4) Copy to the clipboard
(5) Paste block from the clipboard
It is possible to copy a block from one email to the clipboard and paste it into another email open in a different tab.
(6) Save
You can save any blocks for later use. They are stored in the Saved blocks tab and can be searched by name or by type.
(7) Remove
Removed blocks can be restored by entering the Ctrl+Z keyboard shortcut or by pressing the Undo button in the top right corner of the screen.
Elements
Elements refer to different content that can be added inside Blocks. You can also drag and drop an element straight on the working space wherever you find it fit. In that case, the builder creates a block automatically.
Image
You can upload images in PNG, JPG, SVG, or GIF formats. Max size is 1,600 x 2,000 px and 500 KB. You can also pick an image of a GIF from the stock.
You can then edit any image in the Image Center.

After editing, the image is directly saved to the email. For now, you can not save the image edited in the Image Center for later use, but we are working to bring this functionality to future releases.
Video
Insert a video by adding a Vimeo or a YouTube link. The builder recognizes different links, including the video URL, the web page URL, and shareable links.
You can customize the thumbnail and the play button or choose to have no play button at all.
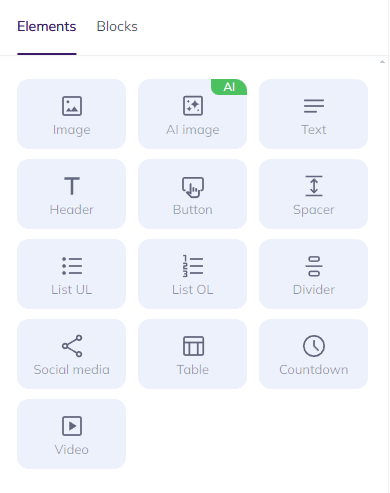
Other elements you can add inside a block:
- AI image
- Paragraph of text
- Header
- Button
- Invisible spacing between elements or blocks
- Lists
- Visible divider to break up elements or blocks
- Set of social media icons
- Simple table to organize your content in three columns without creating a multicolumn structure within a block
- Countdown timer
Similar to common blocks, elements have preset values, helping you speed up the design process.
Actions with elements:
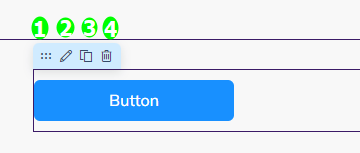
(1) Reorder
Drag and drop elements where you find them fit.
(2) Edit
Each element has its own settings. Click on the element to display its settings in the right-side menu panel.
(3) Clone
Copy and paste elements with the same settings under the selected element.
(4) Remove
Removed elements can be restored by entering the Ctrl+Z keyboard shortcut or by pressing the Undo button in the top right corner of the screen.
Typography
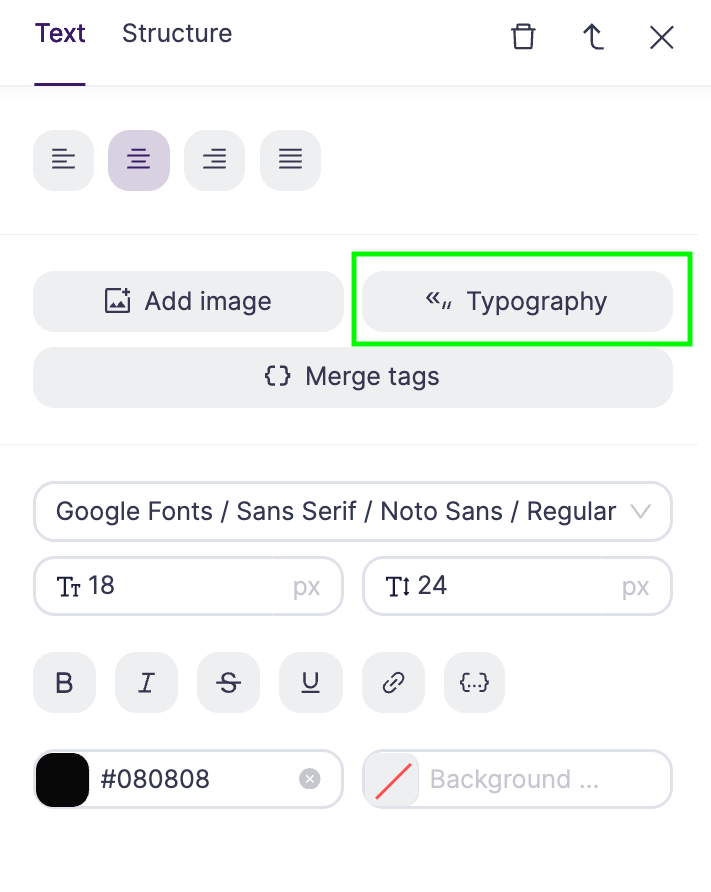
This setting is available for all elements that might contain text. It adds non-breakable spaces where needed to make your content look good.
Additionally, it changes the quotation marks from “ to «.
You can apply the setting to the selected element or to the whole email at once.
Basic mode vs PRO Mode
In Selzy AI Builder, two modes are available: Basic and PRO.
Basic mode is recommended for beginners, since it includes basic design styles, ready-made elements, and AI tools.
PRO mode, on the other hand, is recommended for experienced marketers. It offers more flexibility to customize email design, experiment with interactive content, and personalize email campaigns.
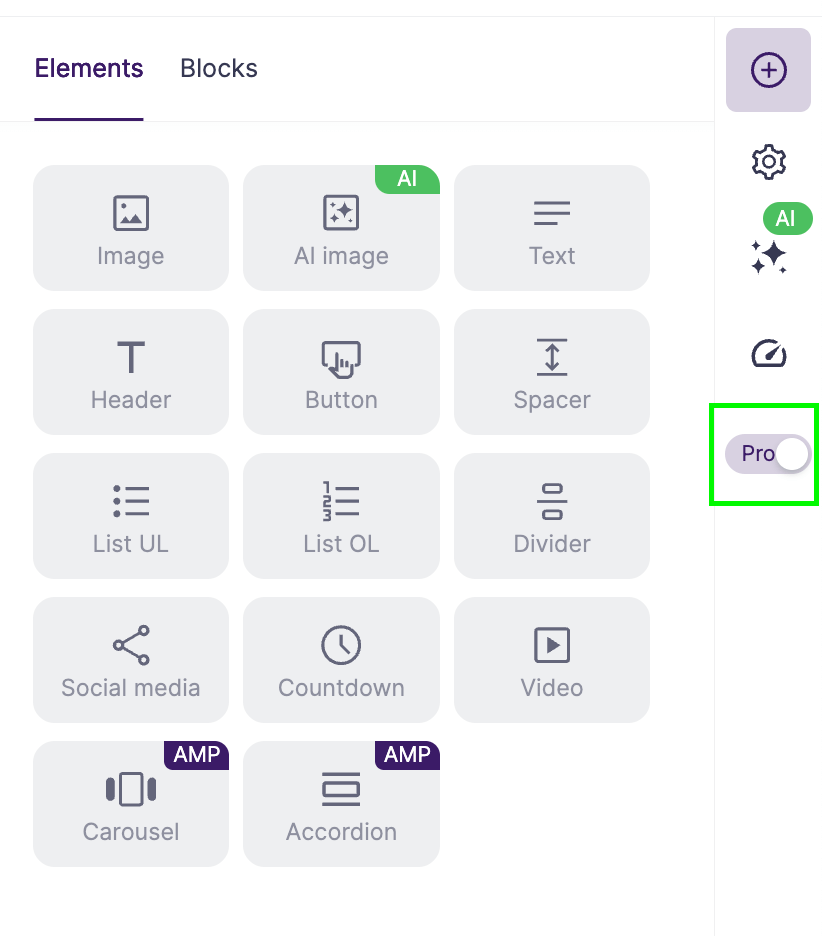
Features available in PRO mode include:
- AMP elements (e.g., Carousel and Accordion) that let subscribers interact with content, such as expanding text in FAQ blocks
- Display control to hide images on mobile or set different paddings for text on phones and desktops
- Typography with non-breaking spaces, quotation marks, and dashes
- Personalization for inserting a subscriber’s name, city, or other data
- Content styles for quick changes to fonts, colors, and backgrounds
- Optimization for detecting errors in code, images, and links, and assessing the risk of your email going to spam
Activate or deactivate PRO mode in Settings.
Content direction and display control
Some email layout components have the Direction and Display control settings available in the PRO Mode.
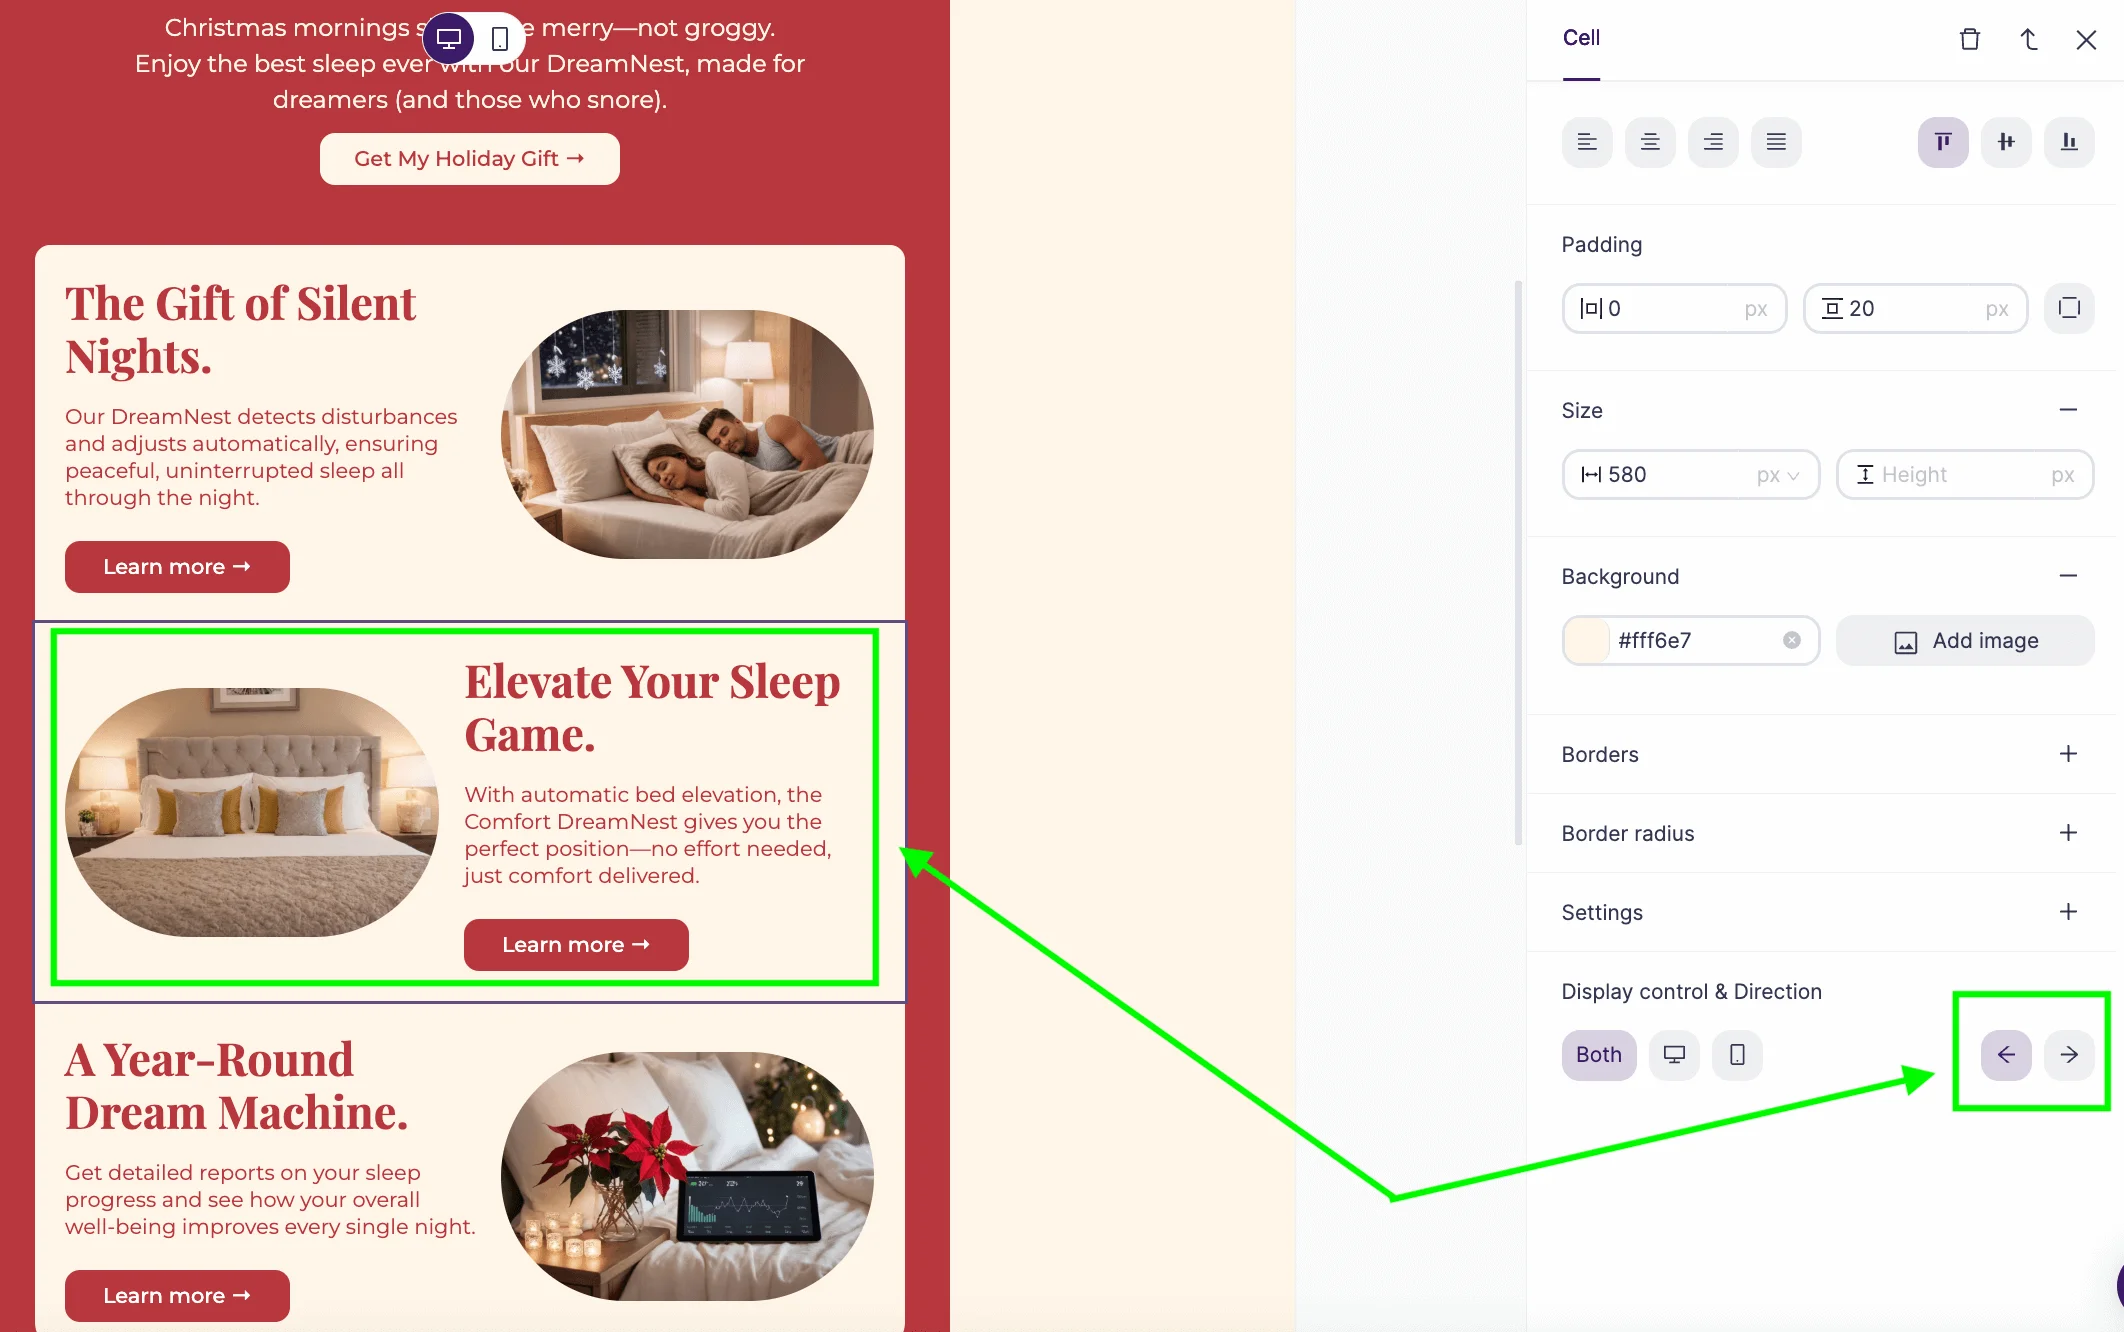
Direction
You can choose how to display content inside the block: from left to right or from right to left. This setting is useful if you send emails in right-to-left languages or want to create a layout like in the screen below:
Display control
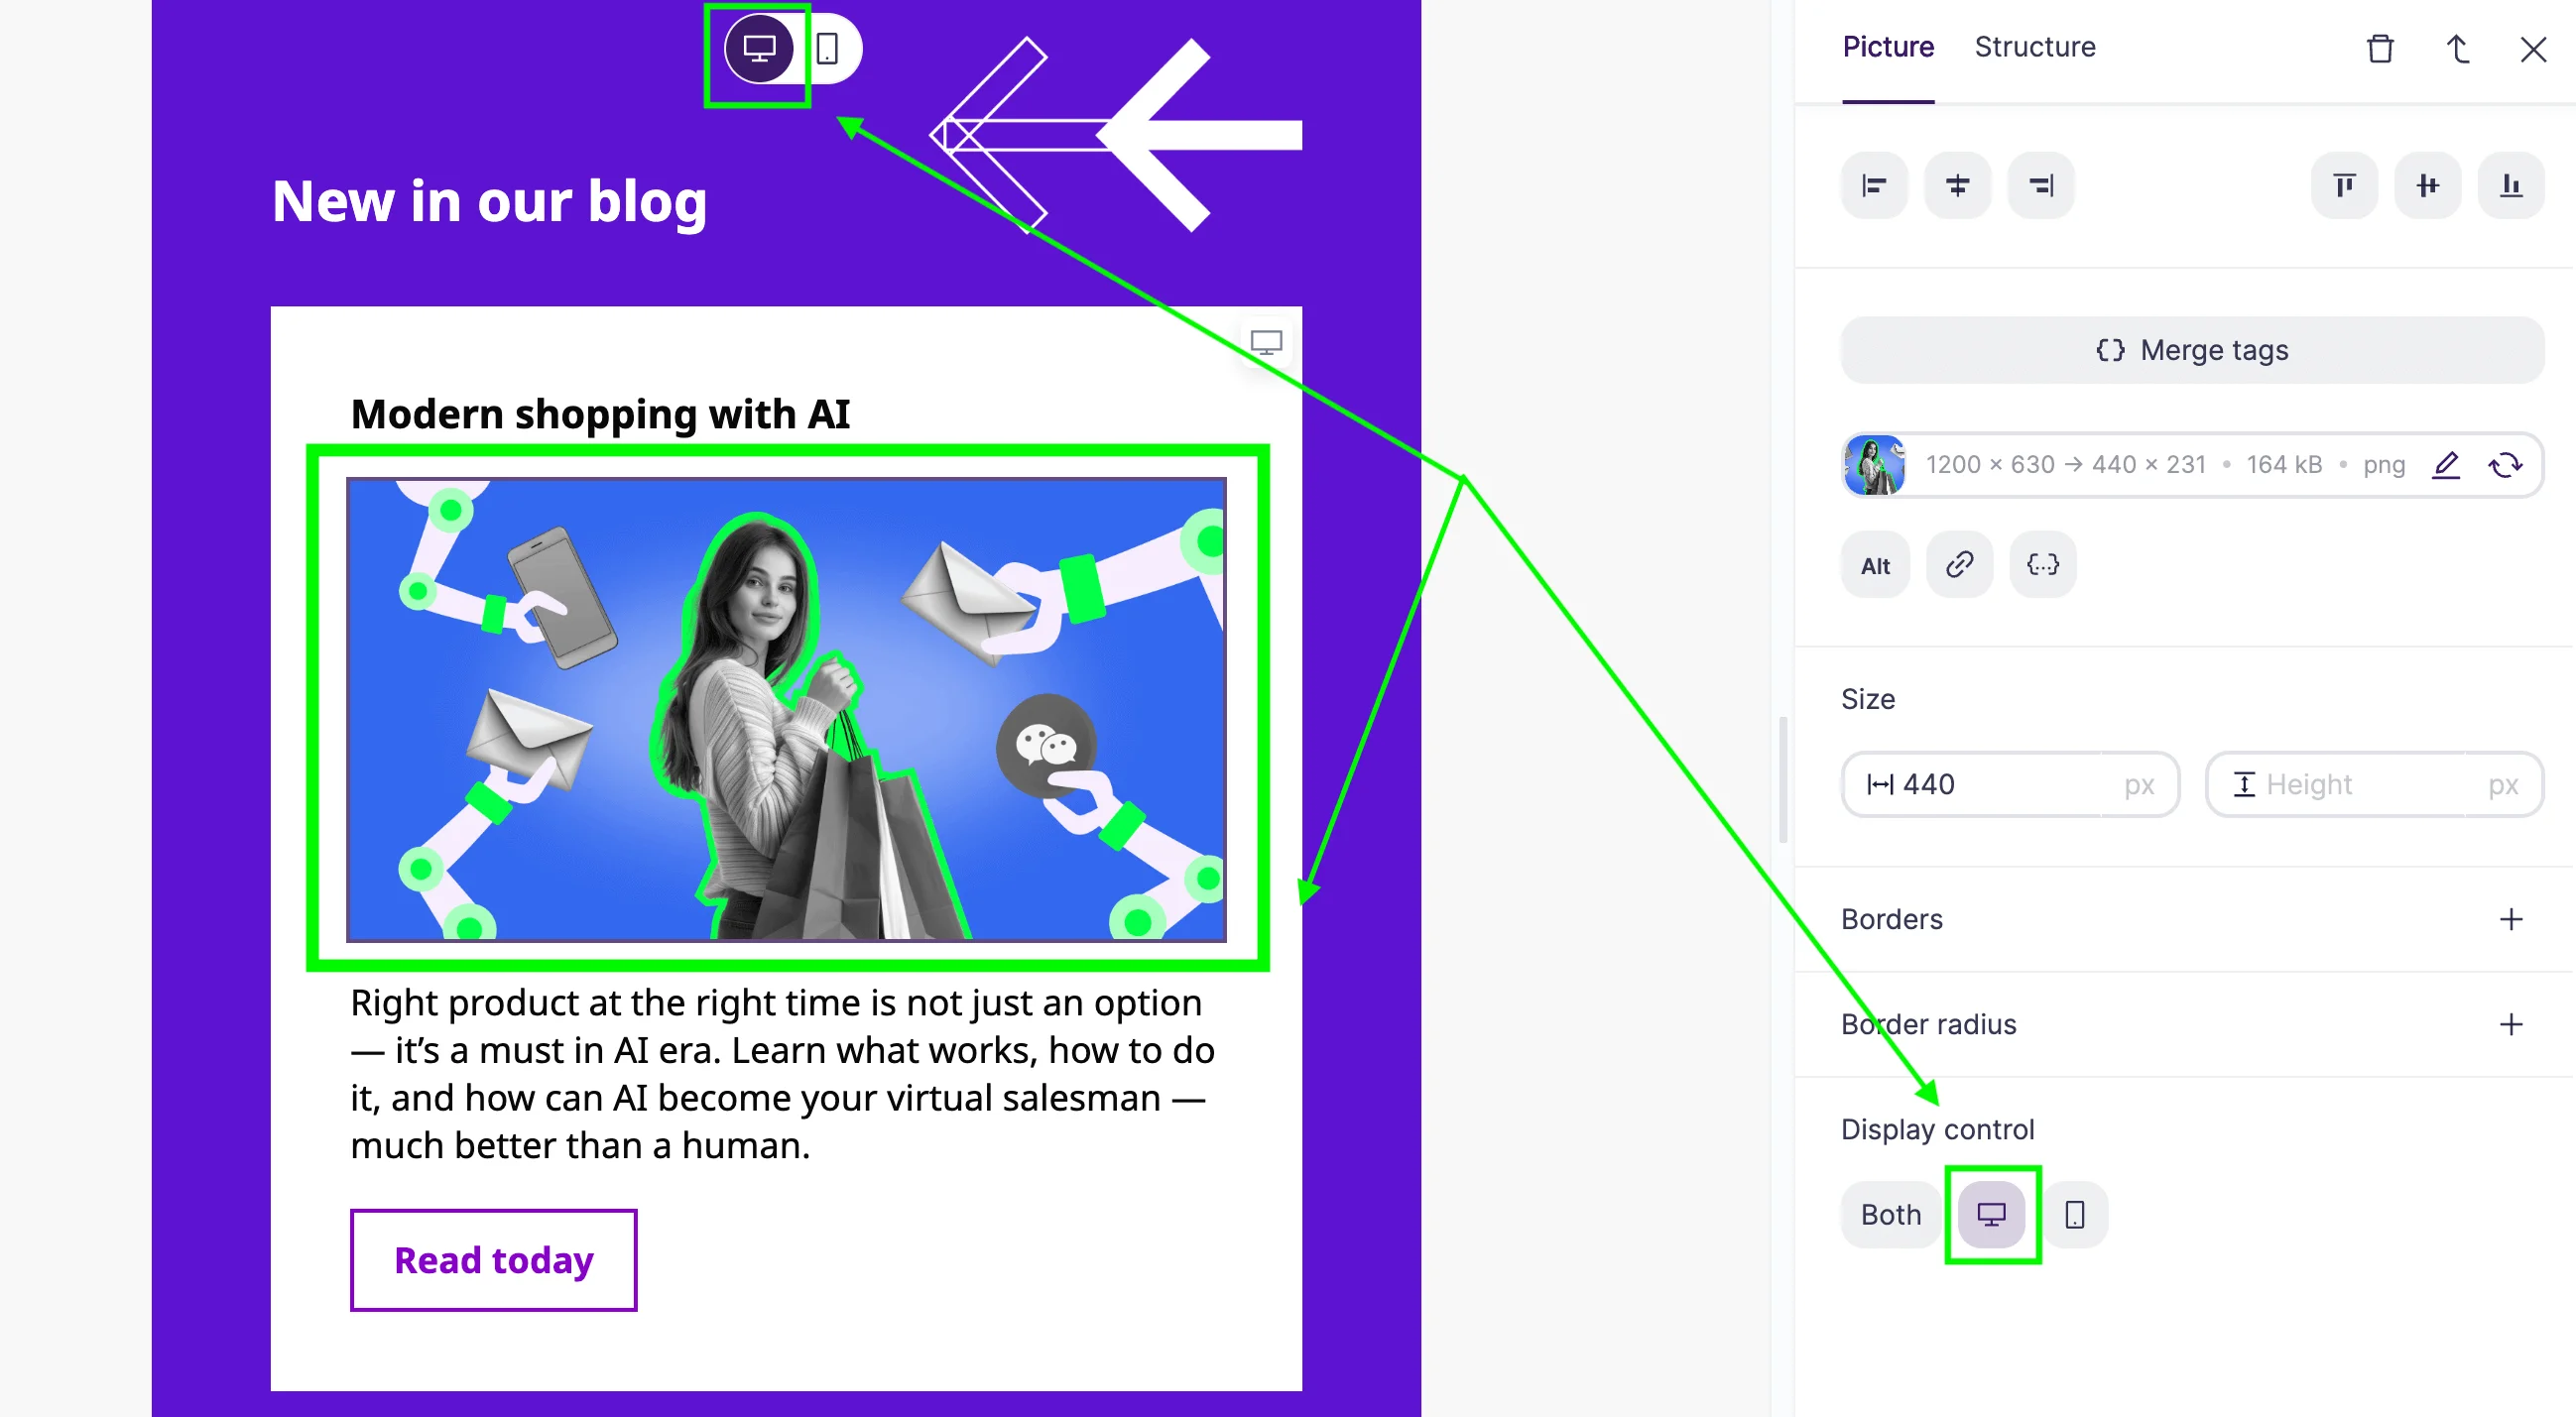
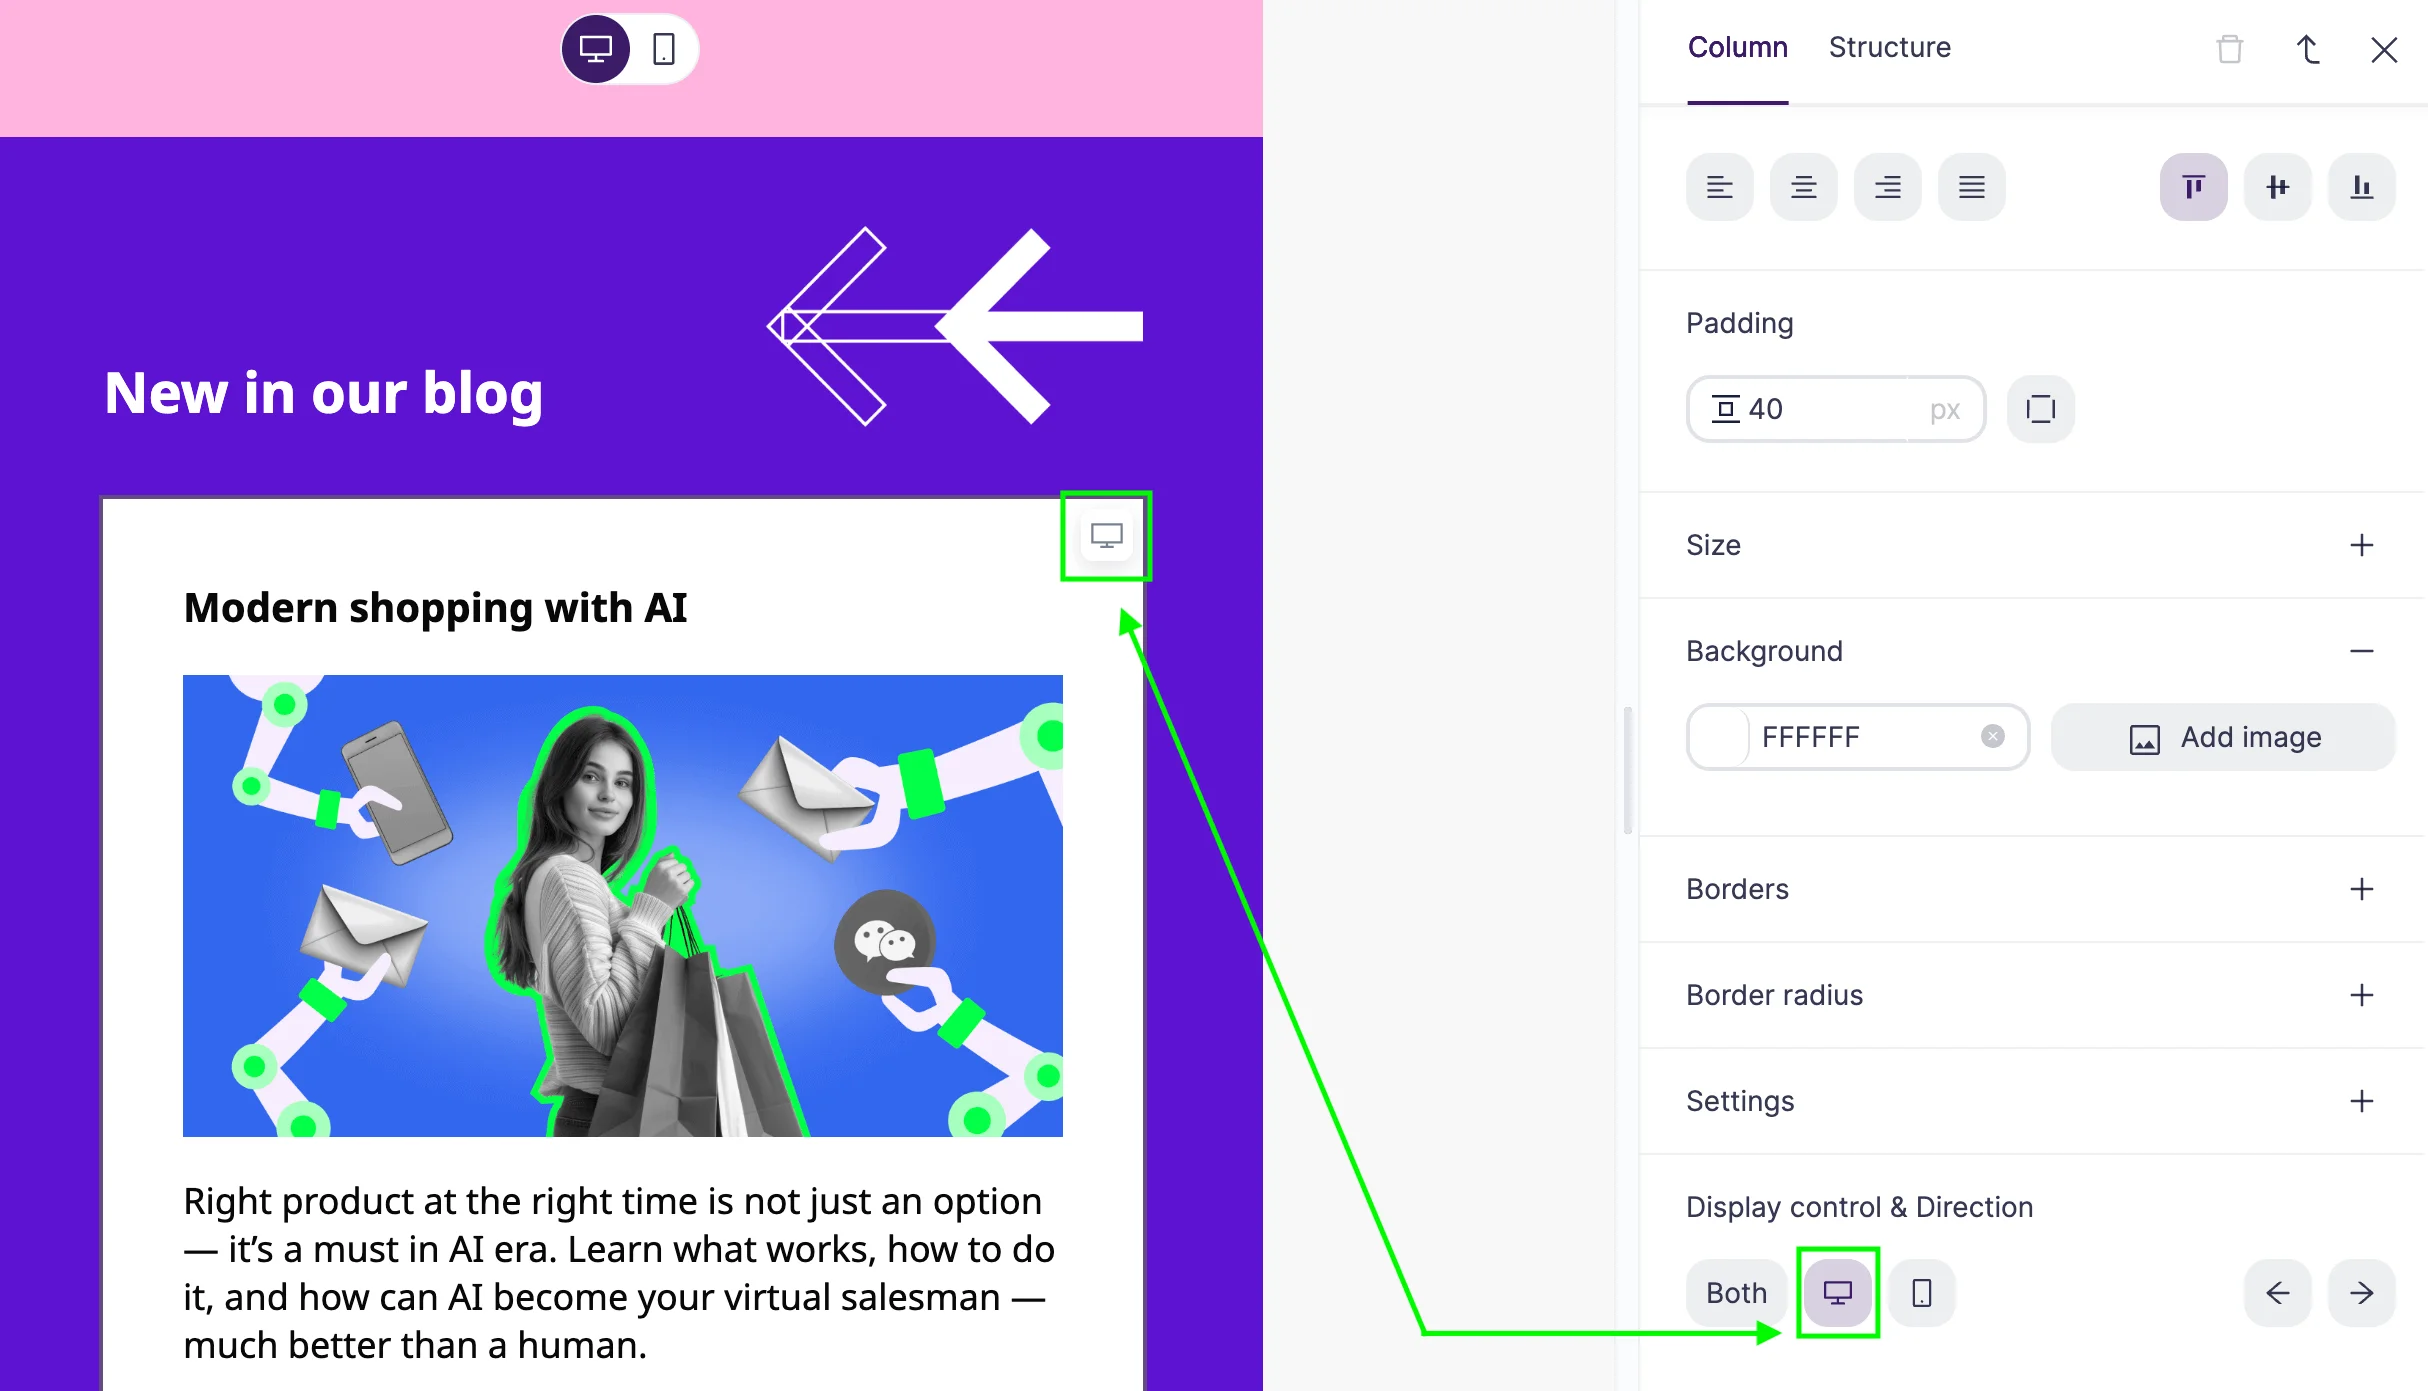
For blocks and elements, you can choose whether you want them to be displayed only on mobile devices, only on desktop, or on both.
When you choose one device over the other, the content appears only in the working space of the corresponding view.
For example, if you choose to hide article covers on mobile devices, you will still see them in the working space when in Desktop view:
But they will not appear in Mobile view:
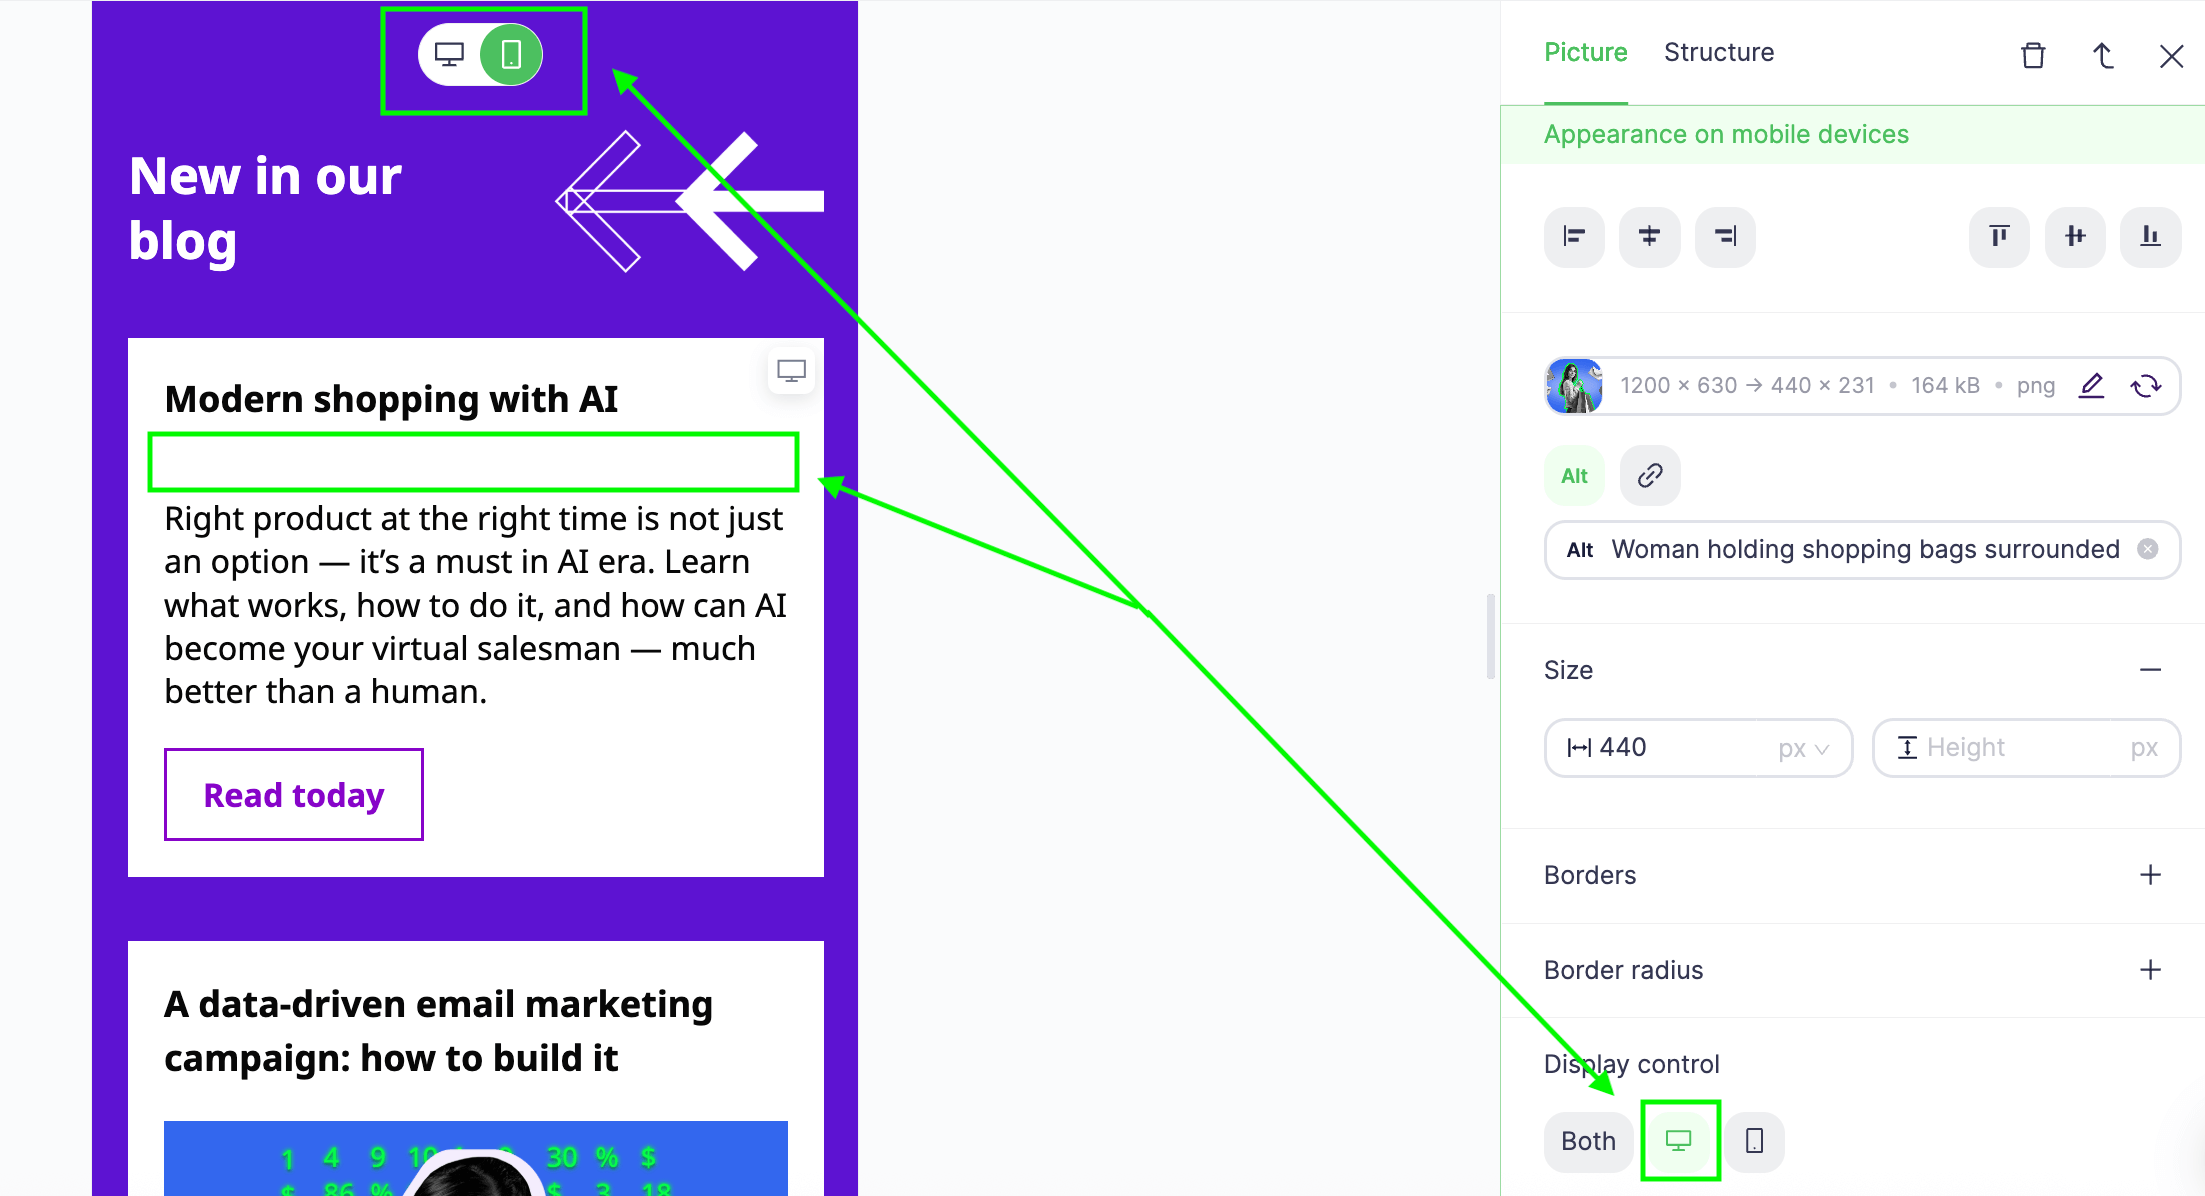
The working space is designed to function as an email preview and, therefore, displays the email in the same way a recipient will see it on their device.
Blocks and columns will be marked with a special icon, visible only in the builder’s interface.
AI features
This email builder is powered up with the AI functionality designed to speed up the creation of email marketing campaigns.
AI Assistant
AI Assistant in Selzy goes beyond generating text at user request. In addition to processing free-form prompts, it can also perform tasks within predefined roles.
Subject line & preheader generator
Get a few combinations of subject lines and preheaders based on the contents of your email, or write a free-form prompt, adding other specifics.
Add the output to your email in one click. No copying and pasting: just click the subject line or the preheader you like, and it will replace the current Subject line and Preheader fields in the topbar menu.
Translator
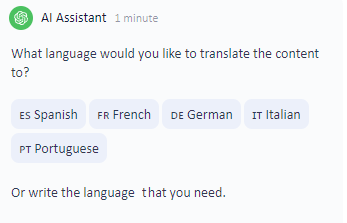
Translates the email’s content into the specified language.
Copywriter
Creates a marketing copy based on the specified task. Since our AI Assistant is multilingual, you can get your content in any language you need.
For left-to-right languages, make sure to use the content direction setting.
Proofreader
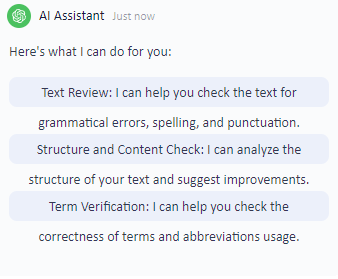
Assesses your content from a few angles, helping you create clear and grammatically correct copy while checking whether you use accurate terms and industry-specific language where appropriate.
Marketer and Psychologist
Both roles analyze the current copy and provide feedback on how to improve it.
For instance, Marketer might suggest trying out one of the popular techniques like creating a sense of urgency in subscribers while talking about the upcoming sale or promoting a limited edition product.
Psychologist will be primarily assessing the tone of voice of your email and providing recommendations on how to put the subscribers into the right mood and push them towards the desired action.
Both roles are going to be especially helpful for junior marketers and business owners who are starting out in email marketing.
For all AI assistant's roles, you can activate it either by pressing the corresponding button, selecting the role from the list, or just typing your request.

AI image
You can add an AI image to your email in two ways:
(1) by hovering over the center of the image element that is already inside a block on your working space and clicking the AI image icon (the last one in the row),
(2) by dragging the AI image element from the Elements tab over to the working space.
In both scenarios, Image Center will open the AI tab, where you can type in your prompt.
You can write prompts in any language and add keywords like “realistic” or “vertical.”
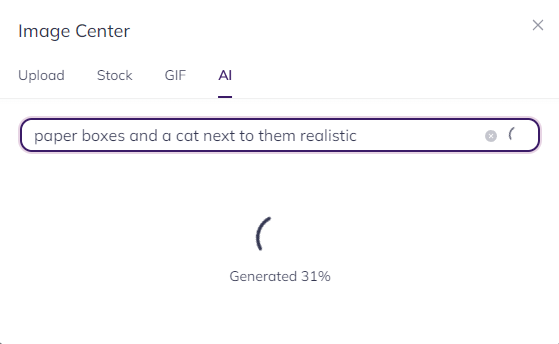
While the AI is generating an image, you can close the window and continue working on the email. Generating might take some time — usually around a minute — but the actual time will heavily depend on the complexity of your request.
The AI provides you with four options to choose from.
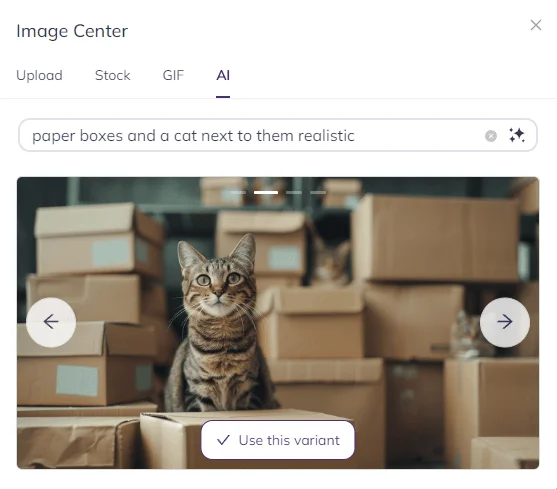
If you encounter an error, try to repeat your request or wait for a few minutes and repeat it once again.
Code mode
To enter the code mode, toggle the Code mode icon in the top left corner of the screen. Email Preview will stay in the same place, and the Build menu will be replaced with Code panel and Minimap.
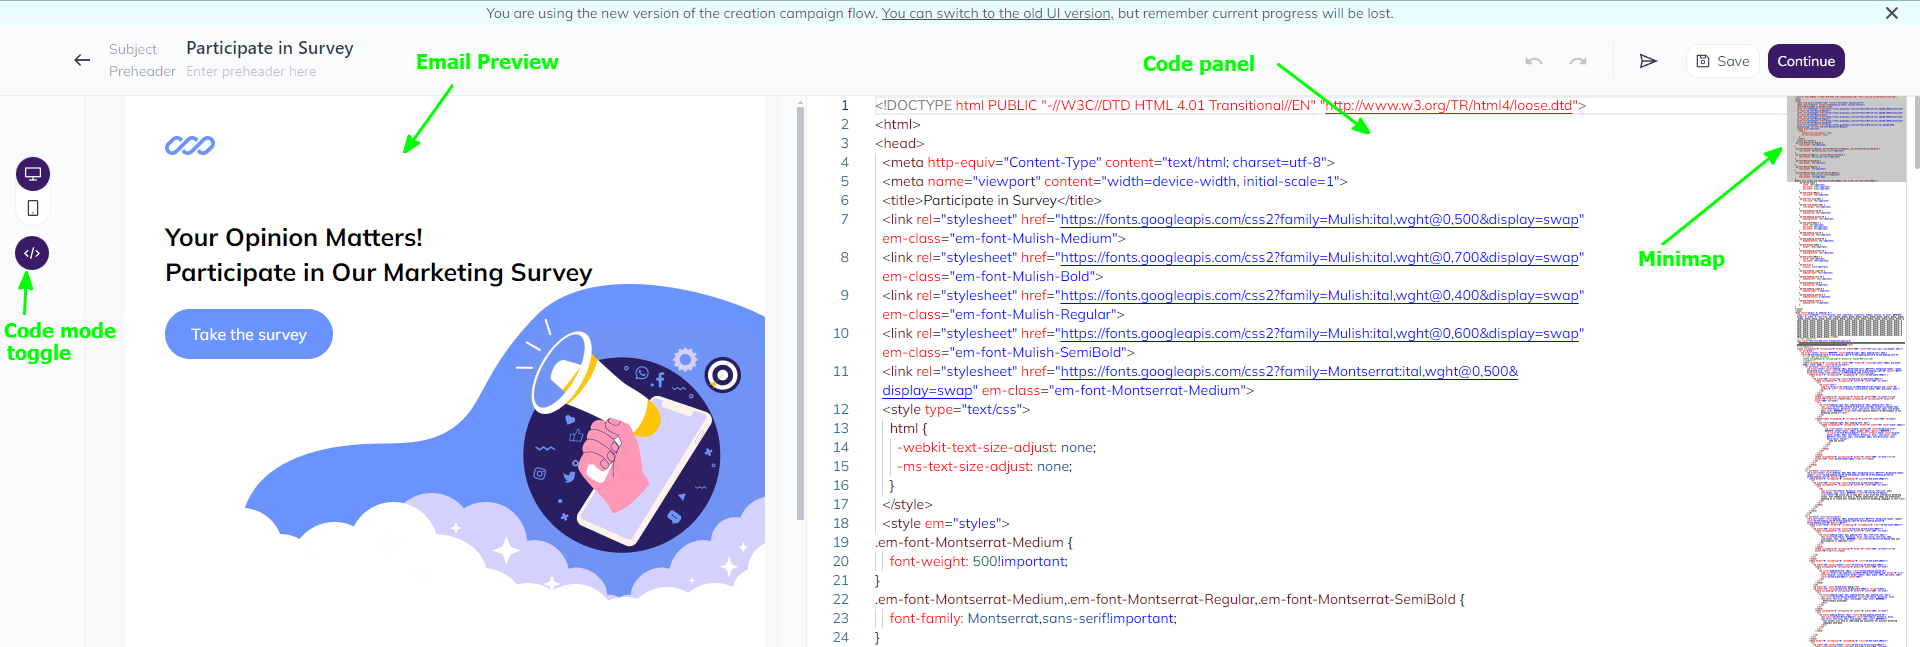
Email Preview will reflect all the changes you are making to the code right away.
At any point, you can switch between Code mode and Build mode and insert new pieces of code.
The code editor can automatically fix minor issues. For example, you forgot to add a closing tag and either switched contexts or left the Code mode. When you resume working on the code, the tag will be right where it should be.
When in the code mode, you can switch between the Desktop and Mobile view by toggling the corresponding icons in the top left corner of the screen.
To switch to the mobile view, you can also drag the Email Preview space sideways. However, please note that once you drag it back, it will not automatically switch back to the desktop view, and you will need to toggle on the Desktop view icon.
Common questions
Can I edit campaigns created in the main builder in the AI builder?
Yes, campaigns created in the main builder can be opened and edited in the AI builder. For instance, you will be able to add new blocks and elements, update text, images, etc.
However, please note that the two builders have different architectures and are not 100% compatible. So, you might encounter display errors or notice that some email layout components have not been properly recognized and, as a result, have limited editing options.
Can I use templates from the main builder in the AI builder?
Similar to campaigns, templates from the main builder can be opened and edited in the new builder only to some extent.
For this reason, we have created new templates for the AI builder and will be expanding the collection going forward.
Can I insert HTML code in the AI builder?
Yes. If you have HTML code, you can insert it in the AI builder in the Code mode and then either edit it in the Code mode or switch to the Build mode and add new blocks or elements through the right-side menu panel.
The HTML code you are inserting has to adhere to the industry standards for emails. If the code contains errors or invalid tags, the builder might not properly recognize such code. As a result, your editing options will be limited.


