Soon, Selzy will stop supporting Automations. This means that Omnichannel automation scenarios will be the only place where new automation features are introduced, including more ways to reach your audience across different channels.
We recommend moving your automations to Omnichannel automation scenarios as soon as it’s practical.
The new Omnichannel automation scenarios allow you to:
- Build more flexible automations with multiple communication channels
- Use additional conditions and actions within scenarios
- Attach files to your messages — for example, price lists, lead magnets, infographics, or ebooks
- Export scenario reports in Excel spreadsheet format
- Create both Bulk and Triggered scenarios: use Bulk scenarios for time-bound campaigns or one-off actions on large contact groups, and Triggered scenarios for event-based automation driven by subscriber behavior (for example, message opens or clicks)
🙂 For common questions, see the FAQ section at the end of this article.
Selzy’s human support team is also available 24/7 by email (support@selzy.com) or through the chat in your account.
Convert automations to scenarios
When you convert an automation, Selzy creates a new scenario based on your existing automation. During this process, automation blocks are converted into corresponding scenario blocks, while settings, logic, and content are preserved. At the same time, the original automation remains unchanged and continues to work if it’s active.
⚠️ After conversion, the automation becomes an independent scenario. Any changes made in Automations will affect only the original version. If you want to update your automation sequence, do it in Scenarios.
To convert your automations, go to Automations → All chains. There, you’ll see a notification prompting you to transfer your automations.
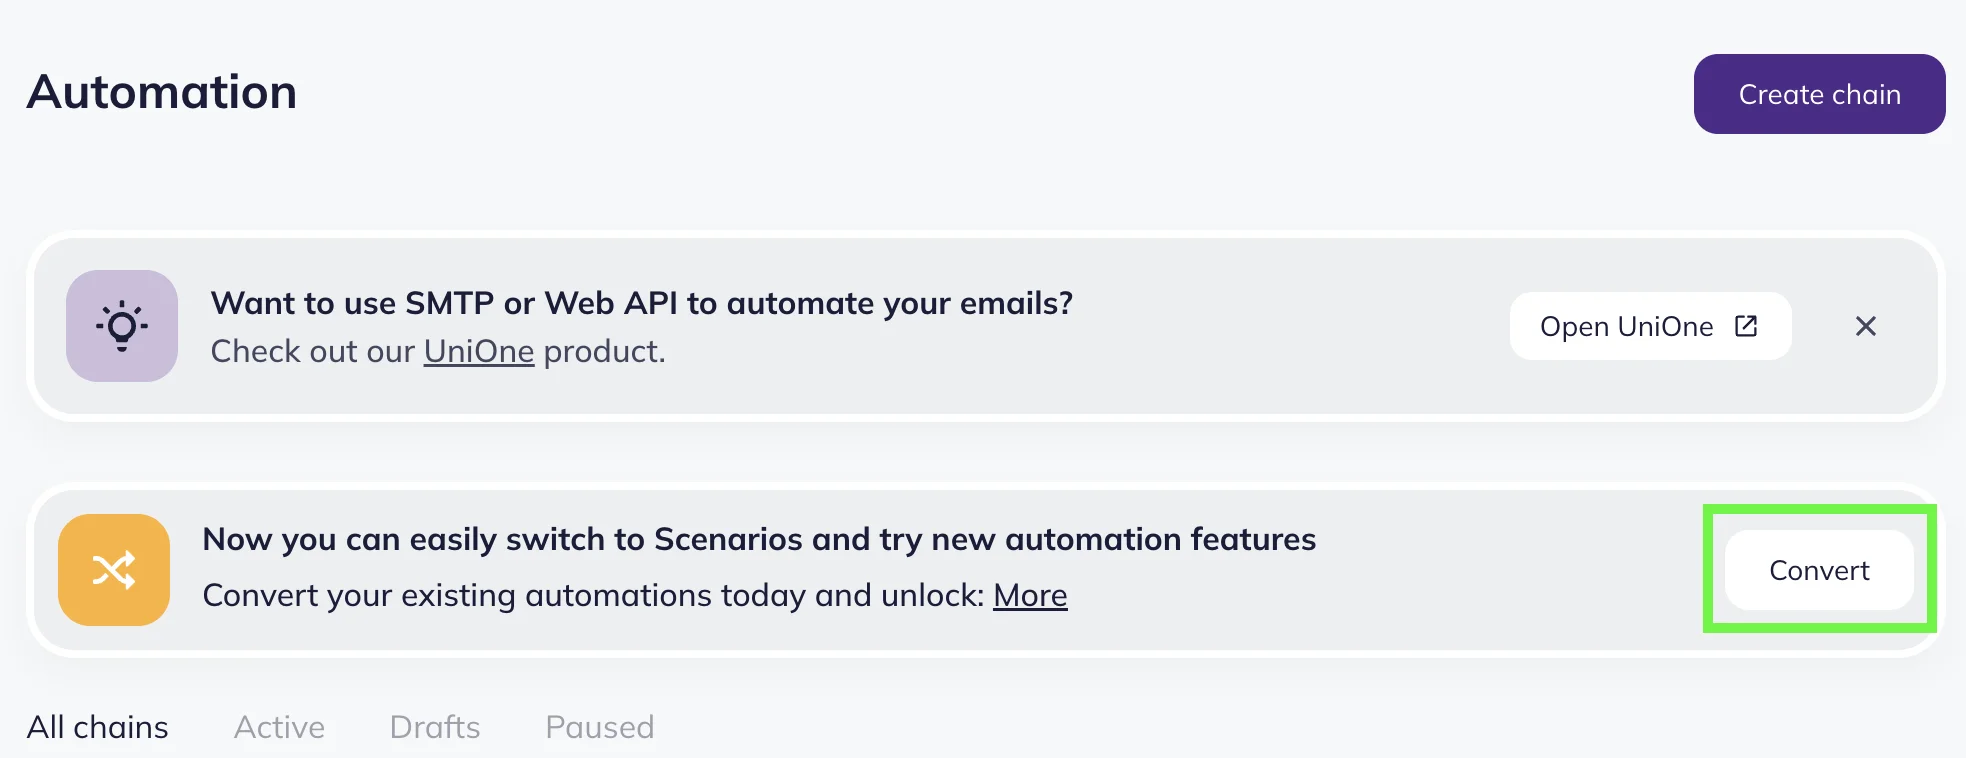
Click the “Convert” button. A pop-up window will open with the list of your automations. Your automations are grouped by status:
- Active
- Draft
- Paused
Each tab contains checkboxes, allowing you to select individual automations or all automations within the specific tab. You can also select all existing automations in the “All” tab by clicking the “Select all” checkbox.
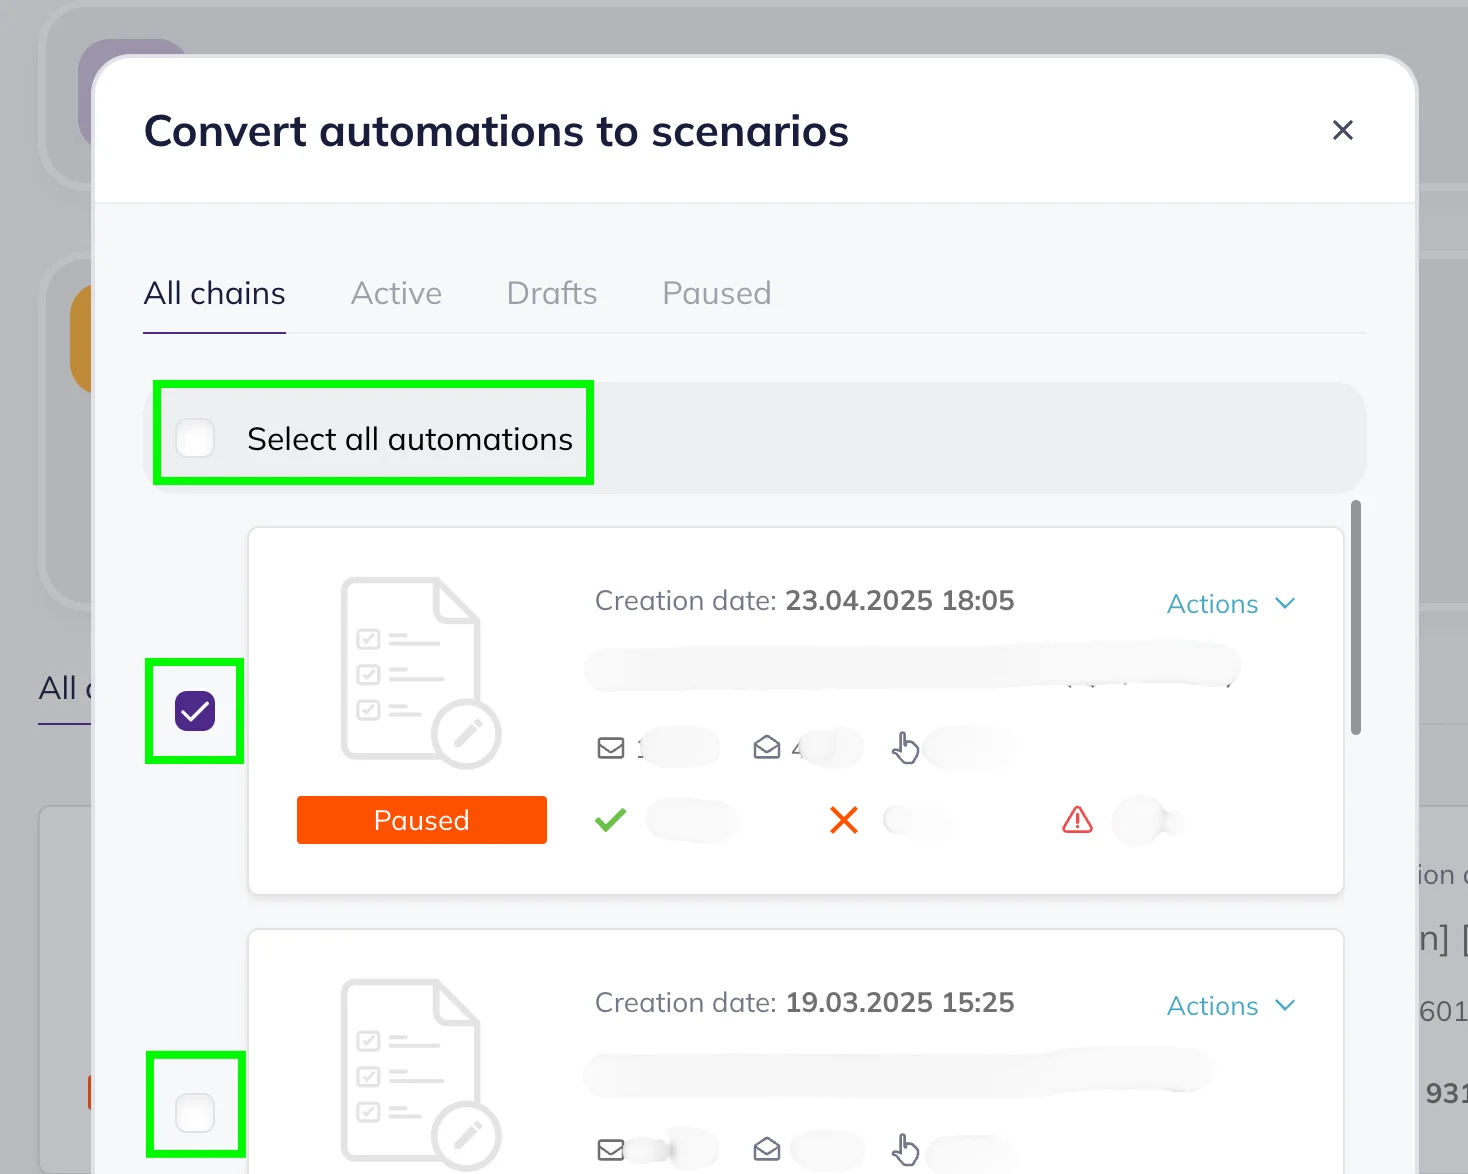
Click “Convert” to convert selected automations to scenarios. Selzy will create new scenarios based on your selection. The original automations remain unchanged and available for further use until Automations as a feature is discontinued.
⚠️ All converted automation scenarios are created with the inactive status and saved as drafts. This means that you have to activate them manually.
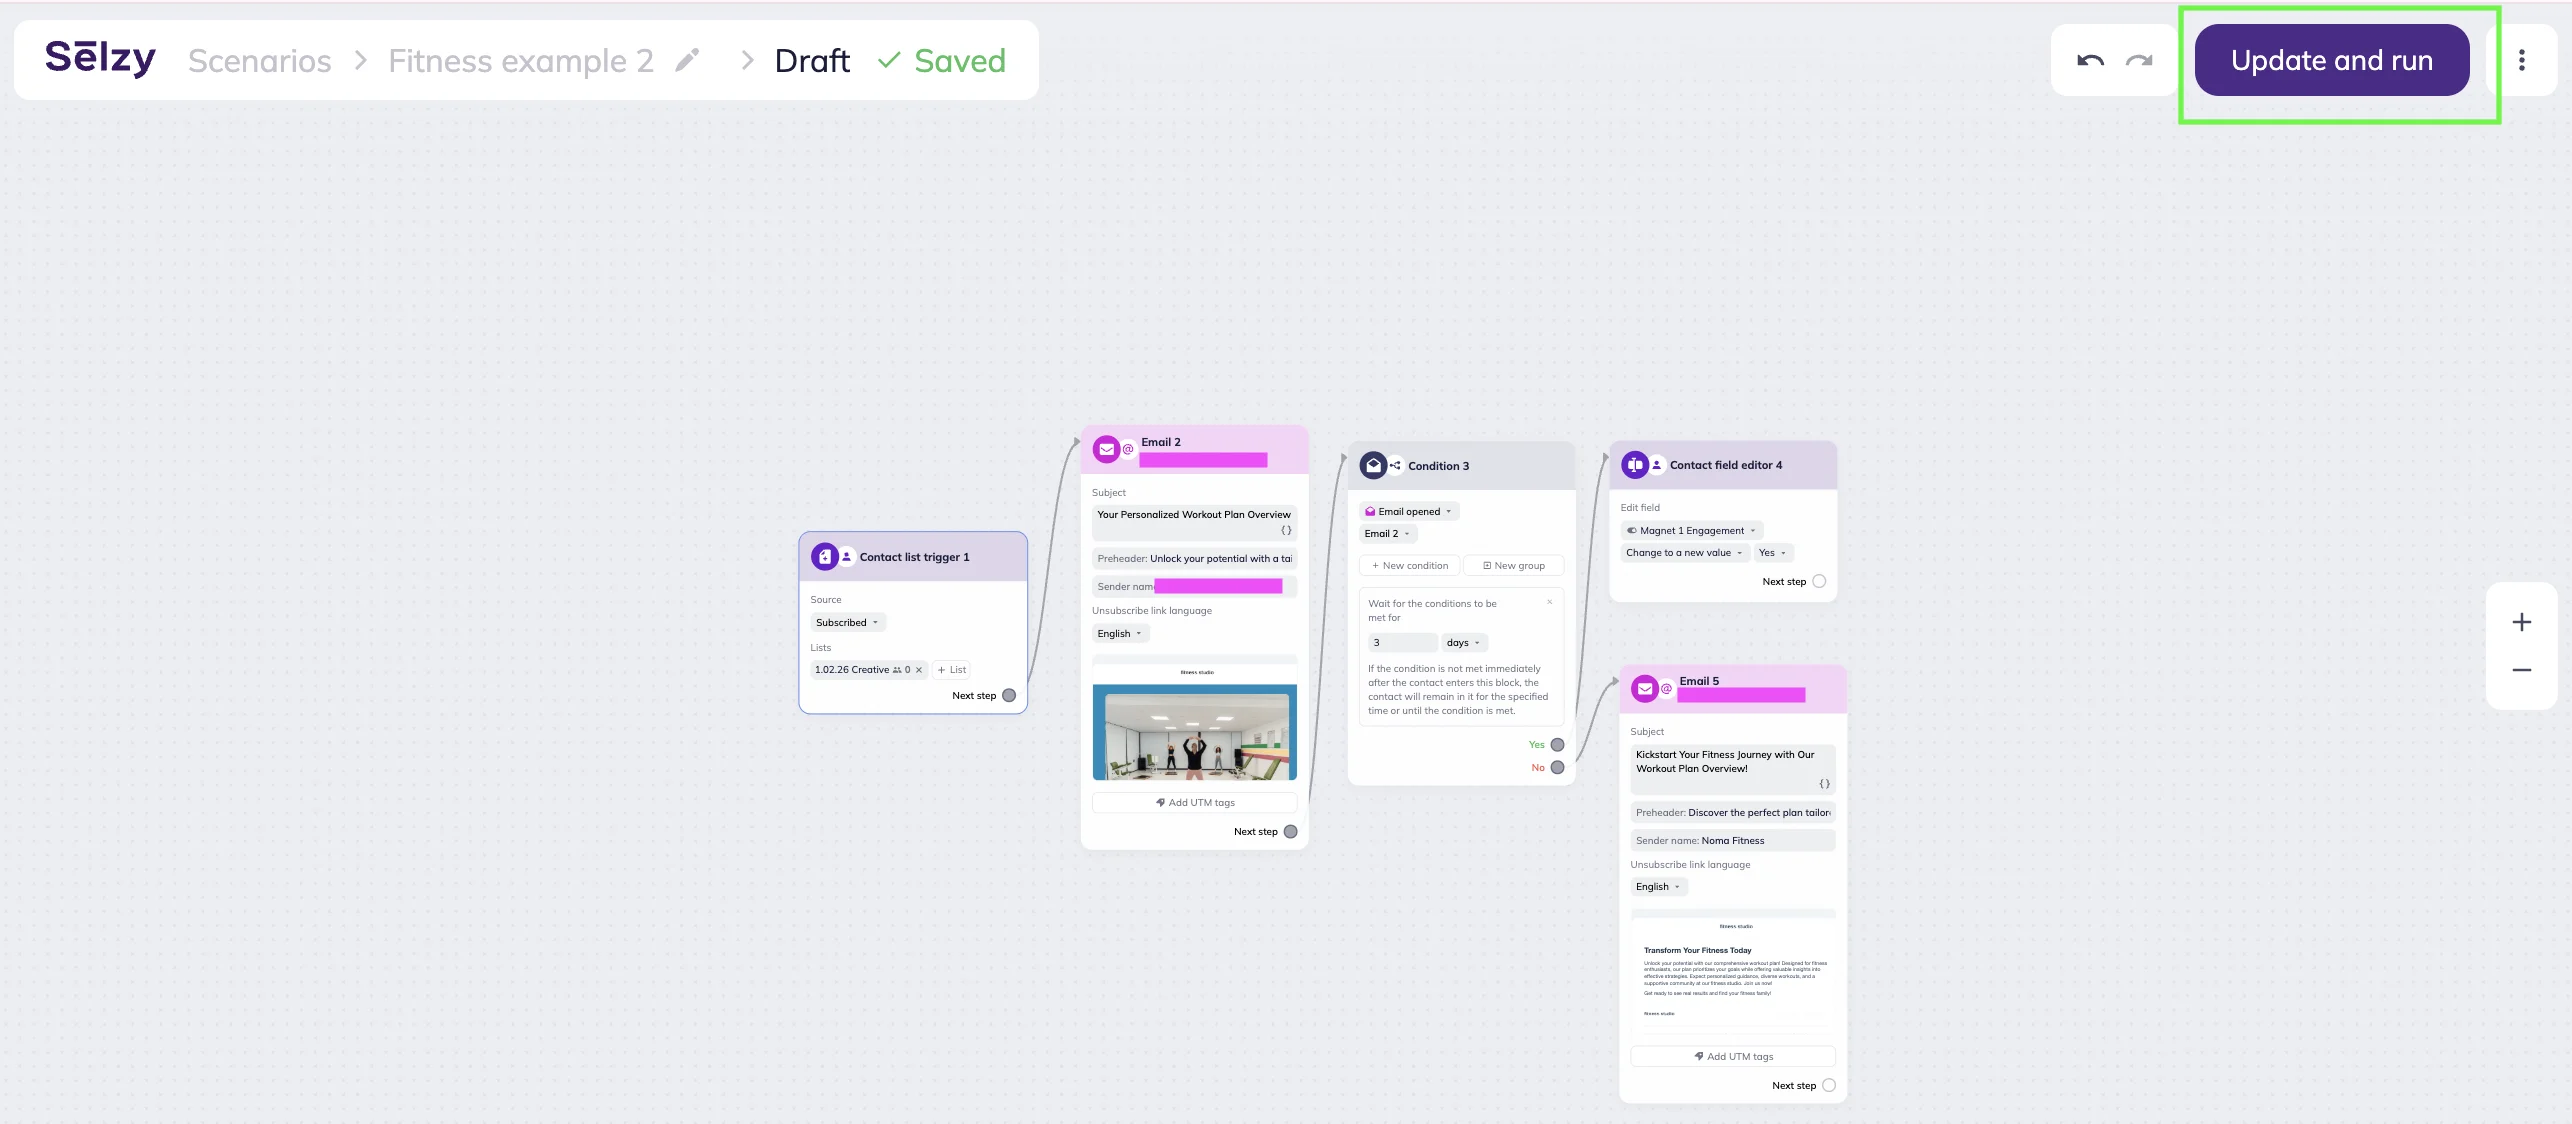
Review your scenario and when you’re ready, click the “Update and run” button in the upper-right corner of the scenario visual editor.
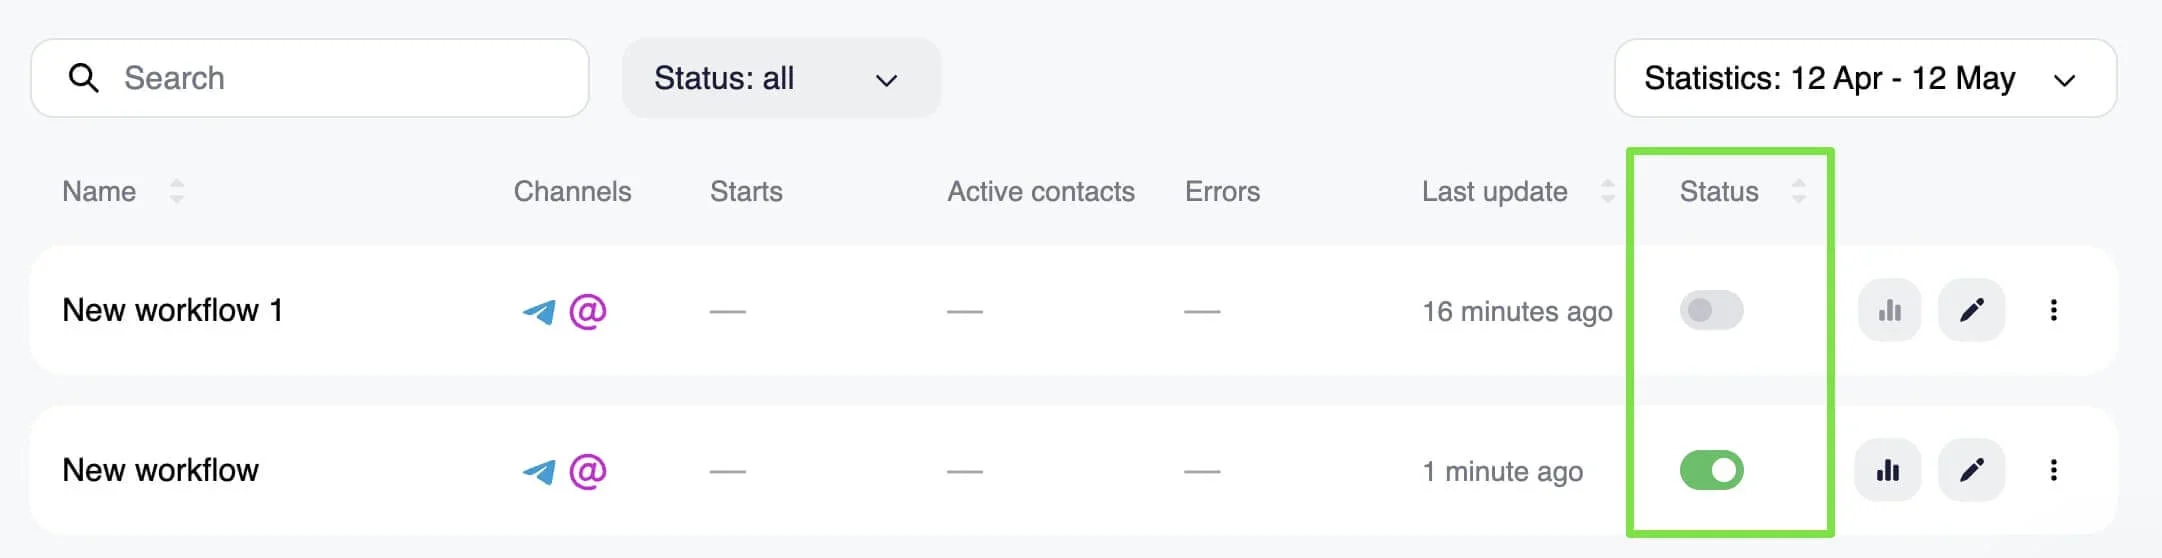
From that moment, subscribers will start entering the scenario and receiving content. After launching, you can edit the scenario at any time — add new blocks, update content, or adjust settings. Scenarios with an active status are marked by the green status toggle.
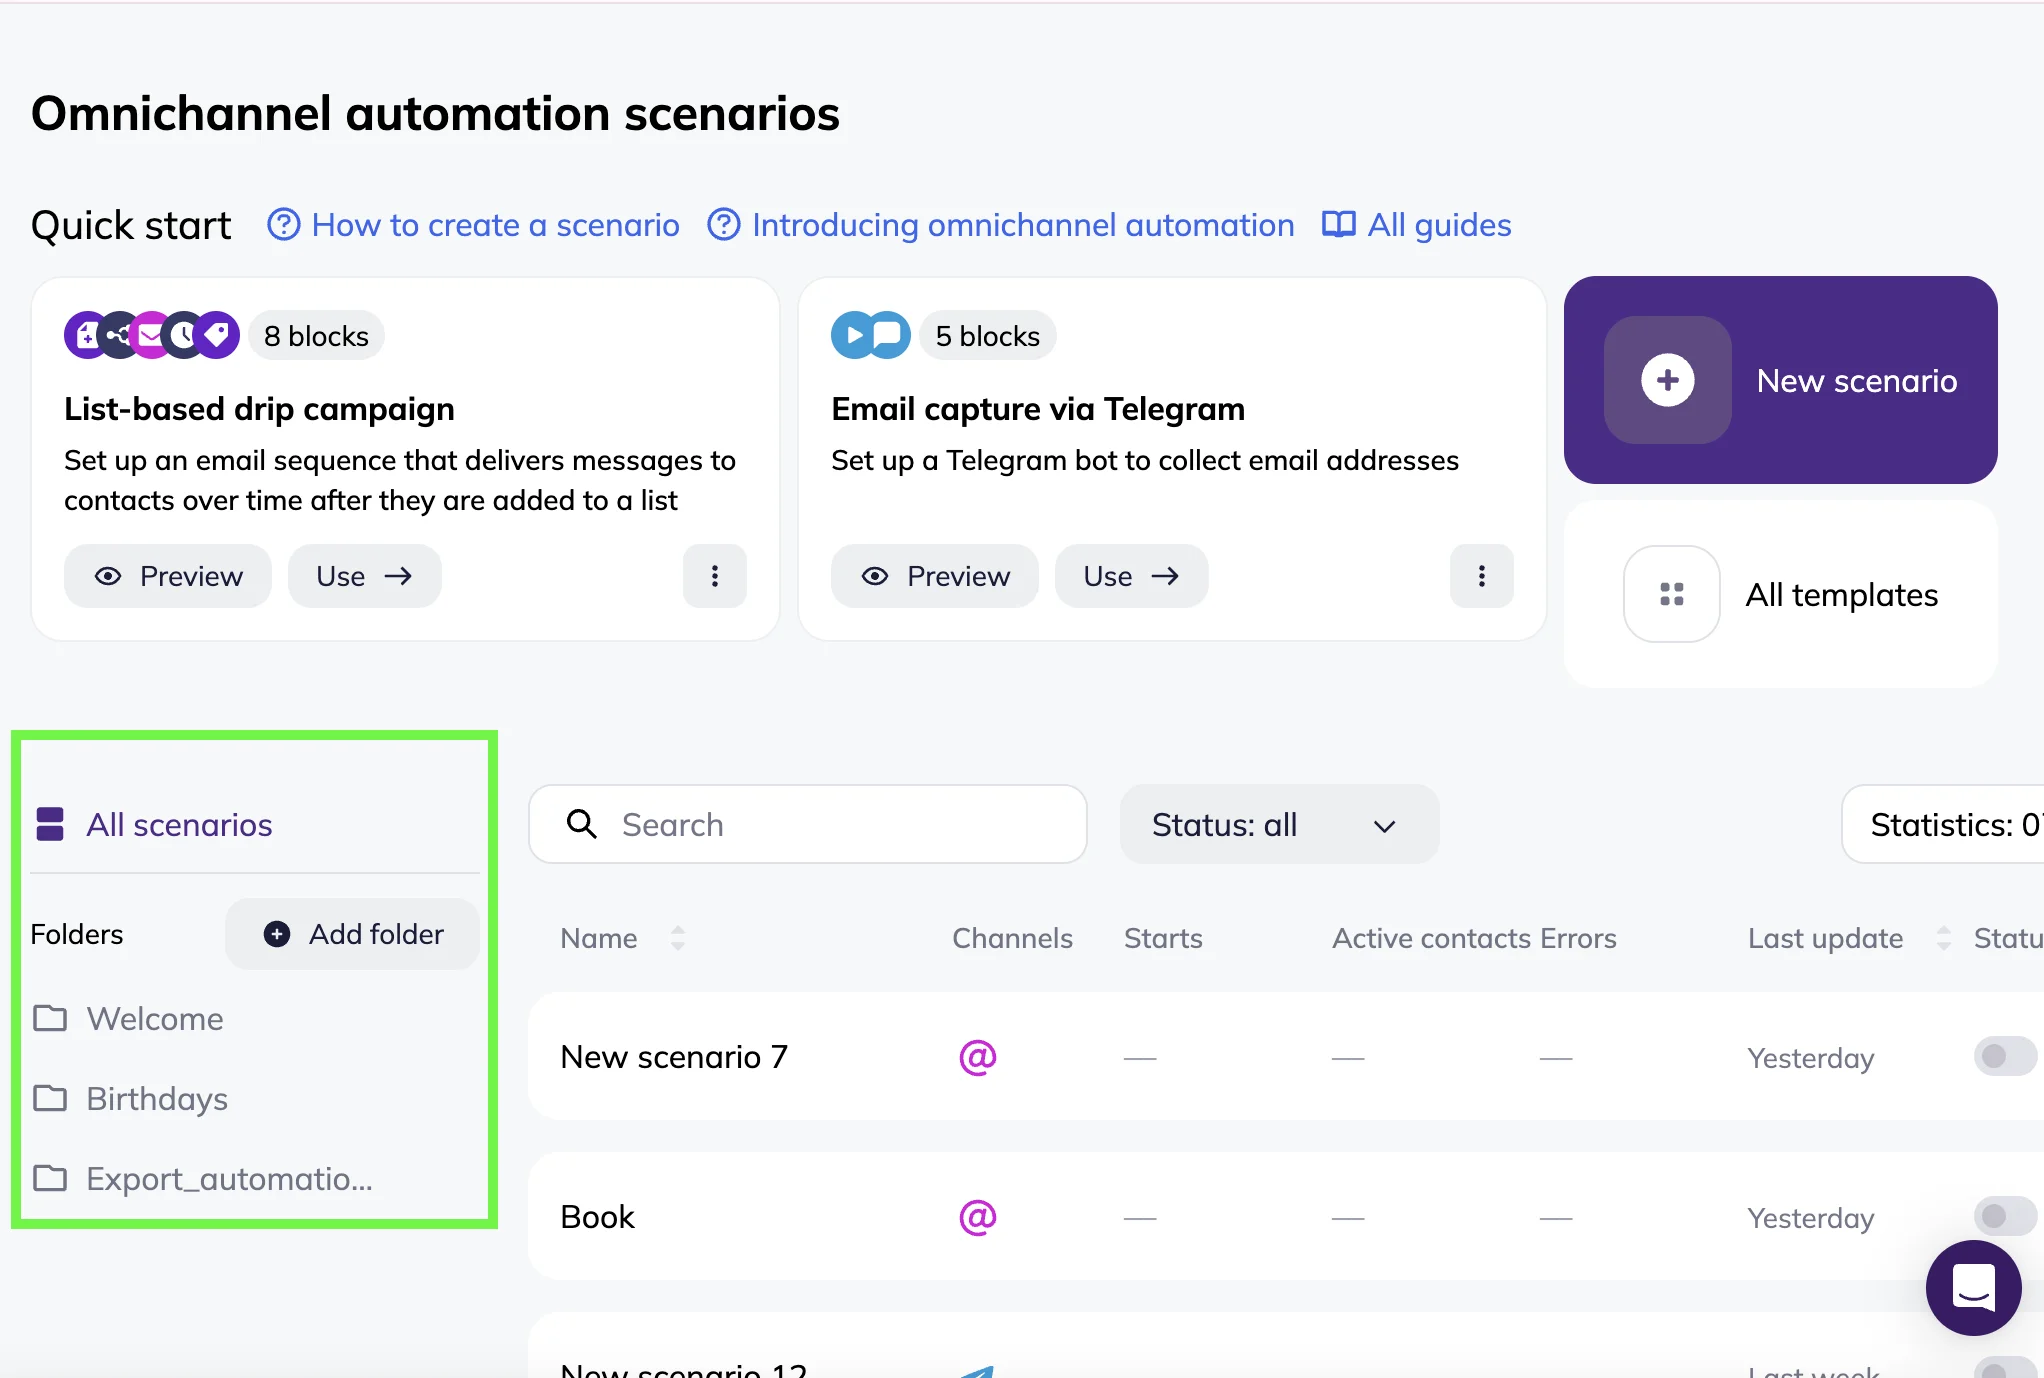
To find converted automation scenarios, go to Triggered scenarios — either click on the arrow icon in the Scenarios section of the main menu or on the Triggered tab on the Omnichannel automation scenarios page.
⚠️ There are two types of omnichannel automation scenarios: Triggered and Bulk. All copied automations are added to Triggered scenarios.
Scenarios are organized into three default folders based on their original status:
- Export_automation_active
- Export_automation_draft
- Export_automation_paused
The folders are created and managed automatically by the system. You cannot choose folders manually when converting automations. A single automation is added to the folder matching its status.
⚠️ We recommend to wait until you’ve finished converting all required automations before reorganizing or renaming these folders. If you delete or rename any folder and then decide to convert more automations, the system will create a new folder with the default name.
Automations can be converted multiple times. Each time, an independent scenario is created and can be edited separately from the previous conversions.
Changes in automation
While automation logic remains the same, you may notice differences in how blocks are represented:
- Some actions are now represented as separate blocks (for example, Delay).
- Conditions are grouped into the Condition block.
- Email activity is tracked in the Email block and Condition block.
- Contact updates are handled through Change list, Change tags, and Contact field editor blocks.
Chain trigger
Learn more about scenario triggers: How to create an omnichannel automation scenario
All chain triggers are converted into trigger blocks. All data (lists, tags, etc.) remains intact.
| Automations | Scenarios | Notes |
| Add to list | Contact list trigger block | The source field in the Contact list trigger block is set to “Add manually” by default. |
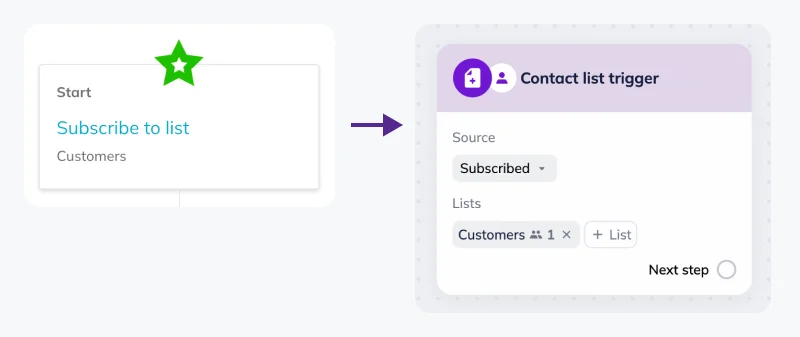
| Subscribe to list | Contact list trigger block | The source field in the Contact list trigger block is set to“Subscribed” by default. |
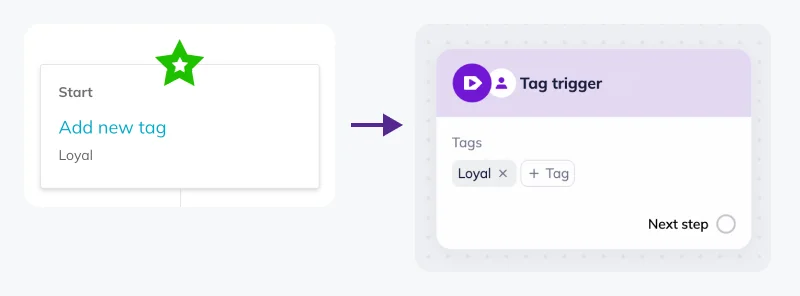
| Add new tag | Tag trigger | Tags are copied automatically. |
Click here to take a look at the visual comparison between trigger blocks in Automations and Scenarios.
Add to list → Contact list trigger

Subscribe to list → Contact list trigger
Add new tag → Tag trigger
Action
If a delay was set for any Action block in Automation, a Delay block is automatically added in Scenarios.
Learn more about available actions: How to create an omnichannel automation scenario
Action blocks are converted as follows:
| Automations | Scenarios | Notes |
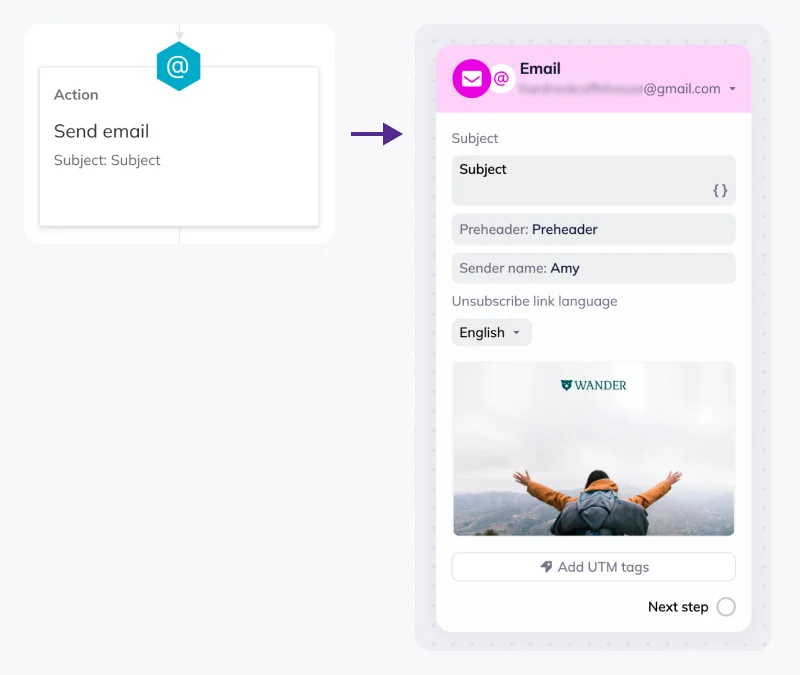
| Send email | Email block | Sender name, subject line, email body, and UTM tags are converted automatically. |
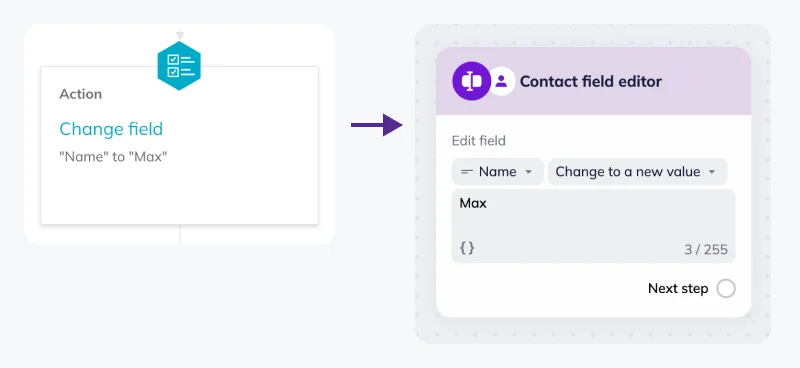
| Change field | Contact field editor block | All custom fields data and actions are converted automatically. |
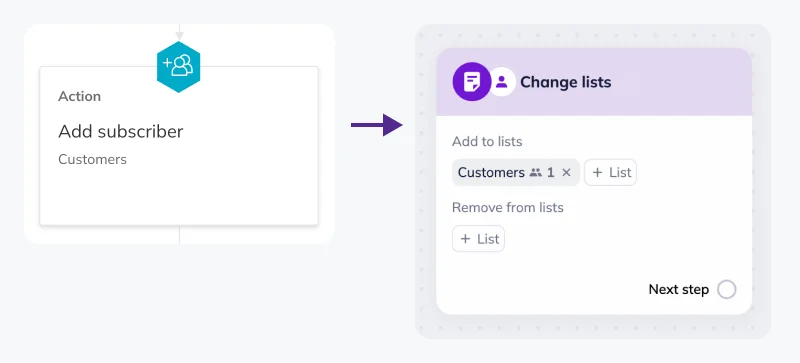
| Add subscriber | Change lists block | All lists and actions are converted automatically. |
| Delete subscriber | Change lists block | All lists and actions are converted automatically. |
Click here to take a look at the visual comparison between action blocks in Automations and Scenarios.
Send email → Email block
Change field → Contact field editor
Add subscriber → Change lists
Condition and Email Activity
If a delay was set for any Сondition or Email Activity block in Automation, a Delay block is automatically added in Scenarios.
Learn more about new condition checks: Condition block in Selzy's Omnichannel automation scenarios
Conditions are converted as follows:
| Automations | Scenarios | Notes |
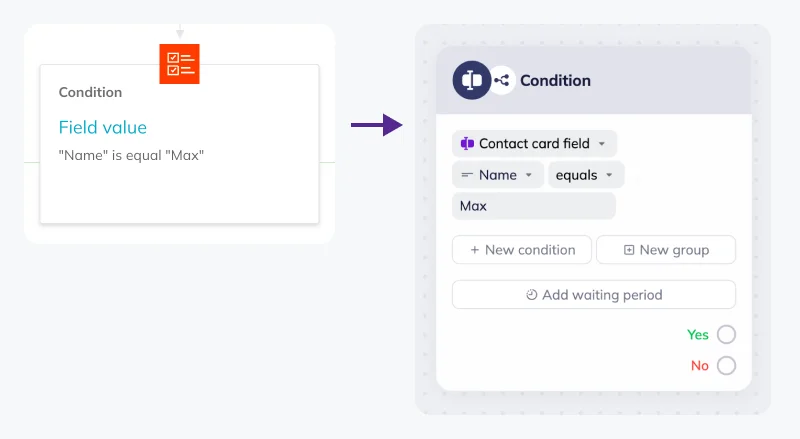
| Field value / Condition block | Custom field check / Condition block | If a delay was set for a Condition block in Automation, a Delay block is added automatically in Scenarios. |
| Presence in the lists / Condition block | Contact list check / Condition block | If a delay was set for a Condition block in Automation, a Delay block is added automatically in Scenarios. |
| Read analysis / Email activity | Email activity check (Email opened) / Condition block | The waiting period is automatically copied to a Condition block in Scenarios. |
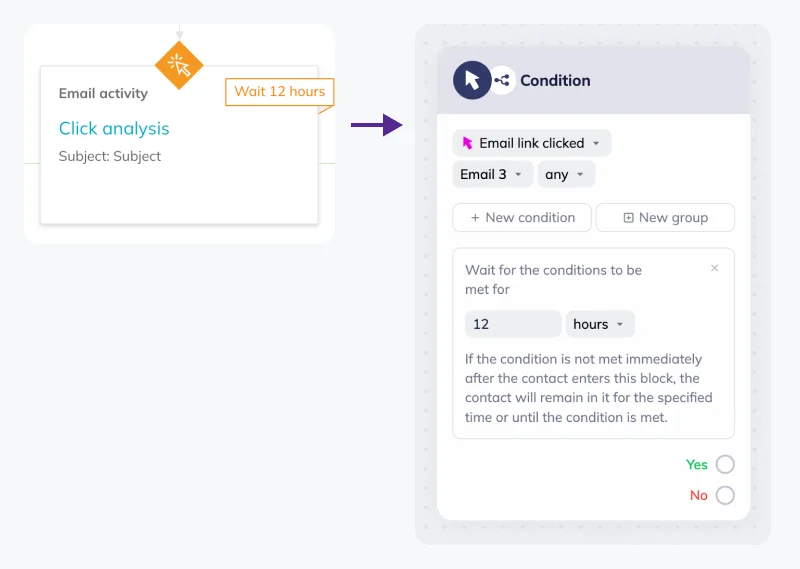
| Click analysis / Email activity | Email activity check (Email link clicked) / Condition block | The waiting period is automatically copied to a Condition block in Scenarios. |
Click here to take a look at the visual comparison between condition blocks in Automations and Scenarios.
Field value → Condition block
Read analysis → Condition block

Click analysis → Condition block
Result
Result blocks (both Success and Fail) are not transferred to Scenarios. Labels are not transferred either. In Omnichannel Scenarios, the same functionality is implemented differently, so a dedicated Result block is no longer required.
| Automations | Scenarios |
| Result blocks collect statistics for each automation branch. | Statistics are collected at the block level and displayed in the statistics mode. Each block gathers its own performance data. For example, you can see email performance metrics such as opens and clicks right in the Email block. |
| Result blocks explicitly end a branch created by Condition or Email activity blocks. | Branching logic is handled through the Condition block and its Yes / No paths, including checks based on subscriber interactions (such as opens or clicks). A scenario branch ends automatically when there are no more blocks — no explicit ending block is required. |
If you previously used Labels to leave notes or mark branches, you can still do this in Scenarios using Notes.
Notes can be added to any block or any point in the scenario. They help document logic, decisions, or hypotheses without affecting scenario execution.
Export automation statistics
Statistics are not transferred from automations to Scenarios. They remain available in the original automations. You can export reports before or after copying.
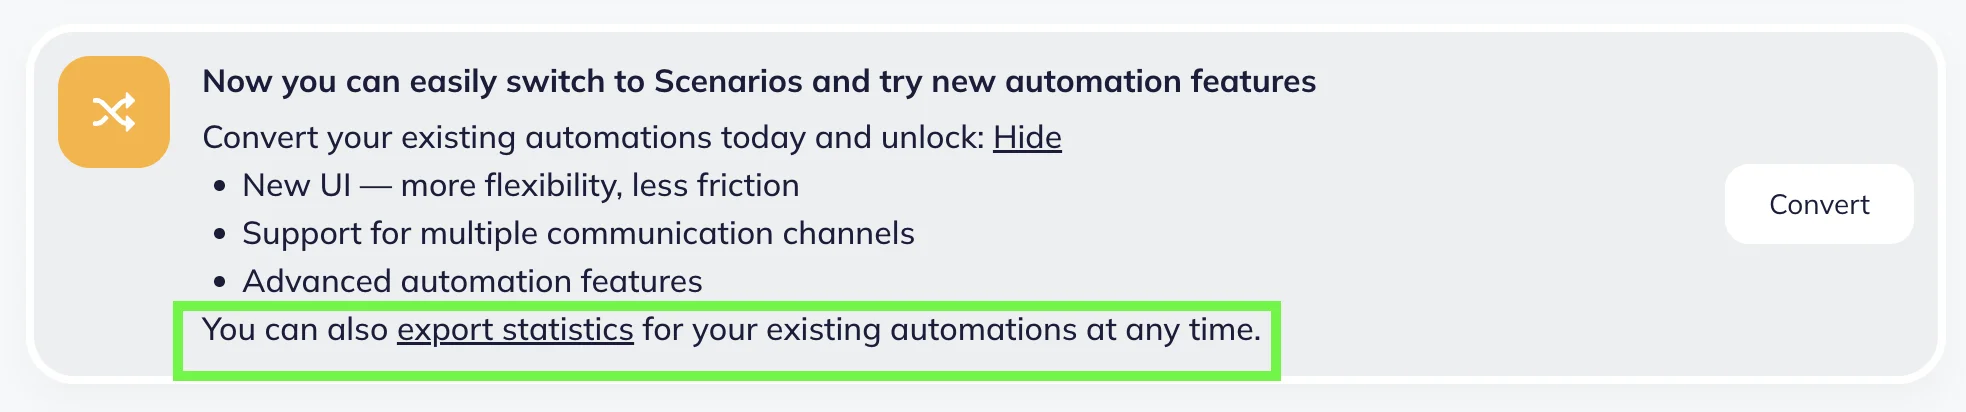
To access the detailed automation statistics, go to Automations → All chains. There, you’ll see a notification prompting you to transfer your automations. Click “More.”

Next, click the “Export statistics” link in the notification.
The downloaded Excel file (.xlsx) contains the following columns:
- ID
- Name
- Delivered
- Opened
- Clicks
Detailed statistics for individual campaigns within an automation are not included in the file.
Checklist for automation converting
Before converting:
✅ Export and save statistics if you need historical data
✅ Decide which automations you want to reuse in Omnichannel automation scenarios
✅ Choose whether to convert active, draft, or paused flows
After converting:
✅ Find the new scenarios in the designated folders in the Triggered scenarios section
✅ Review your scenarios in draft mode
✅ Check new features available only in Omnichannel automation scenarios
✅ Click ‘Update and run’ to activate scenarios when ready
Common questions
Will my current automations disappear?
For now, all existing automations stay in place and remain available. However, you will lose access to them when Automations as a feature is discontinued.
Will active automations stop working?
No. Conversion does not affect automations. For now, active automations continue running as usual. However, after conversion, the automation becomes an independent scenario. Any changes made in Automations will affect only the original version. If you want to update your automation sequence, do it in Scenarios.
What happens to contacts already moving through an automation?
A converted automation becomes a new scenario, and scenarios can only process contacts that enter after the scenario is activated and meet its trigger conditions.
If a contact was already moving through an automation and you stop that automation, their progress does not carry over into the scenario at the same step. They will need to re-enter the flow based on the scenario’s triggers.
Will I have to rebuild everything from scratch?
No. Choosing to automatically convert your automations before we stop supporting them, you’re getting the scenarios with the same functionality and logic, as the original automations.
What happens to my emails — content, design, images?
All email content is preserved during conversion, including email text, design and layout, images, links, and UTM tags. Emails are opened and edited in Selzy’s AI Email Builder, even if they were created in a different builder.
Will I lose my contacts, lists, segments, or custom fields?
No. Contacts, lists, segments, and custom fields are not stored in automations. They are stored in your account independently of automation logic, so nothing happens to them during conversion.
Will my new scenario run immediately?
No. New scenarios are saved as inactive drafts and must be activated manually.
Will I lose my statistics?
No, but statistics are not transferred to Scenarios. If you need this data, make sure to export it before or after copying in the Automations, while it is still available. To access the detailed automation statistics, go to Automations → All chains. There, you’ll see a notification prompting you to transfer your automations. Click “More” → Click the “Export statistics” link in the notification.