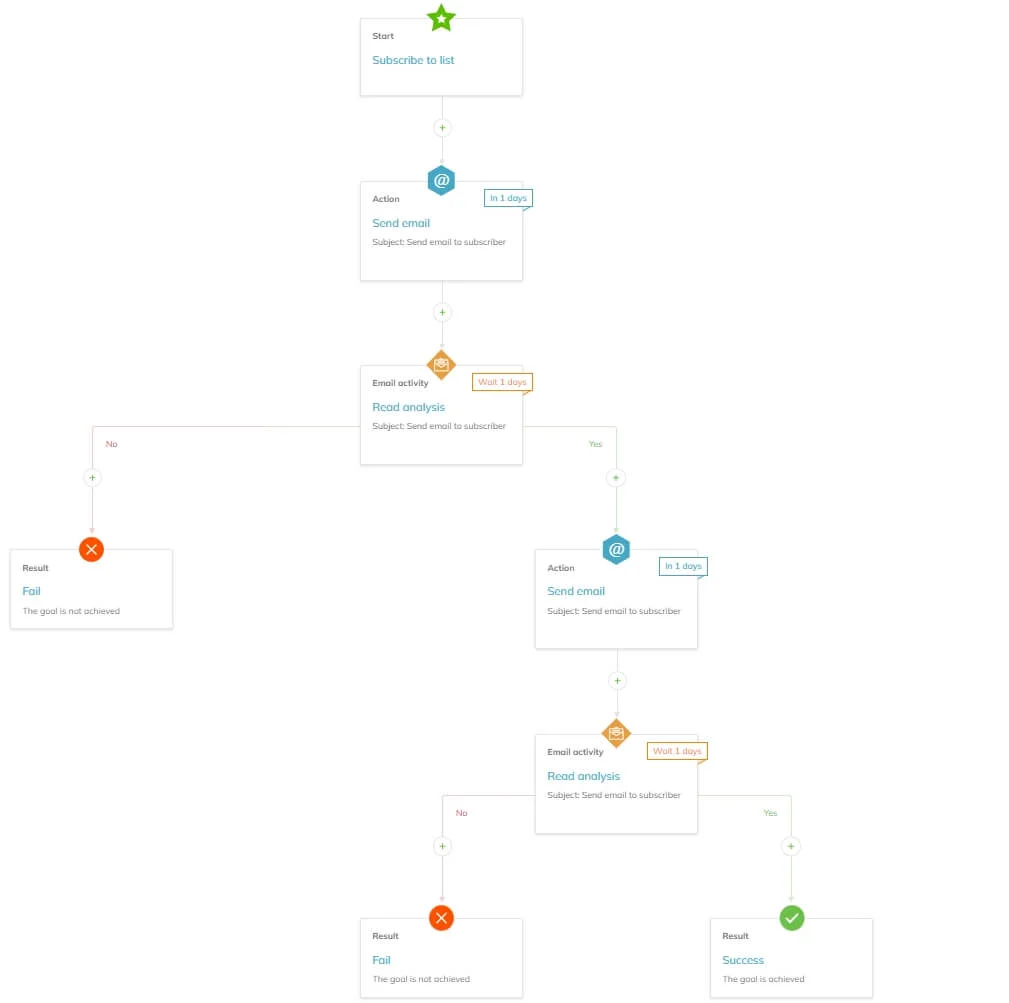
An automation consists of interconnected blocks. Each automation must have a Chain trigger and a Result block and either an Action or a Condition block at a minimum.
The Condition and Email activity blocks create Yes/No branches. To activate the automation, each branch must end with a Result block.
Let’s explore each block.
Chain trigger
A Chain trigger is a block that starts an automation sequence. In this block, you specify how a subscriber joins the automation.
Follow a separate instruction to learn how to create an automation chain.
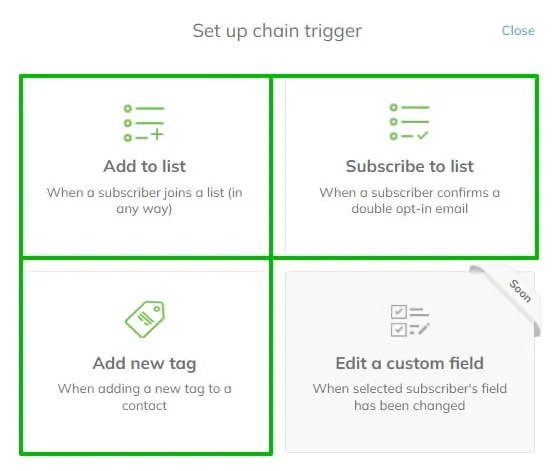
There are three chain triggers in Selzy: Add to list, Subscribe to list, and Add new tag.
Subscribe to list
If you select the Subscribe to list option, a contact will be included in the automation sequence after they confirm the subscription to one or more lists by clicking the confirmation link in the confirmation email.
You can specify one or more lists after you select the Subscribe to list trigger.
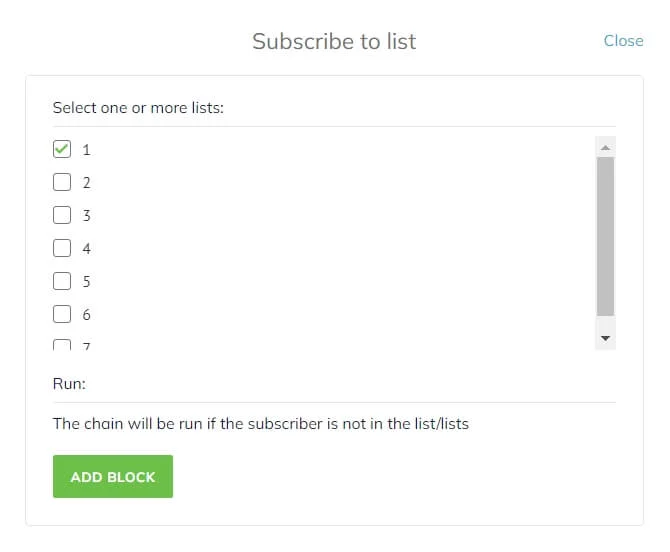
The automation will only affect those contacts that were added to the list after the automation was activated. The contacts that were on the list prior to the creation of the automation will not be affected.
So if you want the contacts to join the automation, we recommend you create a new empty list to use in your automation. And after you activate the automation, you can add contacts you need to be affected by it into this new specifically created list.
Add to list
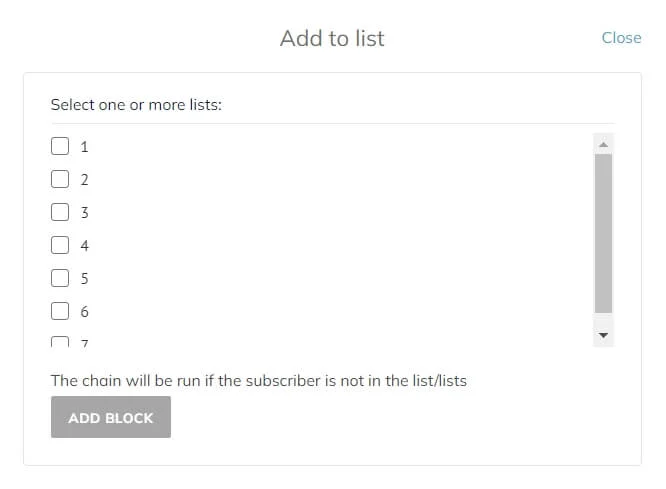
A contact will be included in the automation sequence after you add them to one or more lists specified in the Add to list menu.
Unlike the previous options, the double opt-in is not required here, so the contact joins the automation as soon as they are added to the list. You should only select this option if you have the contact’s permission to send them emails. You can not send emails to people who did not previously agree to receive them.
You can add contacts to the list in several different ways:
- Manually add a contact using the Add contacts button in the Contacts dashboard or by ticking the checkboxes on the contact card.
- Import several contacts from a file or type them in.
- Copy or move contacts from one list or several lists.
- Move contacts that did not belong to any lists before.
- Use API methods.
The automation will only affect those contacts that were added to the list after the automation was activated.
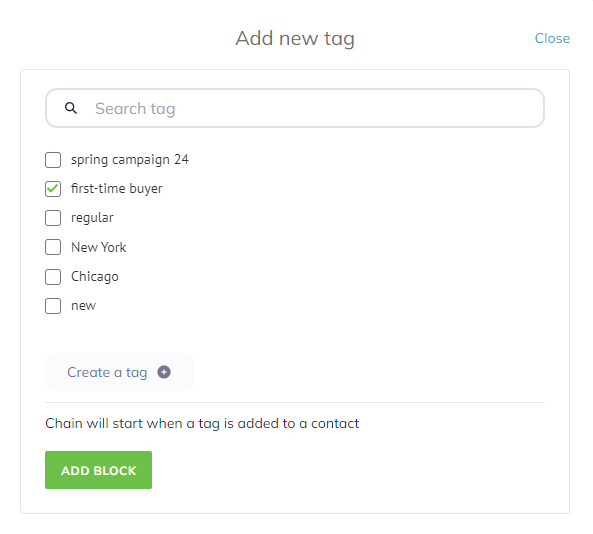
Add new tag
A contact will be included in the automation sequence when they receive a new tag or tags.
Tags allow you to organize contacts into specific groups or segments, enabling targeted automation. For example, you can tag first-time buyers and target them with special offers like a coupon for the next purchase to encourage them to buy again.
You can add tags to contacts:
- Manually from the contact card.
- Manually from the All contacts list (Contacts — All contacts) or from a specific contact list (Contacts — Lists) by selecting contacts and clicking Actions — Update tags.
- Manually from campaign reports (Campaigns — History).
- During contact import.
- Through API.
For adding new tags to one or a few specific contacts, use the contact card or the All contacts list. For bulk actions, adding tags from reports and lists works most efficiently.
The automation sequence will only be triggered for contacts that received tags after the sequence was activated.
If you delete the tag from the contact list, the sequence will stop, and new contacts will not be included. However, the previously included contacts will continue progressing through the sequence.
You can select multiple tags; the sequence will be triggered when any of them is added to a contact. If you haven’t found the tag you need in the list, create it by clicking the Create a tag button.
Action
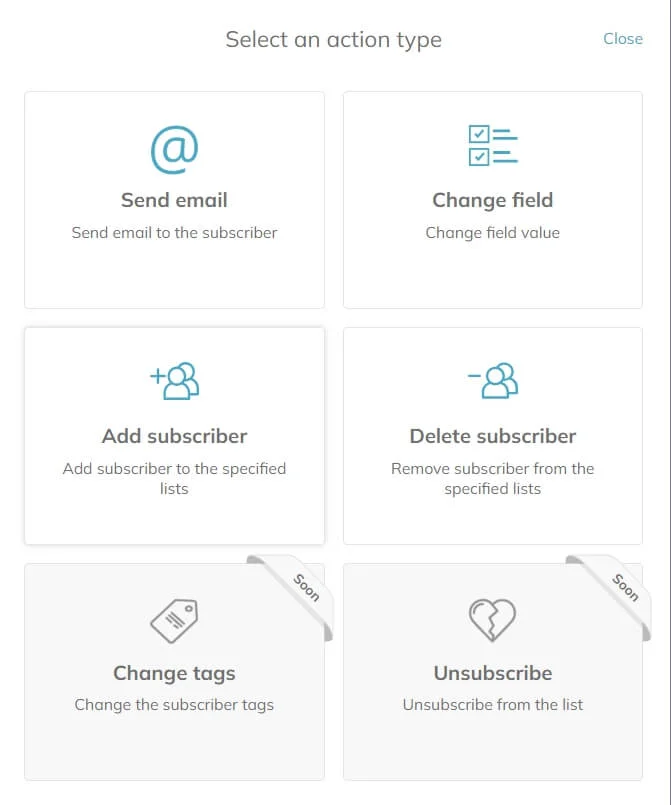
Action is one of the block types that can follow the Chain trigger. In Selzy, there are four action types: Send email, Change field, Add subscriber, and Delete subscriber.
Send email
Sends an email to a contact that is passing through this block. This means that if this block is continuing a Yes or No branch, the email will only be sent to the contacts following the branch. If there are no Yes or No branches before this block, the action will affect all the contacts in the automation.
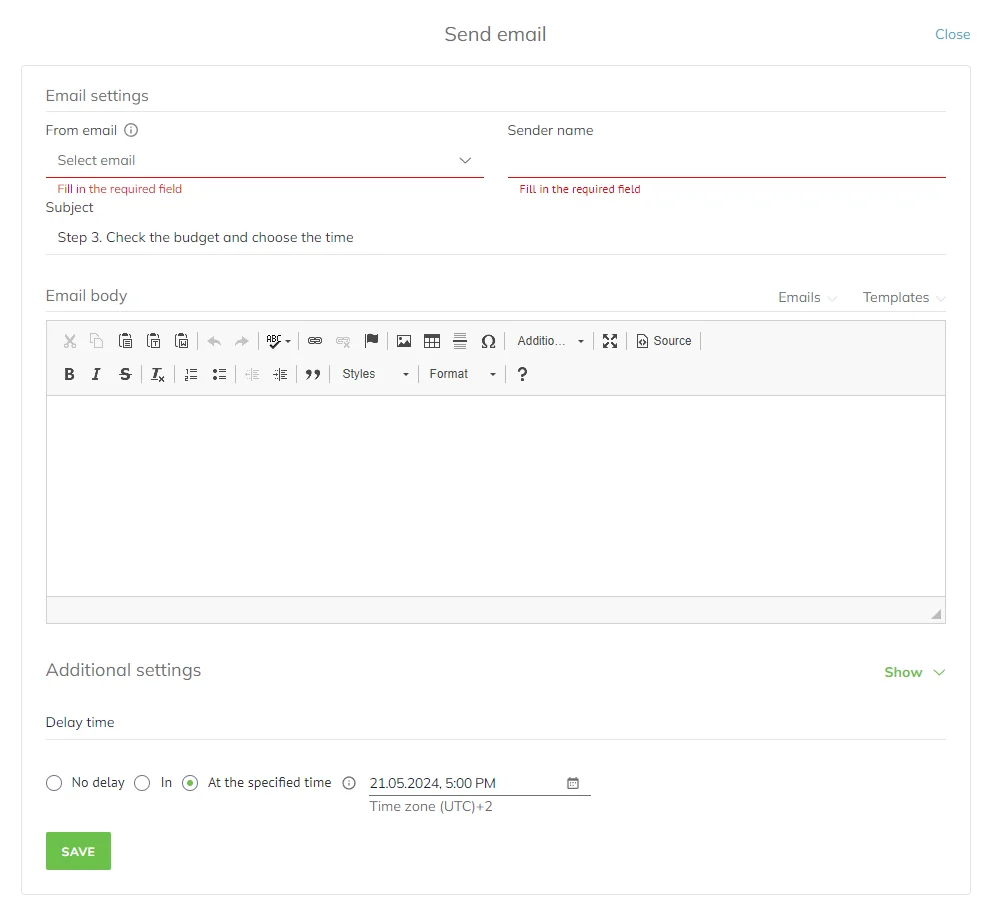
After you select the Send email Action type, you can specify said email’s parameters:
- From email — select one of the confirmed email addresses listed on your account. This email will be shown in the From field of the email you send. If there are no confirmed emails showing in the drop-down menu, confirm an email in your account’s settings. Learn more about confirmed emails and email authentication in Tutorial №4.
- Sender name — enter the name that will be displayed in the recipient's email client.
- Subject — enter a subject line for your email.
- Email body — create an email using the built-in HTML editor, or select an email or a template from the ones previously created. By clicking Emails you will be able to select one of your previously created emails. And clicking Templates allows you to select an email template that you have previously saved. Templates from the My templates section will be available here.
- Delay time — set when an email will be sent to a contact passing through the block. There are three options available: No delay — send the email immediately; In — send the email with a delay, which can be minutes, hours, or days; and At the specified time — send email on set time and date. The latter option is particularly useful for planning your brand’s communications during holiday season and sales.

When setting up delay time, please note that sending an email to all subscribers might take up to 30 minutes.
If you choose to send email on set time and date, it will be sent only at that time regardless of the chain trigger you’ve selected.
If a contact is added to the automation chain after the set time, they will not receive an email and will continue progressing through the chain.
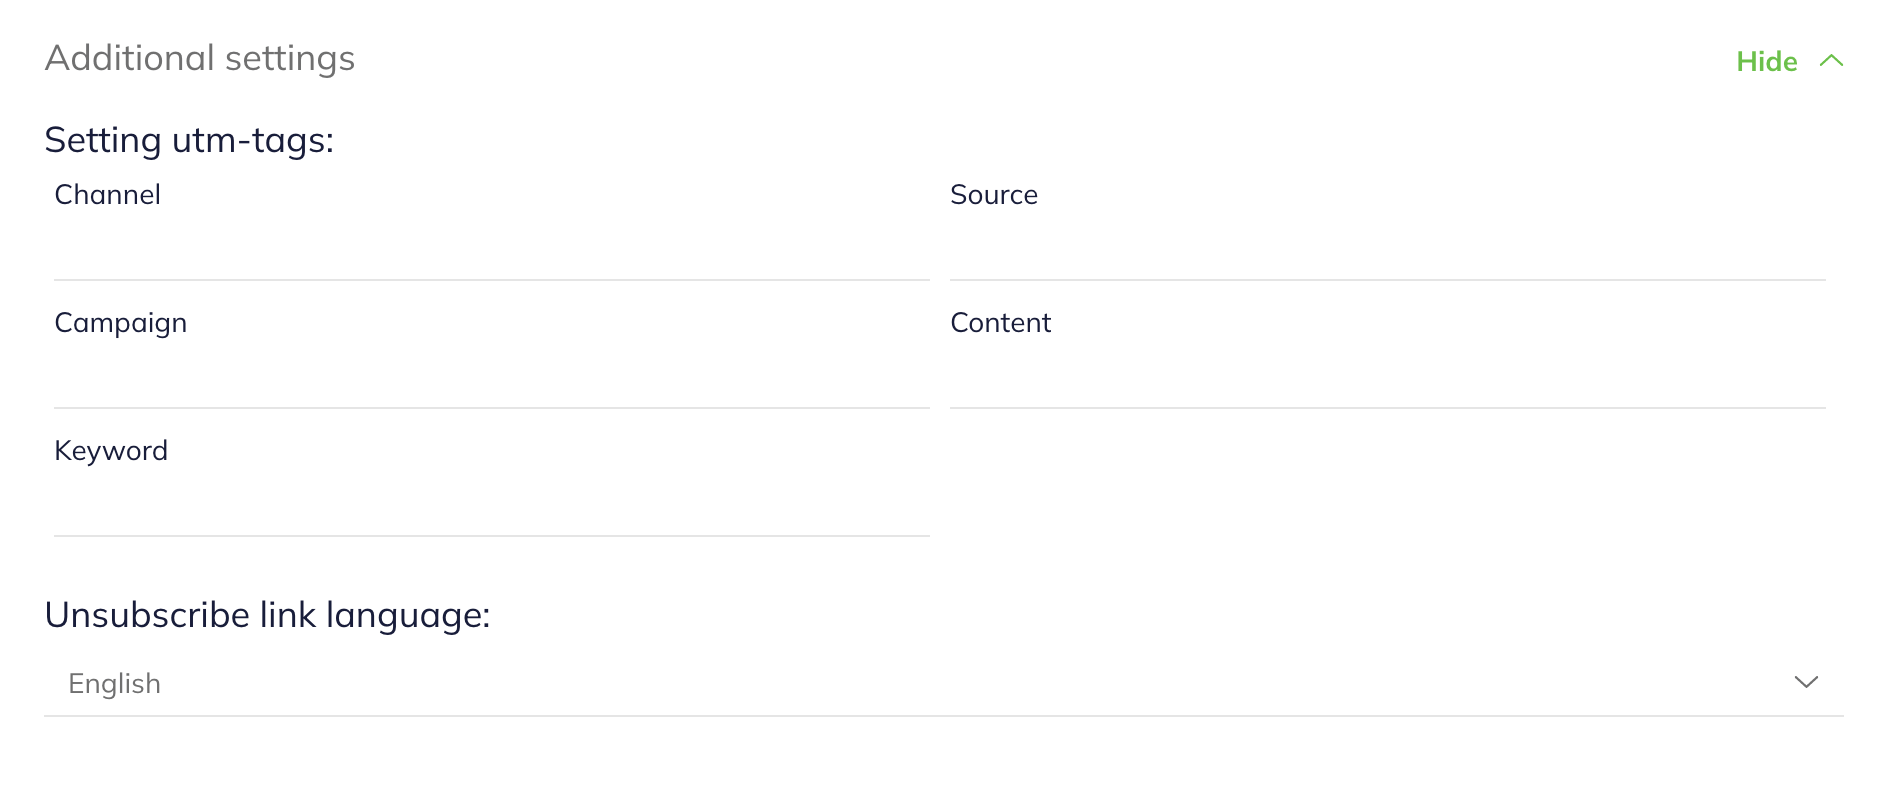
In the Additional settings, you can set up the UTM tags and indicate the language of the unsubscribe link.
Change field
This action changes the values of the selected fields of the contact that passes through this block.
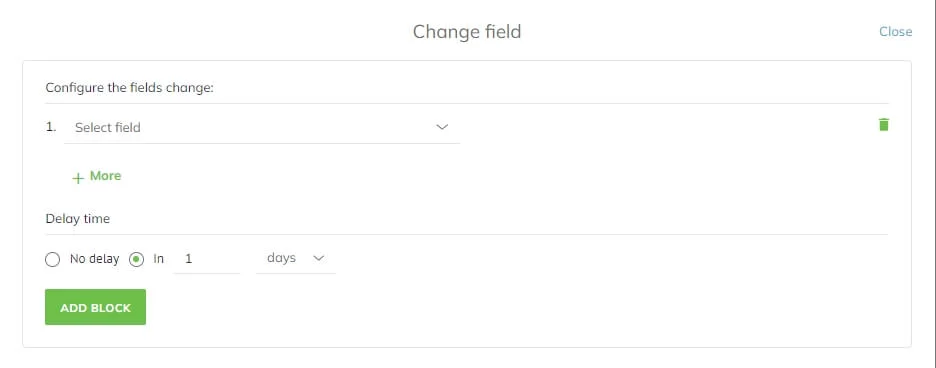
After you select the Change field Action type, you can:
- Configure the fields change — first, select the field that needs to be changed from the drop-down list on the left. Next, on the right, enter the value you want to set for the field. You can change multiple fields’ values at once with a single Change field Action block.
- Delay time — indicate when you want to change a field’s or fields’ values. You can make the change immediately or set a delay time.
Add subscriber
This action adds a contact to the selected list or lists.
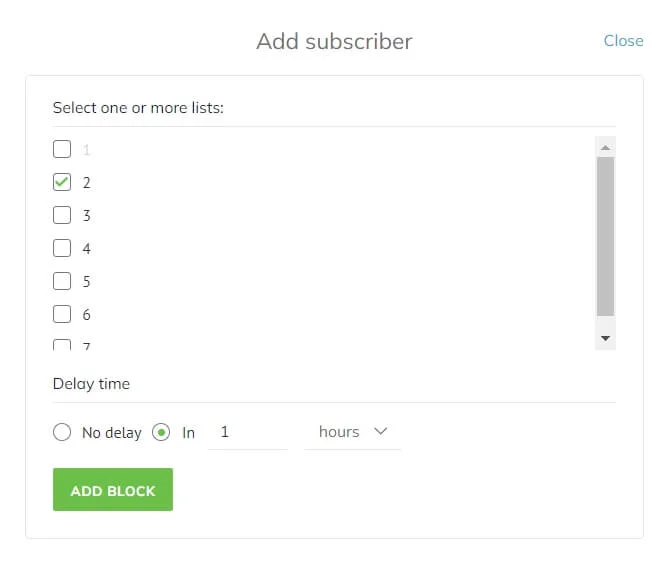
After you select the Add subscriber action, you can:
- Select one or more lists to add the contact to.
- Specify the Delay time — set the time when the contact needs to be added to the desired list or lists. You can add the contact immediately or set a delay time in minutes, hours, or days.
Delete subscriber
This action removes a contact from the selected list or lists.

After you select the Delete subscriber action, you can:
- Select one or more lists from which you want to remove the contact.
- Specify the Delay time — set the time when the contact needs to be deleted from the desired list or lists. You can delete the subscriber immediately or set a delay time in minutes, hours, or days.
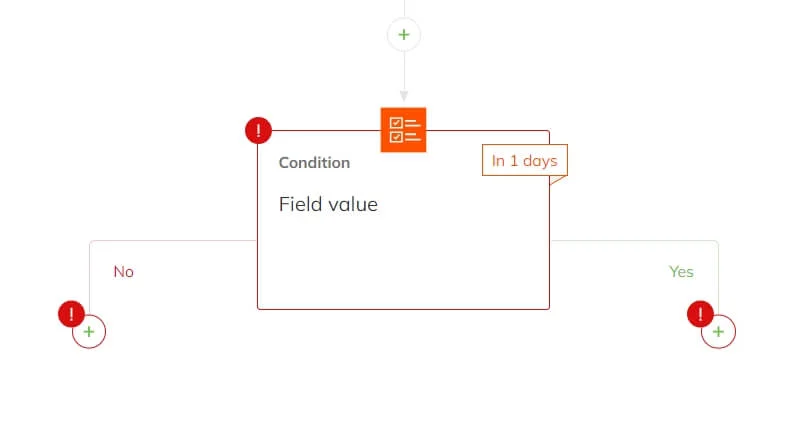
Condition
This action checks the contact’s field values and presence in one or several lists.

The Condition block creates Yes and No branches. If the specified condition is fulfilled as a result of the check, the contact is sent through the Yes branch. If the condition is not fulfilled, the contact goes through the No branch.
Field value
Field value condition type checks the value of one or more selected fields of the contact.
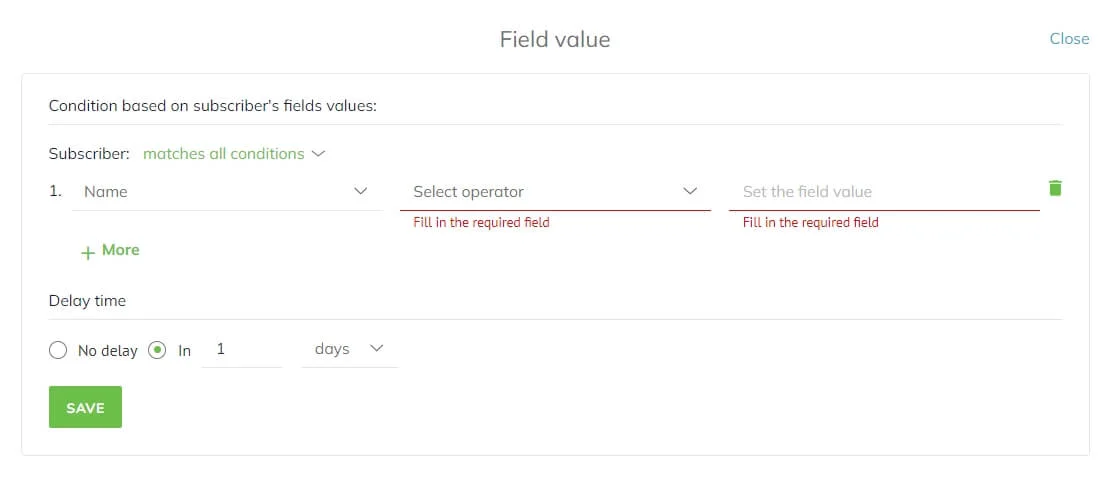
After you select the Field value, you can set up the condition’s parameters. The process is very similar to segmentation:
- On the left, select a field to validate from the list of your contacts fields.
- Next, in the center column, select an operator: is equal, is not equal, contains, does not contain, starts with, does not start with, ends with, or does not end with.
- On the right, set the field value.
- At the bottom, specify the Delay time in minutes, hours, or days.
You can create complex checks and check several conditions at once. If you need multiple field value checks, you can add more fields by clicking More. Then you will need to repeat the setup process, as described above. To coordinate the condition, on the top, choose whether the subscriber needs to match all conditions or any conditions.
Let's look at an example:
EXAMPLE
We want to check whether the contact lives in London or not. To do this, in the left column we select the City field, in the center column we select the operator Is equal, and in the right column, we enter London.
So we have created a check for the condition City equals London. The system will check whether this is true. And if the condition is met, the contact will be sent through the Yes branch. If the condition is not fulfilled, the contact will be sent through the No branch.
In this example, the City field is custom. So if you want to use it in your automation, you need to first create it following the instruction on how to create custom fields.
Presence in the lists
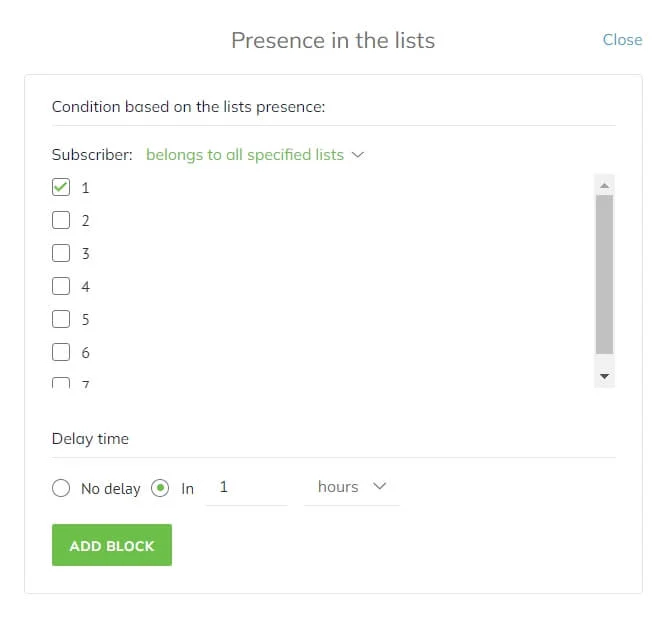
The Presence in the lists condition type checks whether the contact is present in one or more lists. After you select this condition, you can specify the desired list or lists and set the delay time.
- If the contact is in the specified lists, they will be sent to the Yes branch.
- If the contact is not in the specified lists, they will be sent to the No branch.
If you select belongs to all specified lists, a check will be performed to see whether the contact is in all specified lists. The result will be successful if the contact is in each of them. Otherwise, the contact will be sent to the No branch.
If you select belongs to at least one of the specified lists, a check for presence in all specified lists will be performed. The result will be successful if the contact is in at least one of the lists.
EXAMPLE
We want to check if the contact is present in the London list. We add the Presence in the lists block and tick the list we need.
This way we have created a condition to check if the contact is in the London list. The system will check whether the contact is in the specified list. If the condition is fulfilled, the contact will be sent to the Yes branch. If the condition is not fulfilled, the contact will be sent to the No branch.
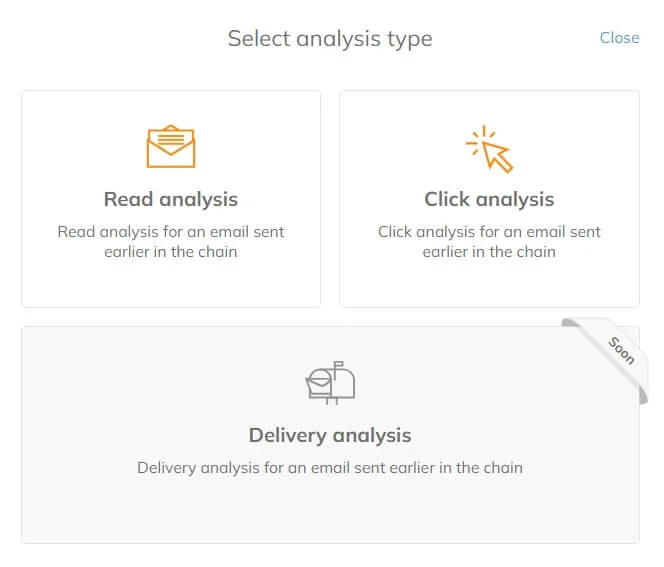
Email activity
This block analyses email reads or clicks. For it to work, there should be an email to analyze, so a Send email action block.
If as a result of the analysis the specified condition is fulfilled, the contact is sent to the Yes branch. If the condition is not fulfilled, the contact goes to the No branch.
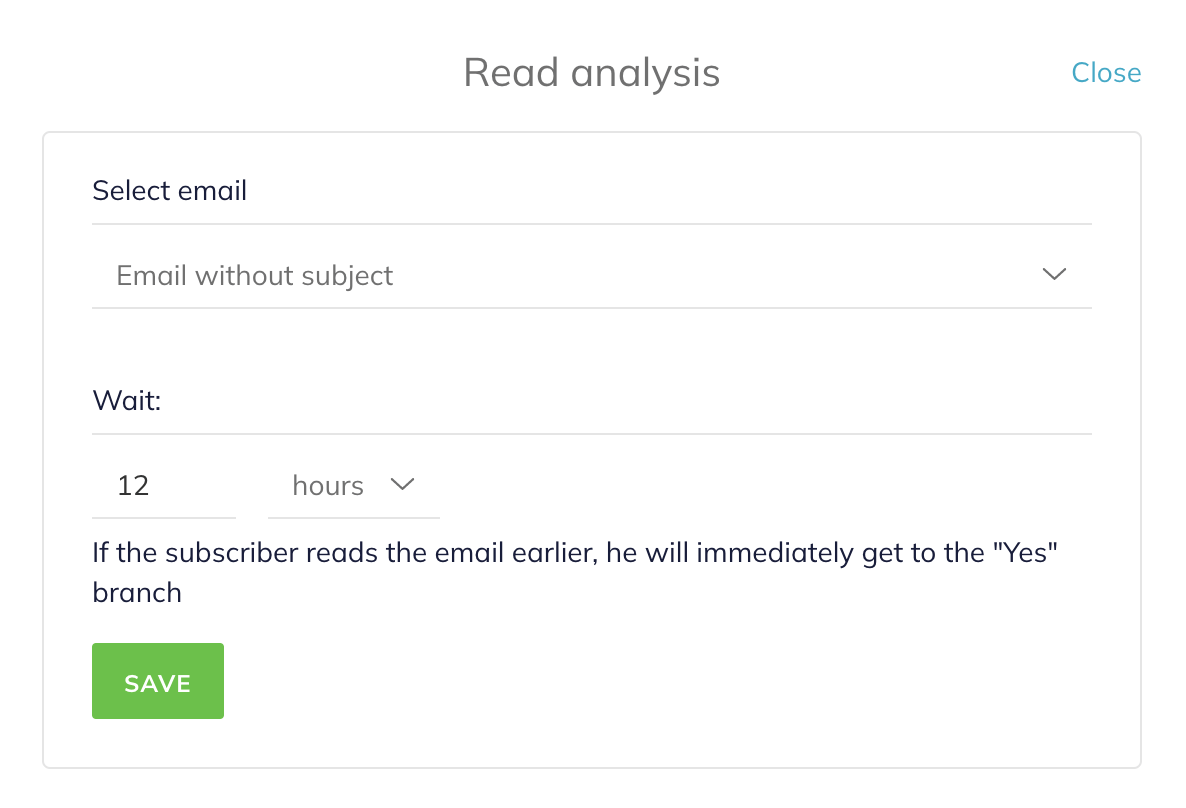
Read analysis
In the Read analysis block menu, you need to select an email from the list of emails sent earlier in the automation sequence. You also need to specify the wait time in minutes, hours, or days. This sets how long the automation should wait for an email opening. If the subscriber reads the email before the wait time is over, they will immediately be sent to the Yes branch.
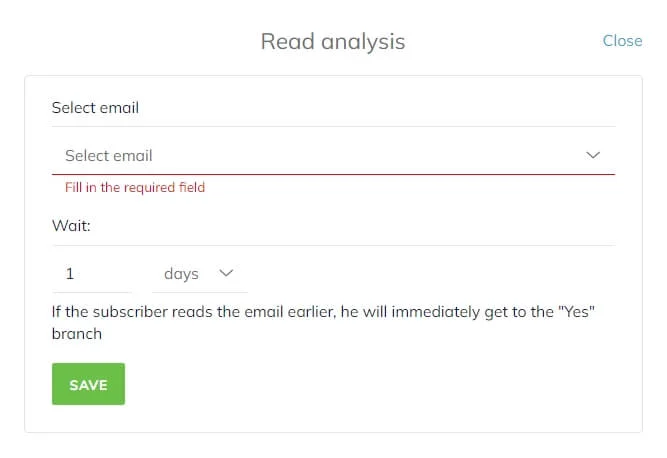
- If the email is opened, the contact will be sent to the Yes branch immediately after they open the email.
- If the email is not opened, the contact will be sent to the No branch as soon as the time set in the Wait section has passed.
Let's look at an example:
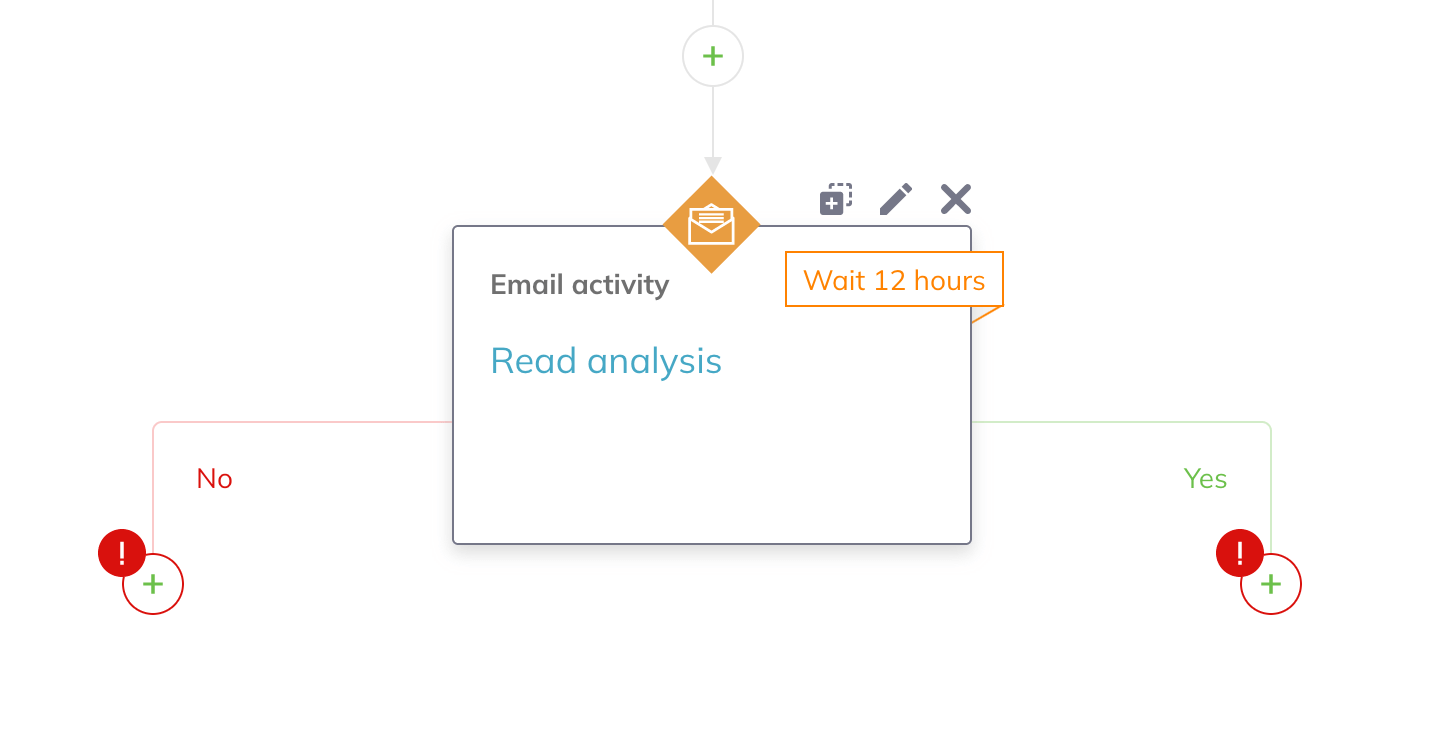
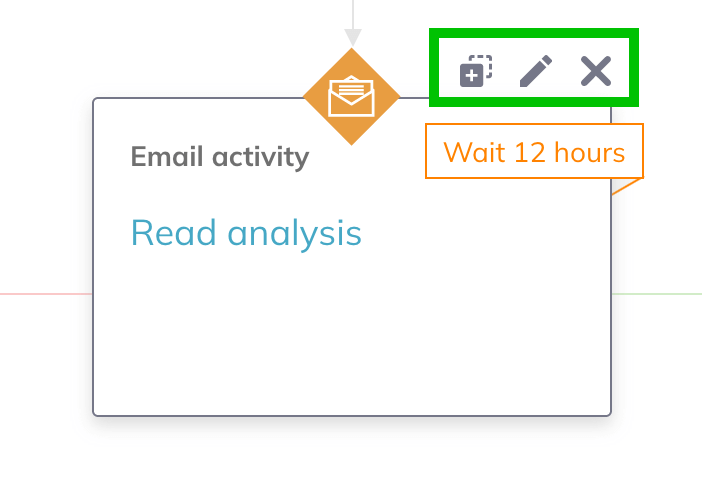
EXAMPLE
We added the Read analysis block and the Wait period of 12 hours. The contact opened the email 2 hours after delivery. They will go straight to the Yes branch, without waiting 12 hours. This is how we achieve a drip effect, where each contact moves at their own speed.
Click analysis
In the Click analysis block menu, you need to select an email from the list of emails sent earlier in the automation sequence. You also need to specify the wait time in minutes, hours, or days. This sets how long the automation should wait for a click on a link in the email. A click on any link in the email is considered. If the subscriber clicks on a link in the email before the wait time is over, they will immediately be sent to the Yes branch.
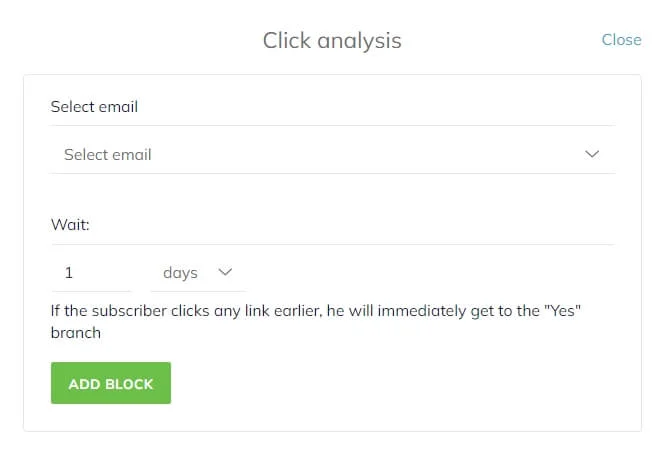
- If the link is clicked, the contact will be sent to the Yes branch immediately after the click.
- If there is no click, the contact will be sent to the No branch as soon as the time set in the Wait section has passed.
Result
The block that ends the automation sequence. It’s an important block since it forms the automation’s statistics.
Each automation branch (branches are formed by the Condition and Email activity blocks) must have its own Result at the end.
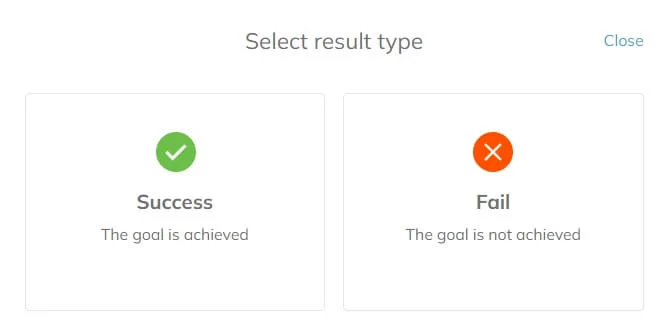
The Result block has two types:
- Success
- Fail
This divide helps to monitor the automation results for statistics. When creating an automation, it is up to you to decide what is considered a Success and what is considered a Fail.
EXAMPLE
You create an automation that will send 3 emails if a contact has read the previous email.
Then a successful result of this automation for you will be if the contact reads all three emails. If they stop reading the emails and fall off after the first or second email, it is a fail.
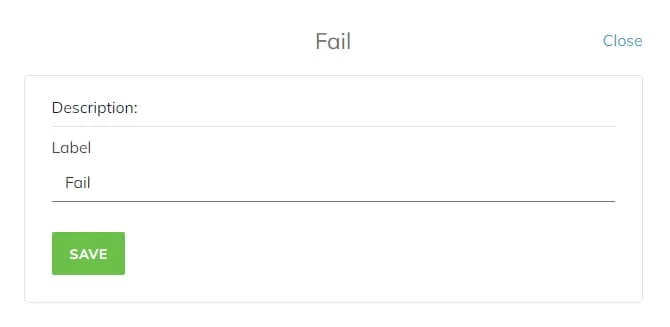
You can provide a label for each Success or Fail result. The Label is a short description of the automation’s work result.
EXAMPLE
We have an automation with email sends and read analysis blocks. The Read analysis block creates two options: contacts that have read the email will receive another one, and those who have not read the email will stop moving through the automation.
You can end the No branch of the Read analysis block with the Fail result. You can add "Did not read the email" in the description of the result. Then, when you open this automation in a few months, you will be able to see how many people ended the automation with a Fail result and "Did not read the email".
How to work with an automation block?
After you select a block, you can fill in the settings fields. Some fields are required, so you must fill them in to activate the automation.
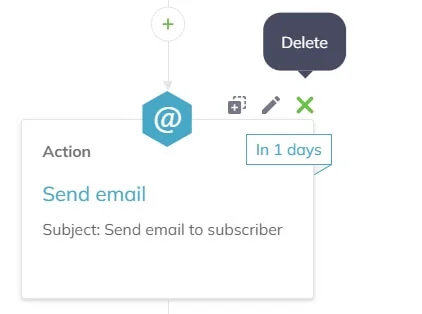
You can edit, copy and delete blocks by hovering over a block and clicking on the appropriate icon.
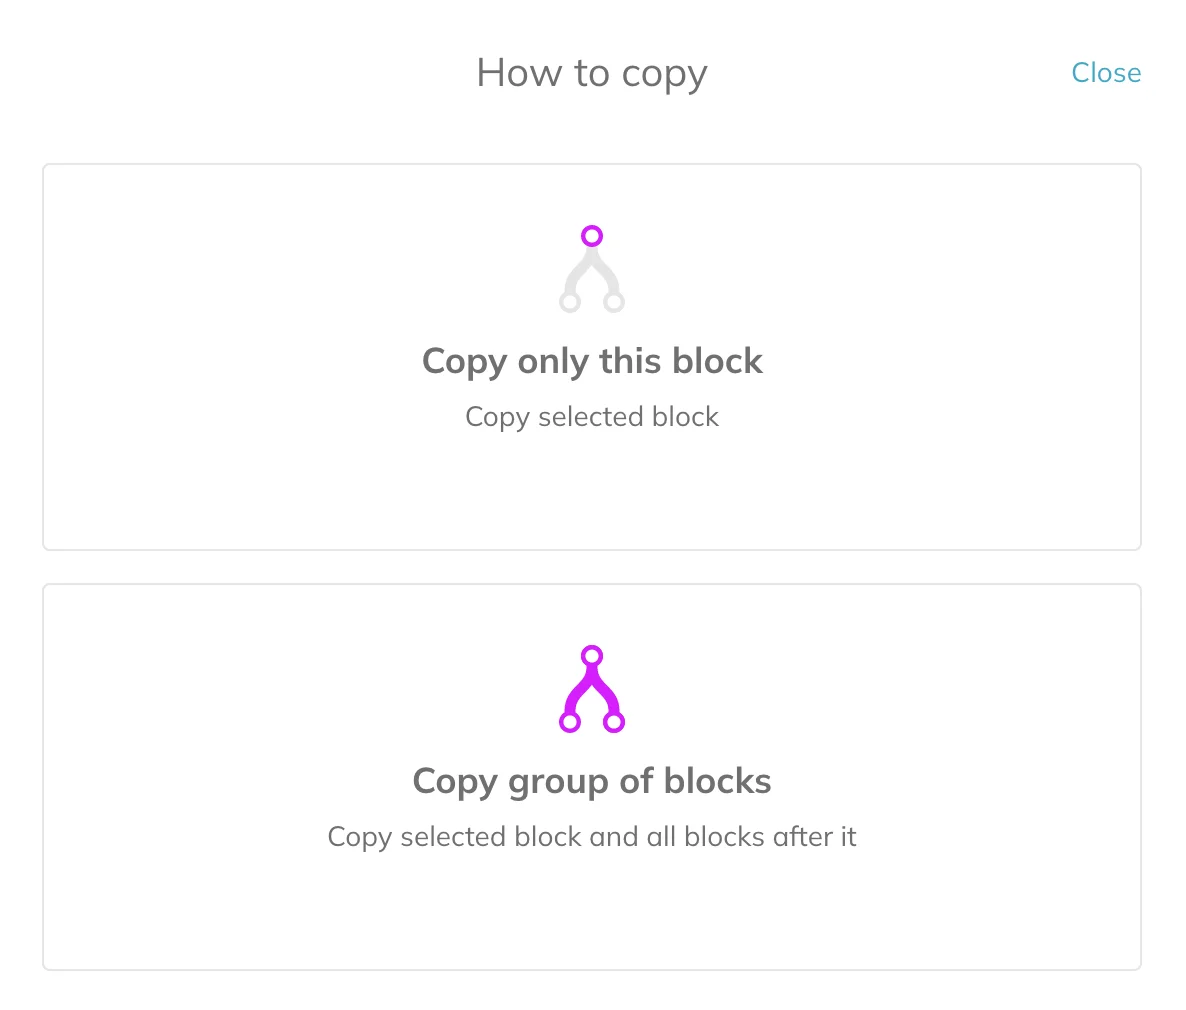
How to copy a block?
Hover over a block and click on the copy icon (two rectangles with a plus sign). You can either copy only the selected block (Copy only this block option) or copy the selected block and all the following blocks (Copy group of blocks).
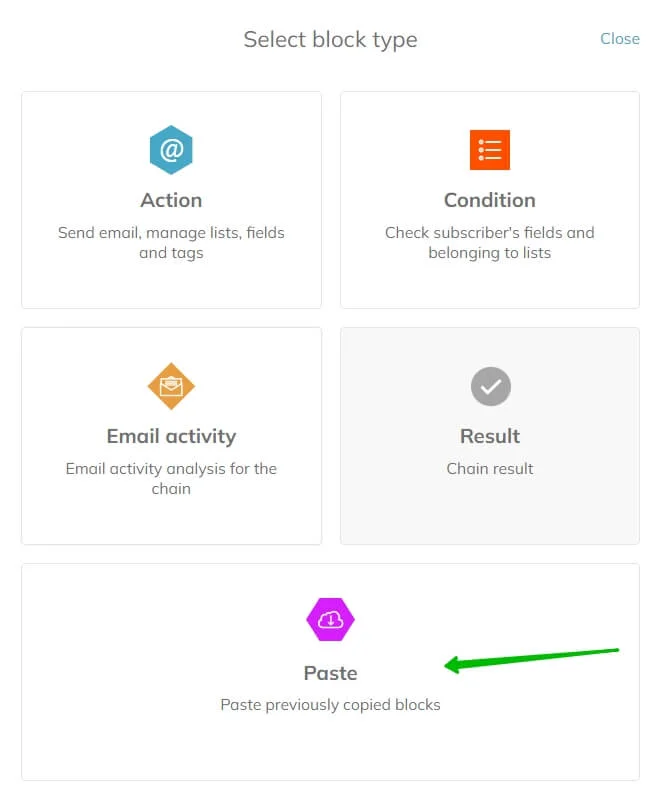
To paste the copied block, just click on the + to add a new block, and select Paste in the popped up window.
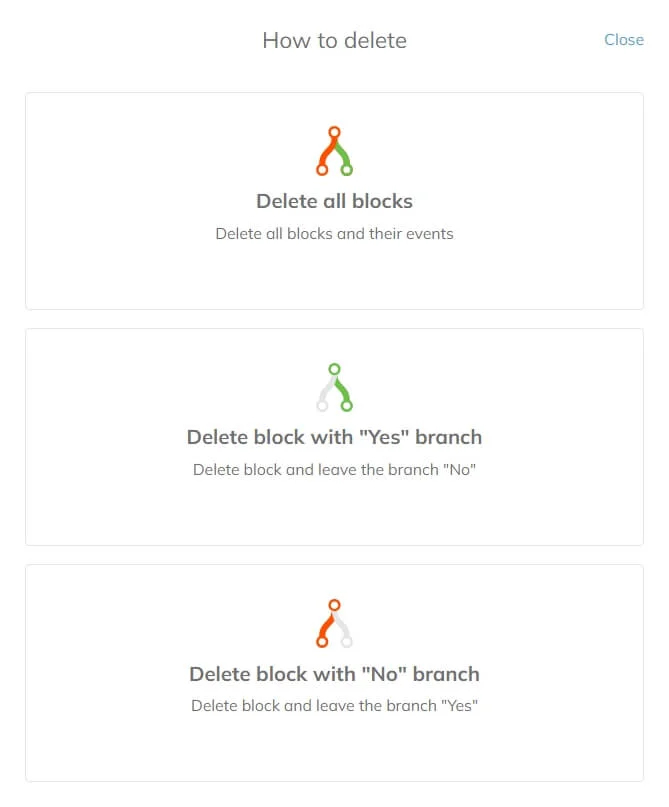
How to delete a block?
Hover over a block and click on the delete icon (a cross).
You can select:
- Delete all blocks to delete this block together with all the branches following it
- Delete block with “Yes” branch to delete this block and leave the No branch
- Delete block with “No” branch to delete this block and leave the Yes branch