This article describes the old Selzy email builder. You can find information about key features of the new email builder in the overview article available in English.
If you need help with the functionality described in this article but in the new builder and can’t find it in the overview article, please contact our Support Team.
Selzy Support Team is available for all users 24/7.
Icons are used to direct the newsletter reader to the most important pages of the website. For example, to the page displaying reviews or to the contacts. A picture with a caption informs the subscriber where it leads to.
Additionally, it is easy to make a call or send a message directly from the email, using appropriate icons.
Let's learn how to add and configure icons in the Selzy builder.
Add a block with icons to the email
To add icons to the email, drag the Icons block to the desired location of the newsletter. Then, in the block properties, add the required number of icons using the Add new icon button.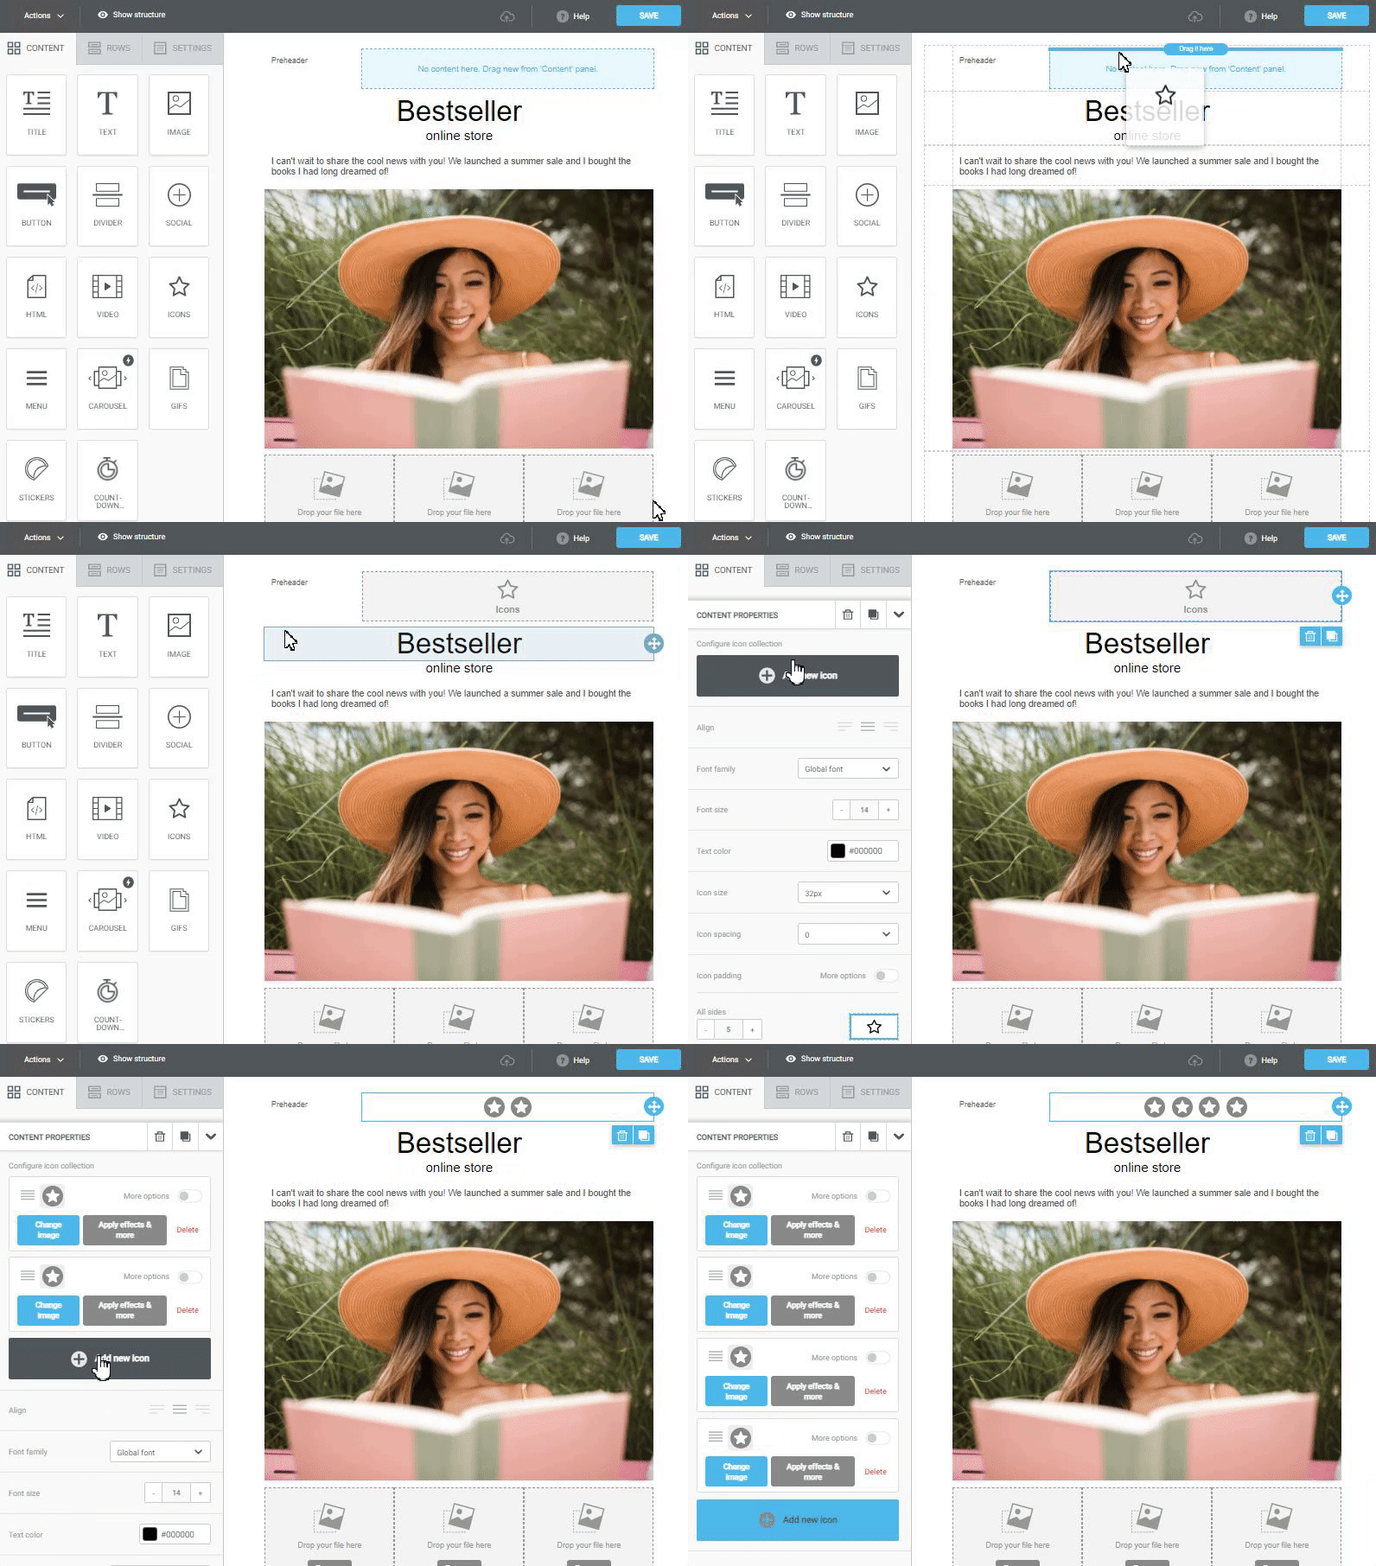
By default, the icon has the shape of a star, but you can replace it with any other using the Change image option.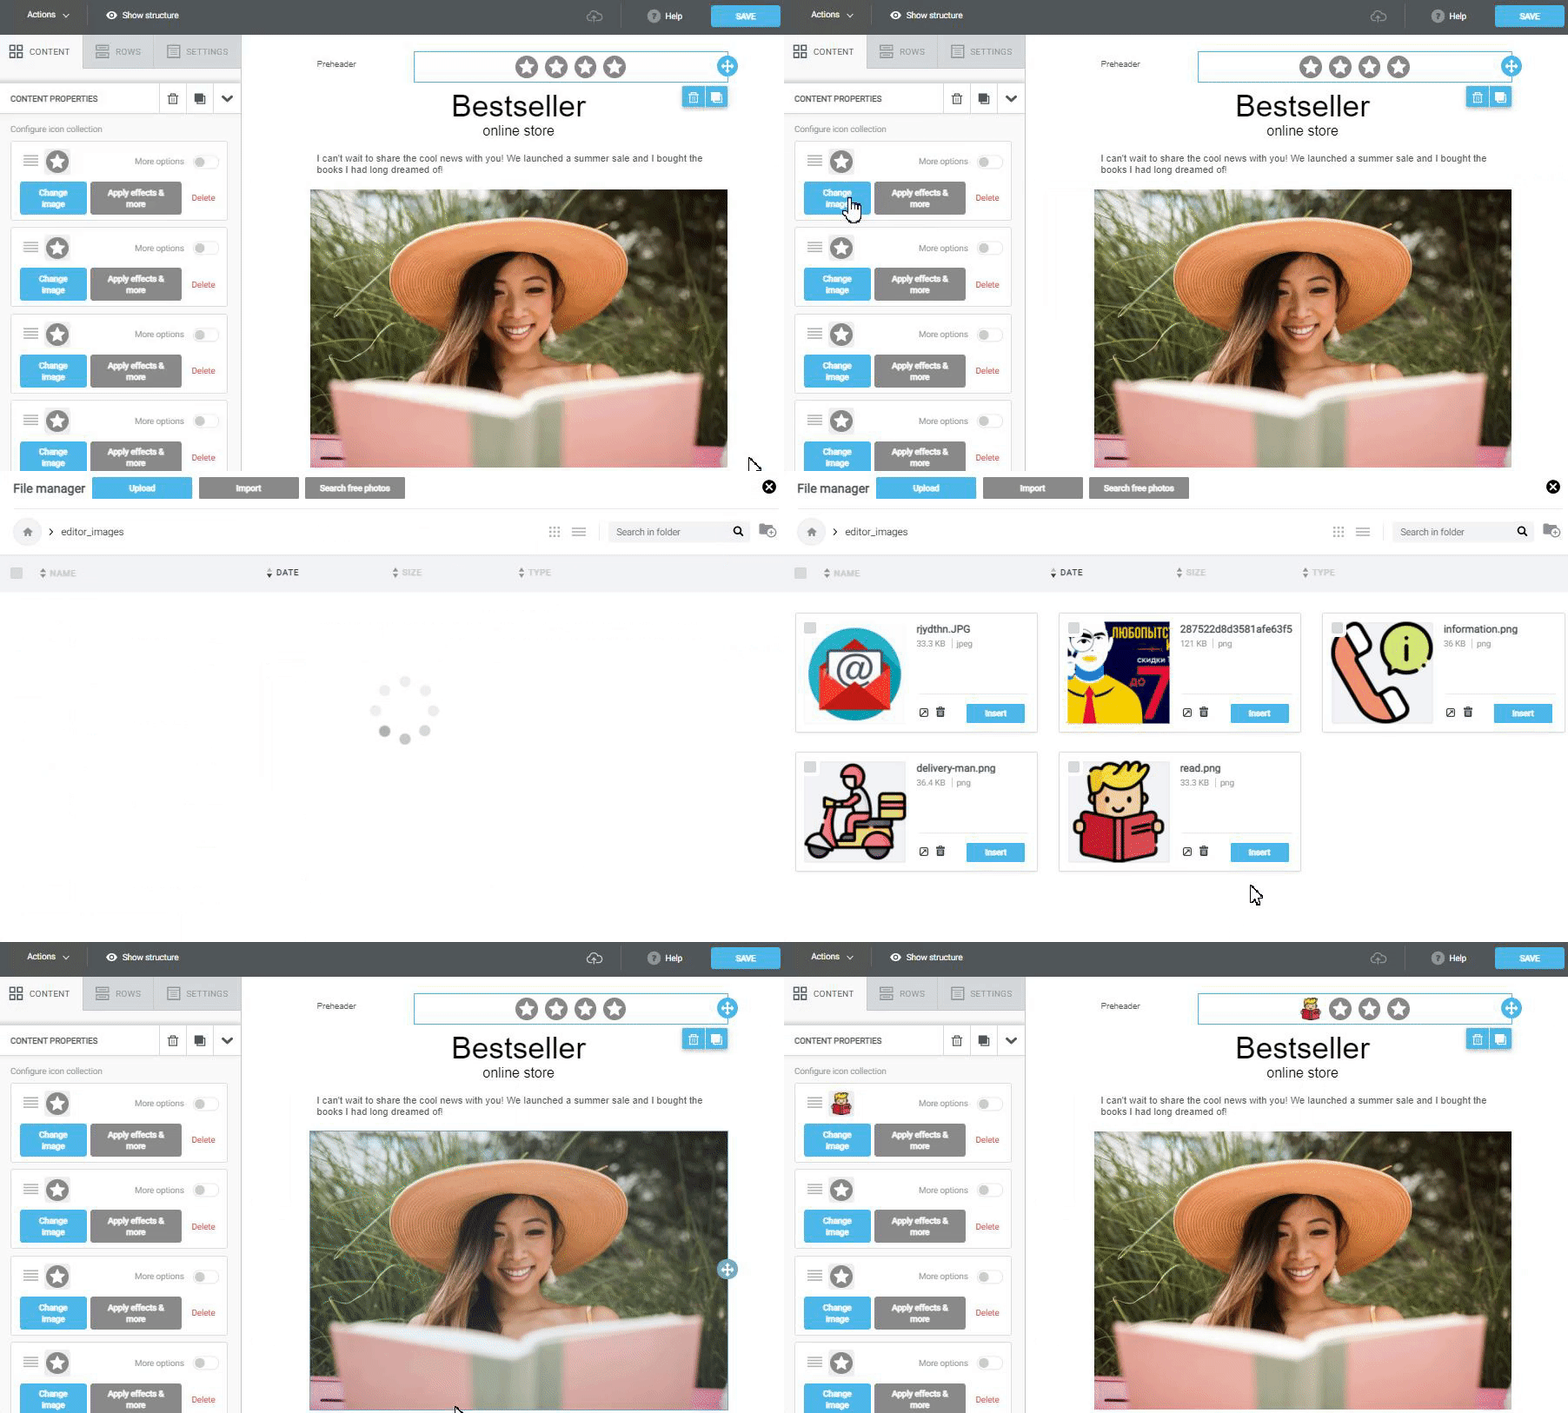
Add a link to each icon
Here we explain how to set an external link. To open the advanced settings, use the More options (1).

In the Icon Url row, you can insert a link to your icon on the external source, if you do not want to upload it to Selzy (2).
Be sure to add the alternative text (3). If images are disabled in the recipient's mailbox, the alternative text will help them understand which section of the website the icon leads to.
To label your icon, use the Icon text row (4). Note that short names work better, e.g. "Reviews" or "Call us".
Use different types of links to configure the action when you click on the icon: open the link, send an email, call, send an SMS (5).

Select the action when you click on the icon
Let's look at actions you can choose in the Link type row.
Open the link. When clicking on the icon, the user will be taken to the page you specified. You must add links with the "http://" or "https://" protocol.

Next, in the Target drop-down list, select how the link will open — in a new tab or in the current tab.

Send an email. The reader will be able to send an email to the specified email address directly from the newsletter. Specify the address the email will be sent to. You can also set the subject line and write the text for the email. But the sender will be able to edit this data.

Call. When clicking on the icon, the reader will be able to call you directly from the email, if his/her browser or email client can handle the tel protocol.
Send an SMS. It works on the same principle as the Call link, that is, when clicking on the icon, the user will be able to send an SMS to the specified number.
Set up a block with icons
Alignment. This option allows the user to change the location of icons in the block closer to the left edge, or in the middle, or on the right edge.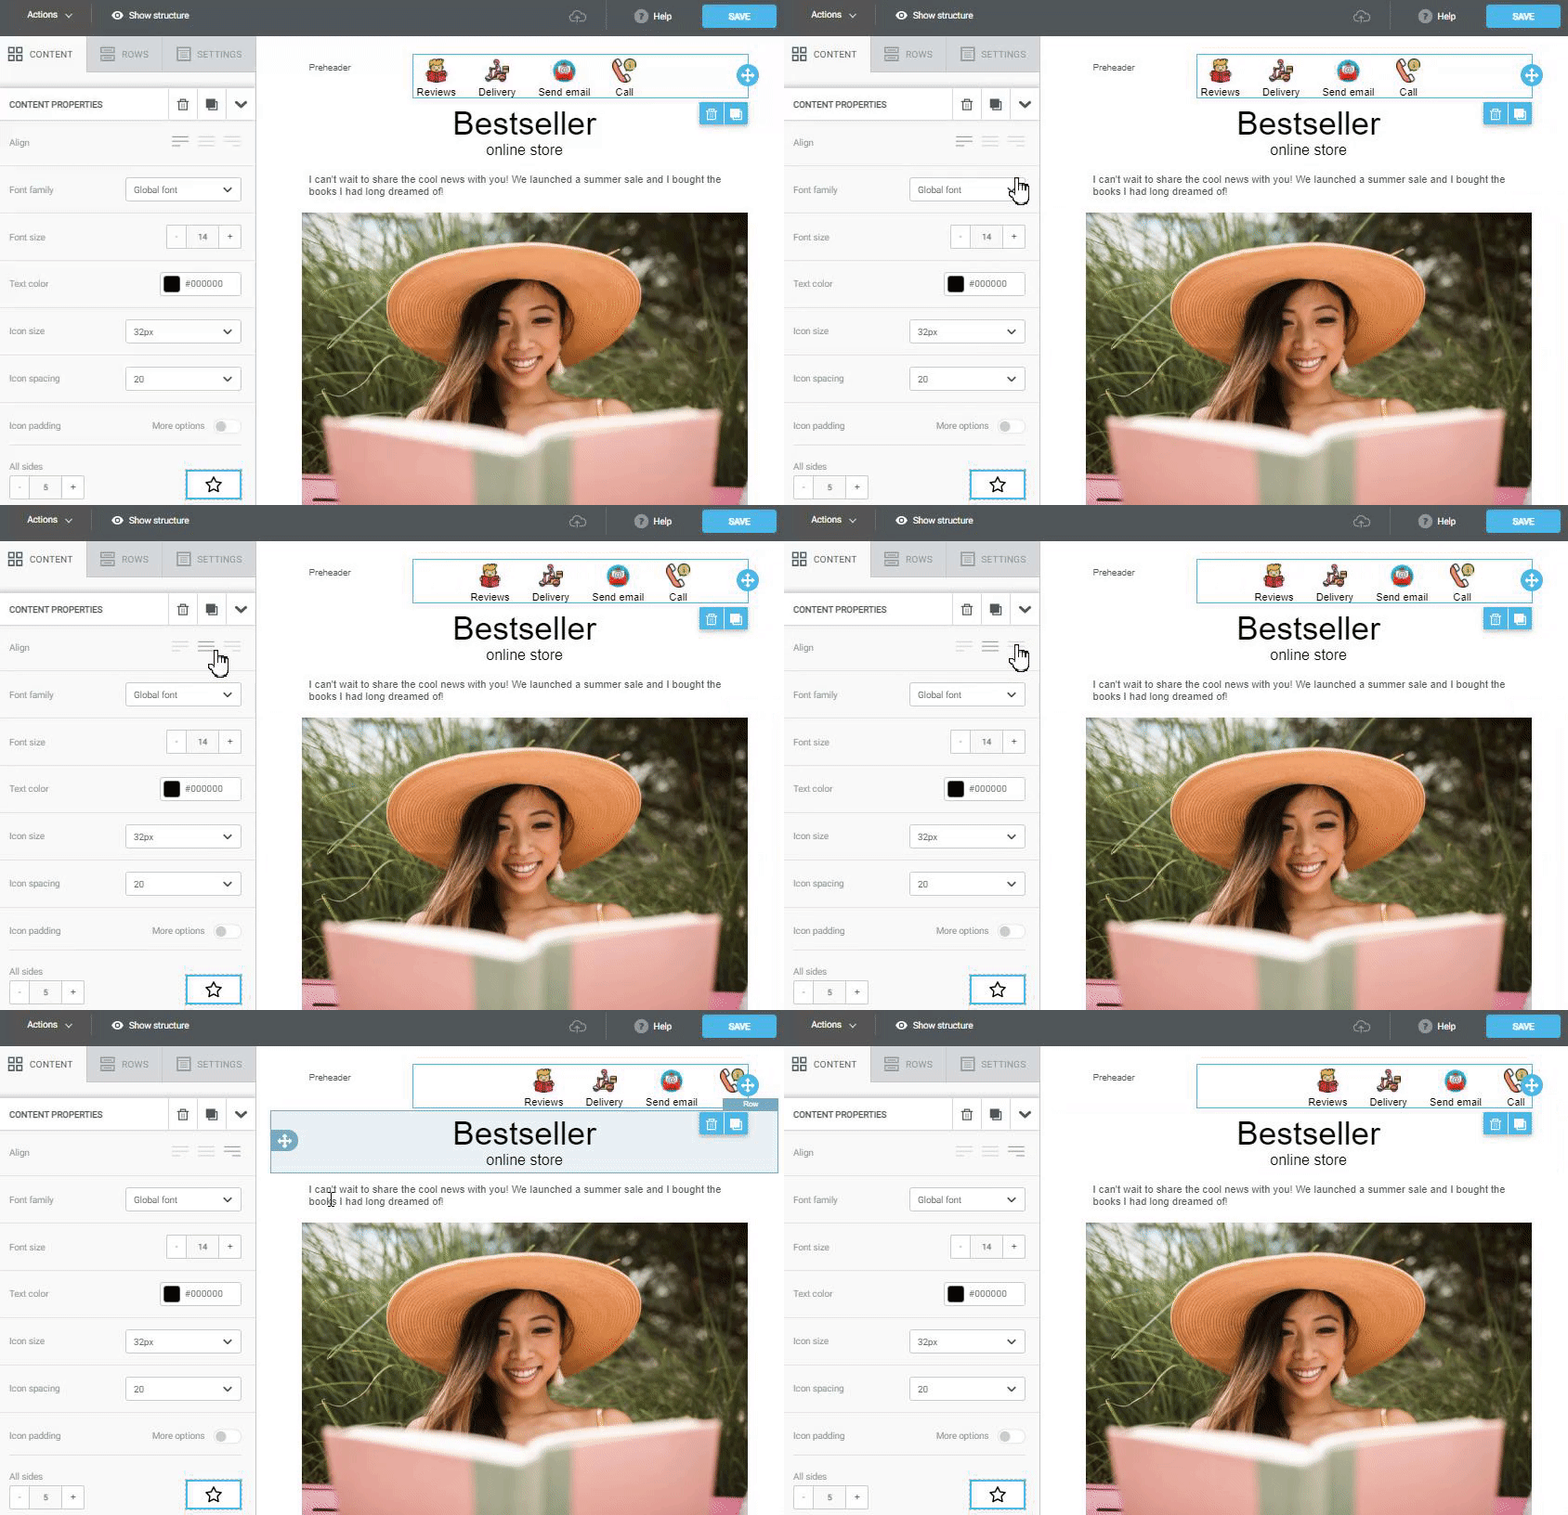
Font, color, and font size. Select the icon label font. It is preferable to use the same font as in the email. You can choose the text color from the suggested palette, or insert it as a hexadecimal code.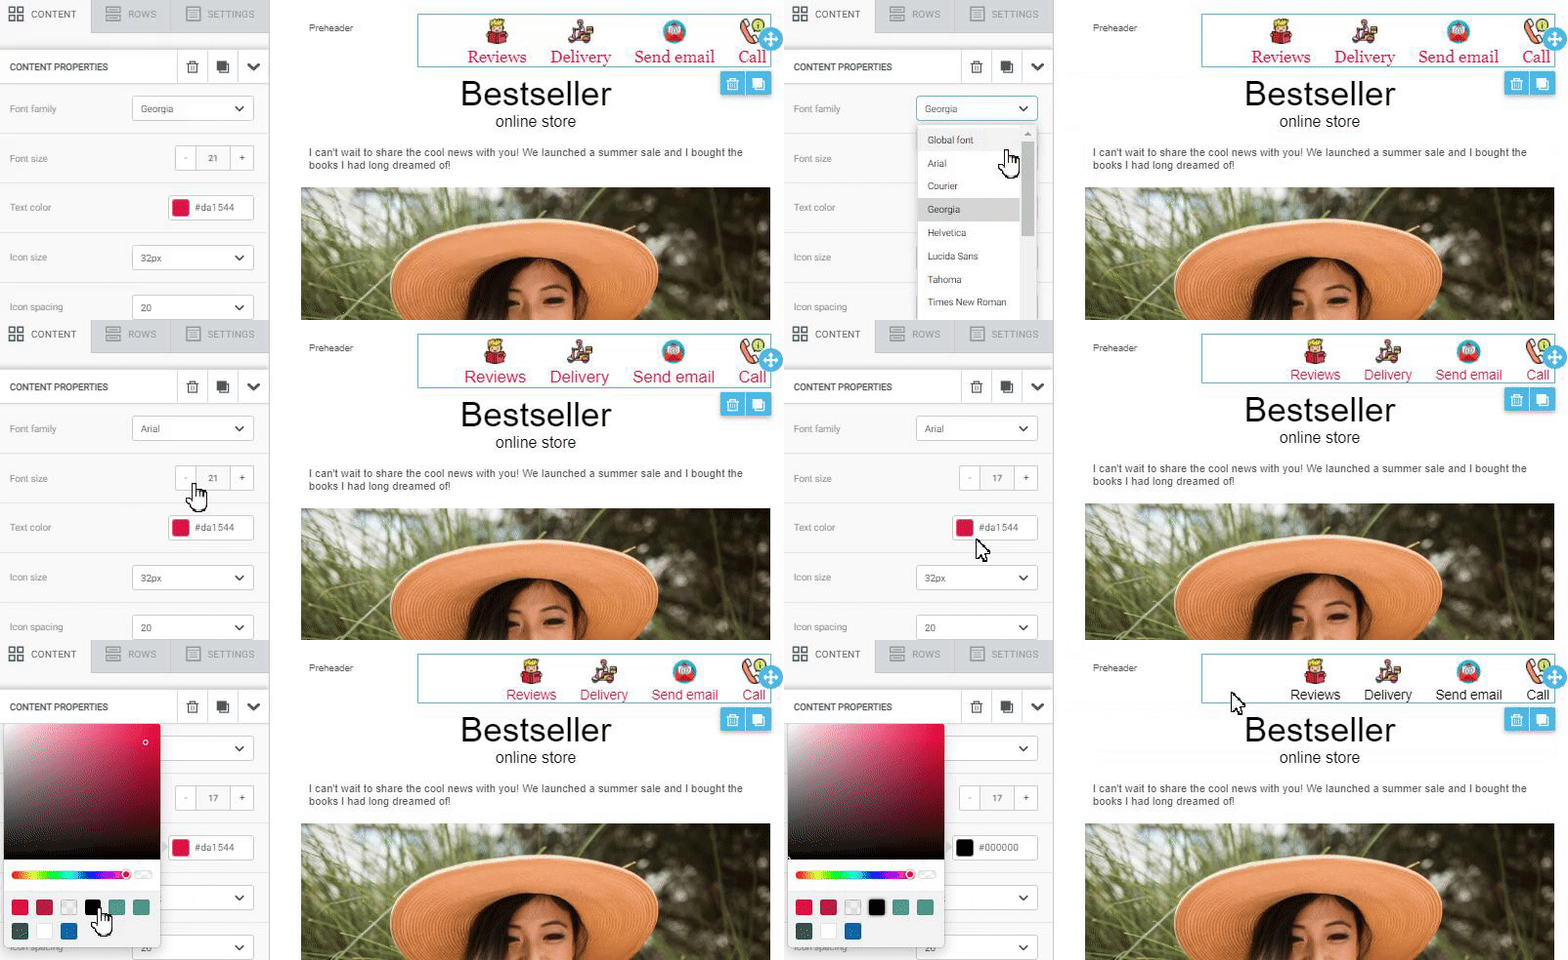
Size of icons. By default, icons are loaded as 32 pixel icons. If desired, they can be reduced to 16 pixel size or enlarged to 64 or 128 pixel size. Select the desired size from the drop-down list.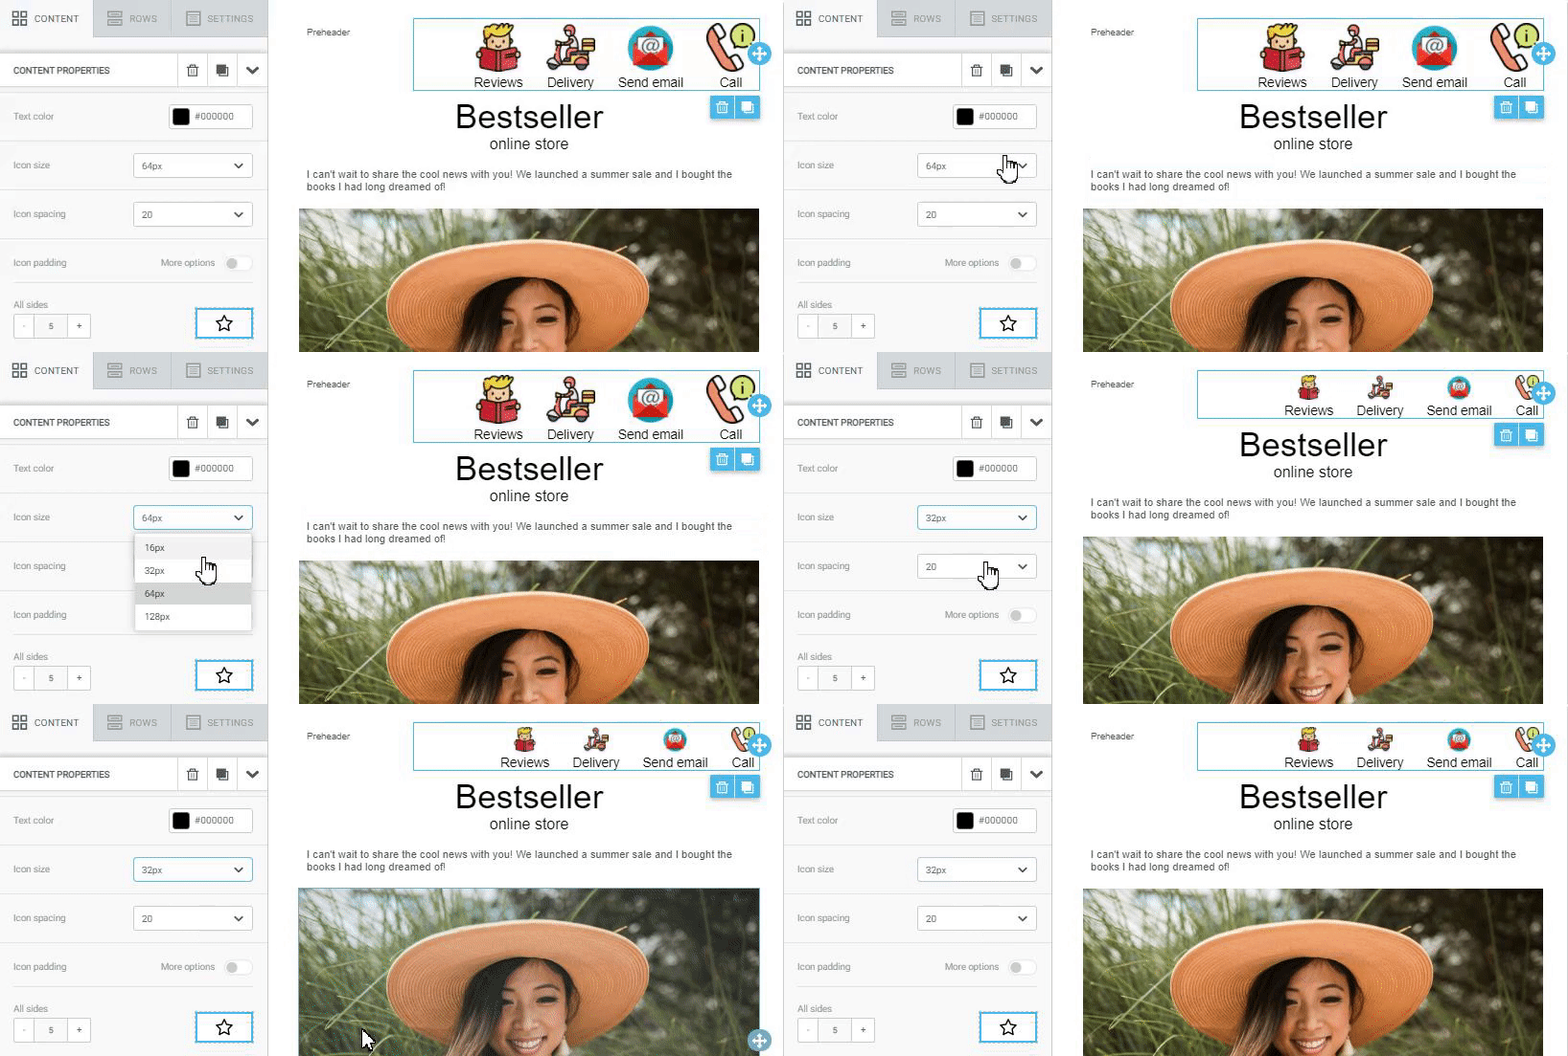
Interval between icons. This option enables you to set the interval from 0 to 20 pixels between icons.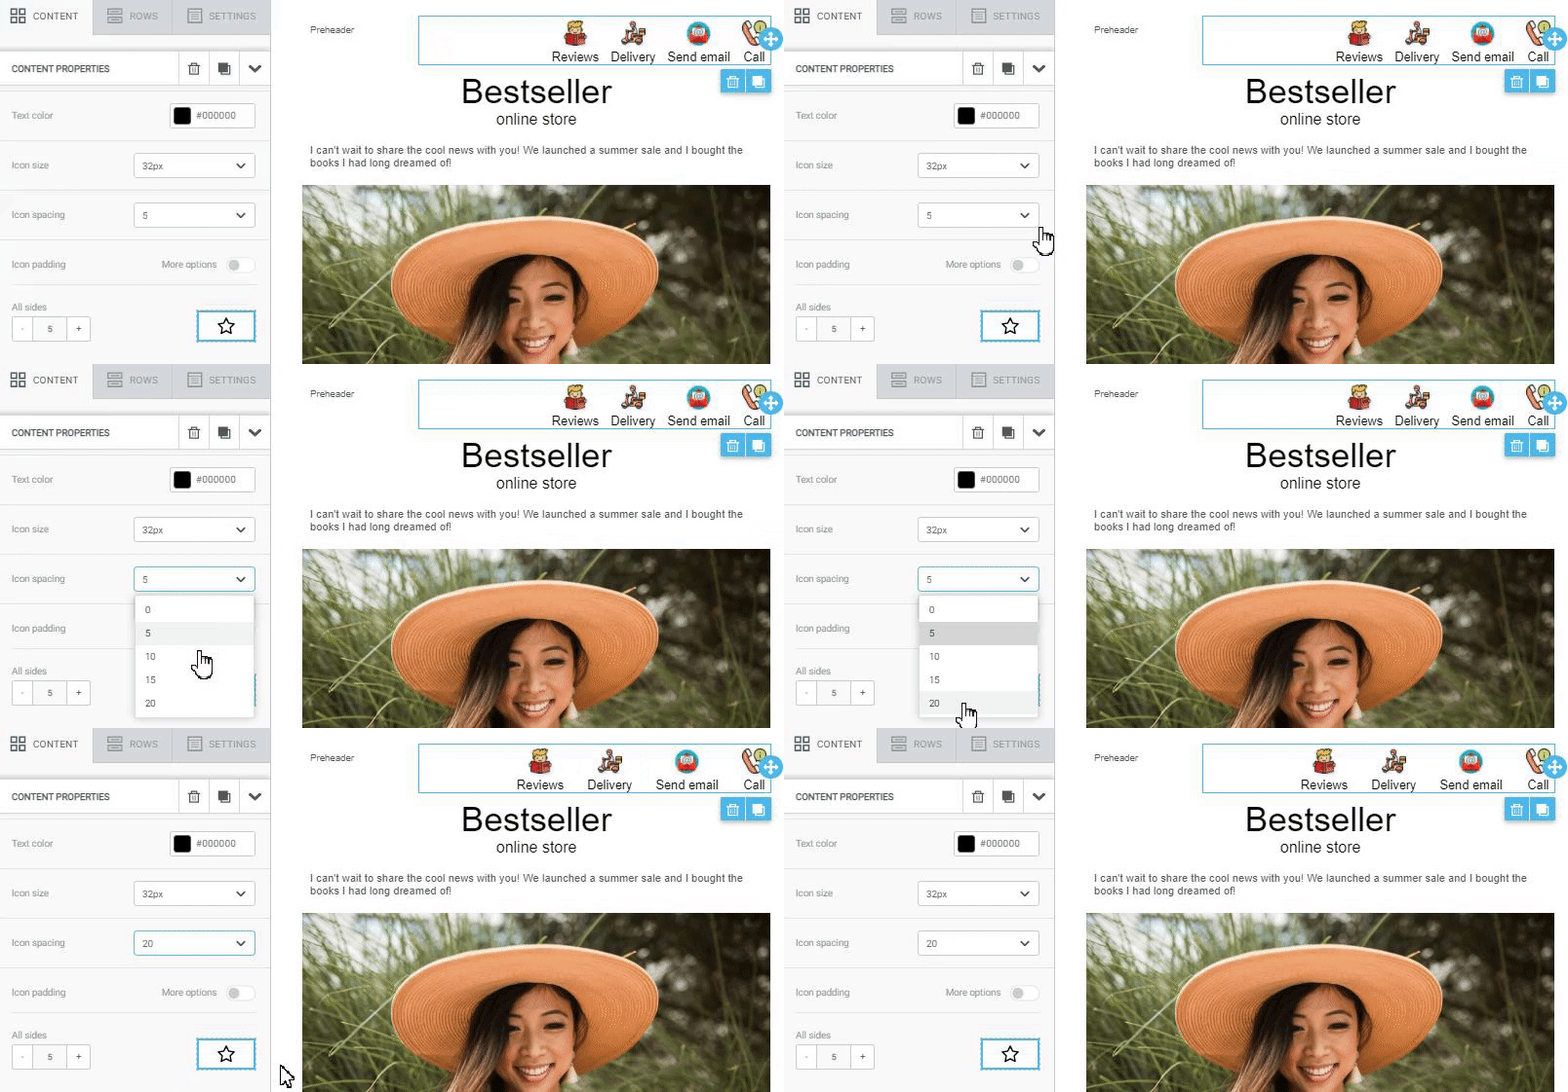
Icon indentation. Configure the indentation from the internal sides of the block: both from particular sides and along the entire perimeter.
The Hide option. This option enables you to hide the Icons block when viewing on your mobile device or PC. To reset this setting, click on the cross icon.
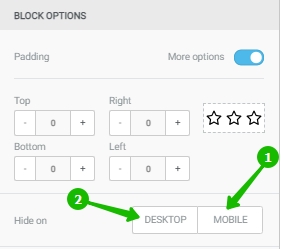
With these settings, the icon will not be displayed on mobile devices
