Selzy API is a special interface for developers that allows you to integrate the features of a campaign with almost every open-source web service or desktop app.
Our API for bulk emails allows you to manage your lists, create and send various types of messages, analyze the statistics, and cooperate with your partners.
If you need advanced features for sending emails via API, try UniOne, also developed by our team.
UniOne offers higher processing speed (up to 3,000 emails per second against one email per second), suppression list management, events dumps, independent environments for different campaign types, and much more.
Selzy API is free for all types of accounts. To get access to API for bulk emails, use the key that can be generated in your account. To protect yourself from having your address used for someone else’s campaigns, never share your API key and avoid making it visible in the web page code.
Why you need Selzy API
Integrating Selzy with a service you use all the time, makes solving your company’s email marketing tasks much easier. Now you don’t have to manually sync all your lists, it will be done automatically:
- All new online shop buyers will get to your list at once.
- Your contacts’ statuses will be synchronized with your CRM.
- Campaign statistics will be sent to analytic systems and data mining.
Quick start
To configure the API, you can use our guidelines to create integration.
How to use API
Call method
Call API method for bulk emails — that is an HTTPS request to URL in the form of:
https://api.selzy.com/LANG/api/METHOD?format=json&api_key=KEY&arg1=ARG_1&argN=ARG_N
where:
| LANG * | is the language of API server messages (currently, supporting only en, ua, ru) |
| METHOD * | is the name of the method |
| KEY * | API access key |
| ARG_1 ... ARG_N | method arguments (different for each method) |
All parameters should be encoded in UTF-8. In the example above the parameters are given in the GET request, but you can send them through POST as well. Moreover, we strongly recommend that you send the api_key parameter through POST to ensure it’s not saved in proxy servers logs.
The response gets back in the form of a JSON object.
Both the request and the response can be compressed with gzip or bzip2 algorithms.
Successful method call
If the call is successful, the object will include the “result” field (its content depends on the method called) and won’t include the “error” field.
The successful method call can include the “warnings” field, which contains an array of warning objects with the only “warning” string field.
An example of a successful method call:
{

"result": {

"message_id":34423432

},

"warnings": [

{"warning":"probably not a mobile phone"}

]

}
Unsuccessful method call
If an error occurred while executing the method, the response object will contain the “error” field with an HTML message of the error and the “code” field with the string code of the error. In case of an error, the “result” field should be ignored.
An example of a response with an error:
{

"code": "invalid_arg",

"error": "fields: This value \"mymail@@@@gmail.com\" is not a valid email address.",

"result": ""

}
Major error codes while working with API
List of available methods
Work with contact lists
Work with additional fields and tags
Create and send messages
Work with templates
Get the statistics
Methods for partner websites
- getLists — get the lists for campaigns with their codes;
- createList — create a new campaign list;
- updateList — change the properties of the campaign list;
- deleteList — delete the campaign list;
- subscribe — subscribe the recipient to one or several campaign lists;
- exclude — exclude the recipient from campaign lists;
- unsubscribe — unsubscribe the recipient from the campaign;
- importContacts — mass import and synchronization of contacts;
- exportContacts — export of contacts’ data;
- getTotalContactsCount — get the information on the total number of the contacts;
- getContactCount — get the number of contacts in the list;
- getContact — get the information on one contact.
Work with additional fields and tags:
- getFields — get the list of user fields;
- createField — create a new field;
- updateField — change the parameters of the field;
- deleteField — delete the field;
- getTags — get the list of user tags;
- deleteTag — delete the tag.
- createEmailMessage — create an email for a campaign;
- createSmsMessage — create an SMS for a campaign;
- createCampaign — schedule bulk mailing or SMS campaign;
- cancelCampaign — cancel the scheduled bulk mailing;
- getActualMessageVersion — get the actual message version;
- sendSms — send an SMS;
- checkSms — check the SMS delivery status;
- sendEmail — simplified send of individual emails;
- sendTestEmail — send test email campaign (to your personal address);
- checkEmail — check the email delivery status;
- updateOptInEmail — change the opt-in email text;
- getWebVersion — get the link to the web version of the sent email;
- deleteMessage — delete the message;
- updateEmailMessage — edit the bulk email.
- createEmailTemplate — create a bulk email template;
- updateEmailTemplate — edit the email template;
- deleteTemplate — delete the template;
- getTemplate — get the information on the template;
- getTemplates — get the list of all templates created in the system;
- listTemplates — get the list of all templates without a body.
- getCampaignDeliveryStats — get the delivery status report for the given campaign;
- getCampaignCommonStats — get the general information on the delivery for the given campaign;
- getVisitedLinks — get the link clicks statistics;
- getCampaigns — get the campaign list;
- getCampaignStatus — get the campaign status;
- getMessages — get the message list;
- getMessage — get the information on the SMS or the email;
- listMessages — get the list of messages without a body and attachments.
- getCheckedEmail — get the list of email addresses (confirmed/unconfirmed);
- validateSender — confirm the sender address;
- register — register the user (for partner websites);
- checkUserExists — check if the user exists by the login or email;
- getUserInfo — get the information on the user (for partner websites);
- getUsers — get the information on the users (for partner websites);
- transferMoney — transfer money to the user’s balance (for partner websites);
- setSenderDomain — get the DKIM key for the sender domain.
How to call methods

You can have one or several contact lists. It is believed that each email address list is based on a particular campaign, and a recipient can be subscribed to one or several lists at the same time.
Before sending emails or SMS to a list, learn the list code by calling “getLists” or create a new email address list by calling “createList”.
Then add contacts to the list — all at once by calling “importContacts”, or one after another by calling “subscribe”.
Now you are ready to send messages. You can create a campaign by calling “createEmailMessage” (or “createSmsMessage”). You should state the recipient list id. In this case, your message will be sent to all subscribers from the list, which are active at the moment you call “createEmailMessage” or “createSmsMessage”.
So, your campaign was created but isn’t sent yet. Call “createCampaign” method to do it. State the message_id that you received after you called “createEmailMessage” (or “createSmsMessage”), and send or schedule your campaign.
If you want to send a different message to the same list, call “createEmailMessage”/”crеateSmsMessage” again and follow the steps above.
If there is no need to change the wording of your message, rather, you want to send the same message to the same list, you can call “createCampaign” once again and use the same message_id. Your campaign will be sent again.
Your campaign has been sent, and now you can learn the results by calling “getCampaignDeliveryStats”.
Event notification system (Webhooks)
Webhook is a mechanism of user notification about the events that is used to follow the changes in email statuses in real-time.
The events Webhook can notify:
- about a change in the email status (sent, delivered, rejected, viewed, the recipient conversed);
- that the contact unsubscribed from the list/subscribed to a different list;
- about a change in the campaign status;
- about a change of user information;
- that a confirmed return address was added;
- about a change in the balance;
- that a new user was added (for resellers).
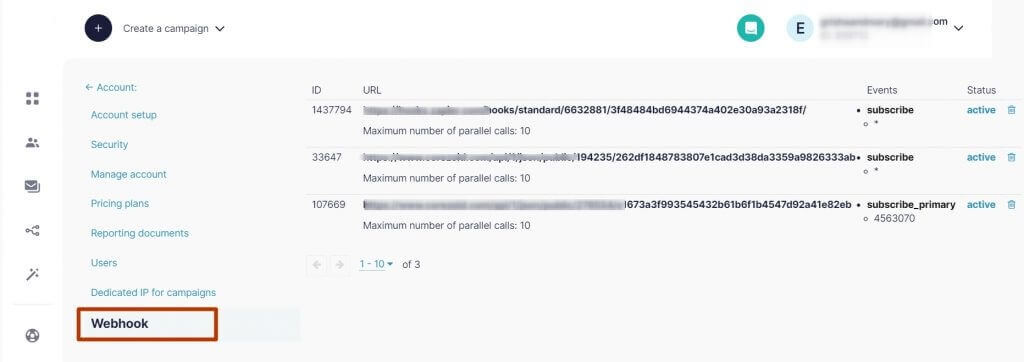
You can manage your Webhooks in your account’s settings in the Webhook tab.


