This article describes the old Selzy email builder. You can find information about key features of the new email builder in the overview article available in English.
If you need help with the functionality described in this article but in the new builder and can’t find it in the overview article, please contact our Support Team.
Selzy Support Team is available for all users 24/7.
Personalization helps turn your bulk campaigns into personal emails. Such campaigns are read more often, and they rarely get into spam folder.
To personalize your emails, you can use:
- Segmentation — allowing you to select the target audience from the general list of contacts
- Substitution — making emails more personal with merge tags
We discussed segmentation in Tutorial №3, so now we are focusing on substitution.
Substitutions are made possible by special variables — merge tags — in double curly brackets. In the email, the merge tag is substituted by the corresponding data.
Check out some examples of merge tags variables usage.
You can add a substitution to the subject or body of the email.
How to use custom fields
You can use any custom field from your contact list to personalize your email.
For a merge tag to be correctly substituted with a particular value, a custom field must be filled in. You can fill them in while importing contacts, subscriptions, or manually.
More about setting custom field values
To see the list of custom fields and corresponding merge tags for substitution, go to Contacts → Tools → Custom Fields.
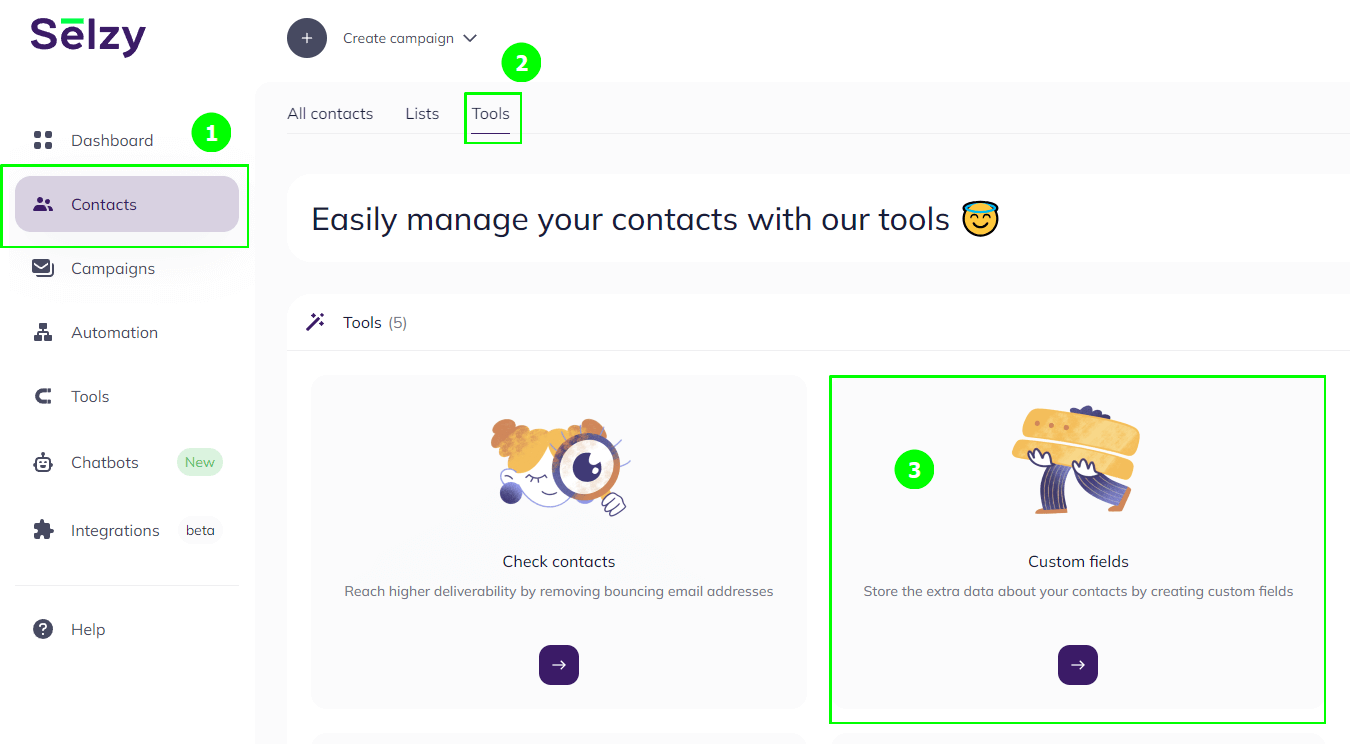
A list of all available custom fields will open.
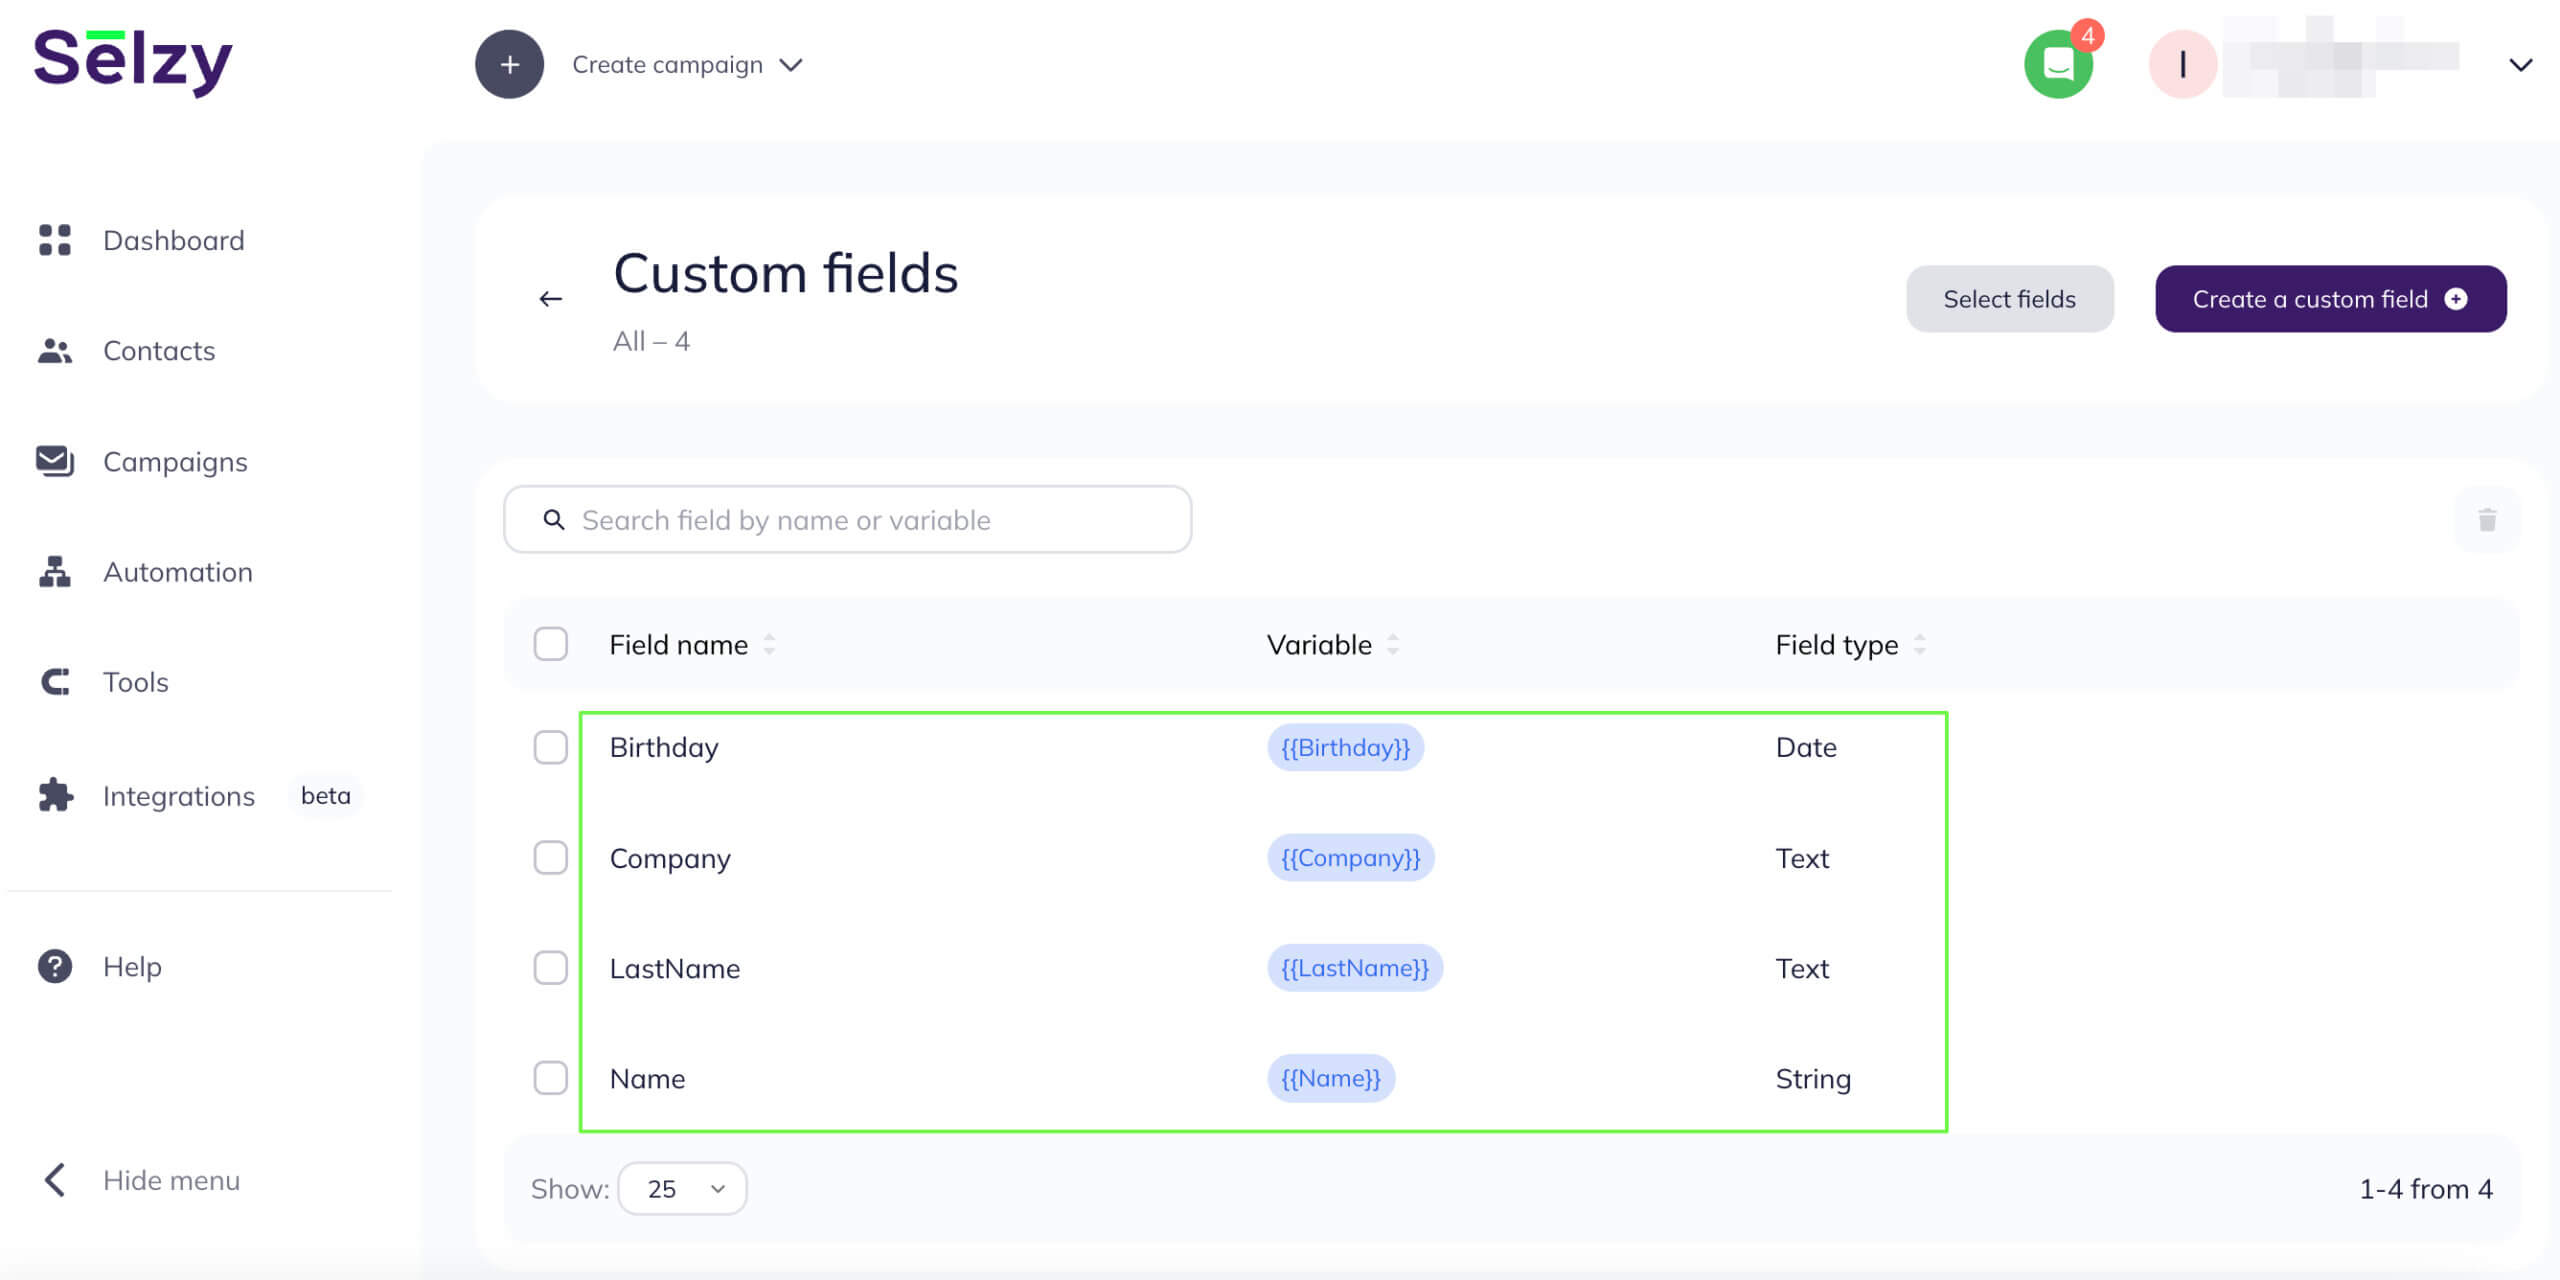
If you need a field that is not listed, you can create it and then import the contacts with this field filled in.
Substituting a merge tag in a campaign
In the email subject
Click on the Personalize button next to the subject line when you are sending a campaign and choose the appropriate substitute.
How to create and send an email campaign

You can also copy the substitute from the Custom fields section and insert it into the subject field.

In the email body
Create an email following the guidelines from Tutorial №5.
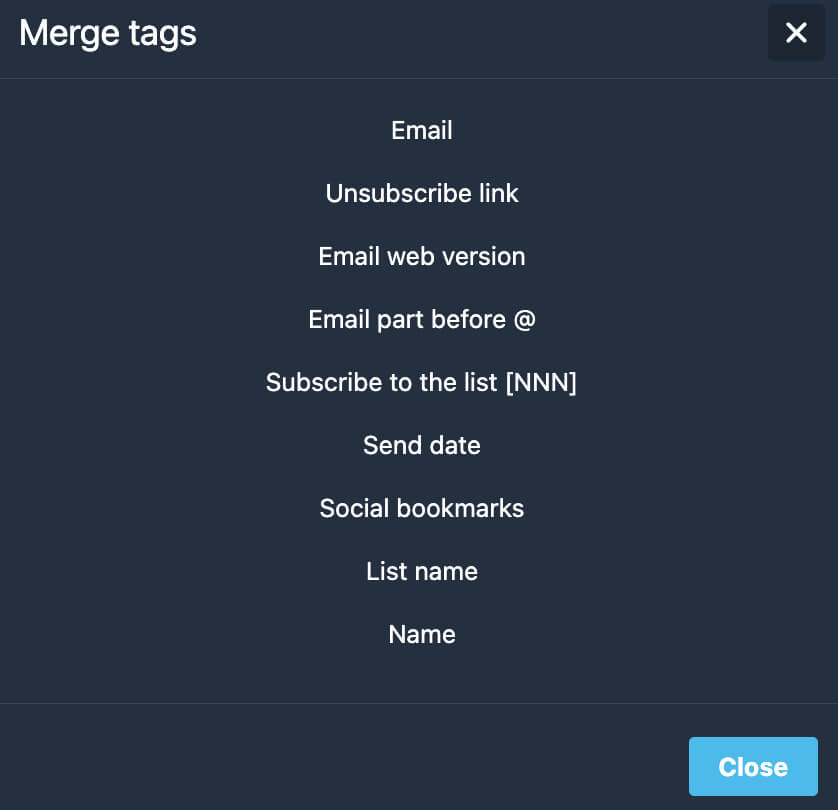
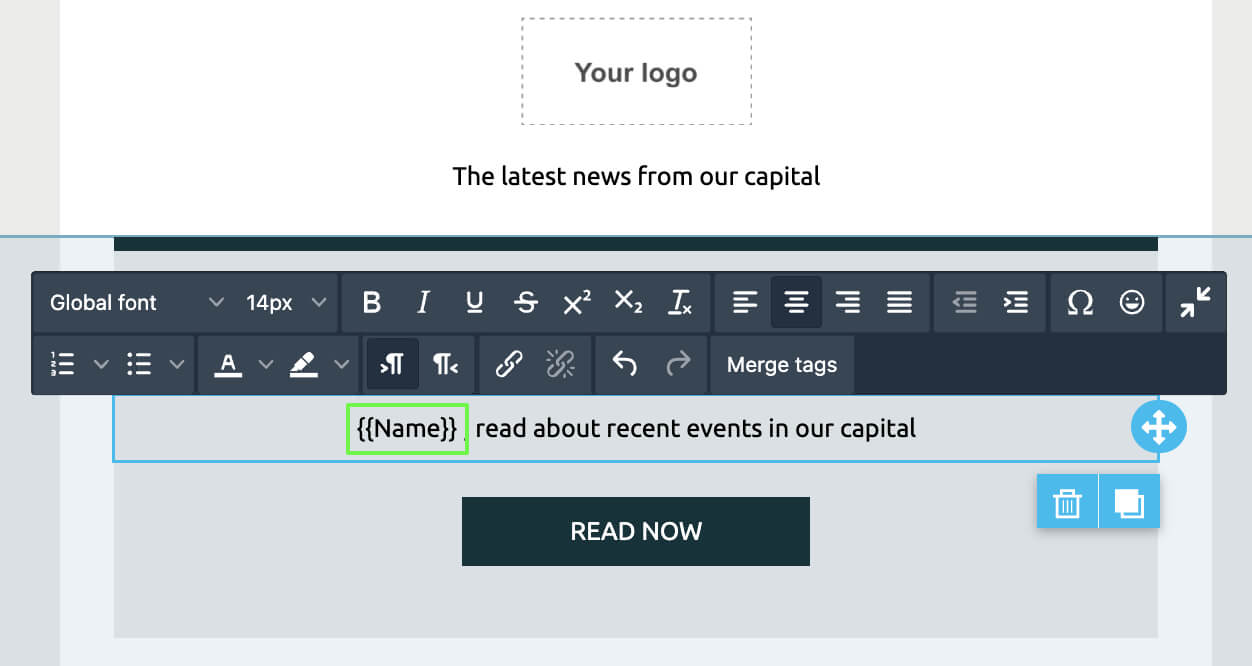
Point the cursor at the place you want to add your variable to and click Merge Tags in the toolbar.

In the new window, choose the merge tag you need.
You can also copy the substitute from the Custom fields section and insert it in the email body.
Examples of merge tags variables usage
The name of a client in an email
Anthony, your purchase is arriving today.
Everyone called Andrew will get a 50% discount today.
The name of an item
You have purchased Stels XT280 bicycle recently, and we would appreciate it if you left your feedback.
Look what we have found for your iPhone 15.
The name of a city
Discounts for New York citizens.
Delivery options for Brooklyn.
The number of an order, login, promo code, or other important information
Your login: Odin111.
Your order number: 112345abc.
Your promo code for the next purchase: 67SALEt.
Common questions
What if not all the contacts from my contact list have the needed fields filled in?
Add the substitute text after “|” in curly brackets in case the field is empty. For example, to add a name, choose {{Name}}. If the Name field is empty, substitute the name with the text “Dear client” — {{Name|Dear client}}.
How to check the substitute text if it is not shown in test emails?
The test email function is intended for you to check the appearance of the email. It does not access the contacts list data. That is why the variables (merge tags) in the test email will be inactive.
To check your substitutes, create a test contact list, add your email address to it, and send the campaign.

