Automation is an email or a series of emails triggered by a subscriber’s action or an email marketer’s action. For example, with automation, you can set up welcome emails, a series of sales emails, or gather feedback about purchases.
To send emails using the automation feature, you need to have a corporate email on your own domain.
Follow the instructions on setting up your email to do so.
To create an automated campaign, you need to first select a starting condition – subscribing, adding a contact to a list, or adding a tag to a contact. Then, configure the sending of a single email or a series of emails for contacts that will be added to the chosen list after initiating automation.
We do not recommend using automation for mass campaigns. If you need to send a single email to a large number of subscribers, use a regular campaign.
In this tutorial, you will learn how to create a classic automated email series.
How to create an automation
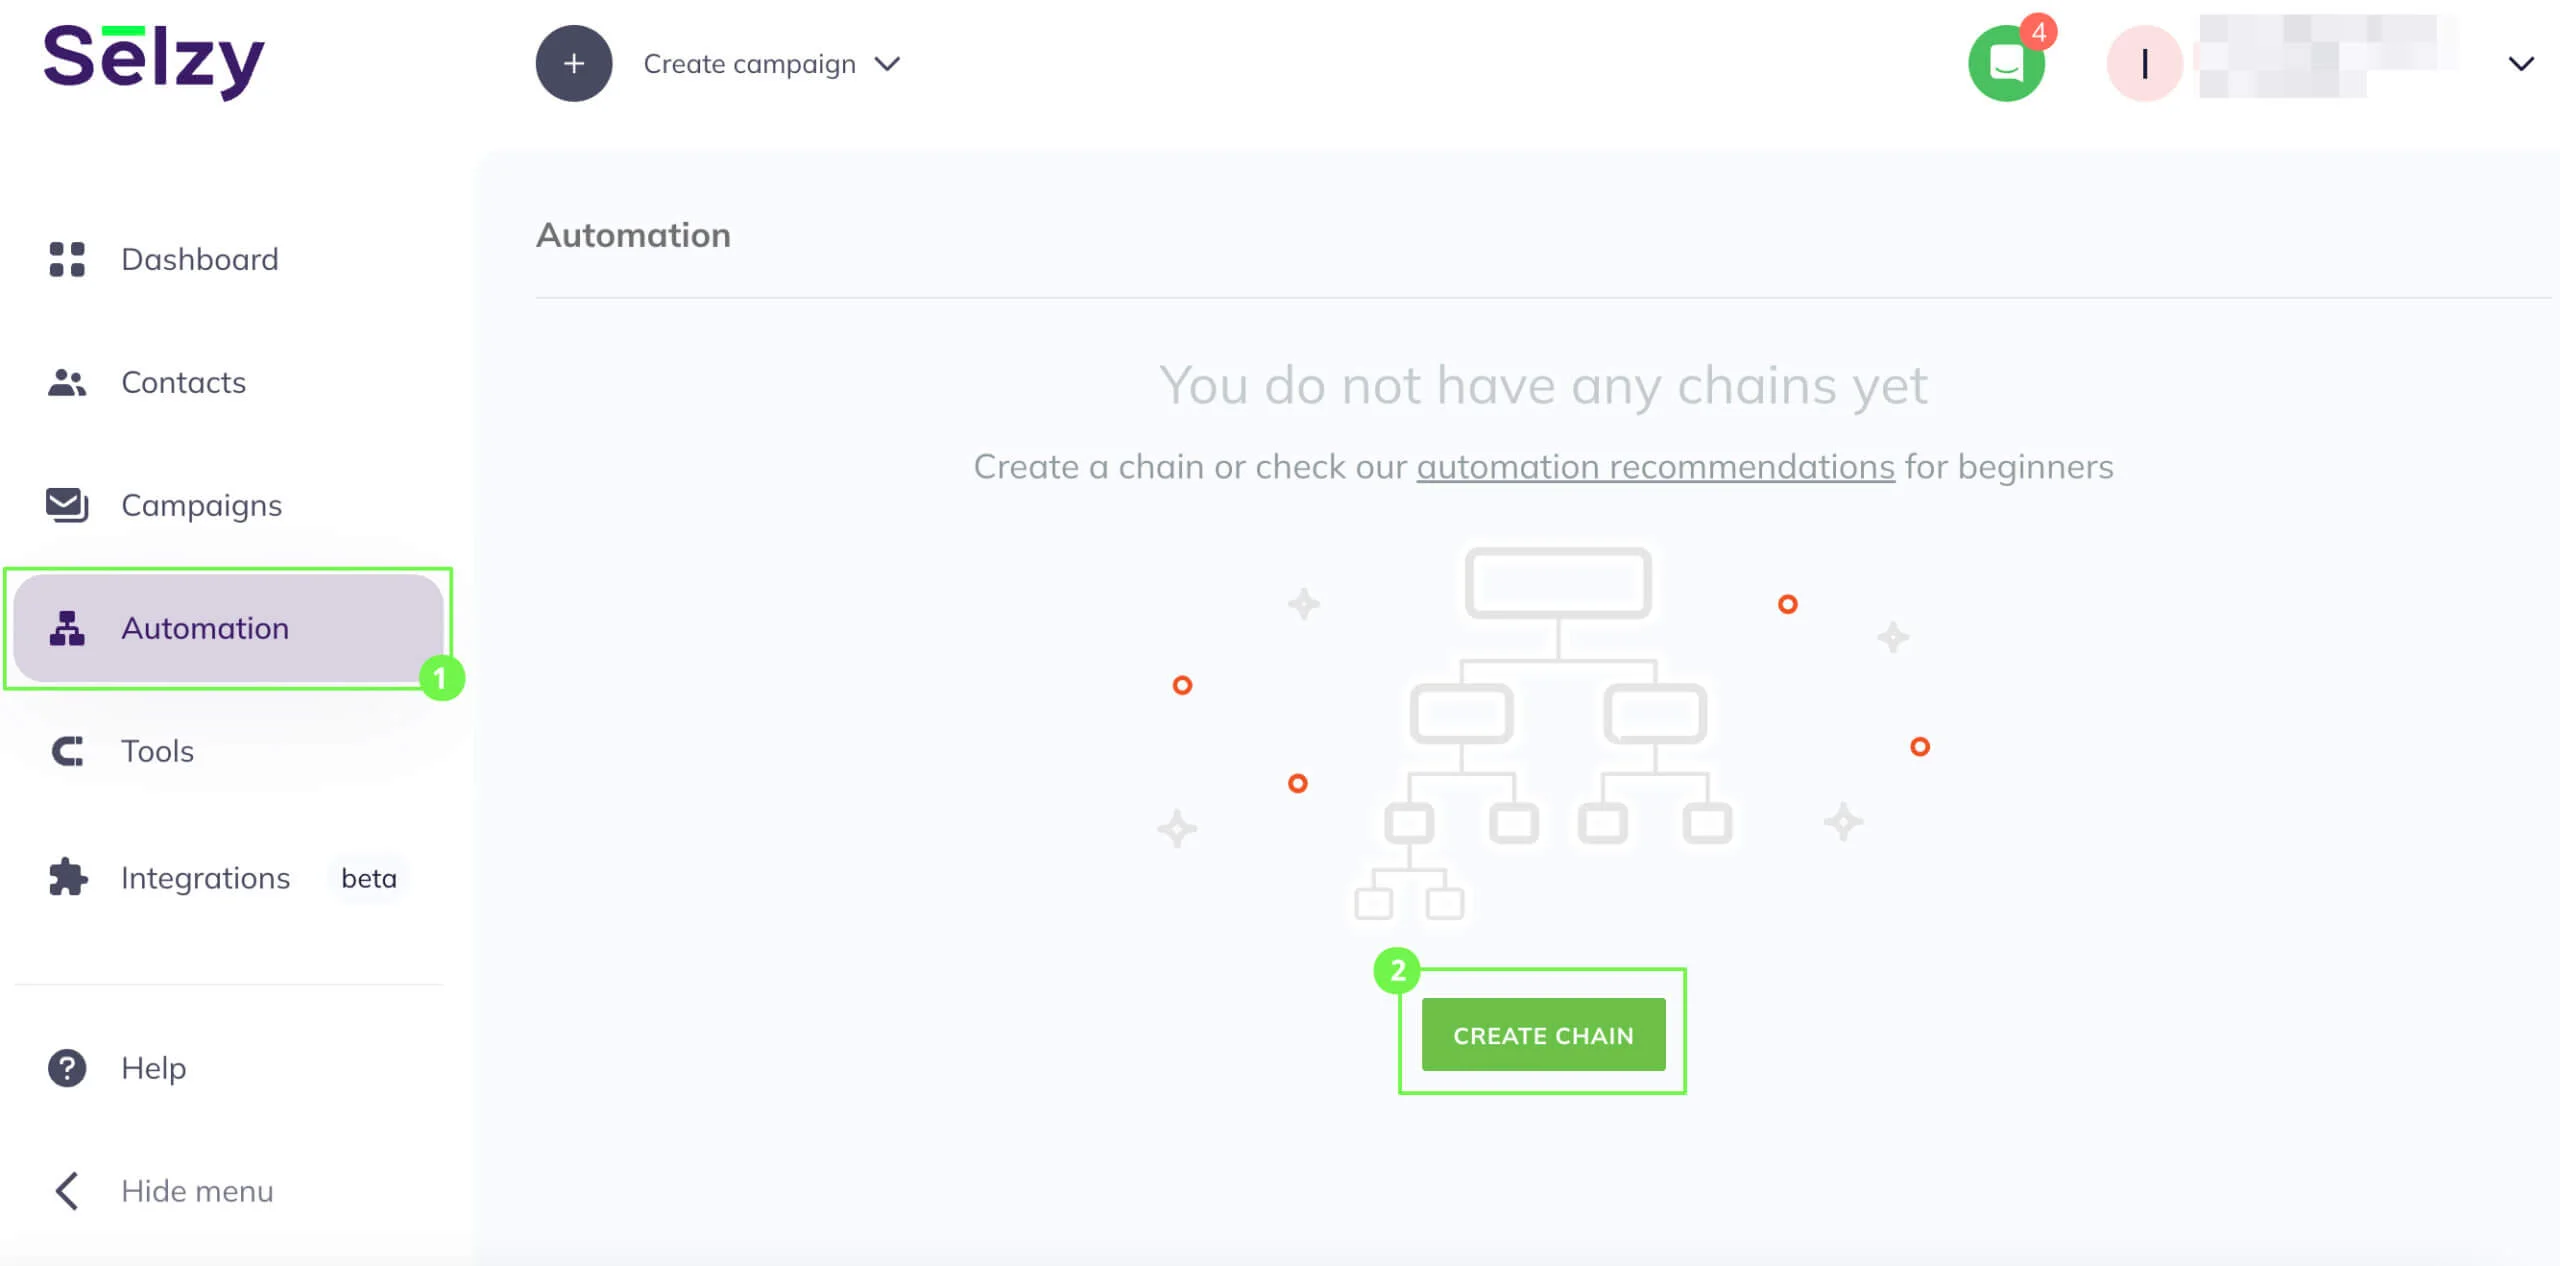
In the menu, choose Automation and click on the Create Chain button.
You can choose a ready-made template and edit it or create a chain from scratch.
To create a chain from scratch, select the Chain from scratch option.

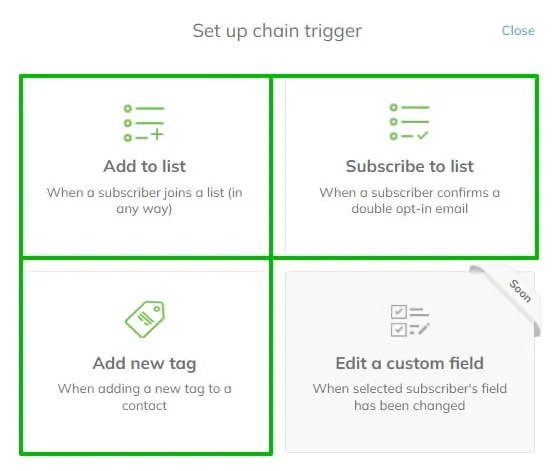
Choose the type of the initial event:
- Adding a contact to a list. A contact will be included in the automation sequence after you add them to any of the specified lists (manually, using API, during import).
- Subscribing. A contact will be included in the automation sequence after they confirm the subscription to the chosen list by clicking the link in the double opt-in email.
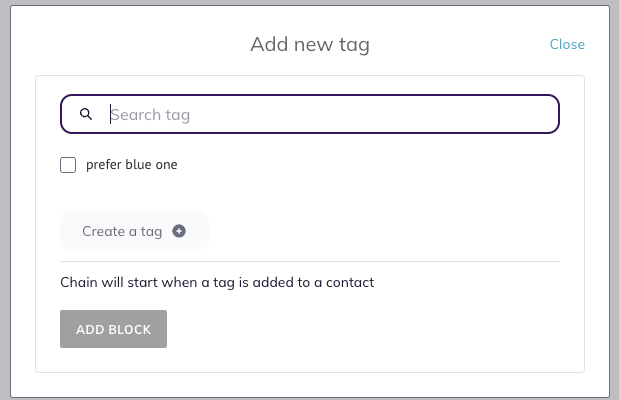
- Adding a new tag. A contact will be included in the automation sequence if assigned with the specific tag.
How to set up Double Opt-In for Emails
Then, select one or more contact lists to set up your automation and click the Add Block button.
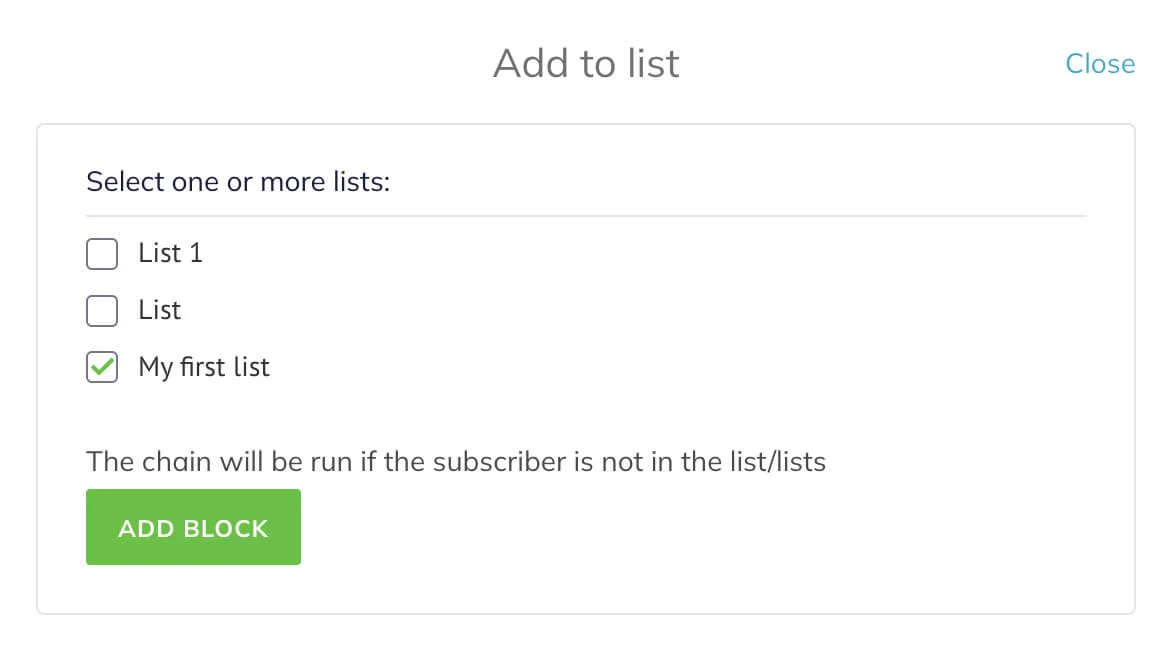
The action in the automation chain will only affect the contacts added after the automation has been started. Ideally, you should create a new empty list to use in your automation. And after the automation has been started, you can add contacts you want to be affected by it to this new list.
Now, it is time to create a chain. As an example, let’s create a chain consisting of two steps: sending an email and analyzing reads. In practice, the chain can include just the email sending (for welcome email automation, for example).
To add action, click on the plus sign (+) and choose a new block: Action — Send email.
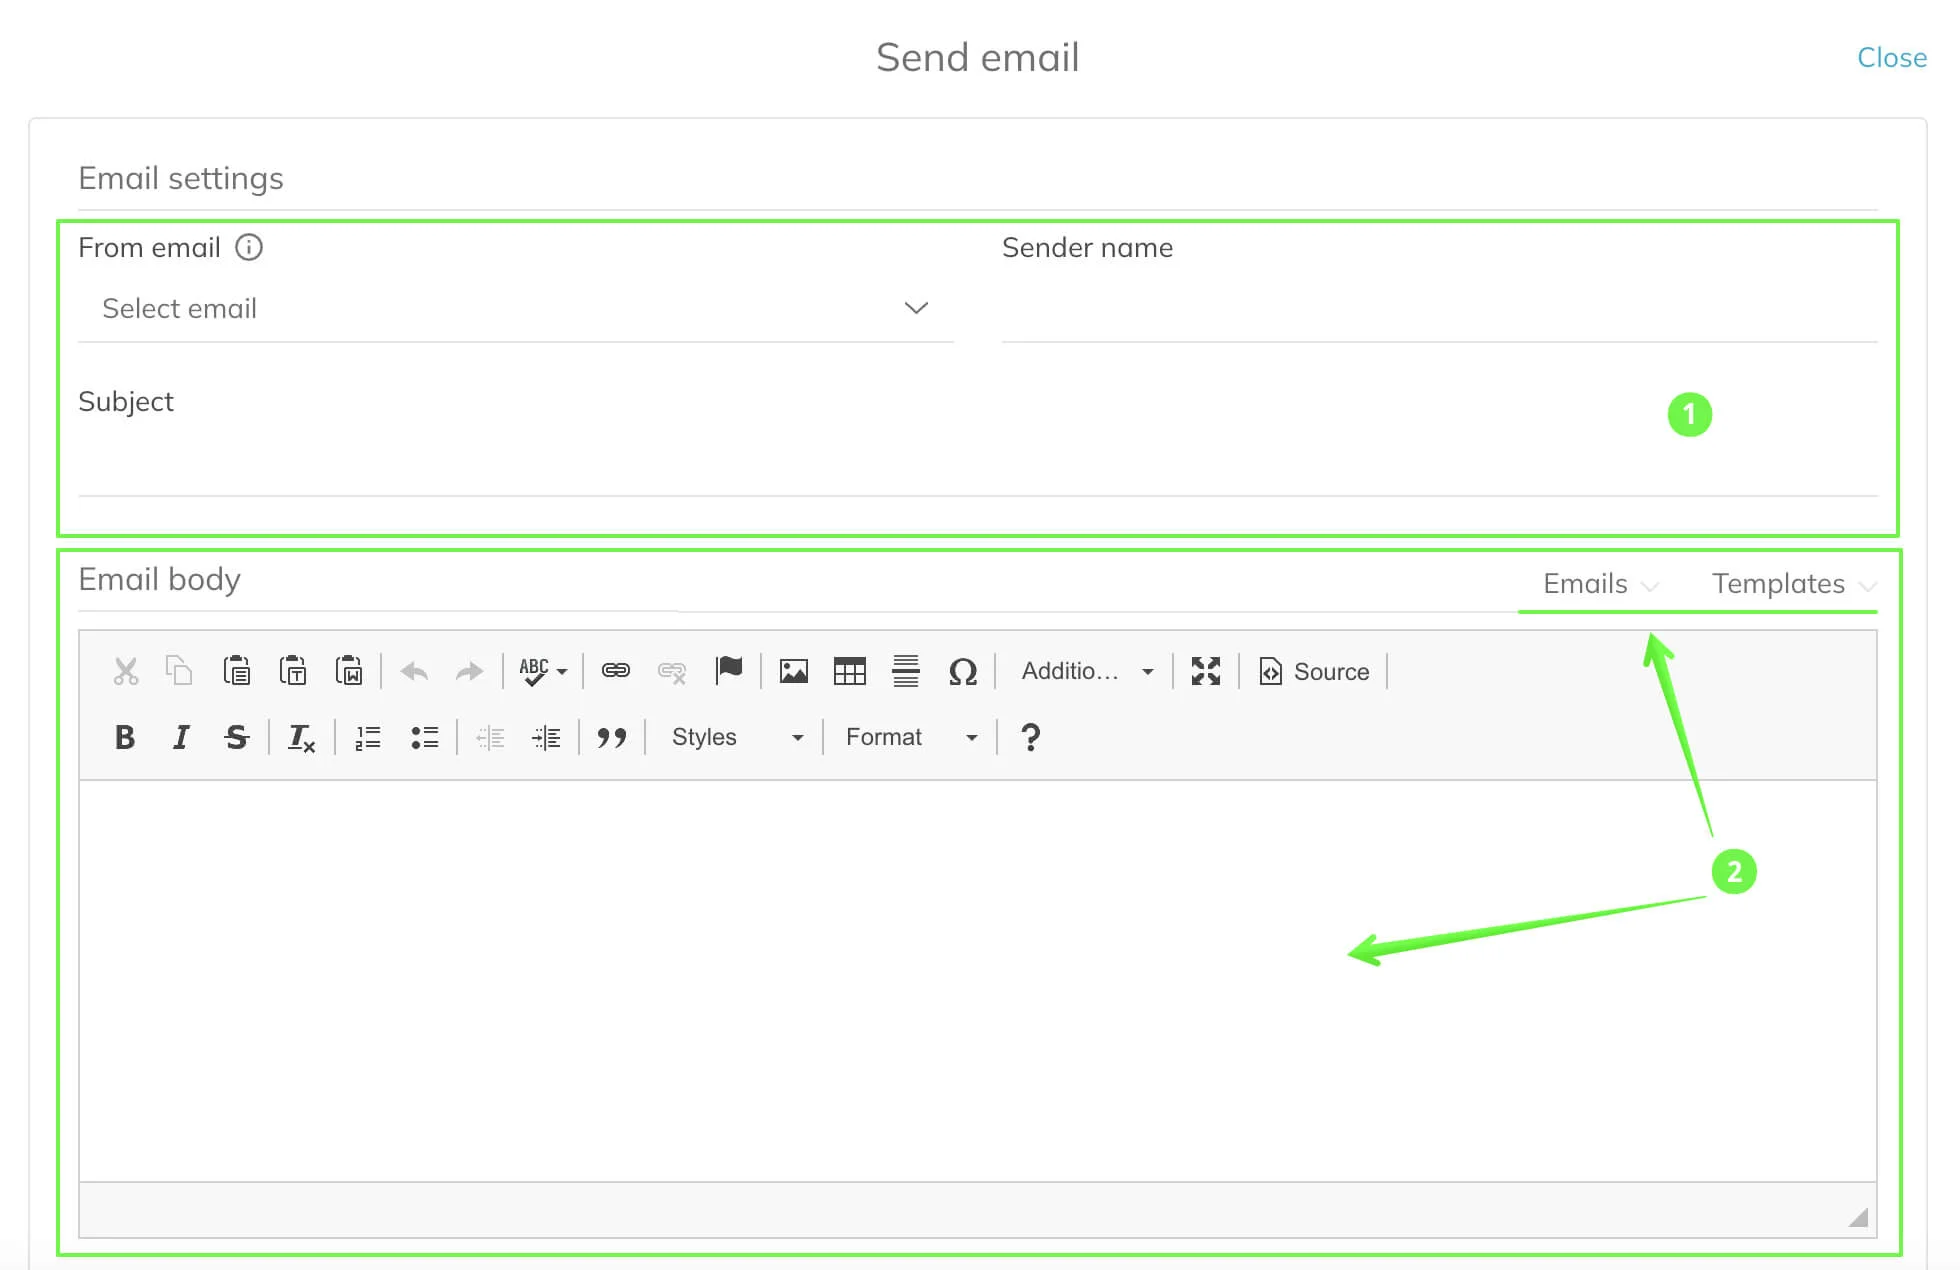
In the new window, state the subject of your campaign, the name, and the email of the sender, and choose the email you would like to send. You can use saved templates or emails created earlier.
How to save an Email Design as a Custom Template
For an automated campaign, we recommend you to create an email beforehand using the builder and save it for later. It is more convenient than editing an email in the automation itself. If you need to edit the email, copy it, edit it, and select a new version of the email in the automation. We recommend copying the email so that you have its unchanged version you can go back to if needed.
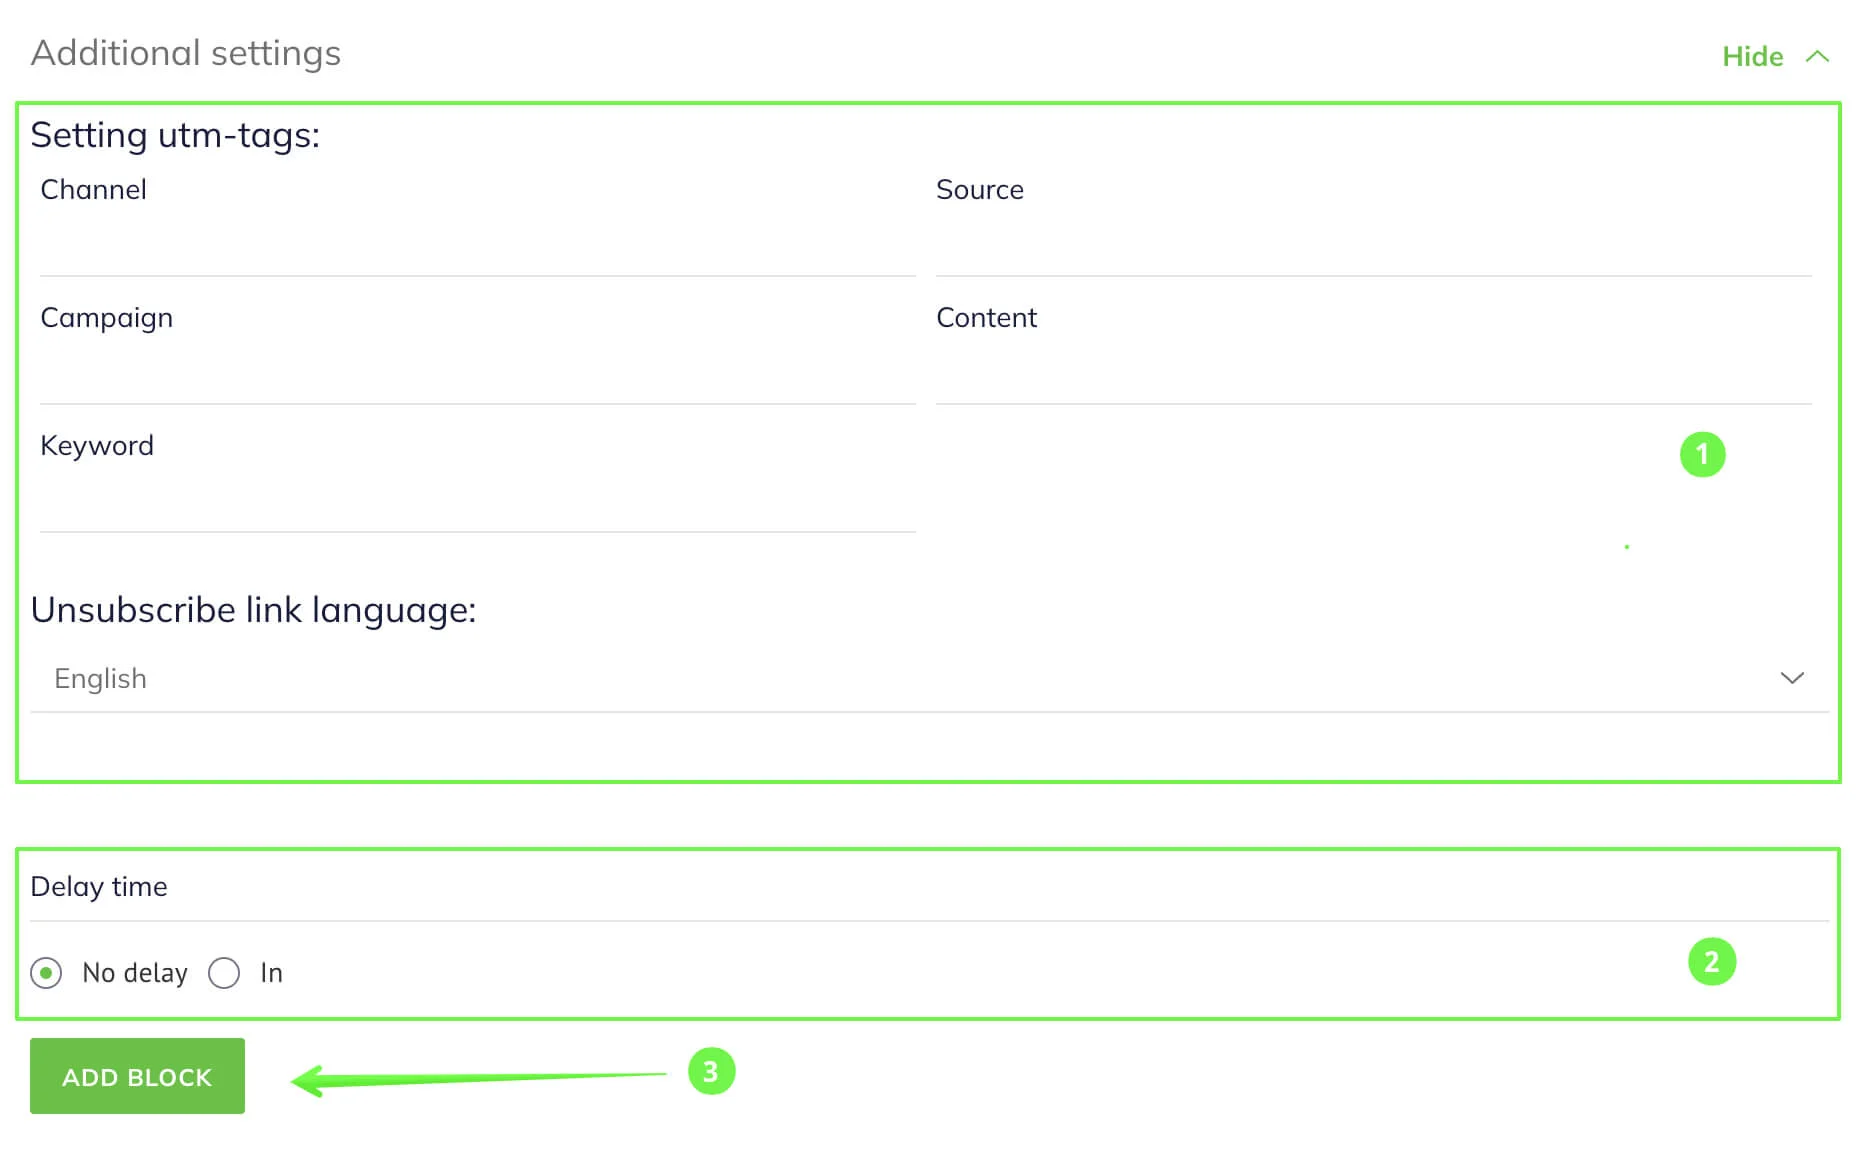
In additional settings, you can change the language of the unsubscribe link and add UTM tags to the email to get more detailed statistics.
In the Delay time section, choose when to send the email:
- No delay option: the email will be sent immediately after adding a contact to the list.
- In X amount of time option: the email will be sent after the set time interval.
When you configure all the parameters, click the Add Block button.
The next step in the automation is to analyze whether the subscribers have read the email or not. This will influence the result of the email sequence.
Click on the plus sign (+) and choose Email Activity — Read Analysis. Enter the name of the previous email and the waiting time. Mind that not all subscribers open the emails immediately, so we recommend you to wait a couple of hours or even days.
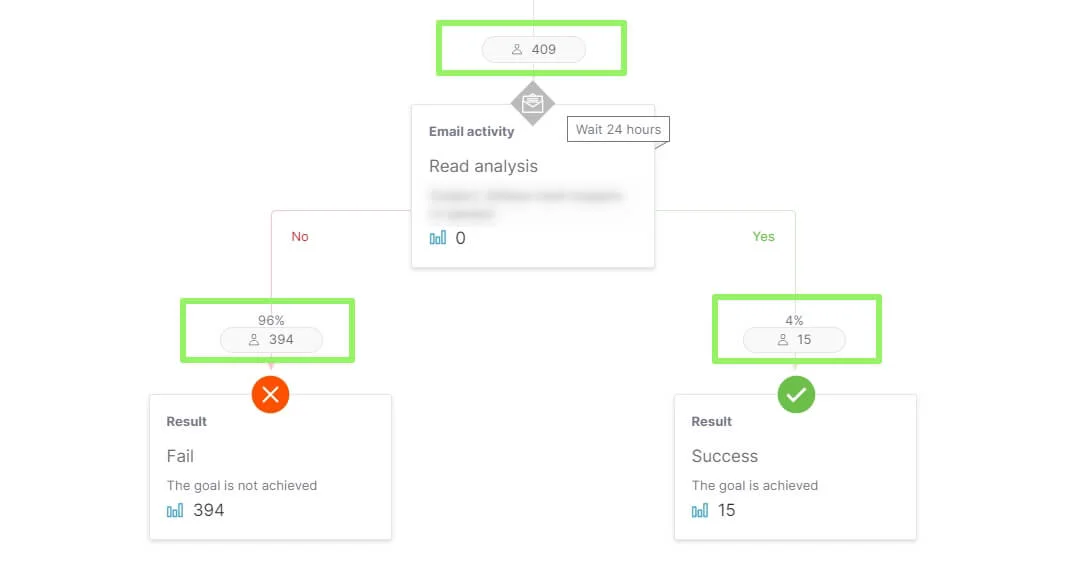
After you add the Read analysis block, your automation chain will be divided into two branches depending on the check-up result.
Finally, add the Result block to each branch. For the Yes branch, choose Success result type, for the No branch, choose Fail. The statistics for the series will be based on the results in these blocks.
The Result block must finish each branch, otherwise, the chain will not run.
Finally, enter the chain title, save, and activate it.
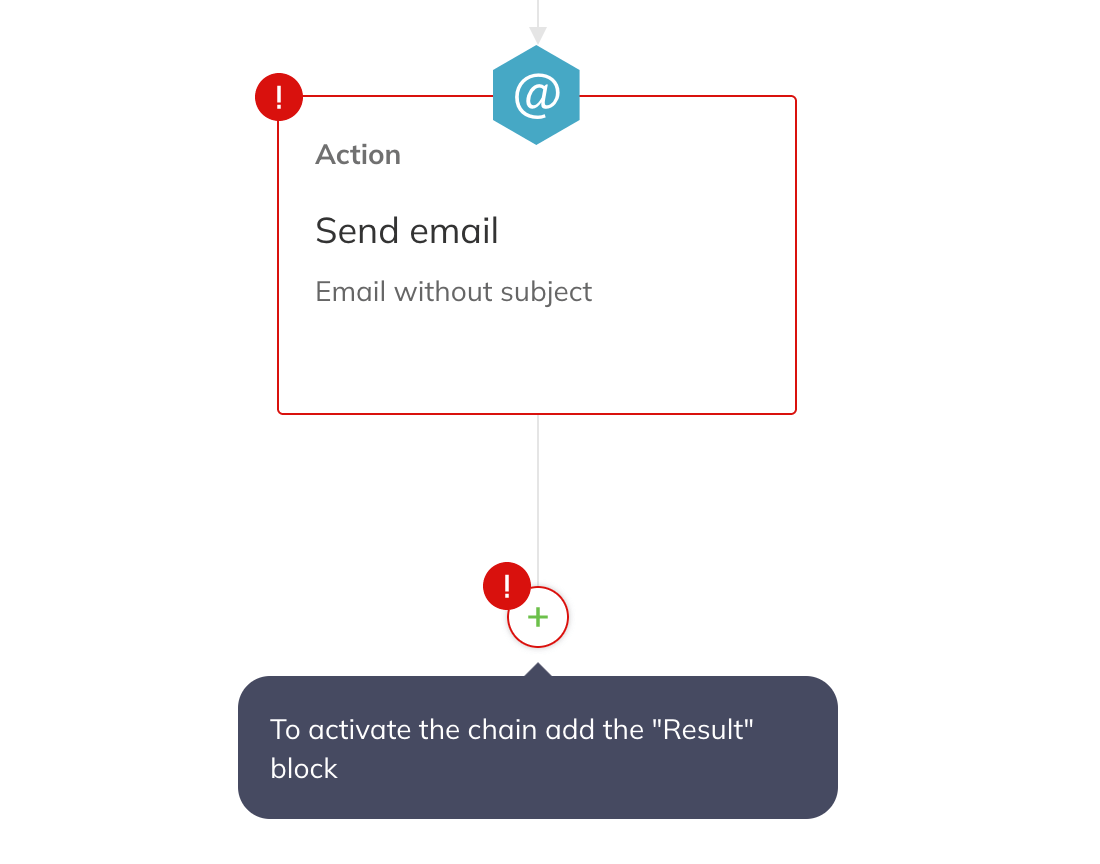
If you can not activate the chain, there must be some mistakes in it. Point the cursor at the mistake sign to learn what the issue is and how to correct it.
There are two mistakes in this chain fragment: the chain does not end with a result, and the Send email block lacks the sender address.
Actions with a chain
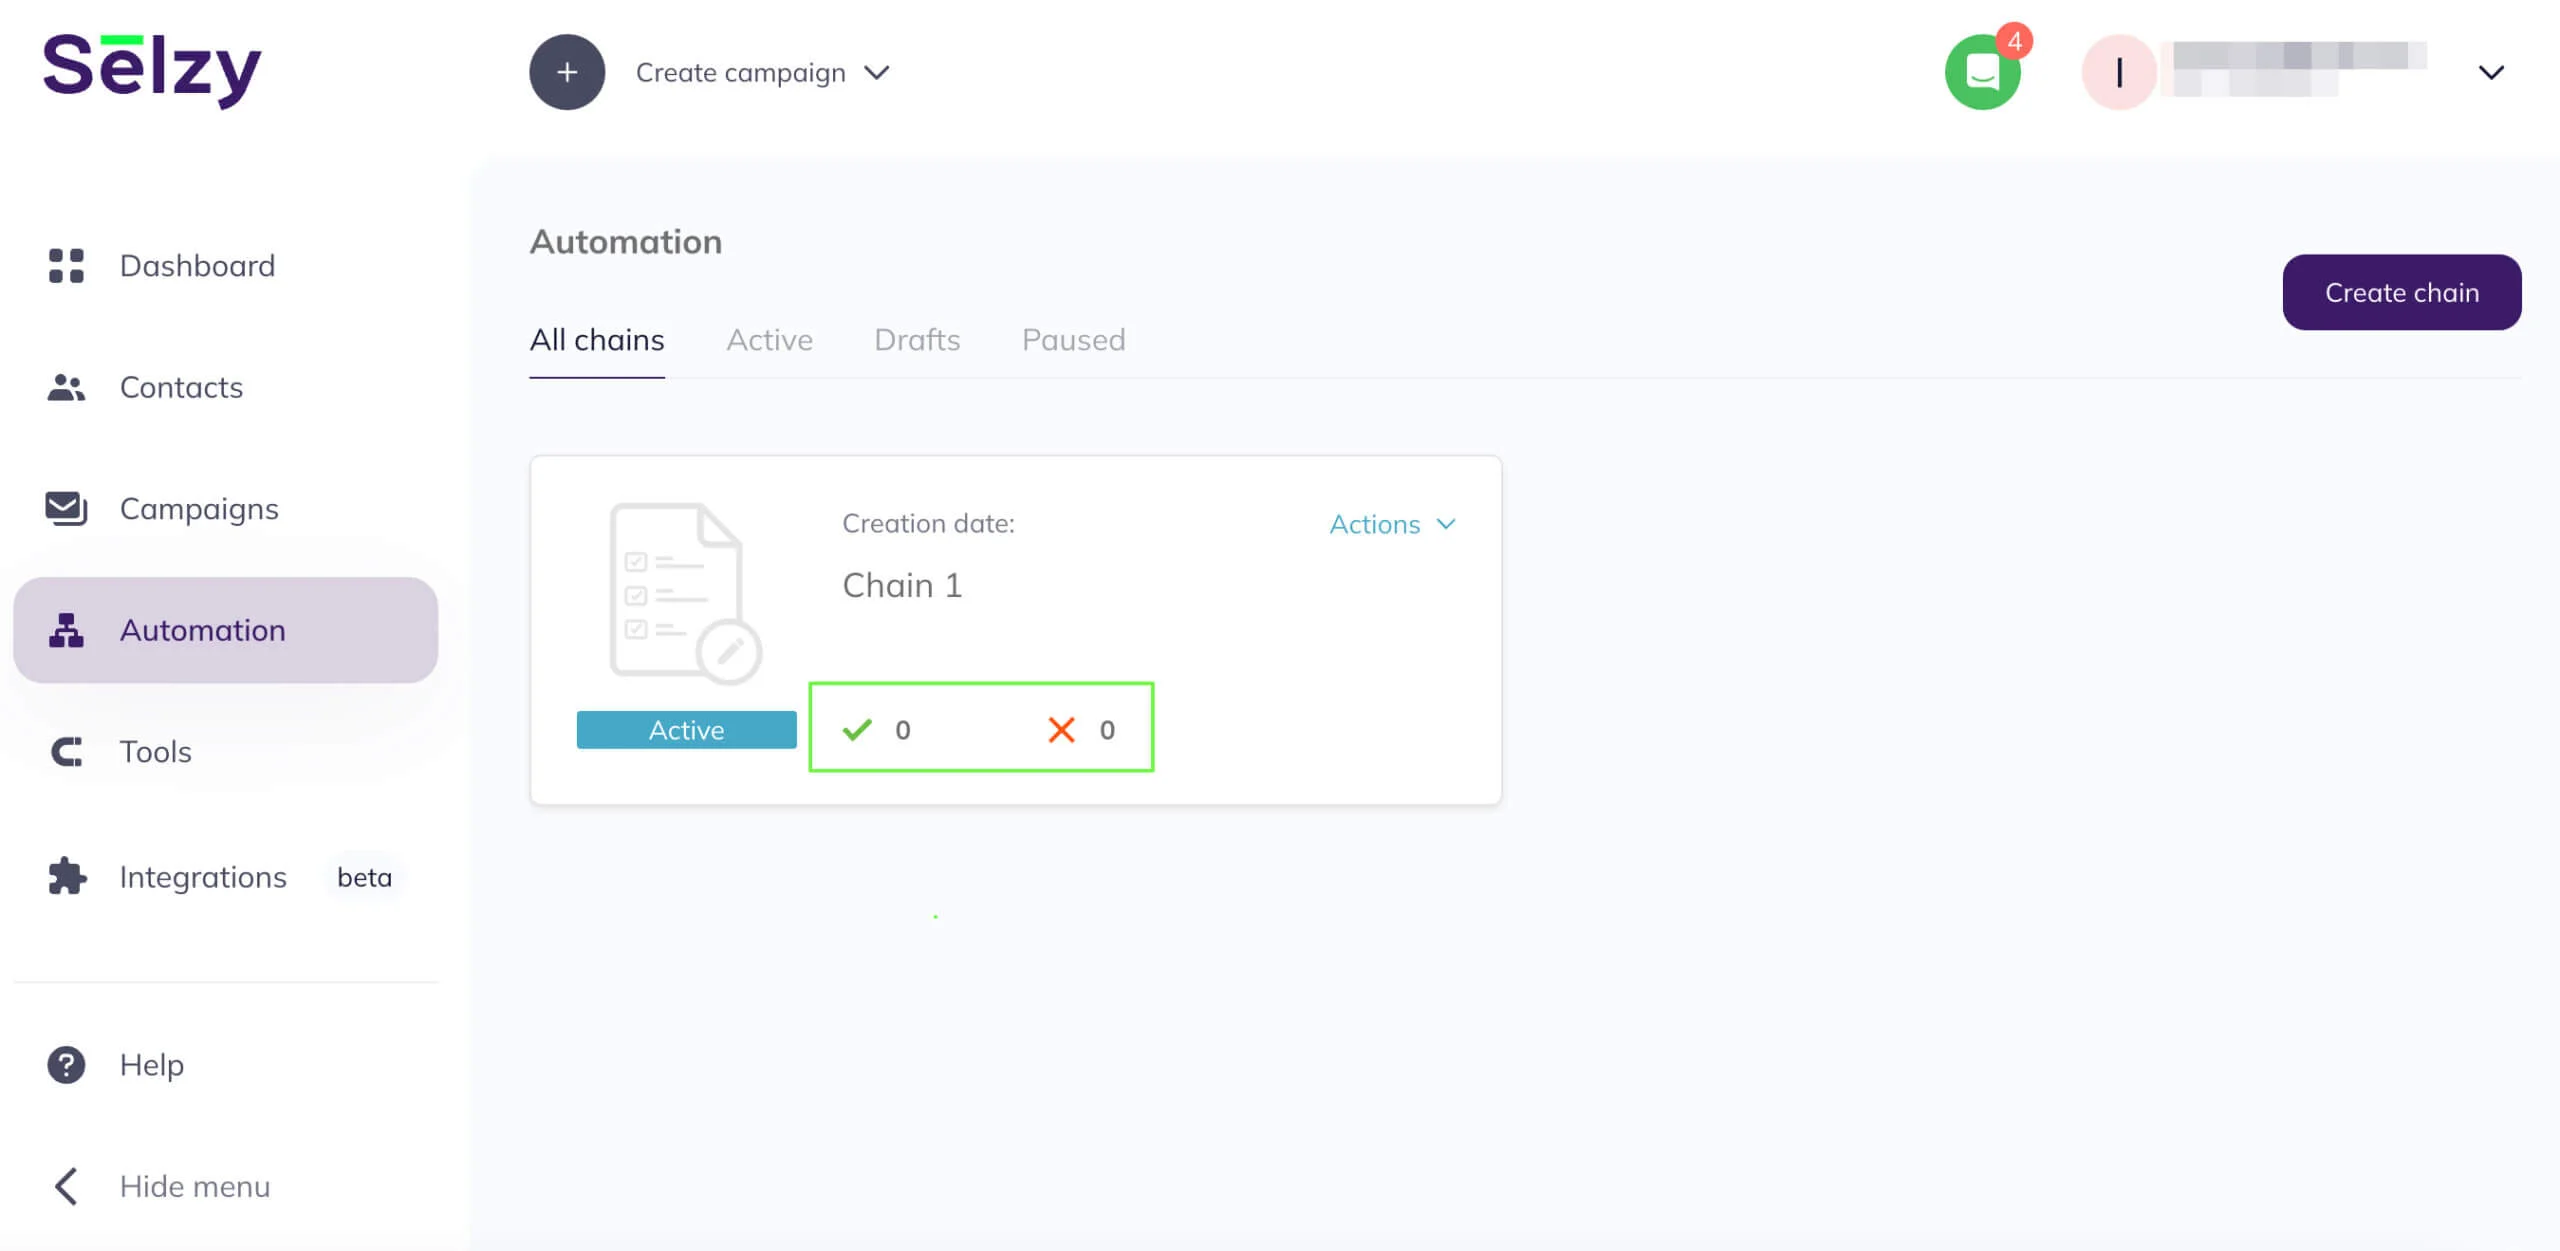
You can pause the chain, edit, copy, or delete it at any time in the Automation section. Click Actions and select the action you want to perform from the drop-down list.
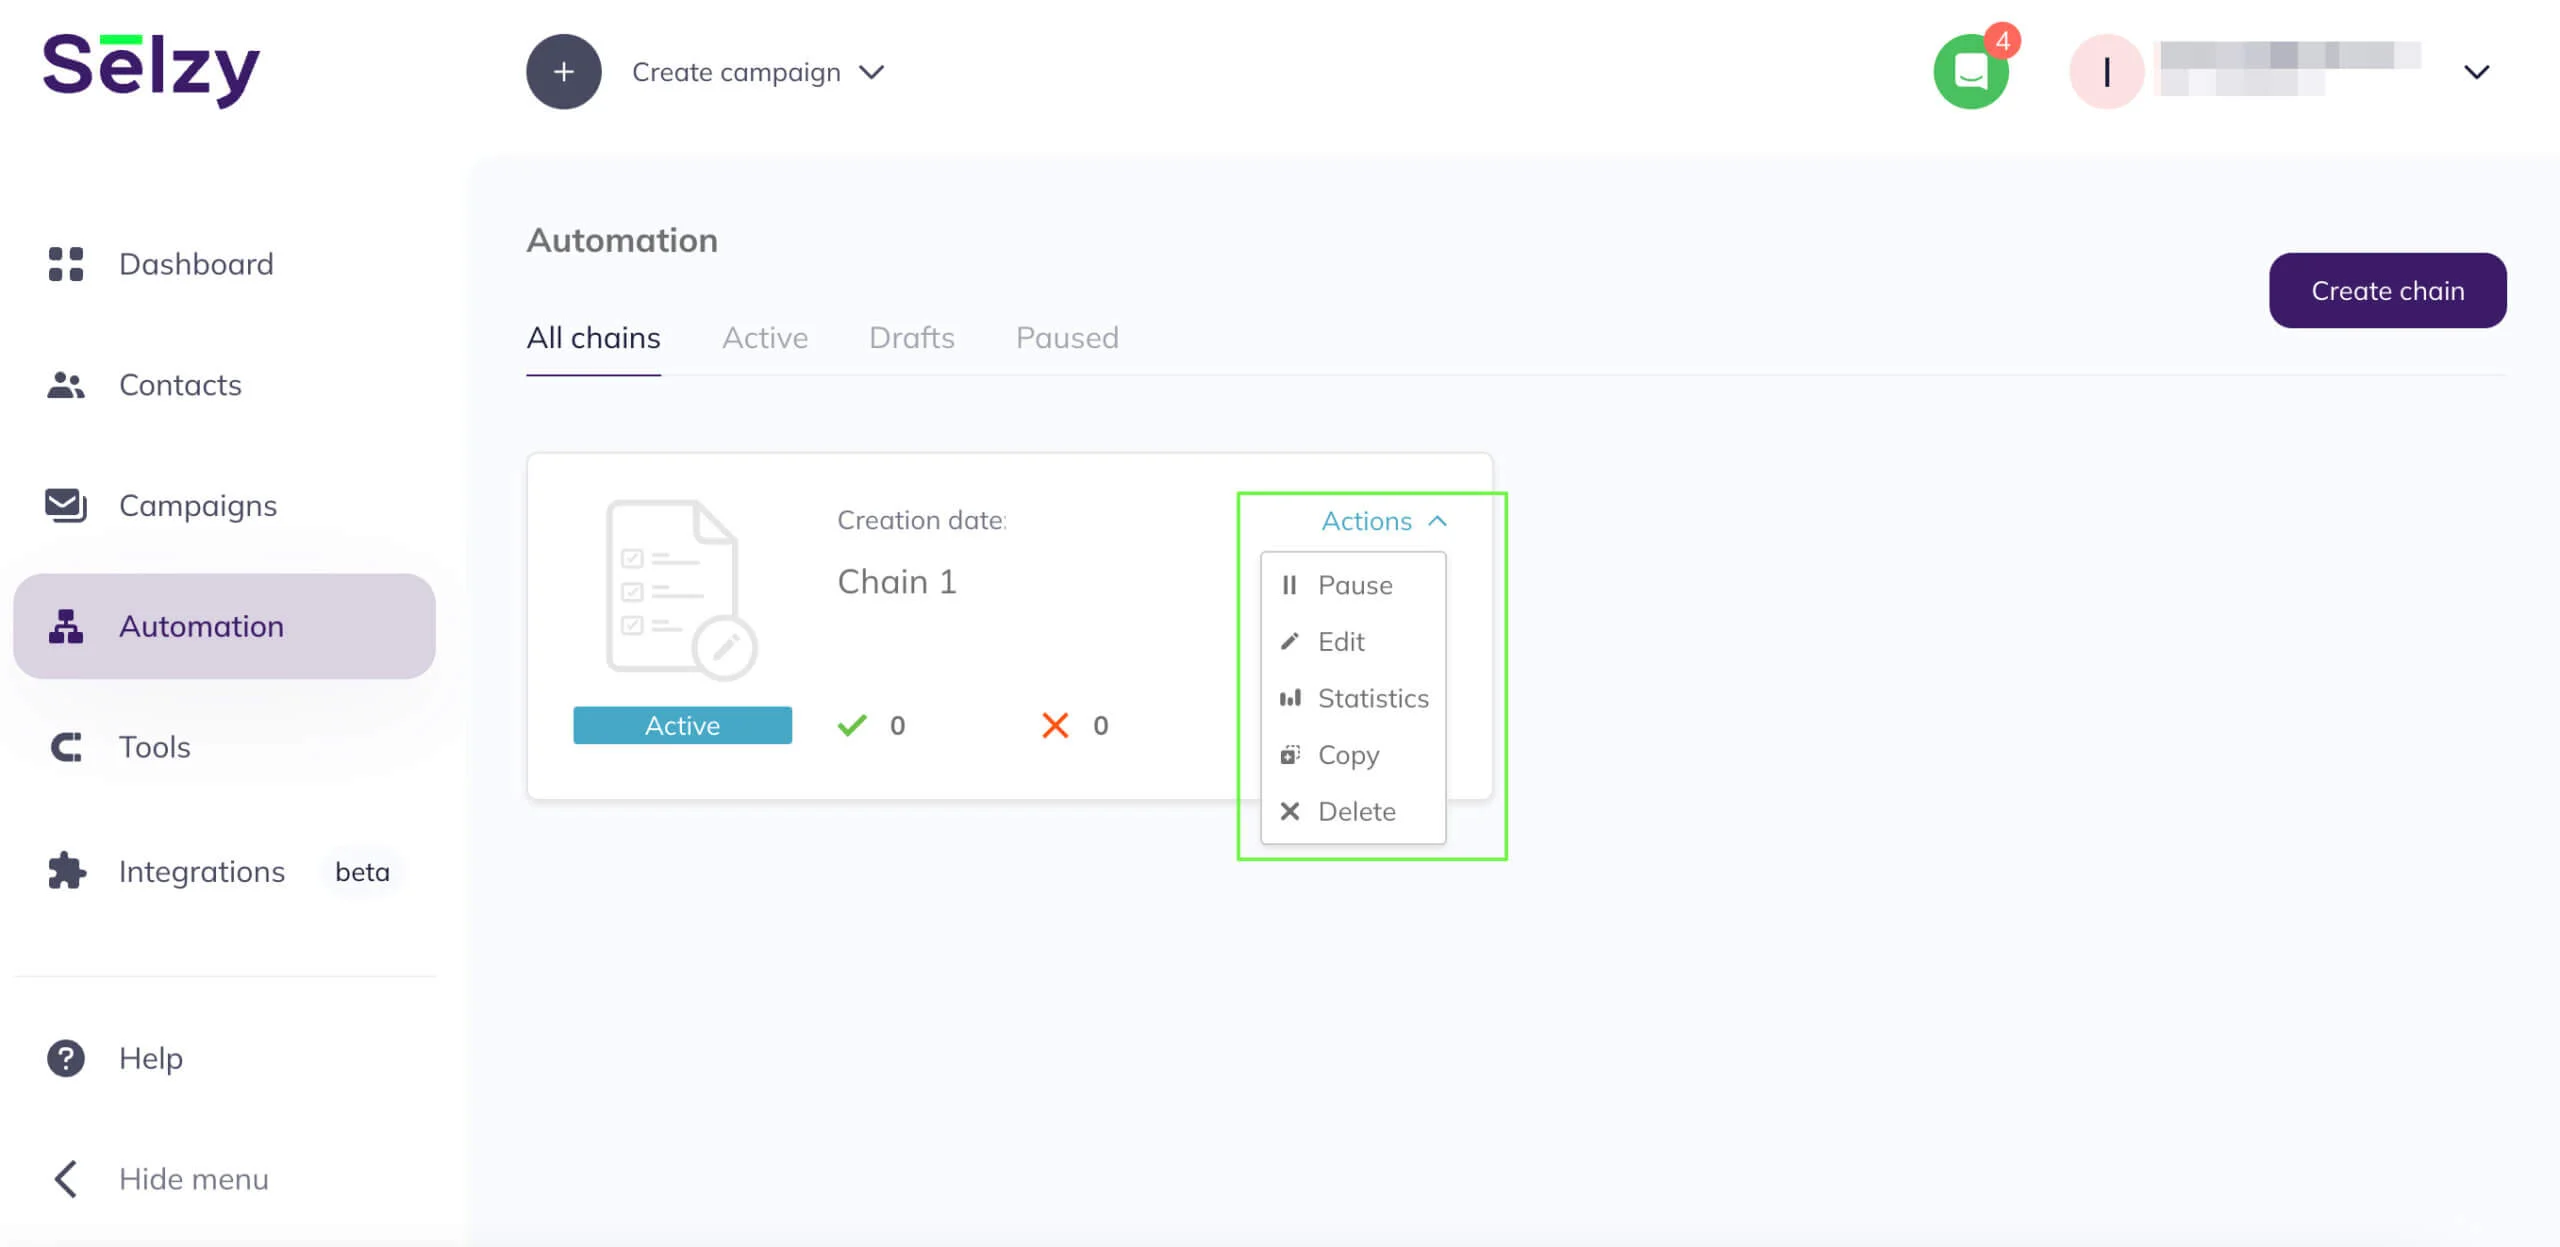
You can also analyze brief statistics of the active chain here.
To view more detailed statistics for the active chain, click Actions — Statistics. The statistics page of the running chain will open.
Common questions
You can get detailed instructions on working with automation sequences in the Automation section of the Selzy Knowledge Base.
Is it possible to set up an email series based on the actions of the subscriber on the website (registration, payment made, etc.)?
Yes. To do this, you need to set up integration between your website and Selzy. You can use both ready-made integrations (like Google Sheets, Hubspot, etc.) and create your own API integration.
To learn more about setting up integration using API, consult our API guidelines.
I made changes to the chain, but my subscribers still haven’t received the previous email. What should I do?
After you have edited the chain, you must activate it by clicking on the respective button. Only then, the chain will be refreshed.
How to delete contacts from the email series?
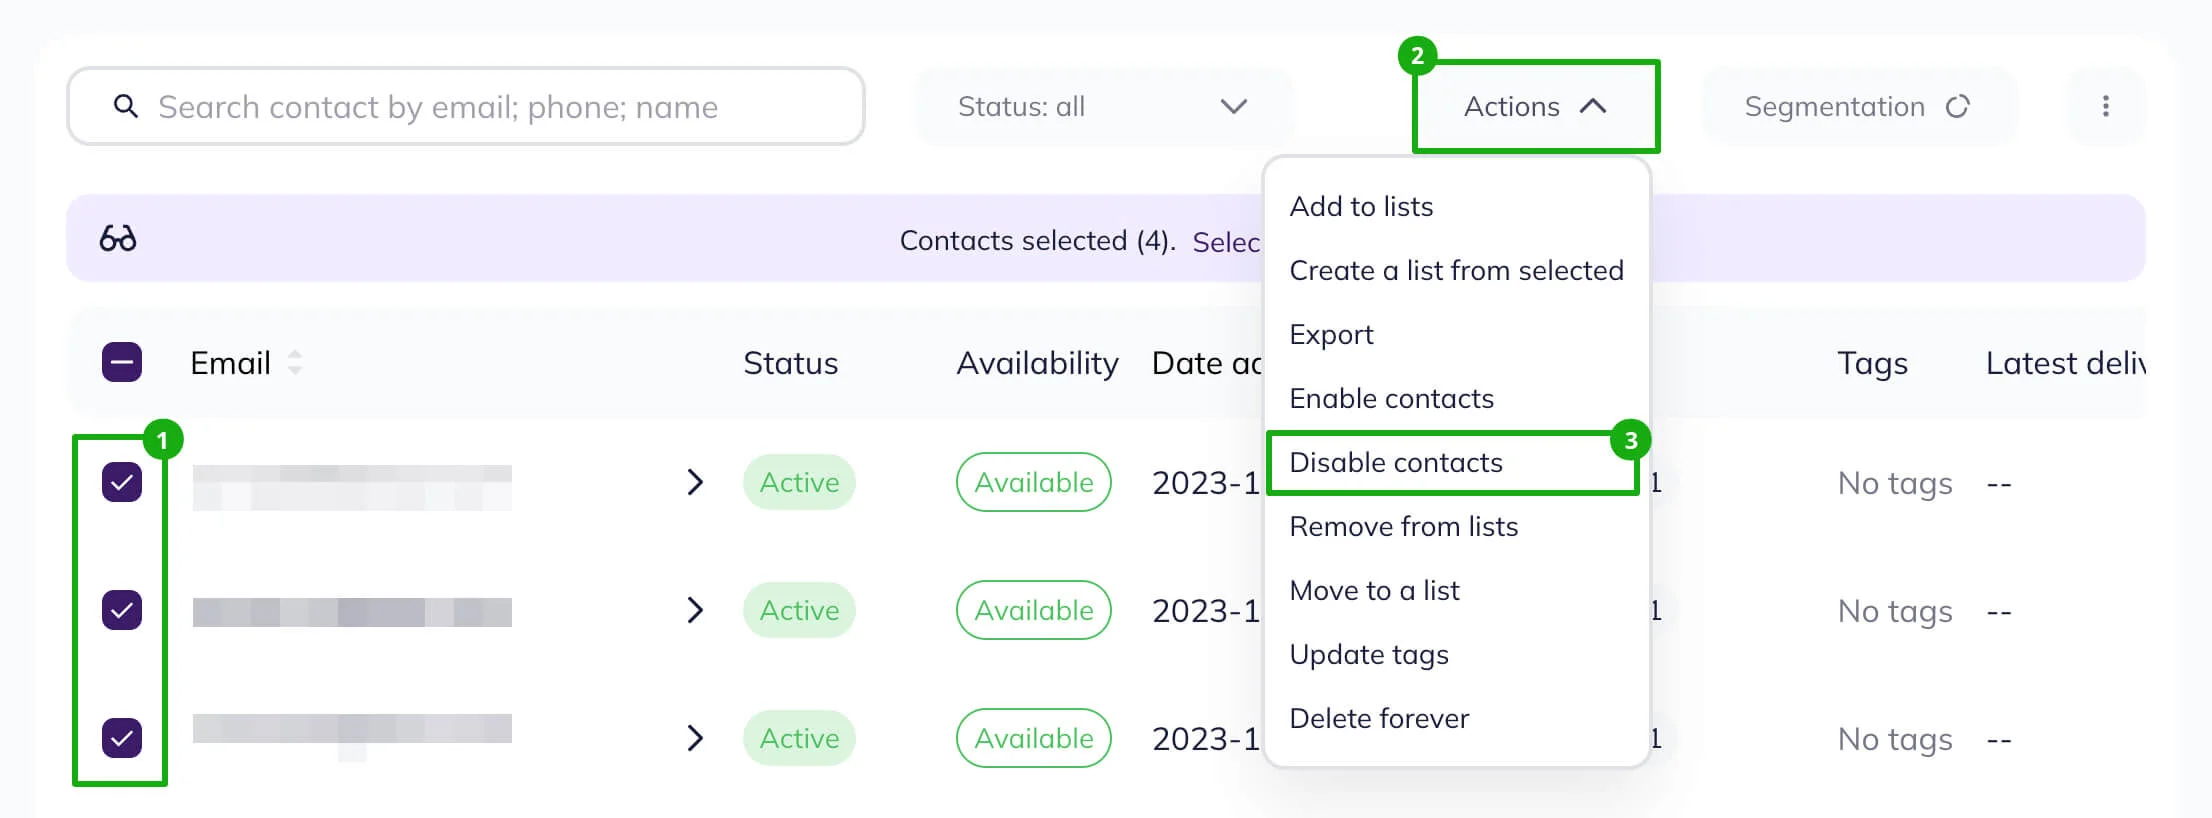
If you do not want any of the subscribers to follow the chain and receive further emails in the series, disable these contacts. If you simply delete them from the list, they will still remain in the email series.
To disable the contacts, go to the contact list, choose the the contacts you do not want to be affected by the automation, and click on the Disable contacts option. These contacts will receive no emails from you unless you enable them.
Please note that if you pause the automation, the contacts that are included in it will continue to receive emails. However, if you delete the chain, the sending of emails will be stopped.
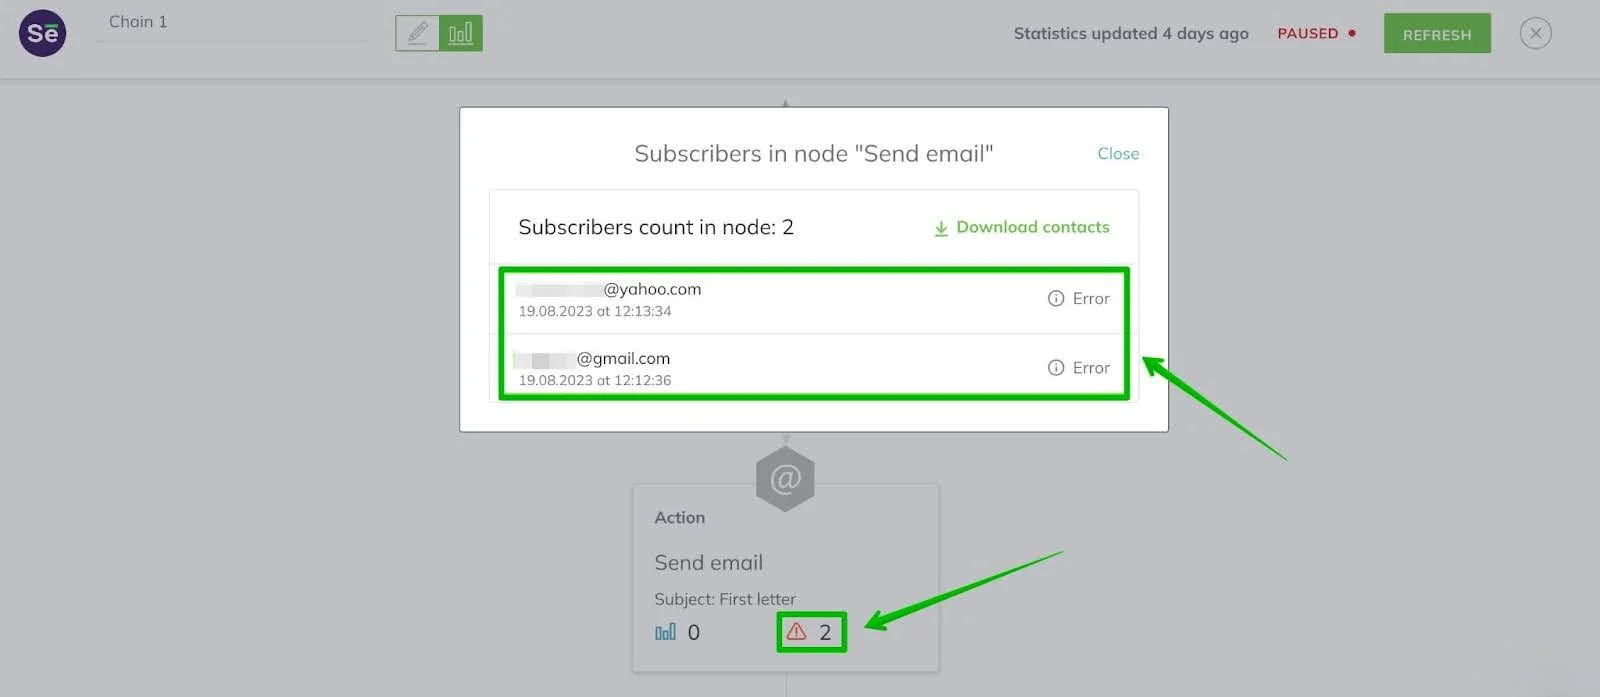
If you want your contacts to receive other emails but not the emails in this automation, disable them and wait until they hit the automation error. Such contacts will stop moving along the automation chain and will not receive emails from it. After that, enable the contacts again, and they will be able to receive other campaigns.
Is it possible to send an automated email at a particular time?
In the settings of each action in the automation, you can set the time for the action to be performed: immediately or after a specified period of time. The time count starts from the moment the previous block’s action was completed.
Unfortunately, it is impossible to set the exact date and time of the execution of the chain action.


