Below, you will find instructions on how to set up integration between Selzy and OnePageCRM. Once set, the integration allows the transfer of contact information from OnePageCRM to Selzy.
Setting up a new integration in Selzy
In your Selzy account, navigate to the Integrations section of the main menu, then go to My Integrations and click on Apps:

The Apps tab contains integrations that you set up with other services. Click on Add a connection to set up a new integration:

In the pop-up window select OnePageCRM or type “onepagecrm” in the search bar. Click on the OnePageCRM icon once again and then click on the Add a connection button.

The integration builder will appear, where you need to set up the parameters marked as required for the OnePageCRM integration to work.
You can leave the default Name your connection field as “My Account OnePageCRM” or set your own.

To fill out the User ID and API Key fields, open a new tab in your browser and go to your OnePageCRM personal account. Click on the account icon in the top right corner of the screen and, from the drop-down menu, select Apps and Integrations.

Then go to the API section.

From the Configuration tab, copy the User ID and API Key fields.

Then, go back to Selzy and paste the User ID and the API Key that you copied into the corresponding field in the Create a connection window. Click Continue.

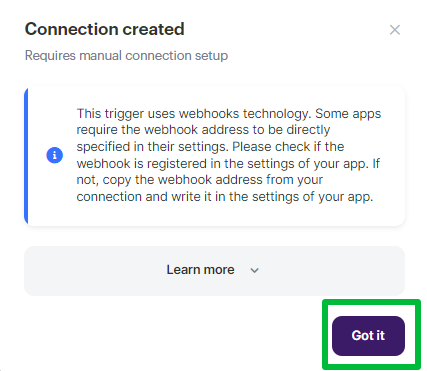
A pop-up will appear notifying you that the connection with OnePageCRM has been successfully created. However, since the integration between OnePageCRM and Selzy uses webhooks, you will need to add the webhook created by Selzy to OnePageCRM to finalize the connection setup.
Go to Integrations — My Integrations — Apps. Select OnePageCRM from the list of connected apps, then press Access, and the webhook URL will be in the corresponding field for you to copy it. Click the copy icon.

Then, open your OnePageCRM account settings and go to the Apps and Integrations section. Find Webhooks in the list and click it.

Click on the green Install button.

Now you can customize your webhook:
- Enter a name for the webhook.
- Paste the webhook URL from Selzy into the Webhook URL field.
- Leave the Secret Key blank.
- For the Data Format field, select JSON.
- Click Save.

The Configure Webhooks section will be updated with the information about the webhook configuration and you will see a success message that webhooks have been enabled.

Selecting OnePageCRM as the data source
To start collecting data from OnePageCRM, you need to create a new automation and set up a trigger, an event that is going to trigger the data collection, and further actions in Selzy.
In your Selzy account, go Integrations → My integrations → Automations → + New automation:

Automation builder will open. Click Select an app to send the data.

The Set up a trigger window will open and you will be able to select a trigger event from the drop-down menu. Among the available options are: New Deal, Updated Deal, New Call, New Action, New Contact, Contact Updated, etc.

For the purposes of this guide, let’s select New Contact as a trigger (2). With this trigger selected, the data will be transferred to Selzy each time you add a new contact in OnePageCRM.
For (1) and (3), choose OnePageCRM.
When you are ready, at the bottom right corner of the window, click Continue.

Setting up an action in Selzy
After you set up the trigger, set up an action to be performed in Selzy. In the integration builder, click on Select an app to receive the data.

In the Add an action window, set the action parameters. For the New contact trigger, choose the Add a new contact action in Selzy.
Once you select all the parameters, click Add an action button at the bottom right corner of the window.

Data mapping
Now, you need to perform data mapping. This ensures that the data from OnePageCRM is correctly transferred and utilized by Selzy to perform the set action(s).
For example, assign New Contact: Email addresses associated with the contact from OnePageCRM to Email in Selzy, and so on.
Additionally, set a Double Opt-In option based on whether or not you need to obtain consent from the customer to receive your emails.

Finalizing the integration setup
Review the settings to ensure they are correctly configured. At the bottom of the integration builder, click Start to activate the integration.

Testing the integration
To test whether everything works, add a new contact in OnePageCRM. Then, go to Selzy and check if the data has been correctly transferred and the set follow-up action has been performed.
We recommend testing the integration with test data rather than using real customer data. Using test data also allows you to experiment with the data transfer option and find the combination of triggers and actions that will work best for you.
