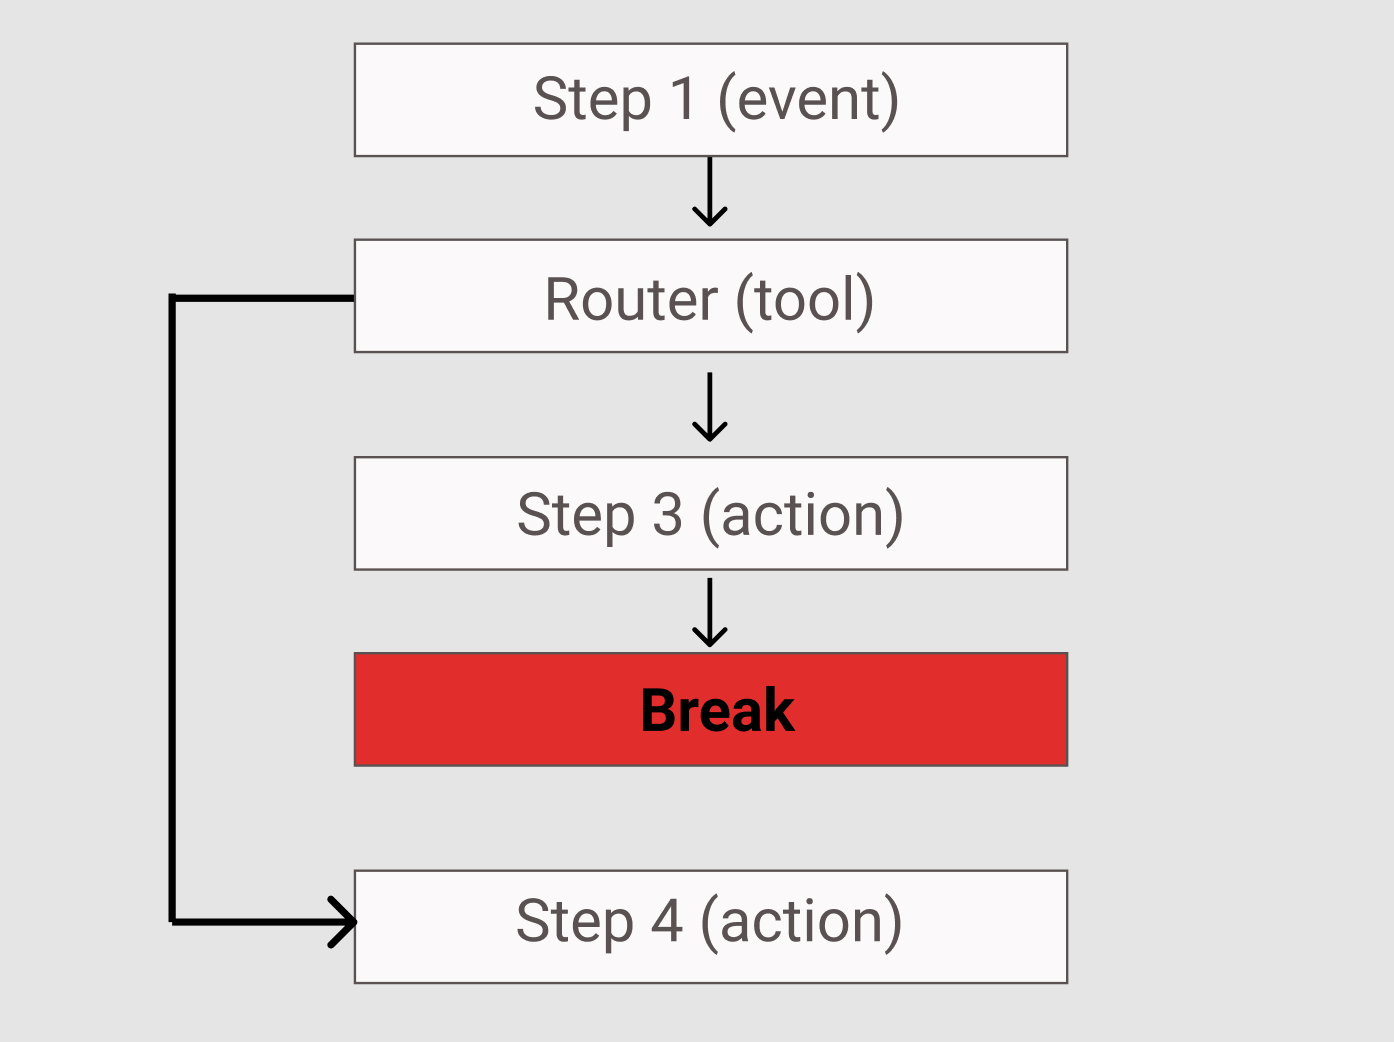
The tool assists in setting the conditions that determine which scenarios will be activated within the automation. Its mechanism can be succinctly described as: “IF condition => THEN START STEP A => OTHERWISE START STEP B”.
To better understand its functionality, let's delve into an example.
Imagine receiving an order from an e-commerce platform. There are multiple managers: one handles orders below 10,000 dollars, while another deals with orders above 10,000 dollars.
Using the Router tool, you can design a scenario where orders are assigned to different managers based on their value.
This categorization can also be based on other order attributes, which are determined from the initial trigger.
Step 1. Adding the tool
To determine which automation steps will activate based on specific conditions, you must integrate the tool into the data source service.
Access your automation setup, click on the Tool option, and choose the Router tool from the list.
Step 2. Configuring the tool
Proceed to set up the tool. Follow these guidelines:
- Assign a name to the dataset that will be formatted by the tool.
- Define the conditions that will dictate the scenario selection.
- Specify the step the automation will transition to if the condition is met.
- Indicate the subsequent step in the automation if the condition isn't satisfied.
A crucial aspect to remember when employing the Router tool is the necessity to designate a Break step, effectively bifurcating the two distinct segments of your automation. This ensures the automation recognizes when to halt or continue. Without this stop configuration, the automation would indiscriminately execute all steps, even unintended ones, until completion.
To incorporate this, click the + symbol located beneath the automation step and opt for the Tool choice. Then, search for the Break tool and click Select to advance.
Here's a snapshot of the eventual structure:

All set! The tool and automation are now ready. Simply click on Start to initiate.


