In Selzy you can set up a condition check between steps. The Stop automation on condition tool identifies when a certain condition is reached and allows the automation to continue or stop.
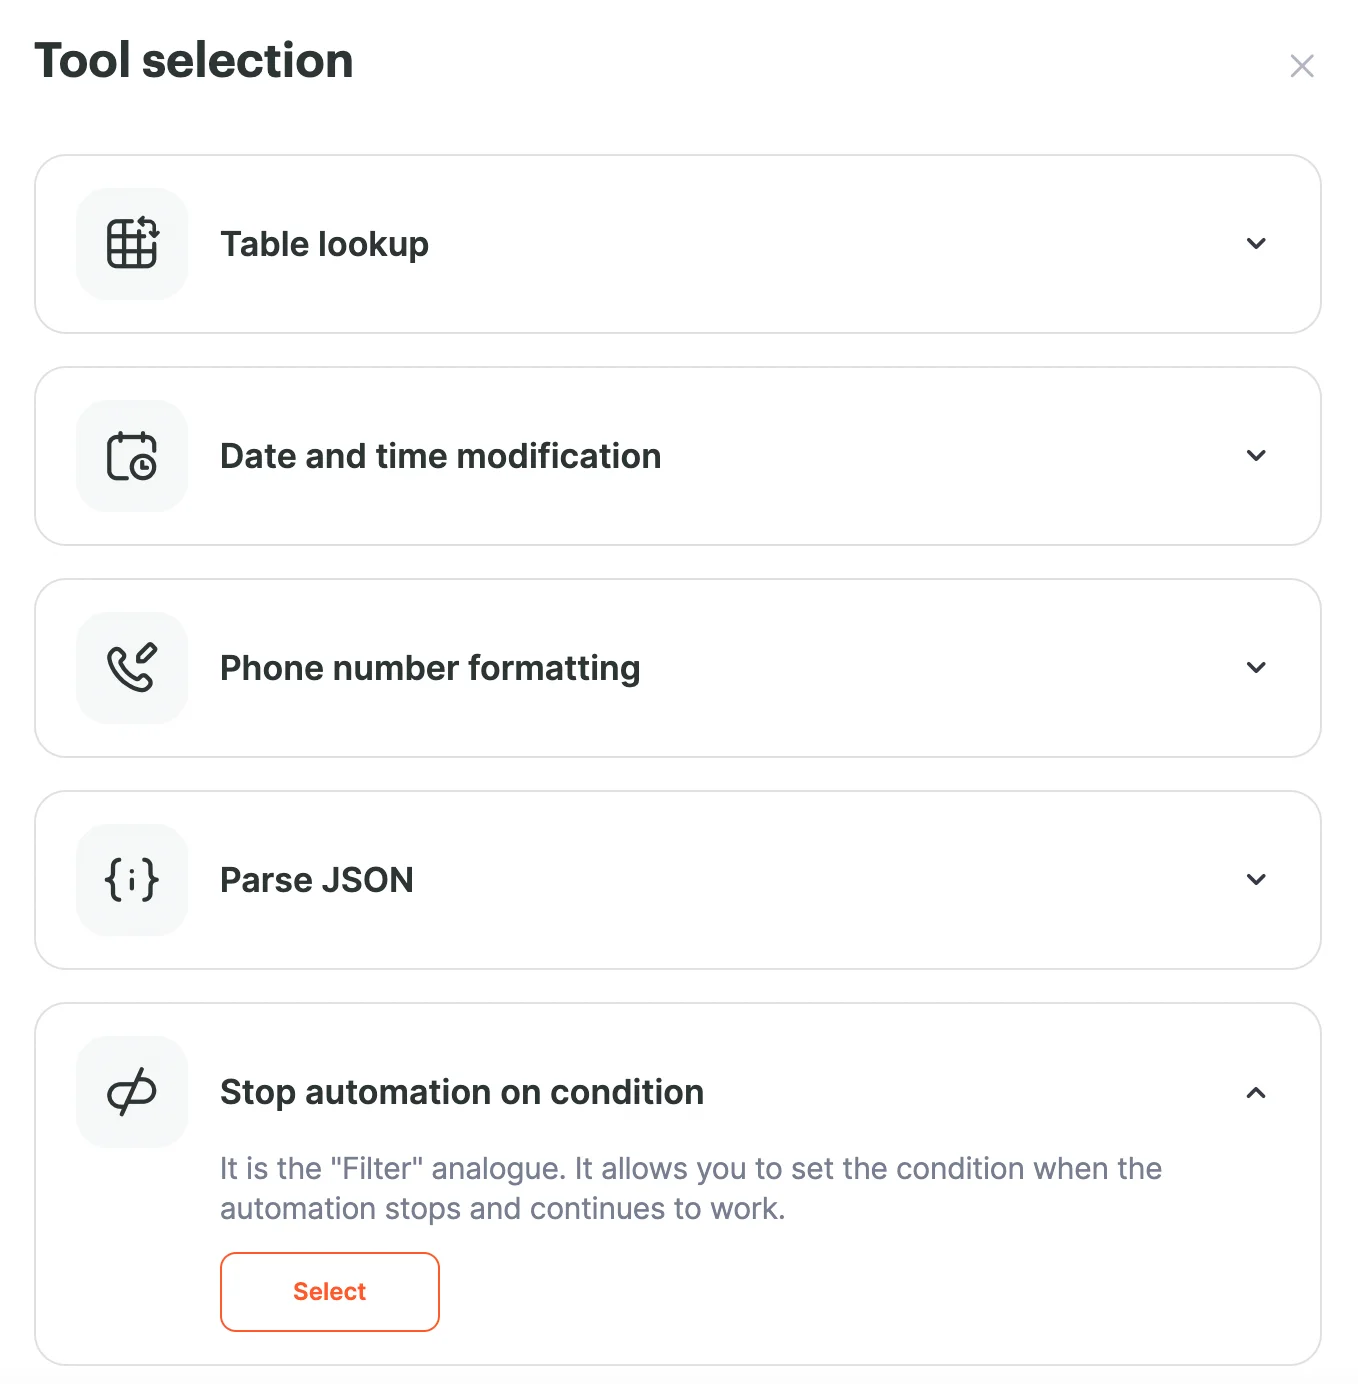
Step 1. Adding the tool
In the Automations section, open your automation, click the + button and select the Tools section.
In the list that opens, select the Stop automation on condition tool.
Step 2. Configuring the tool
In the window that opens, specify the action that the tool will perform if the specified condition is satisfied. There are two actions available:
Pause automation — if the condition specified in the instrument is met, the linking will stop.
Continue automation — when the condition is met, the automation will continue to work.
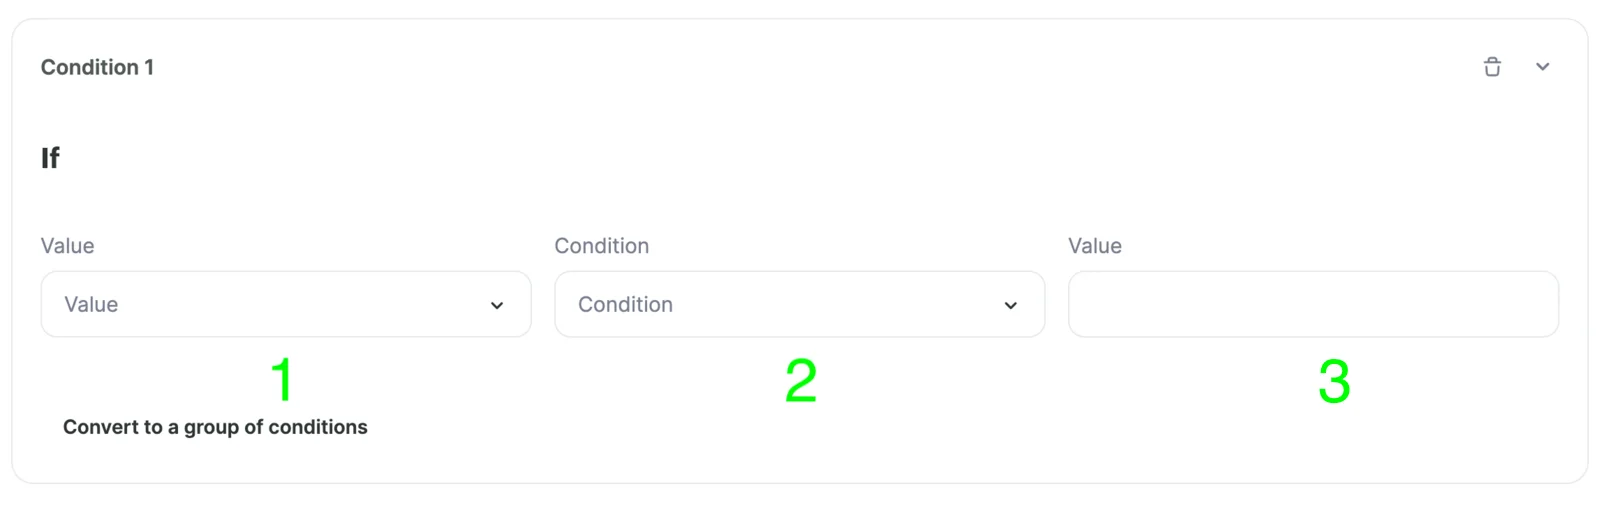
Now you need to define the conditions.
To do this, click on the Add condition button and fill in the three indicated fields:
- Select the broadcast service field for which the tool will check the condition.
- Select the type of condition to check.
- Specify the value to look up.
Setup for simple condition checking
Let's take a look at setting conditions with an example.
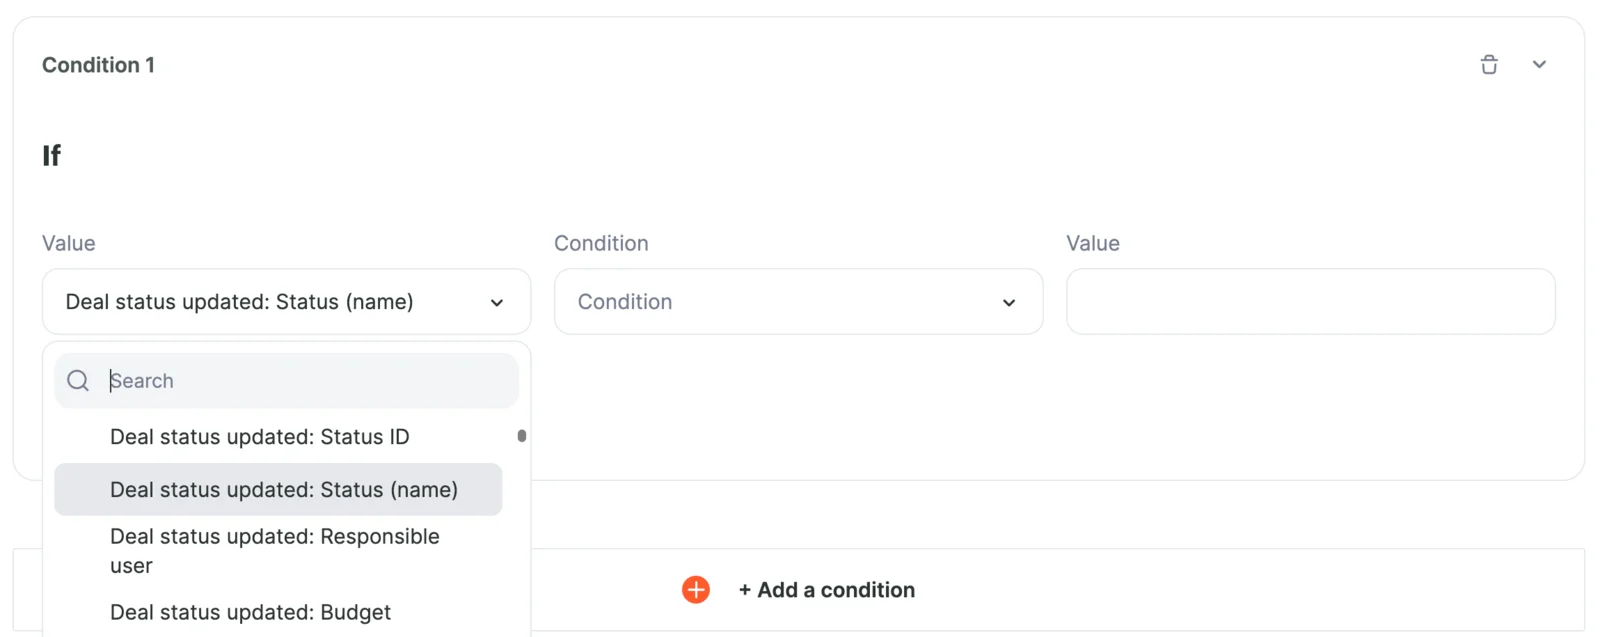
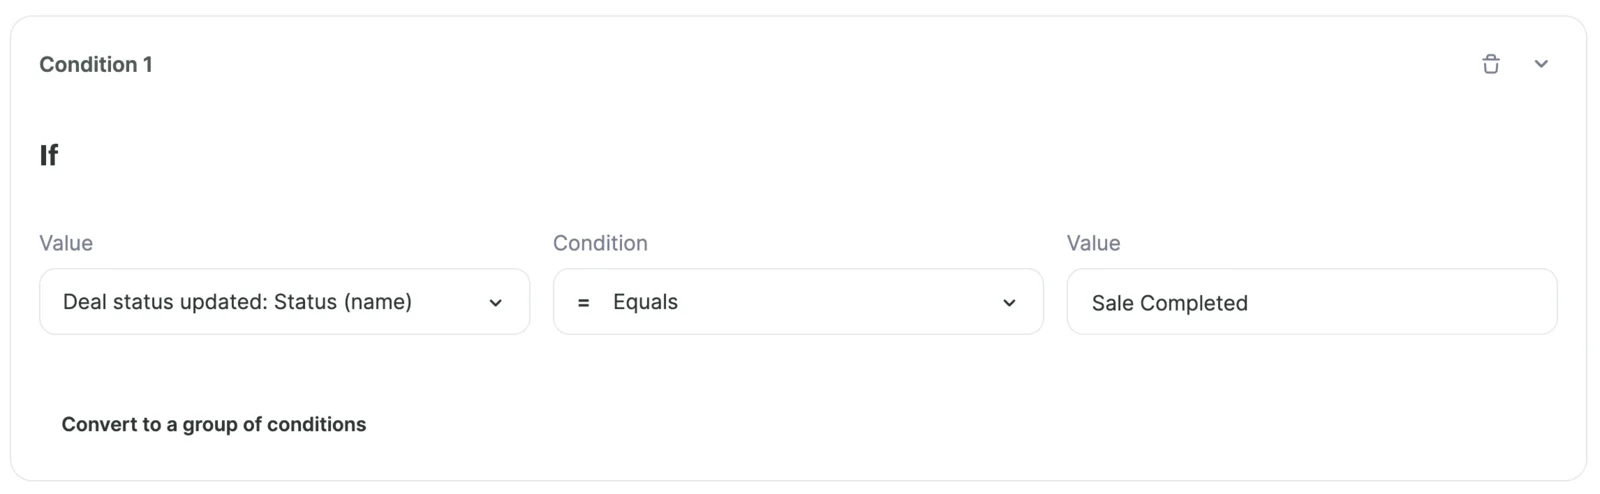
Consider that we will need to configure the tool for the first step Deal status updated in the amoCRM service. The task is to verify the information received and select only deals with a certain status.
In the first field, we will select the value Status (name).
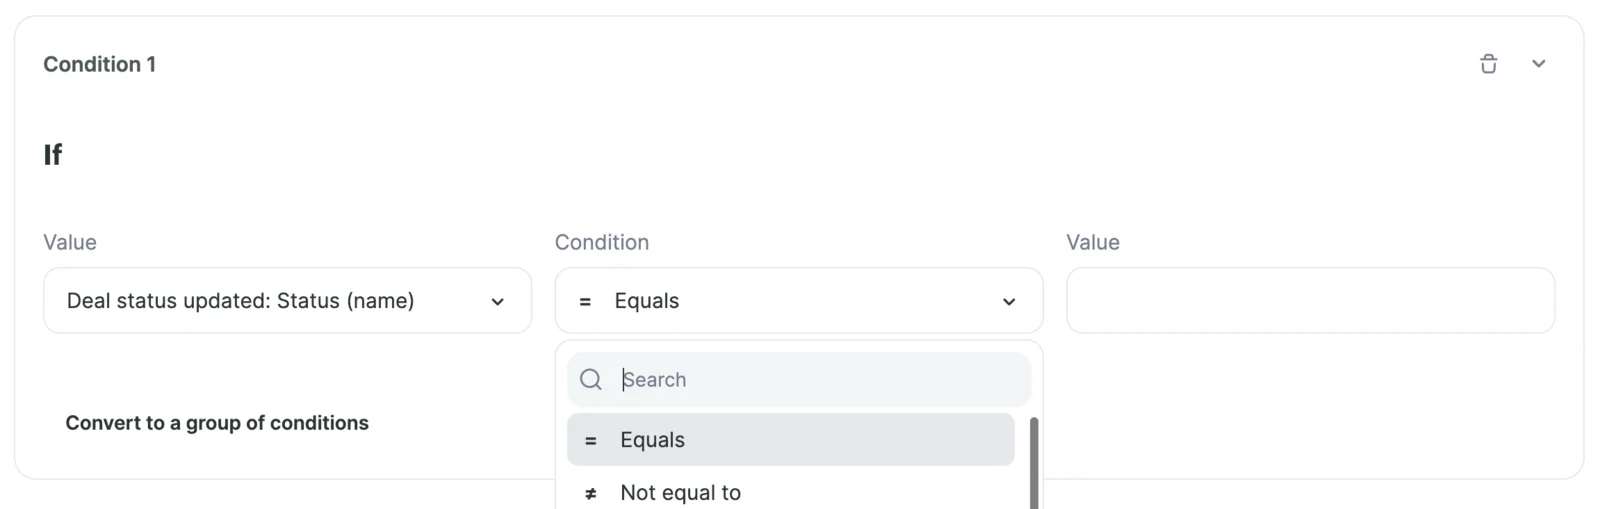
In the second field, we will select Equals as the condition type.
In the third field, we will write the name of the mandatory status of the deal, by which the condition will be checked. In the example, this is the Sale Completed status.
Configuration for checking complex conditions
The condition-checking engine also supports the configuration of complex conditions.
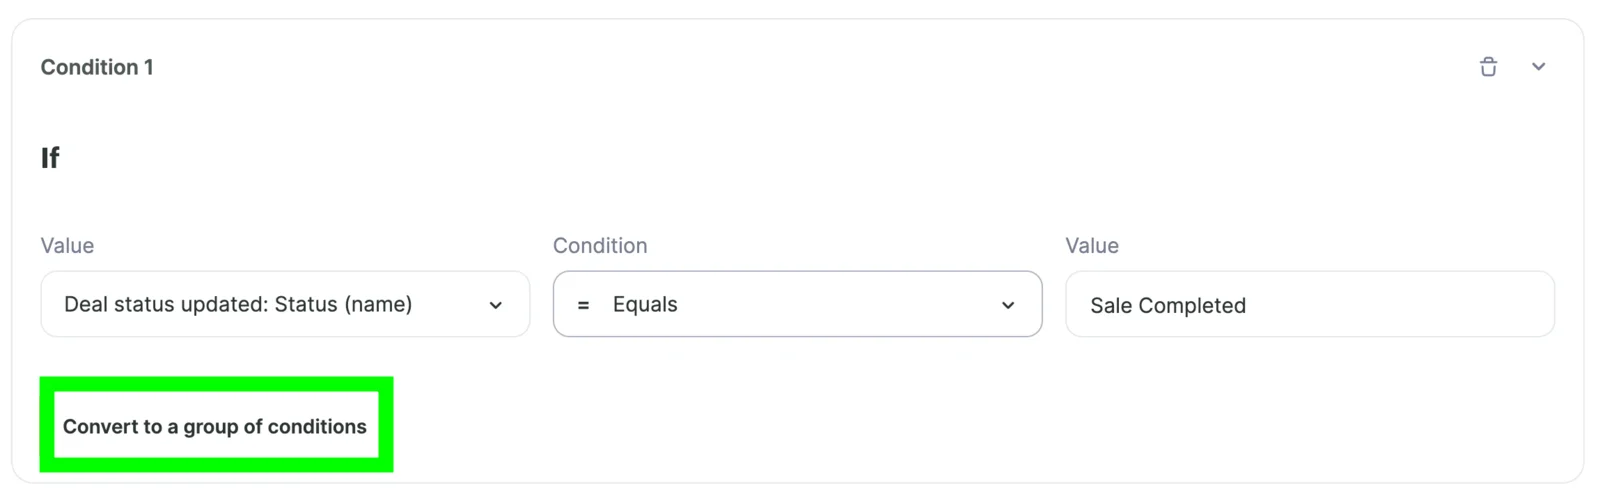
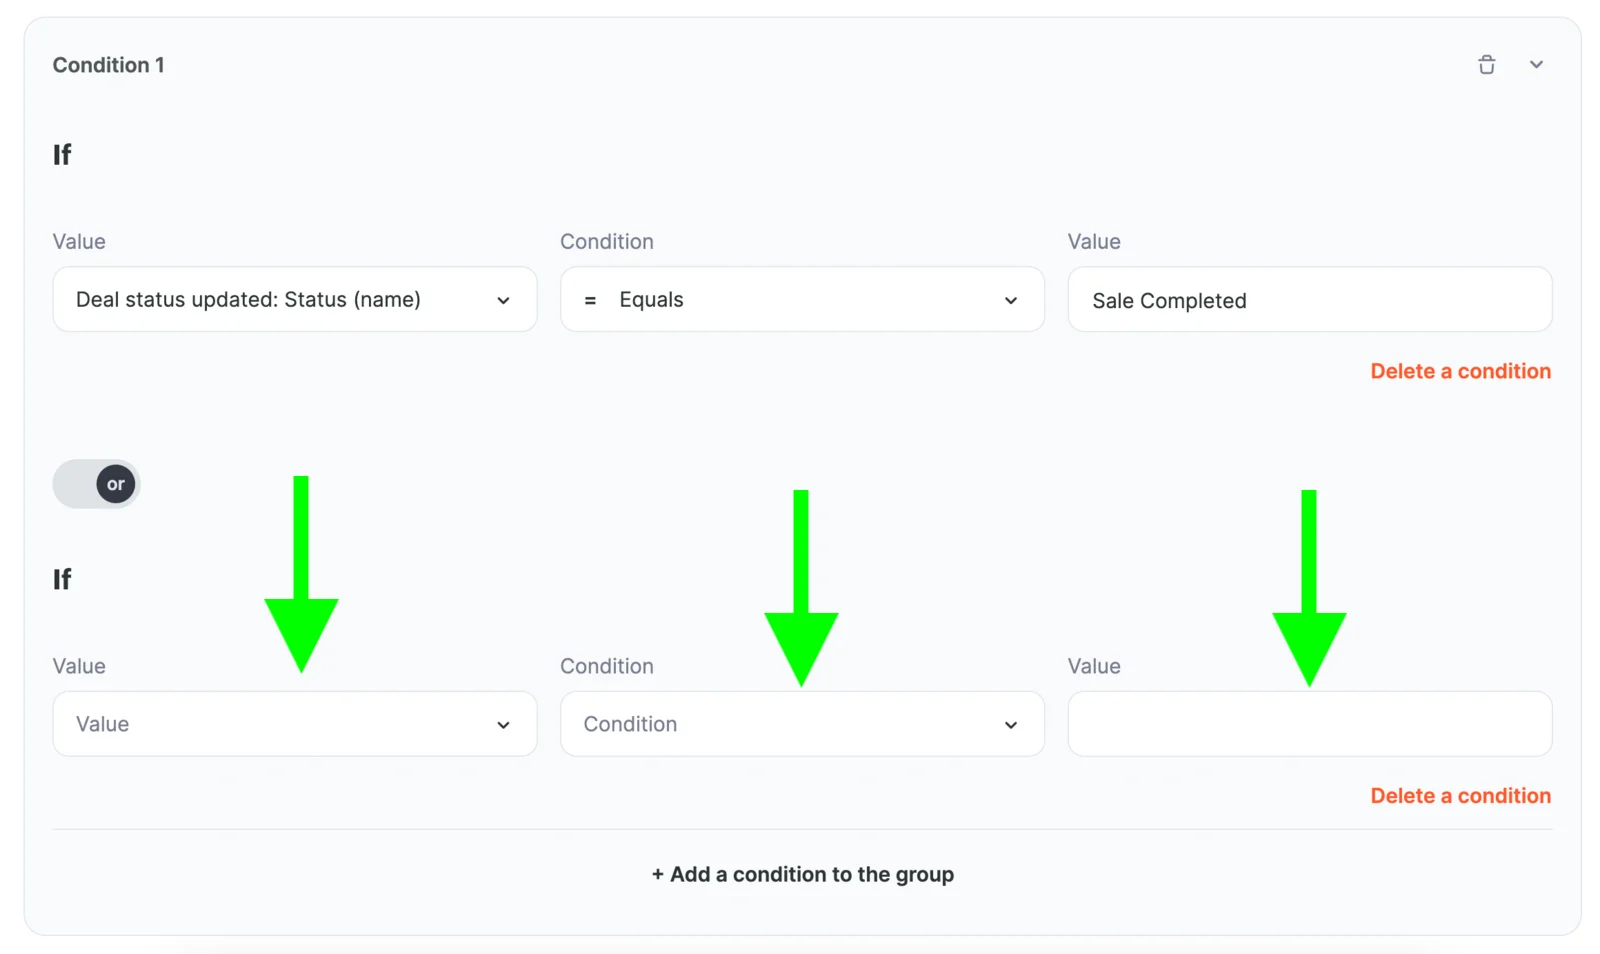
Consider a scenario where the trigger should fire when the transaction status is Sale Completed or Customer Exited. In this case, we can convert the condition to a group of conditions.
Click Convert to a group of conditions and configure an additional condition.
Even more flexible customization can be done using a combination of conditions.
Let's say we only need to receive information about large transactions with a budget of more than $1,000. To do this, just add one more condition to the already existing condition group.
For convenience, we can collapse the first group of conditions using the button in the upper right corner.
When setting up the new condition, we select Budget as the check field, set the condition type to Greater than or equal to, and enter the value in question. It is also important to remember to turn the key to the AND position.
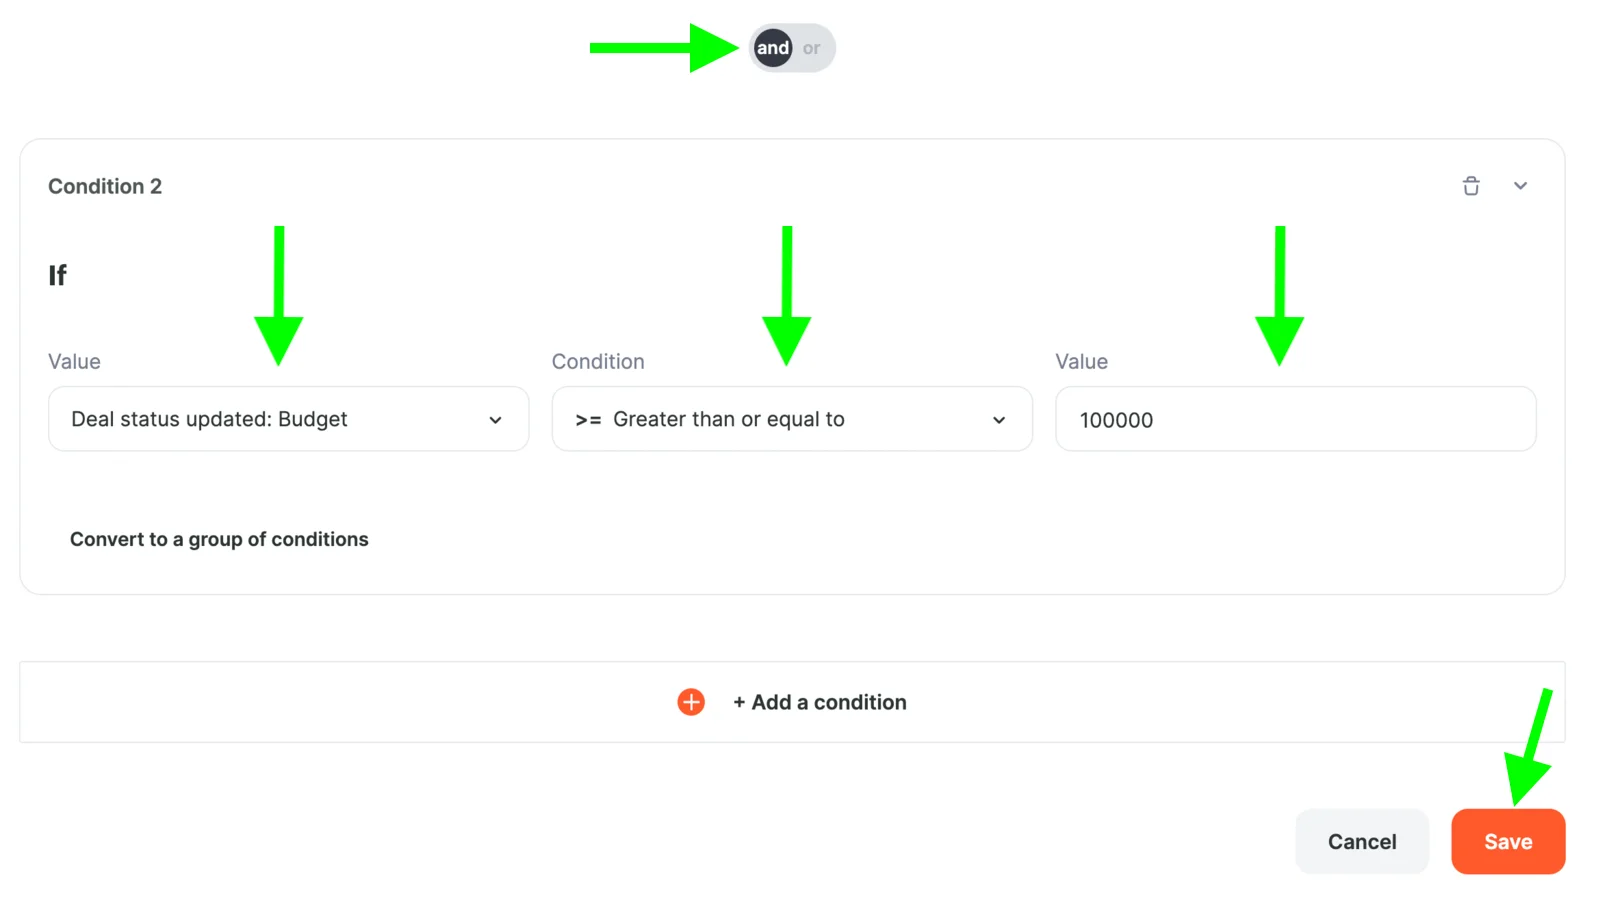
At the end, just click Save and that’s it!
Now, the link will only be activated for transactions with the status Sale completed or Customer left, when the transaction budget is Greater than or equal to $1,000.