


Running a business? Your email address is part of your first impression. Using a custom domain instead of a generic address instantly makes you look more credible and established.
In this article, we’ll discuss why you require a professional business email address (and not just name@gmail.com), go through setting up a domain name and creating a custom email address, and also cover how to create a business email via Google Workspace.
Key takeaways
- Having a custom domain for your business email address enhances credibility and professionalism.
- Benefits of using a business email include professionalism, trust-building, branding, scalability, and security.
- Creating a business email involves setting up a domain name, creating custom email addresses, and using hosting services.
- Testing the setup by sending and replying to test emails is crucial.
- Connecting your business email to Gmail, Outlook, or Apple Mail using IMAP/SMTP settings is recommended.
What is a business email address and why you need one
A business email address is an email that uses your company’s website domain instead of a free email provider. So instead of something like yourname@gmail.com, it would look like yourname@yourbusiness.com. It’s not your personal inbox — it’s tied to your business. This makes you look more professional, builds trust with customers, and keeps your work and personal life separate.
Whether you’re sending pitch emails, replying to customer questions, or running a B2B or B2C email marketing campaign, a business email address makes you look more credible and keeps your communication consistent – even if you’re a small business. Actually, small businesses reap the most benefits from making a professional, strong first impression.
Here are some key benefits of using a business email:
- Professionalism. It shows you mean business — yourname@yourcompany.com looks a lot more legit than a free Gmail or Yahoo address. We’d even go as far as saying that using a business email address is part of email etiquette.
- Trust. Customers are more likely to open and reply to emails from a branded address they recognize and trust.
- Branding. Every email you send reinforces your brand name. It’s a simple way to stay memorable and consistent.
- Scalability. As your team grows, you can easily create custom addresses for different roles (like support@ or sales@) under the same domain.
- Security. Business email providers offer better spam filters, multi-factor authentication, and admin controls to help keep your data safe.
If you don’t have a business email address, it can make you look unprofessional or even suspicious — your emails are more likely to be ignored, land in spam, or fail to establish brand recognition. Plus, for bulk email sending, using a proper domain-based email is essential to stay compliant with Gmail and Yahoo’s sender requirements and avoid deliverability issues.
How to create a business email on your domain
Follow our instructions here to create your own business email. This method gives you full control over your business identity, which is especially helpful if you’re planning to launch a website or connect your email to an email marketing platform or any other business software. Managing everything under one domain keeps things streamlined and professional.
-
Set up your domain name
Before you can create your business email, you’ll need your own domain name — something like yourbusiness.com. You can buy one through a hosting provider (such as Hostinger or GoDaddy) or a domain registrar like Namecheap. The process is quick and usually costs less than $20 per year.
Before buying, also check the renewal price, whether domain privacy is included, and who will control DNS records. DNS access matters because you’ll need it later for MX records and email authentication. Choose a domain that is close to your brand name, easy to spell aloud, and unlikely to be confused with another company’s trademark.
Here’s what it might look like inside your hosting account:

-
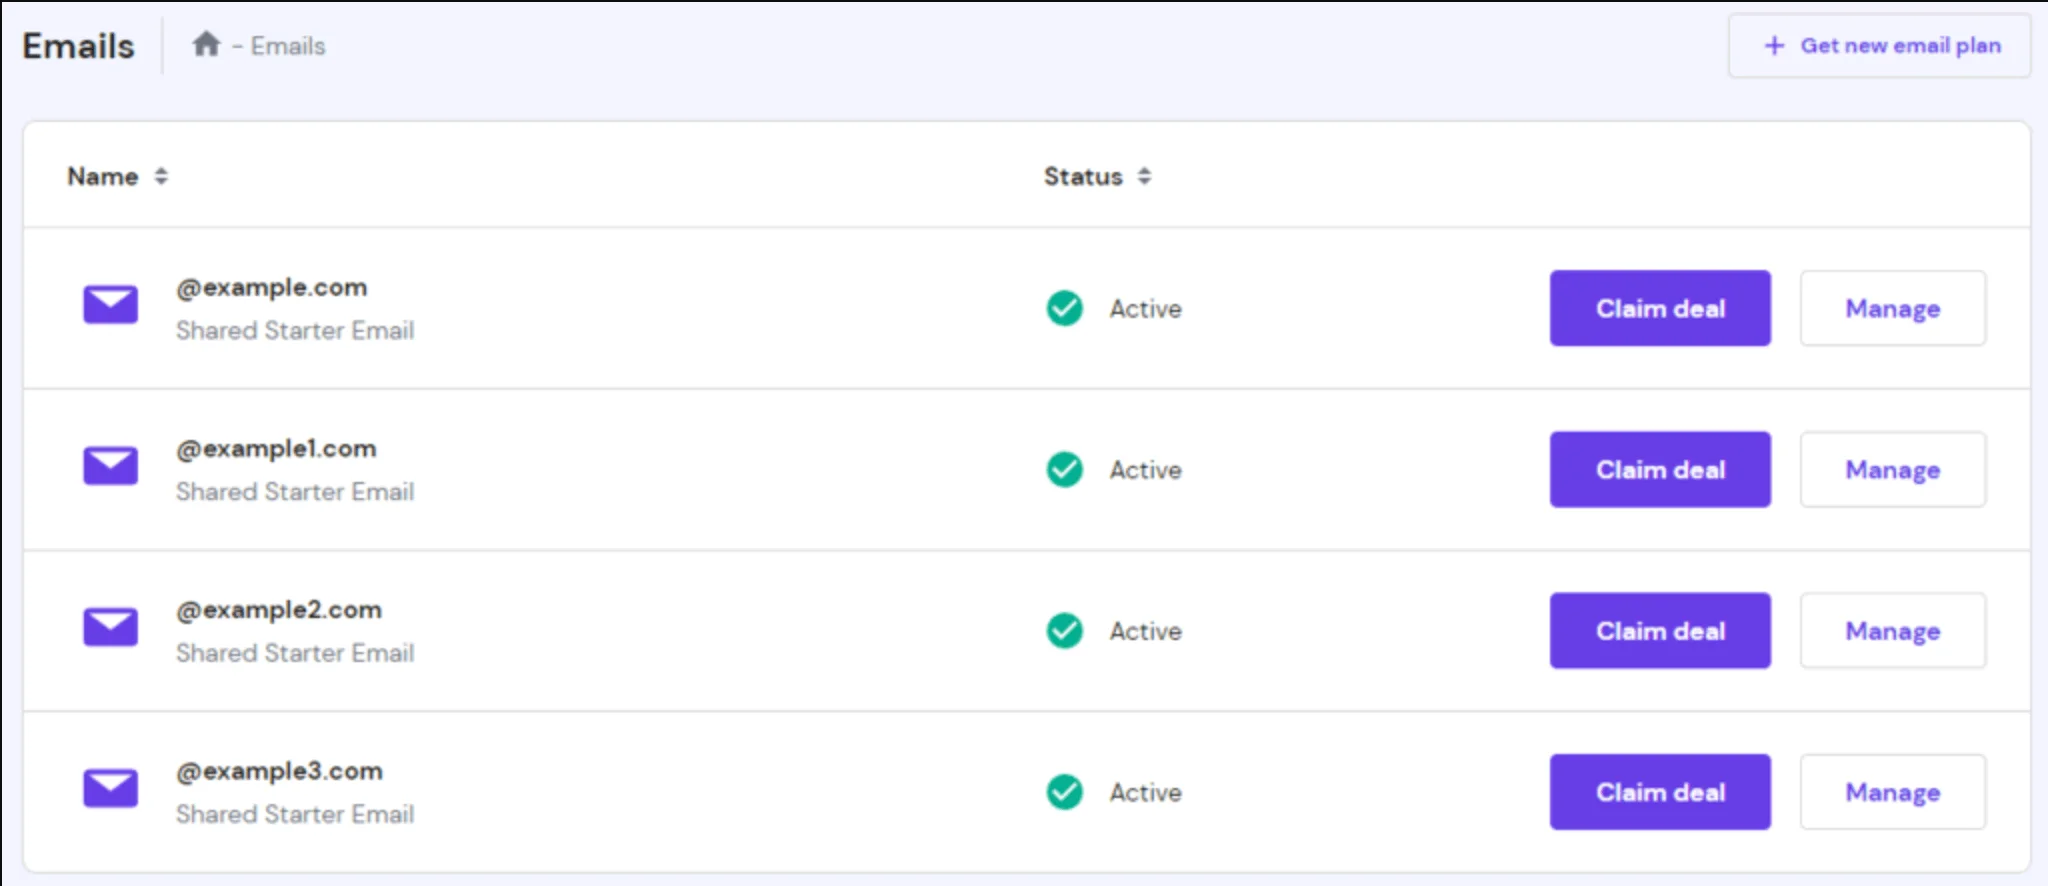
Go to the hosting account dashboard and create an email
Most hosting providers offer built-in email services, sometimes included for free. Log in to your hosting dashboard and look for the email or webmail section. Then, create a new email account linked to your domain.
Choose a professional name like hello@, info@, or firstname@yourdomain.com. Set a strong password, enable two-factor authentication if your provider offers it, and confirm the setup. You’ll now be able to access your inbox via the host’s webmail interface.
For shared work, create role-based addresses such as support@, sales@, billing@, or press@ instead of routing everything through one person’s inbox. This keeps customer conversations easier to hand off as your team grows.
Here’s what your webmail dashboard might look like once your domain-based emails are active:
Here’s a quick tip: some providers also let you create subdomain-based addresses (like support.mail.yourdomain.com), which is handy if you want to separate different functions.
-
Start using your custom domain email
Once you’ve created your business email address through your hosting provider, you can start using it immediately via webmail — a browser-based inbox included with most hosting services. Here’s what GoDaddy’s webmail looks like, for example:
To access your email, log in to your hosting dashboard, go to the email section, find your address, and then click something like “Access Webmail” or “Open Inbox.”
If you don’t love your hosting provider’s webmail interface — or simply want to check all your messages in one place — you can connect your business email to Gmail, Outlook, or Apple Mail using IMAP/SMTP (Internet Message Access Protocol/Simple Mail Transfer Protocol) settings. For example, here’s how to connect your GoDaddy professional email to Gmail. This allows you to send and receive messages from your custom domain right inside your everyday inbox.
Another very important thing you shouldn’t forget about is email forwarding. If you’re switching from a personal or older email address, forwarding helps you avoid missed messages. Most hosts allow you to redirect emails from your previous inbox to your new one.
How to test it’s working
To make sure everything’s set up correctly, send a test email from your personal address to your new business email. Check that it lands in your business inbox.
Then reply from your business email and confirm it shows up in your personal inbox.
Finally, check the spam folder on both ends to make sure your messages aren’t being flagged.
Before you use the address for campaigns, check the domain records too. At minimum, your domain should have the right MX records for receiving mail and SPF, DKIM, and DMARC records for sender authentication. These records tell inbox providers which servers are allowed to send on behalf of your domain and help protect it from spoofing.
Connect to your ESP
If you plan to use your new business email for email marketing, you’ll need to connect it to your ESP (Email Service Provider). Keep in mind: your ESP is for sending, not receiving. You’ll still check incoming messages (like replies) in your webmail or wherever your email is hosted.
Selzy is also an ESP. Here’s a quick guide on how to set it all up. Even if you’re not using Selzy for your email marketing needs, we recommend that you keep reading the article – your ESP’s flow is likely to be similar.
First, go to Settings, then Confirmed emails.

After that, click Add.

Add your new email address and a name.
The name can be your personal name or your company name — it’s what recipients will see in the “From” field when you send emails. You can always update this later in your settings.

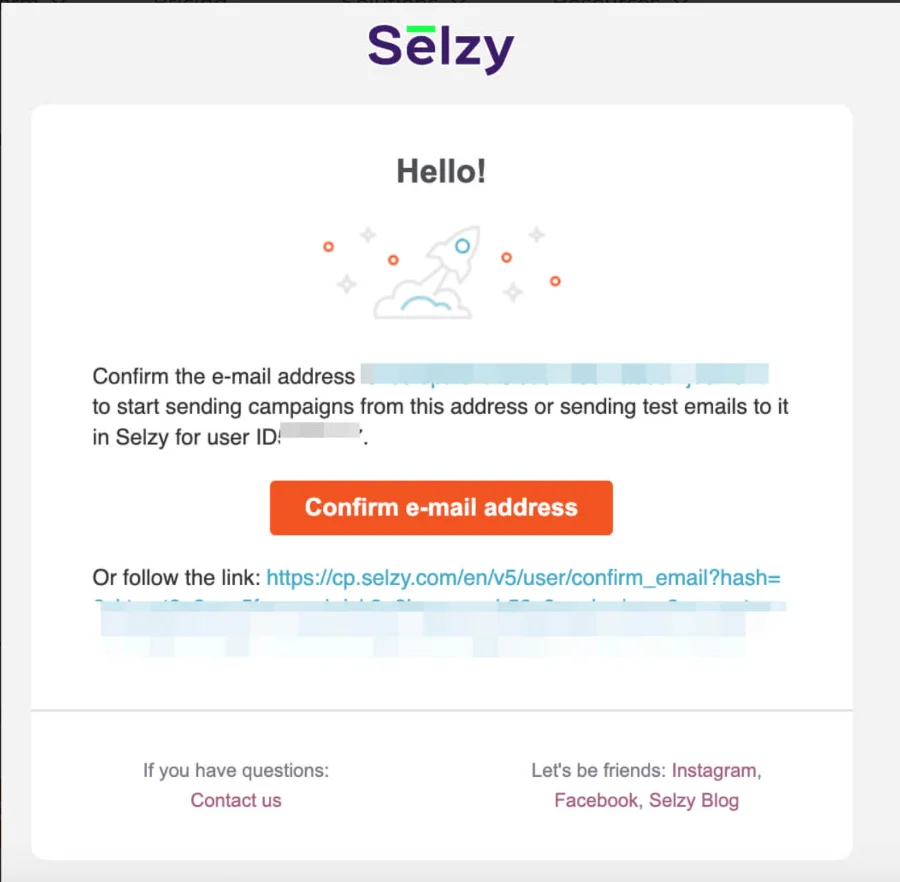
After that, you’ll receive a confirmation email from Selzy at your new address.

Go back to your webmail (or wherever your email is hosted), find the message from Selzy, and confirm your address.
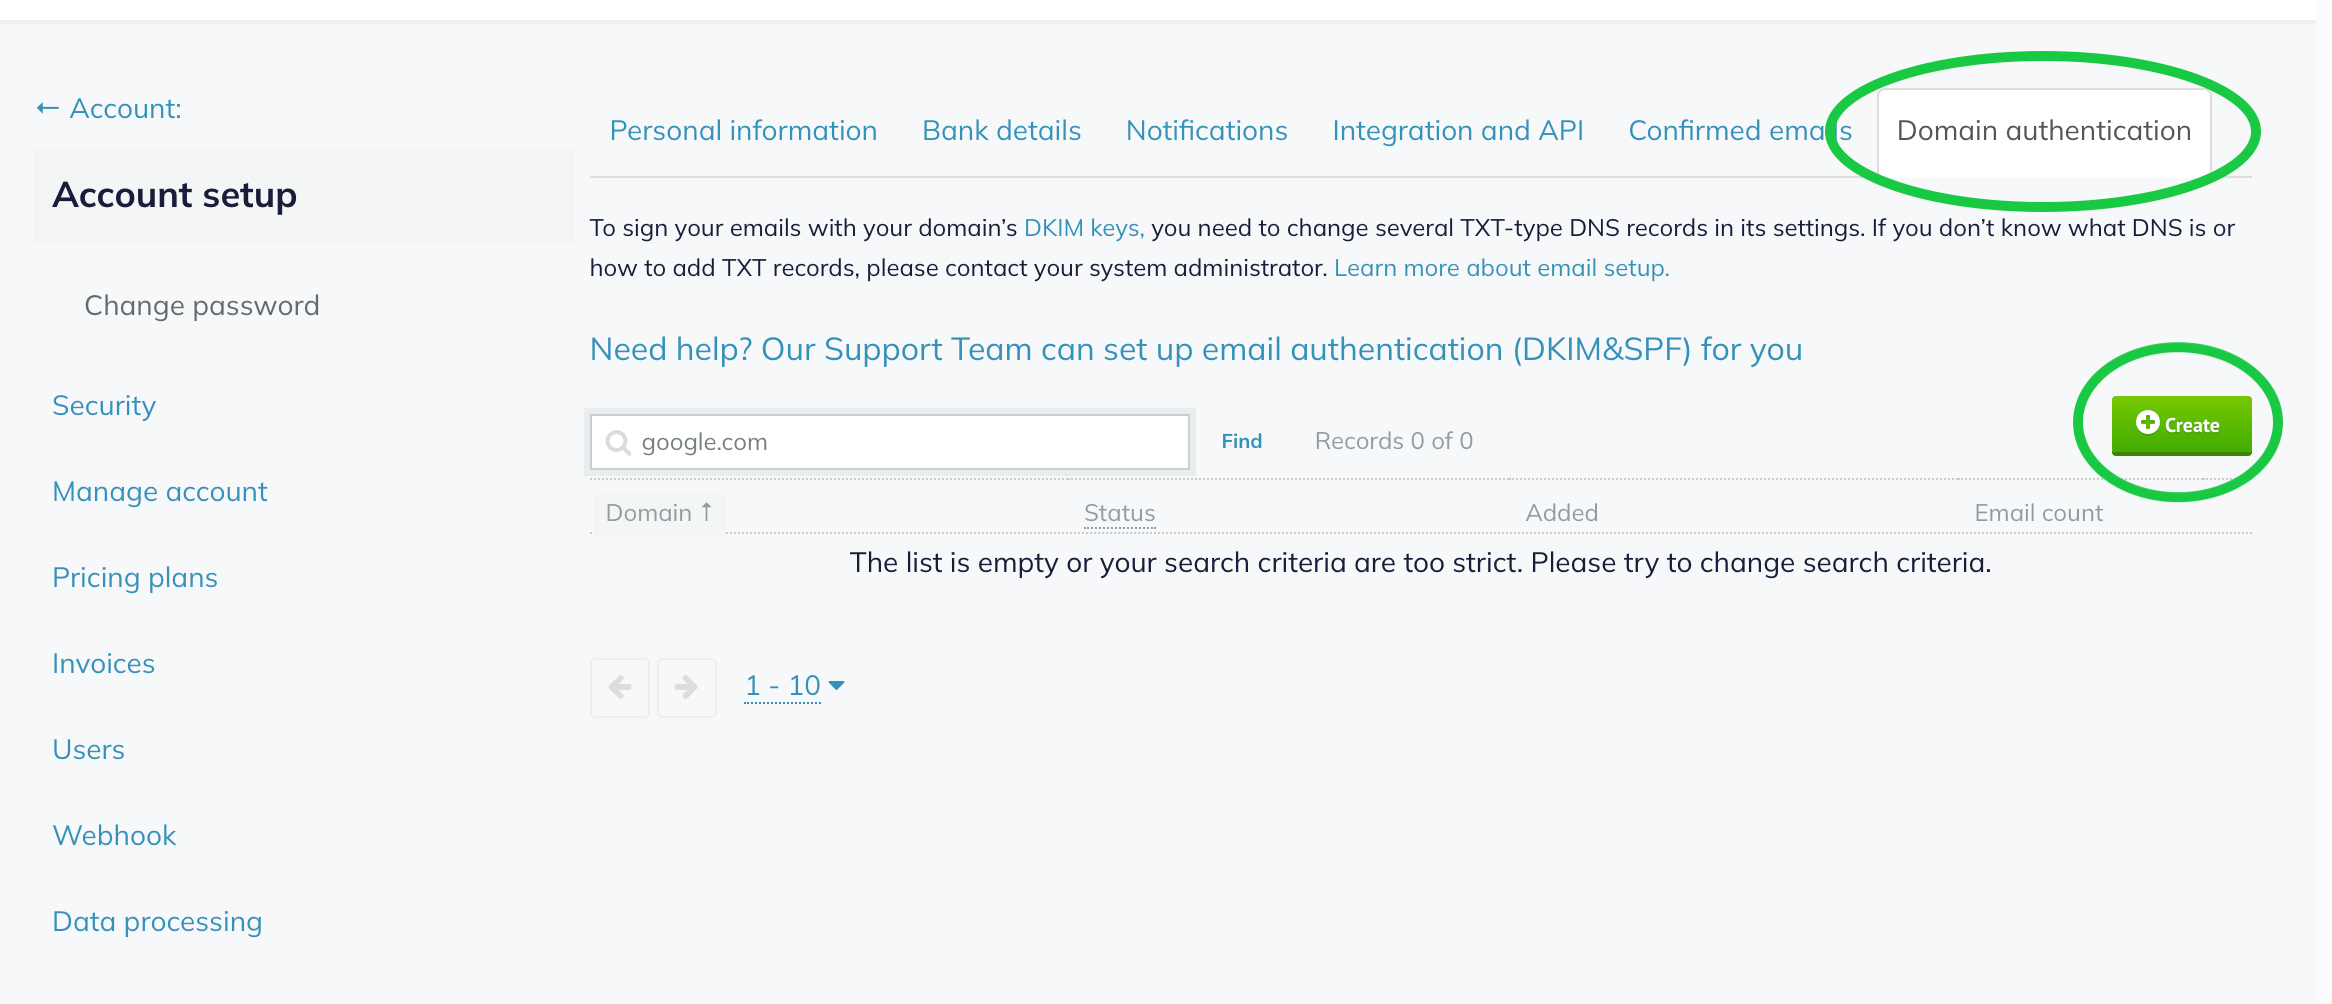
After this, you need to authenticate your address — this step is required to ensure your emails are delivered properly.
Email authentication (via SPF, DKIM, and DMARC) proves that you’re a legitimate sender and not a spammer or scammer. It helps your emails land in the inbox instead of spam and protects your domain from being spoofed. After you’ve confirmed your email, click on Domain authentication and then Create.
Follow these instructions on how to authenticate properly or let Selzy’s team help you.
If you’d rather not deal with the technical setup yourself, platforms like Selzy offer paid assistance — for example, they can authenticate your email domain, set up corporate mail, or prepare and upload your contact database for a small one-time fee.

Creating an email with a custom domain using Google Workspace
Earlier, we touched upon how you can link your business email to Gmail. This is something different. With Google Workspace, you can set up your custom domain email directly through Google, meaning Gmail becomes your actual email provider, not just a place to check messages.
You’ll be using Google’s infrastructure to send, receive, and manage email from your domain — all within the familiar Gmail interface.
Why would you want to use Google Workspace for your email domain, anyway?
At this point in the article, you may be wondering — if I can connect my custom domain to Gmail using IMAP and SMTP as it is, why bother with Google Workspace? The answer is that when you do that, you only get the Gmail interface — your hosting provider is still in charge of things like deliverability, uptime, storage,and spam filtering.
With Google Workspace, you get full Gmail and Workspace functionality plus Google’s infrastructure: better deliverability, built-in security, reliable uptime, and access to the entire Workspace suite — all under your own domain. Its Business Starter plan starts at $7 per user/month on an annual commitment and includes 30 GB pooled storage per user, secure custom business email, and Gemini AI assistant in Gmail. It’s a paid service, but it’s easy to manage, reliable, and familiar to use.
It’s also a great option if you don’t need a website but still want a professional business email — no hosting account or web builder required. Just your domain and Workspace.
-
Get a Google Workspace account
To get started with Google Workspace, first, you need an account. Head to Google Workspace, click Get Started and fill everything out.

If you already have a domain (like from Namecheap or GoDaddy), choose Set up using your existing domain. If you don’t have one yet, Google lets you buy a new custom domain during setup and handles all the backend for you.
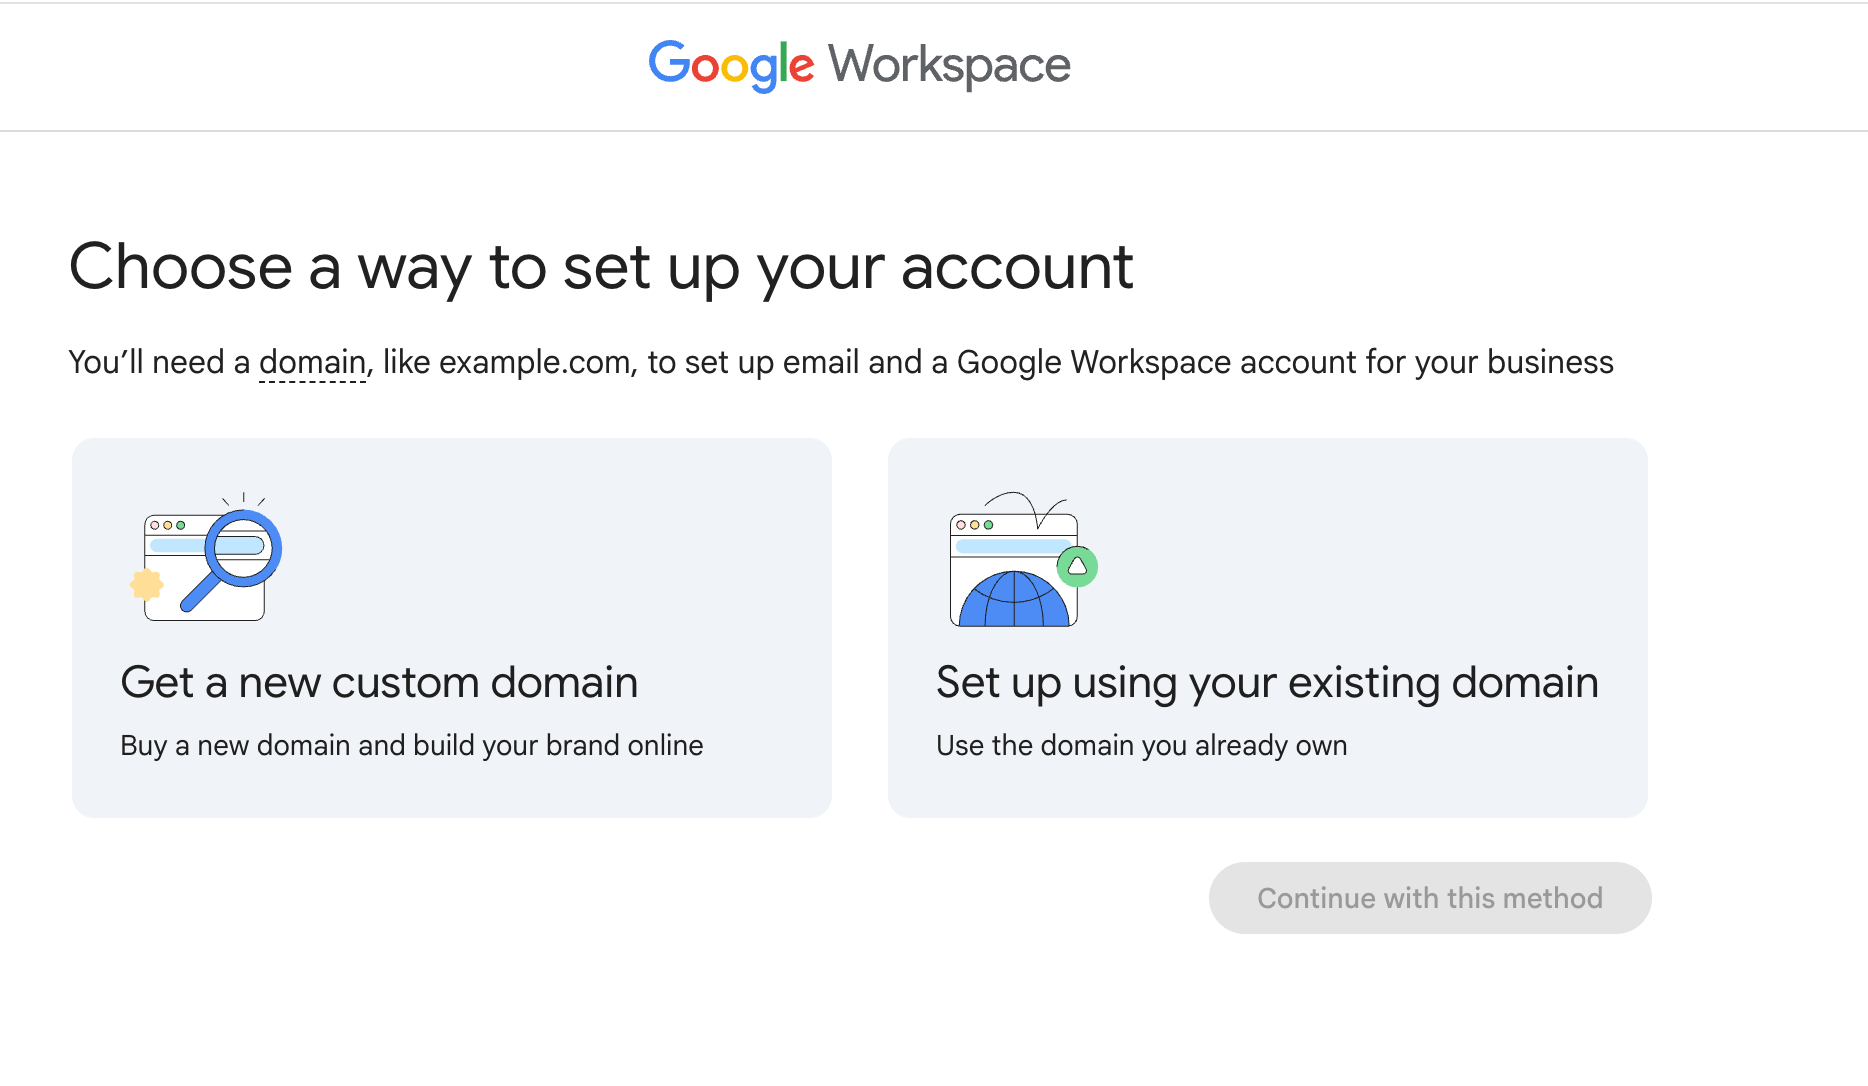
Pick whichever option suits your needs better and follow Google Workspace’s prompts.
-
Connect your Google Workspace account to your domain name
Once you’ve selected your domain — either a new one through Google or one you already own — Google will ask you to verify that you own it. If you bought your domain through Google, this step is handled automatically in the background. No further action is needed.
If you’re using an existing domain, Google will walk you through verifying it though its Admin Panel.
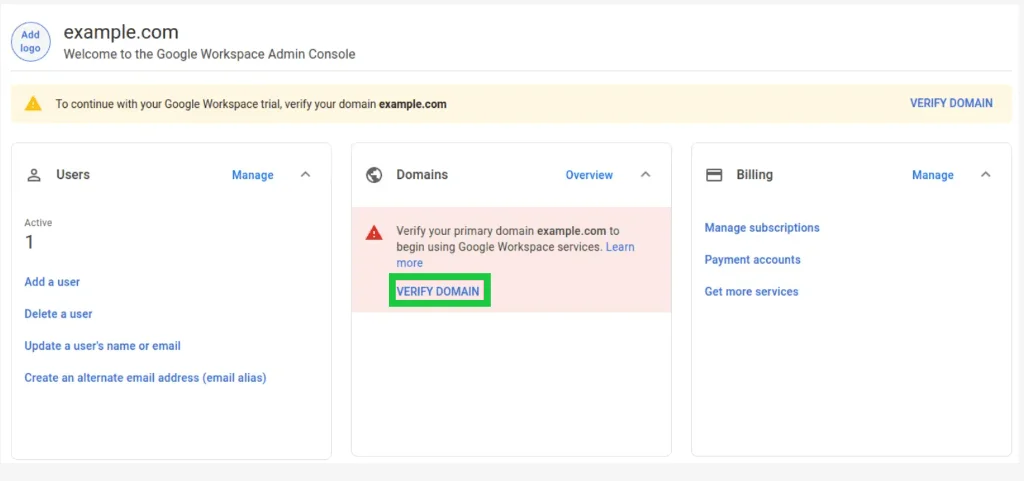
You’ll be welcomed to the console. Click on Next.

Keep following the instructions from Google to verify your domain.
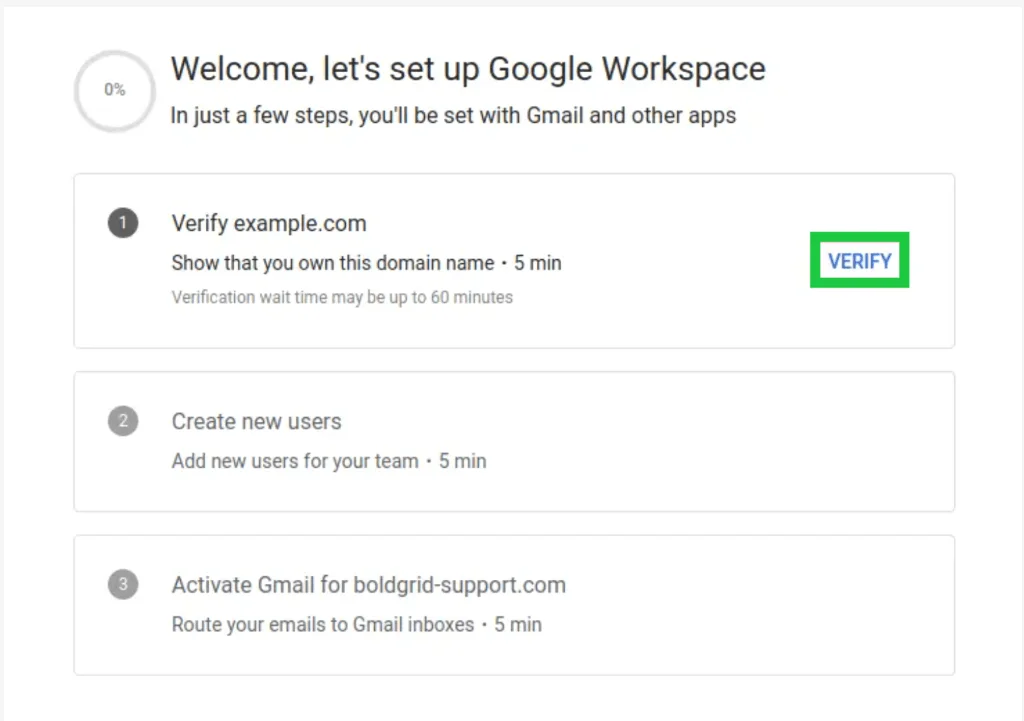
As you progress through the setup process, Google will give you a unique TXT record — this is a line of text that proves you own your domain. Keep it safe.
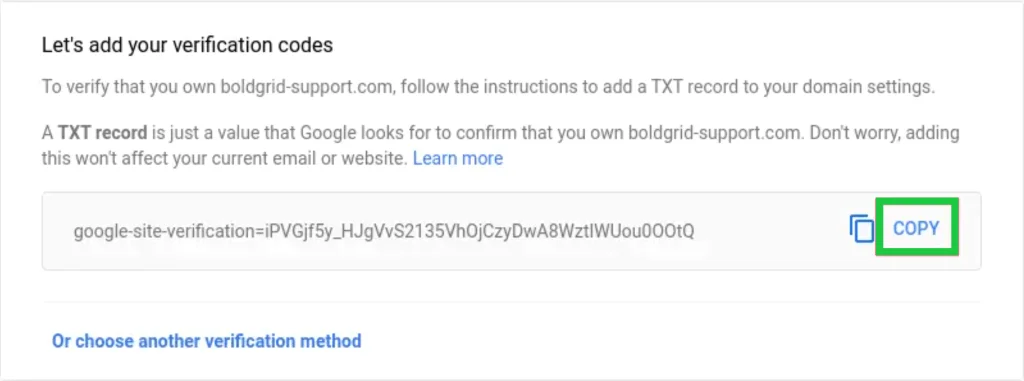
You’ll need to copy your TXT record and add it to your domain’s DNS (domain name system) settings.

Where you do this depends on your domain host (like GoDaddy, Namecheap, or others). Google has custom instructions for many popular domain registrars: it will detect your host and give you step-by-step instructions for your specific provider — no guesswork needed.
Once the record is added, return to the Admin Console and click Verify. It may take a few minutes to an hour for verification to complete. If this part feels too technical, many domain providers (and Google Workspace) offer support to walk you through it.
-
Configure domain MX records
Once your domain is verified, the final setup step is to configure your MX (Mail Exchange) records. This instructs the internet to send all emails for your domain to Google’s mail servers.
If you bought your domain from Google, this step is automatic.
If you’re using a third-party domain provider, Google will guide you through updating your MX records. This involves:
- Logging into your domain host’s DNS settings.
- Deleting existing MX records.
- Copying and pasting the new records from Google.
Don’t worry — Google detects your domain registrar and gives step-by-step instructions.

This is what DNS settings might look like in your domain provider dashboard – in this example, we’re looking at Namecheap’s advanced DNS settings.
Once you’ve saved the new records, return to the Admin Console and click Activate Gmail.
-
Start using your email
Once everything is connected and active, you’re ready to start using your new email address. Log in at gmail.com with your business address to send and receive email from your custom domain and access all Google Workspace tools.
You can also connect your inbox to your phone, desktop apps like Outlook, or other platforms — like your email marketing service — if needed.
Alternatives to Google Workspace
Google Workspace isn’t your only option for setting up a professional email on a custom domain. If you’re looking for something more affordable or better suited to your needs, here are a few popular alternatives worth considering.
| Name | Cheapest plan | G2 Rating | Notes |
| Zoho Mail | Free for up to 5 users. | 4.4/5 | Part of the larger Zoho ecosystem, which includes CRM, project management, and other business tools. Ad-free, budget-friendly, and ideal for small teams that may grow into a full suite of tools. Note that its free plan does not include IMAP, POP, or ActiveSync and is available only in select data centers. |
| Microsoft 365 Business | $6 a month when paying annually. | 4.5/5 | Full Outlook integration, 1 TB cloud storage, and access to Office web apps. A solid choice for Microsoft fans. |
| Neo Mail |
Starts at $2.49/mailbox/month | 4.7/5 | Neo Mail includes a free co.site domain and a free one-page website while the subscription is active. You can also connect an existing domain. It is designed for freelancers, solopreneurs, and small teams that need a simple, fast, and professional online identity without technical setup. |
| Proton Mail | Paid plans only. Mail Plus supports 1 custom email domain; Proton Unlimited supports 3 custom email domains.
Custom domain support is not included in the free plan. |
4.4/5 | Focused on privacy and security, with end-to-end encryption and a clean interface. Good for privacy-conscious businesses. |
Best professional email address ideas
Here are some practical tips for creating a business-appropriate email address:
- Stick to standard formats like firstname@, first.last@, or info@. These are easy to read and instantly look professional.
- Avoid random numbers unless absolutely necessary — they make your email harder to remember and less credible.
- Use dots or hyphens to separate words, not underscores. Underscores are harder to see and type correctly.
- Create role-based addresses (e.g., support@, sales@, billing@) for teams or departments, not just individuals.
- Keep it short and simple. Long addresses are error-prone and look messy on business cards or email signatures.
- Stay consistent across your company. Use a naming convention and stick to it. It builds trust and reinforces your brand.
FAQ
What is a business email address?
A business email address uses your company’s website domain instead of a free provider, such as yourname@yourbusiness.com instead of yourname@gmail.com. It is tied to your business, not your personal inbox, which helps you look more professional and keeps work and personal communication separate.
Do small businesses really need a custom domain email?
Yes. A custom domain email helps small businesses make a stronger first impression, look credible, and build trust with customers. It also reinforces your brand in every email and can improve deliverability compared with a generic free address.
What DNS records do I need to set up a business email?
You need DNS access because it is required later for MX records and email authentication. When choosing a domain, make sure you control the DNS records so you can connect and manage your business email properly.
Is Google Workspace required to create a business email?
No, Google Workspace is one way to create a business email, but the article also explains how to set up a domain name and create a custom email address on your own domain. The key point is that your email should use your domain and be managed in a way that supports your business setup.
Can I use a business email with an email marketing platform?
Yes. The article says using a domain-based business email is helpful if you plan to connect your email to an email marketing platform or other business software. Managing everything under one domain keeps your setup streamlined and professional.
Final thoughts
Setting up a custom domain email might take a bit of effort, but the payoff is worth it — you get a professional address, full control, and reliable performance. Whichever method you choose, the right setup helps your business look legitimate from day one.
Keep the final checklist simple: buy or connect a domain, create the right individual and role-based addresses, protect every mailbox with strong passwords and two-factor authentication, confirm MX records, authenticate the domain with SPF, DKIM, and DMARC, and send a test email before using the address in campaigns.
