Here is your step-by-step guide on how to change your email marketing service and switch from eSputnik to Selzy.
Import your contact list
No matter how large your contact list is, you can import it from eSputnik to Selzy fast.
Let’s begin with the export of your contacts. To do it, go to the Contacts tab and choose All Contacts. Then, click on the Export button and choose CSV.

If you want to export emails only, leave the toggle switch active. If you need all information about your clients, toggle the switch. Then, click on the Export button.

The service will send the file to your email address. Follow the link to download the list.

Now it’s time to add the contacts to your Selzy account. Log in to your account and find the Contacts tab. Click on the Add Contacts button.

In the opened window, choose Import Contacts. Then, select the CSV file you have downloaded following the eSputnik link.

Then, Selzy will offer you to choose the fields you would like to import. All you need to do is to map the right windows.

Create a new list for the imported contacts or add them to an existing one. Then, click on the Continue button.

Done! Now you can send a campaign.
However, we recommend that you initiate a contact check-up with Selzy. It will help correct typos in email addresses, find inactive subscribers, and segment your contact list.
Clearing the contact list of inactive contacts
Import messages and templates
This article describes the old Selzy email builder. You can find information about key features of the new email builder in the overview article available in English.
If you need help with the functionality described in this article but in the new builder and can’t find it in the overview article, please contact our Support Team.
Selzy Support Team is available for all users 24/7.
You can import both text and HTML messages to Selzy.
Text messages. You can send copies of text messages to your inbox. Go to the Messages section and choose the right message to create your email.

Then, send the message to your email or send there a test message.

HTML messages. You can copy the HTML code of your email manually and save it on your computer. To do it, open the email and go to the code editor.

In the new window, select the whole code (hot buttons Ctrl+А come in handy here) and copy it. Then, save it on your computer.
Next, go to Selzy. Create a campaign, choose the Start From Scratch option — Your Code. Insert the code and send the email.
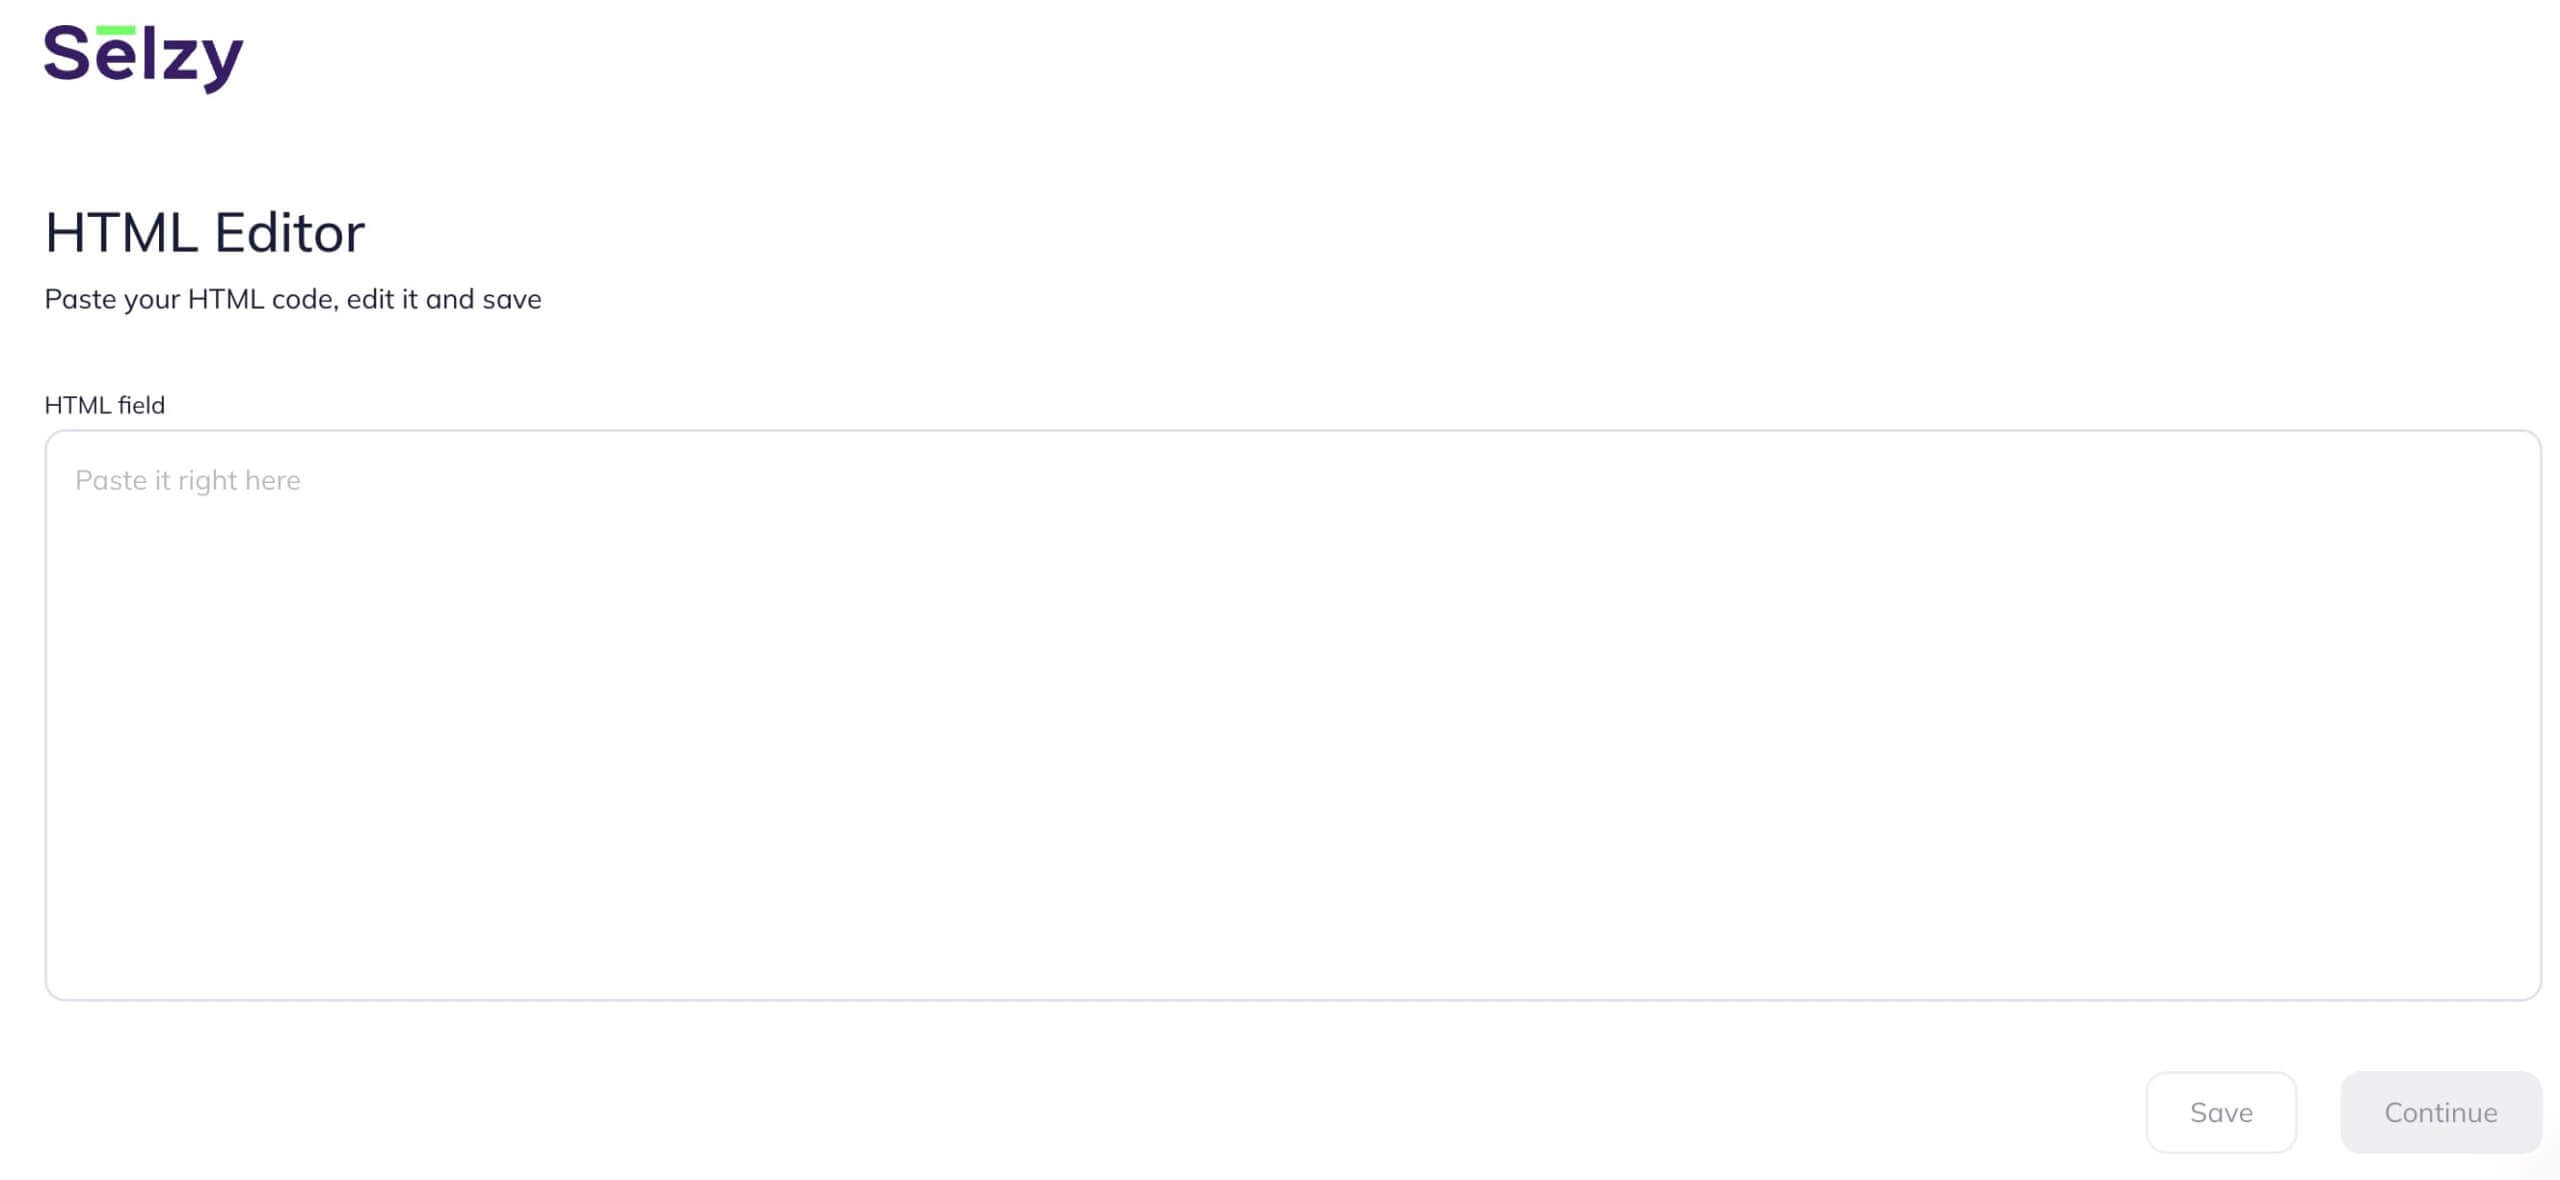
Due to the specifics of HTML code, the rules of formatting are different in eSputnik and Selzy. That’s why the layout in the exported document can sometimes go wrong. To avoid any issues, we recommend that you check the way your email looks and send a test email to your own address before sending your campaign to others.
You won’t be able to export emails created in the eSputnik block builder. However, you can create new emails with ready Selzy templates. They fall into various categories according to the niche and format, so you’ll easily find the ones you need.
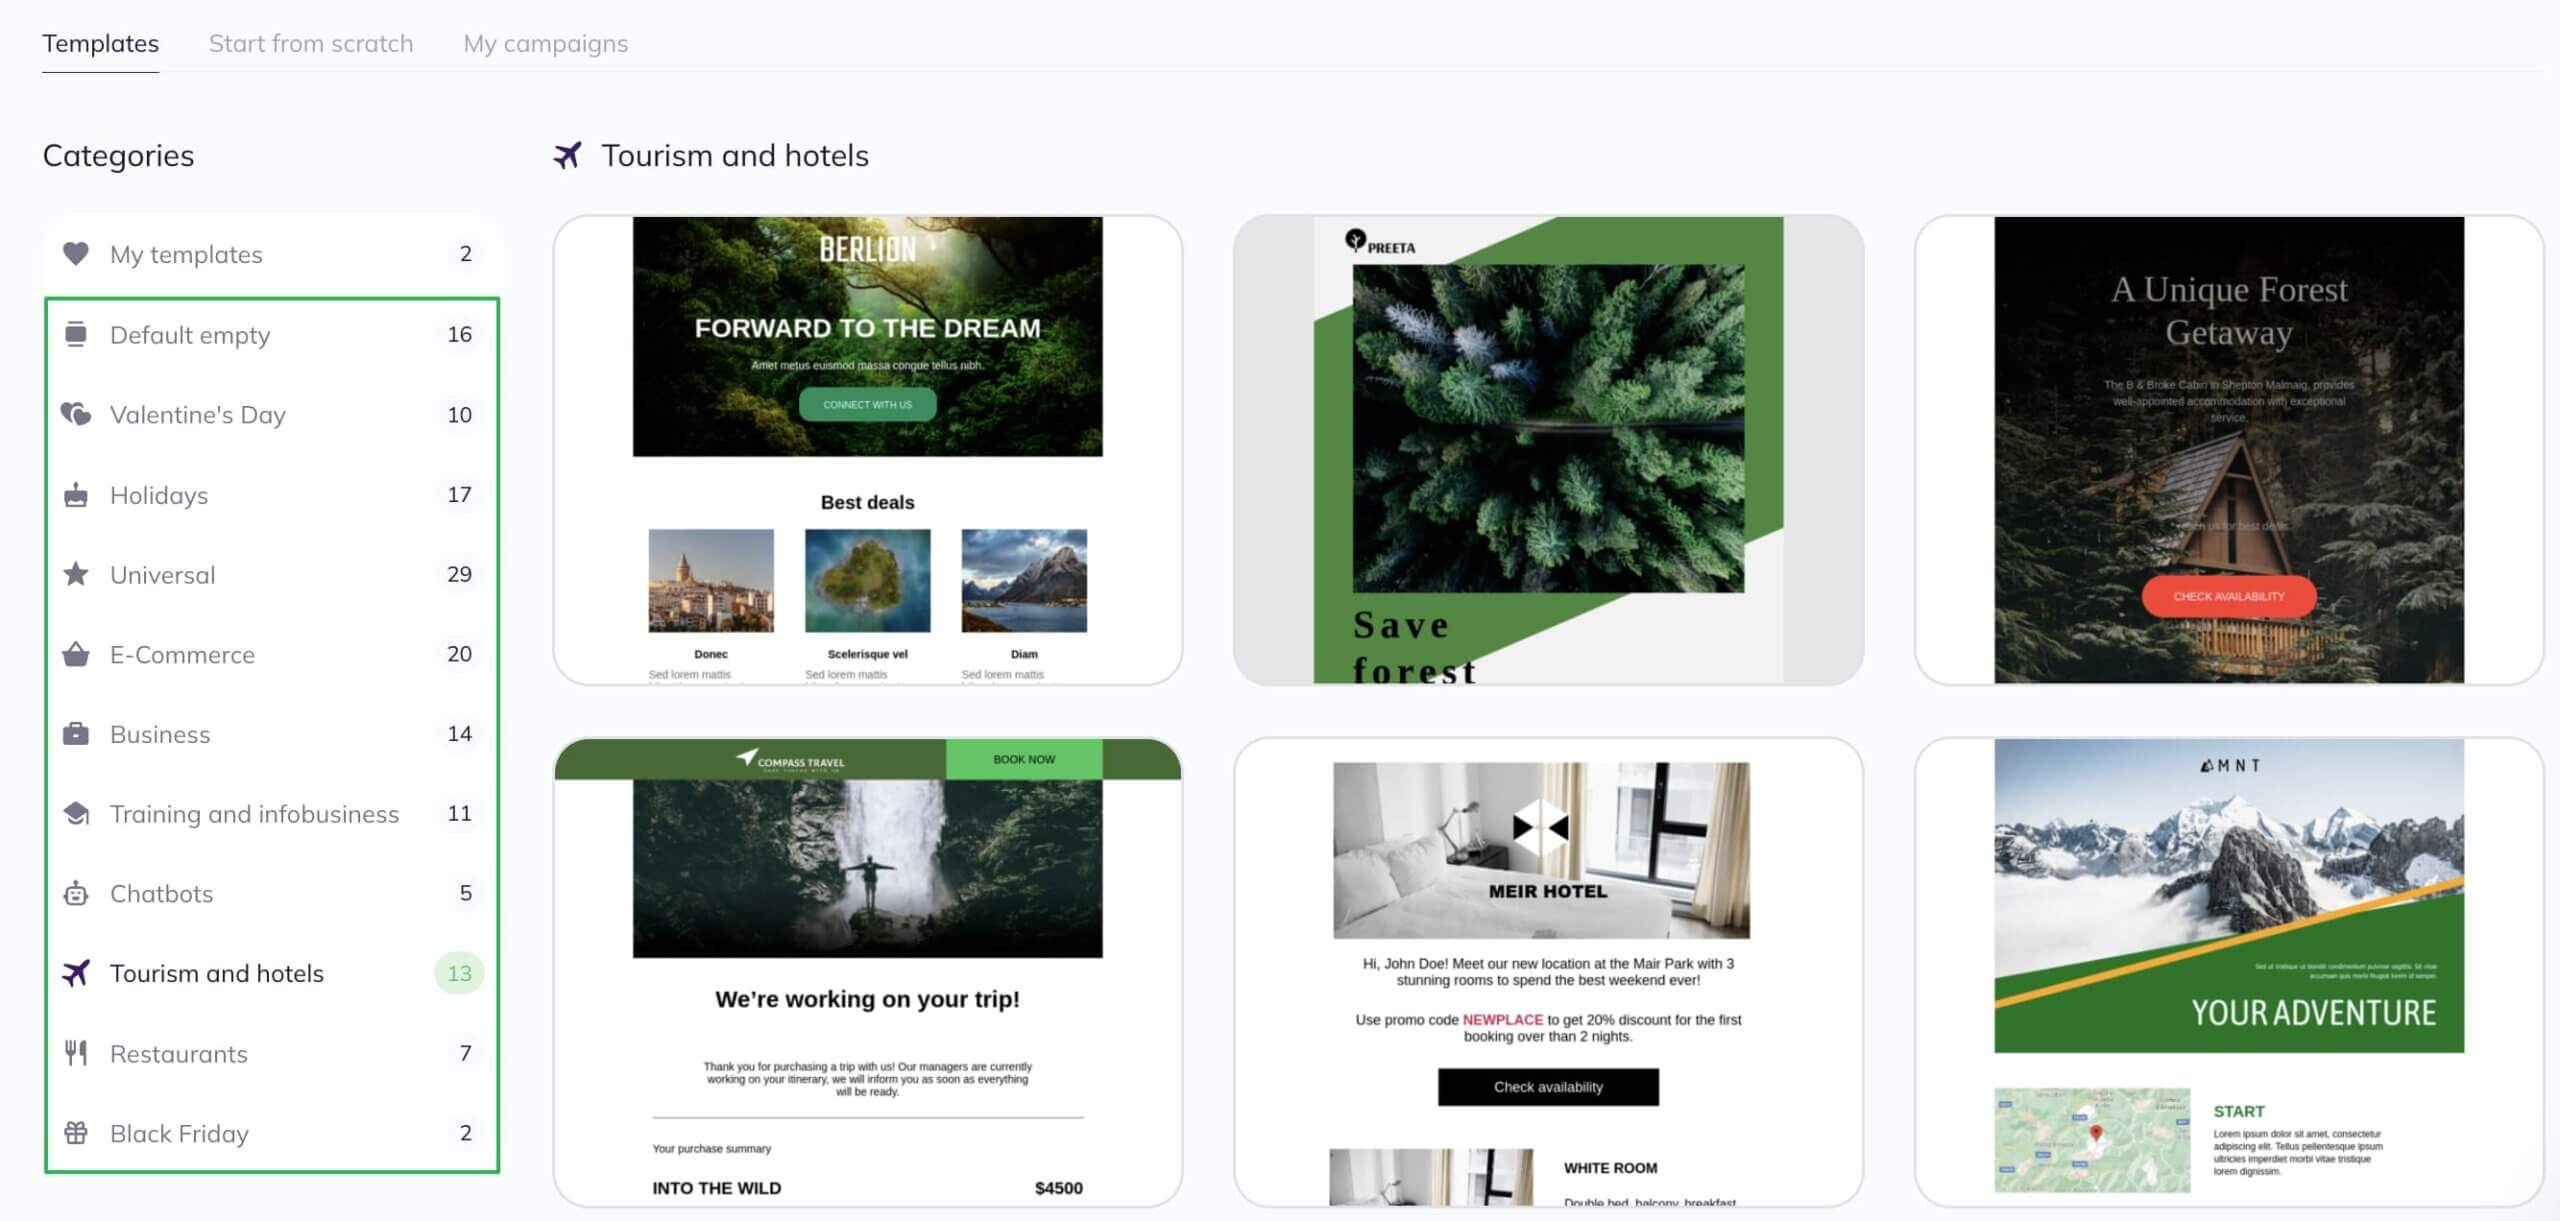
Import signup forms
To correctly set up signup forms in your Selzy account, you need to change the code on the website or revise the integration settings.
Choose Tools — Subscription forms — Create form.

In the block builder, create a template. It’s easy: all you need is to drag and drop ready blocks, edit the text, add pictures.
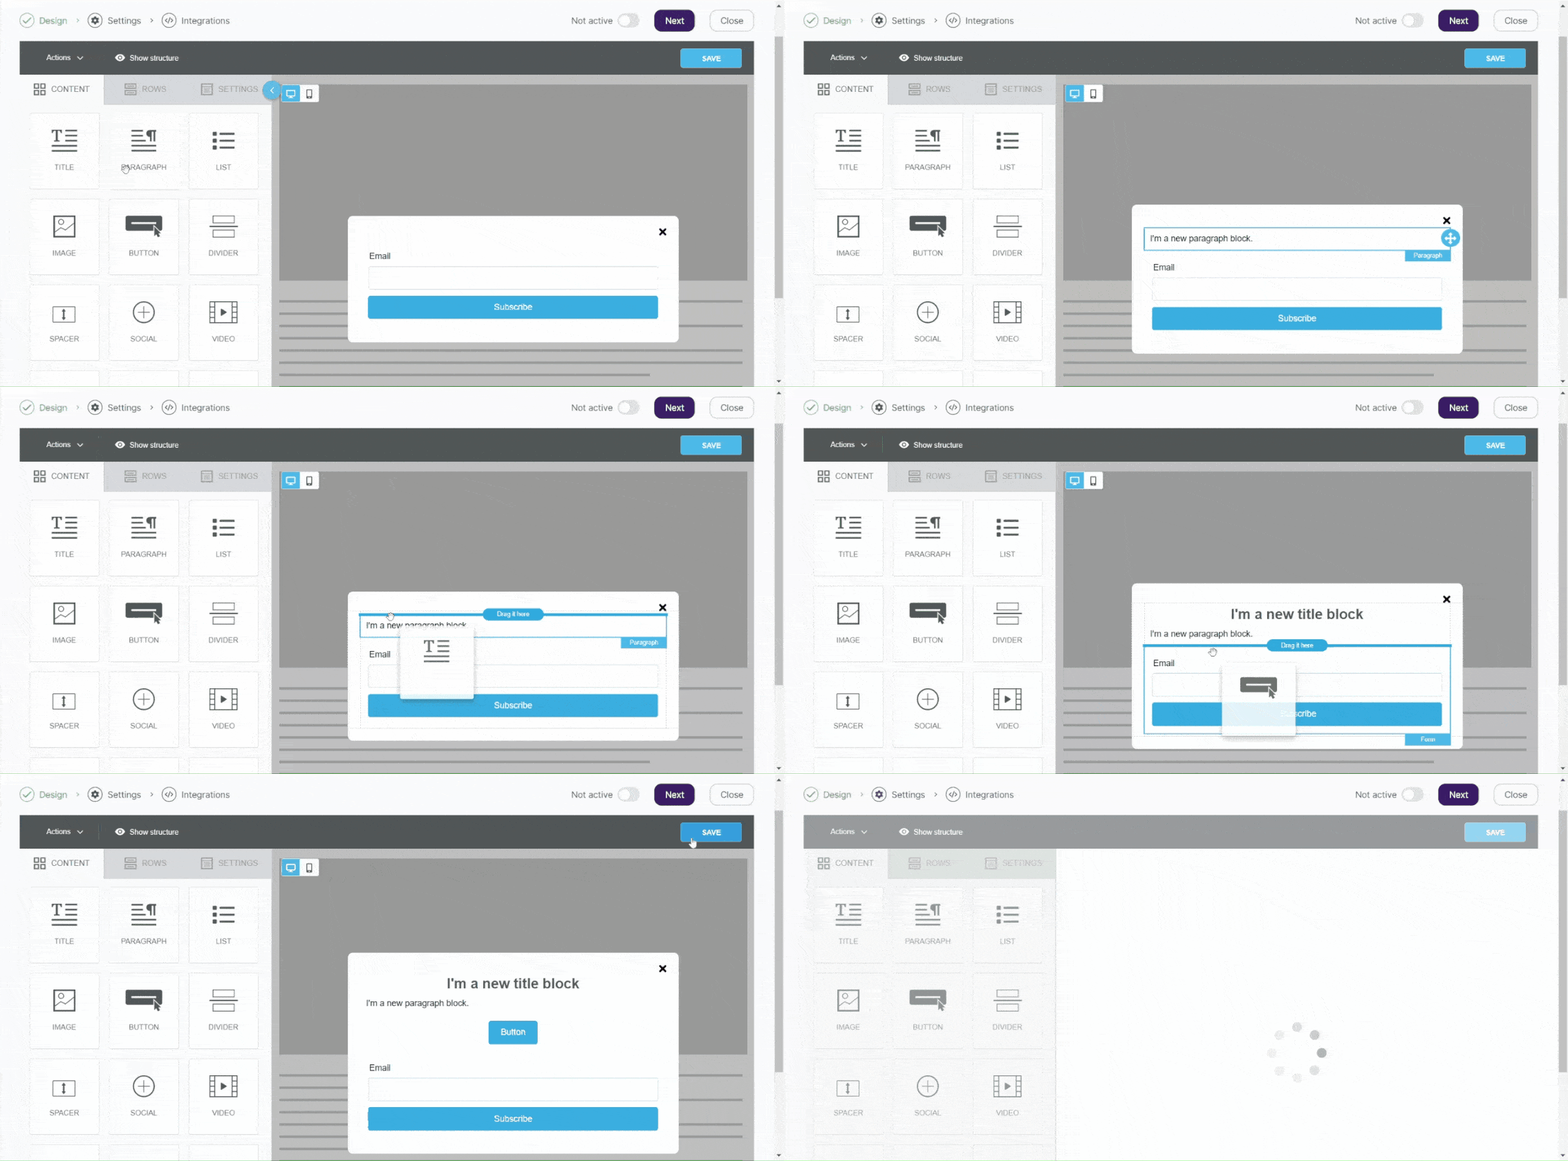
Learn how to create subscription forms in Selzy.
Then, copy the form's code and insert it into your website.
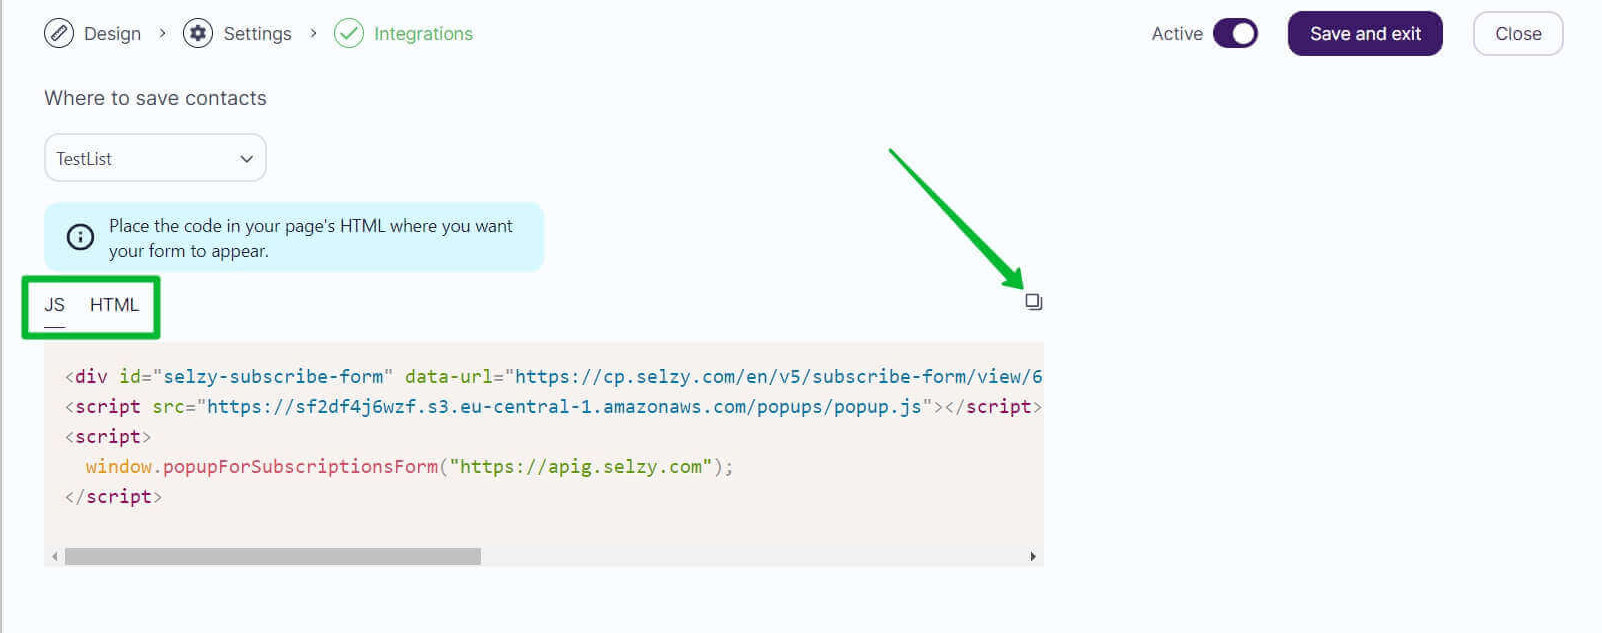
Copy and insert the new code in JavaScript or HTML on your website.
Don’t forget to delete the eSputnik signup code from your website or deactivate all integrations with outer form hosting services.
Set up integrations
In Selzy, you can find ready-made integrations with various services. You can integrate with CRM and CMS systems, website builders, online stores, and service connectors.

If there is no integration you need in the list, you can set it up yourself via API.
Create automations
Just like with eSputnik, with Selzy you can create automated email series. They will react to triggers and send scheduled messages to users.
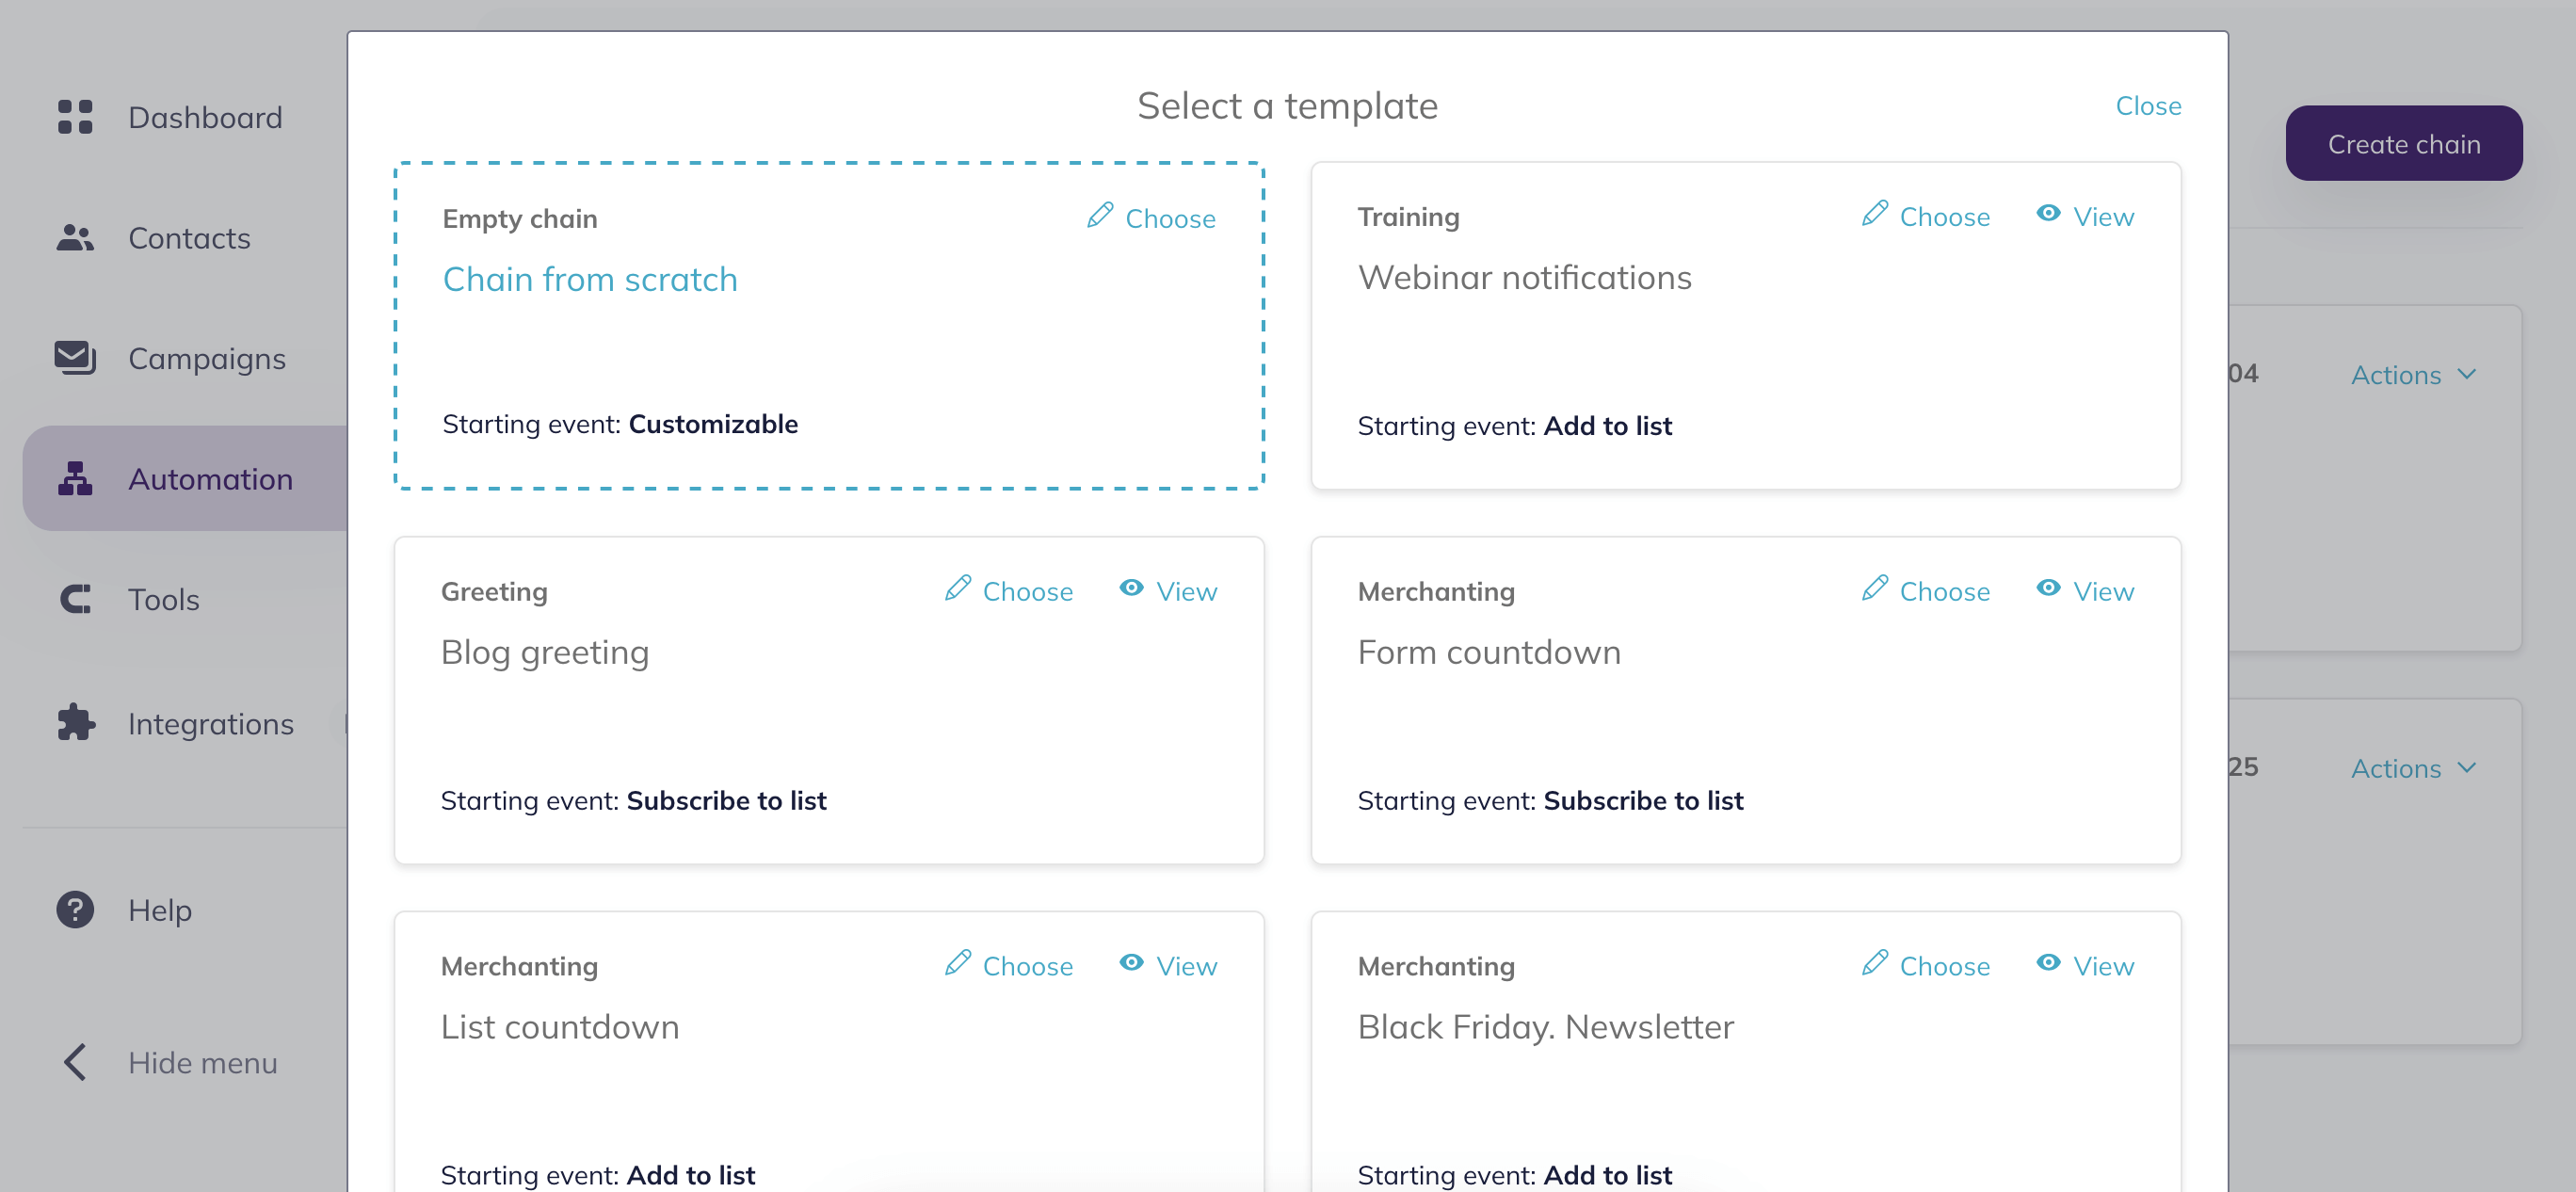
In Selzy, there are many ready-made scenarios for email series like reactivation emails, webinar emails, or a Black Friday selection of goods. Besides, you can create your own email series as well.
Useful links:
Creating and sending a campaign in Selzy
Collecting, importing, and segmenting contacts in Selzy


