Contact segmentation allows you to single out the target audience from the general contact list. For example, you can choose to send your next email campaign only to women, people in a specific location, or those who engaged with your past email campaigns. You can also combine different criteria.
With Selzy, you can use either of two ways to segment your contacts:
Segmentation from contacts lists is most helpful when you need to save a segment for later use. For example, you have a complex segment of ten conditions. To avoid setting it up manually every time you send an email, save the segment and use it at any point.
In another scenario, you might want to choose segmentation from contacts lists when you need to organize your contacts. For example, select contacts with a specific tag and move them to a new list.
However, if you need to create a segment for a single campaign, we recommend using the campaign creation flow.
Segmenting contacts from contacts lists
You can set up segmentation from Contacts — All Contacts, Contacts — Lists, or from any of your contacts lists. In all three cases, you start by clicking the Segmentation button, located to the right of the search bar.
When the Segmentation window opens, choose one or several conditions to apply. You can also add a compound condition (1). If you want to clear all the applied conditions, click Clear all (2).
Example
If you are looking for the subscribers who opened your emails over the past two months, apply the condition Date of the last email opened — no more than_days — 60. Then, click Apply a segment.
If you already have saved segments, you can access them by clicking Upload a segment and edit the conditions if need be before applying them.

To save the segment, click Save a segment, assign a name to it, then click Save. All the saved segments are stored under Contacts — Segments.

After you apply segmentation, the All contacts tab opens with a list of contacts that meet the segmentation conditions. Now, you can select contacts to perform the available Actions (1), like adding the segmented contacts to a list (or lists), removing them from the list or deleting forever, etc.

If you want to return to viewing all your contacts again, without the segmentation conditions applied, just click Clear all (2). The segment will not be deleted, and you will be able to access and manage it at any time from Segments.
The Clear all option also removes the filter settings.
Segmenting contacts while creating a campaign
In February 2024, Selzy introduced a new email builder, while continuing the support of the existing builder (now referred to as the old builder). As a result, segmentation while creating a campaign slightly differs depending on which builder you are using.
If you are a recent Selzy user, it’s most likely that you use a new builder.
You can set up segmentation when you are creating an email campaign:
- In the new builder (recommended)
- In the old builder
In the new builder
When creating an email campaign, at the step Recipients, select the list and click Segmentation.

When the Segmentation window opens, choose one or several conditions to apply. You can also add a compound condition (1). If you want to clear all the applied conditions, click Clear all (2).
Example
If you are looking for contacts with a specific tag assigned to them, for example, Black Friday, apply the condition Tags — some contain — Black Friday. Then, click Apply a segment.
If you already have saved segments, you can access them by clicking Upload a segment and edit the conditions if need be before applying them.

After you apply segmentation, the segmentation button next to the selected list will change its color, notifying you that the conditions are successfully applied. You will also see how many contacts are in the segment. Now, you can proceed to the next step and send your campaign.

Please note, that the segment created at the Recipients step of the email campaign creation flow will not be saved and will not appear in Segments.
In the old email builder
When creating an email campaign, at the step Choose recipients, select the list and click Segmentation.

Segmentation settings will open in a drop-down window, keeping other contacts lists visible. Choose one or several conditions to apply. You can also add a compound condition (1). If you want to clear all the applied conditions, click on the trash can icon (2).
Example
If you are looking for contacts with a specific tag assigned to them, for example, Black Friday, apply the condition Tags — some contain — Black Friday. Then, click Continue (3).
If you already have saved segments, you can access them by clicking Upload saved segment and edit the conditions if need be before applying them.

After clicking Continue, you proceed to the final step of the campaign creation flow, where you can review your campaign’s settings and send the campaign. You can find the segmentation settings, including the number of contacts in the created segment, under the box Recipients.

Please note, that the segment created at the Choose recipients step of the email campaign creation flow will not be saved and will not appear in Segments.
Managing segments
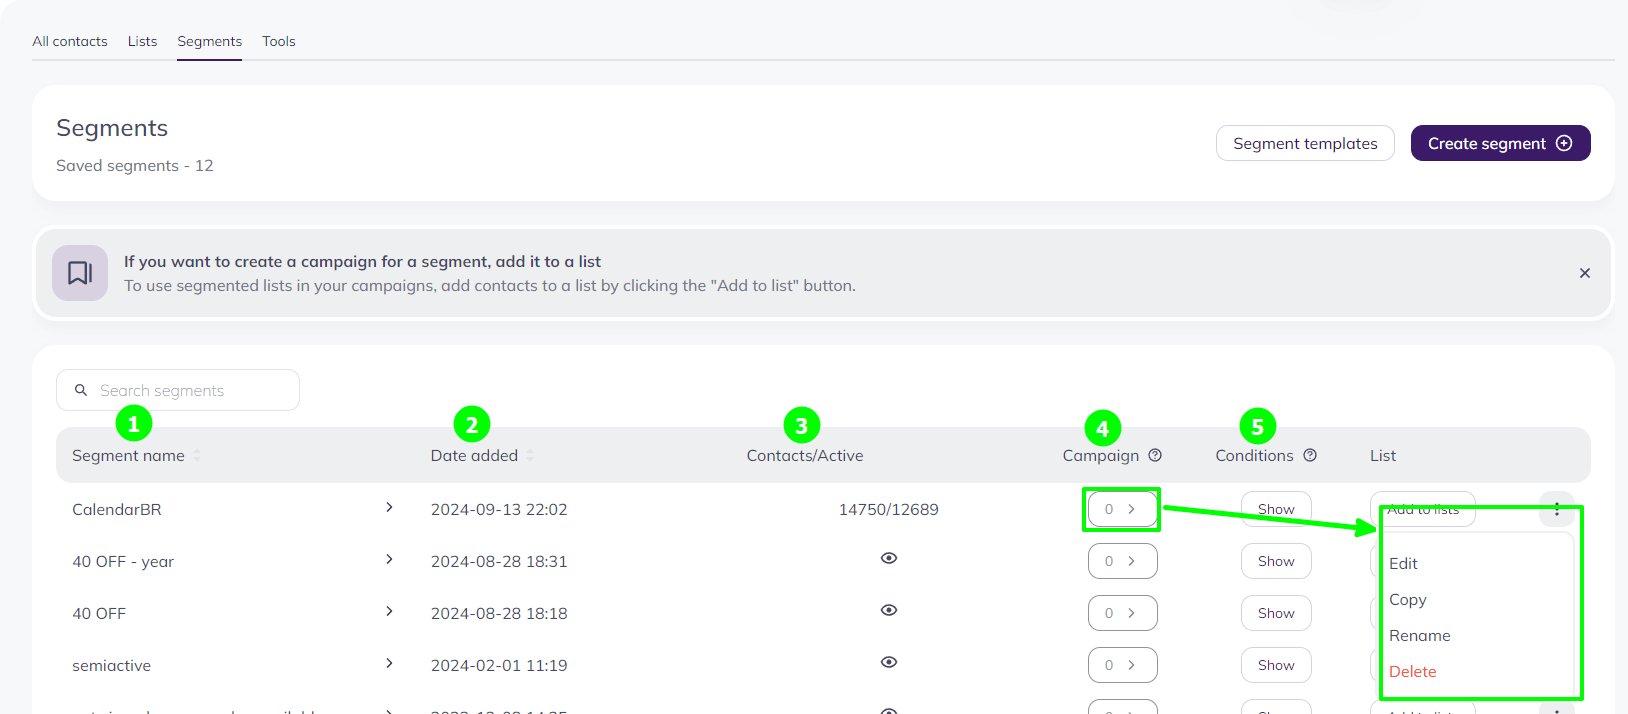
To manage your segments, go Contacts — Segments.
This section stores a list of your saved segments, allows you to create and manage segments, and provides access to segment templates.
In Segments list you can check:
- Segment name
- Date when the segment was created
- Number of contacts in the segment and how many of them are active
- Number of associated campaigns
- Segment conditions
If a saved segment in the list does not have any campaigns associated with it, you can rename, edit, copy, and delete it. Click three dots and choose the desired action.

Segments that have no campaigns associated with them will have 0 under Campaign
If a saved segment in the list has campaigns associated with it, you can rename, copy, or delete it, but you can not edit it, meaning you can not change segmentation conditions.
If you delete a segment less than 30 minutes before the scheduled sending of the associated campaign, the sending can not be canceled. Subscribers who match the deleted segment’s conditions will receive your campaign. In any other case, you will be able to cancel the campaign associated with the deleted segment.
Adding segment to a contact list
From Segments, you can also add a saved segment to a contact list by clicking the Add to lists button. This allows you to use the saved segment to send campaigns to one or multiple existing contact lists or to create a completely new list for this segment.
When you add a segment to a list with an existing automation, the system will notify you. Adding segments means adding new contacts to the automation, which triggers the automation chain.
If you don’t want the new segment contacts to receive emails from this automation, in the same window, choose a different contact list or create a new one and add your segment there.
Segment templates
To save time, you can use preset segmentation criteria to create segments. Segment templates are especially helpful, if you are just starting with segmentation and do not have any segments of your own.
Go Contacts — Segments to access the available segment templates.
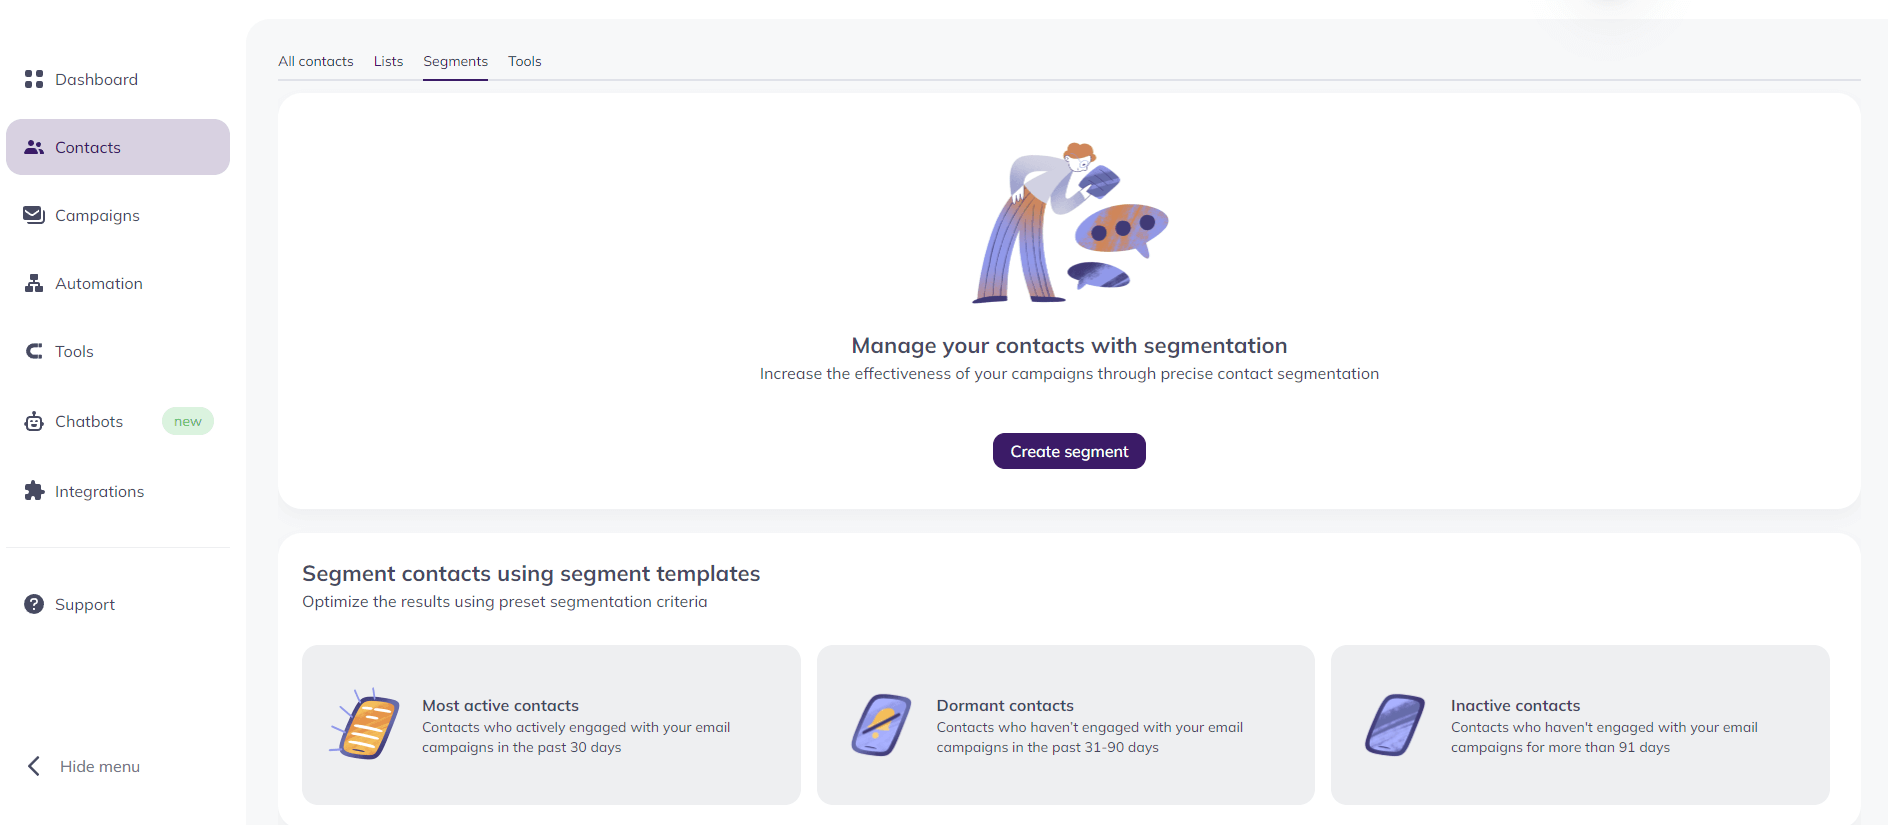
If you don’t have any segments, you will be able to see all the available segment templates right away.

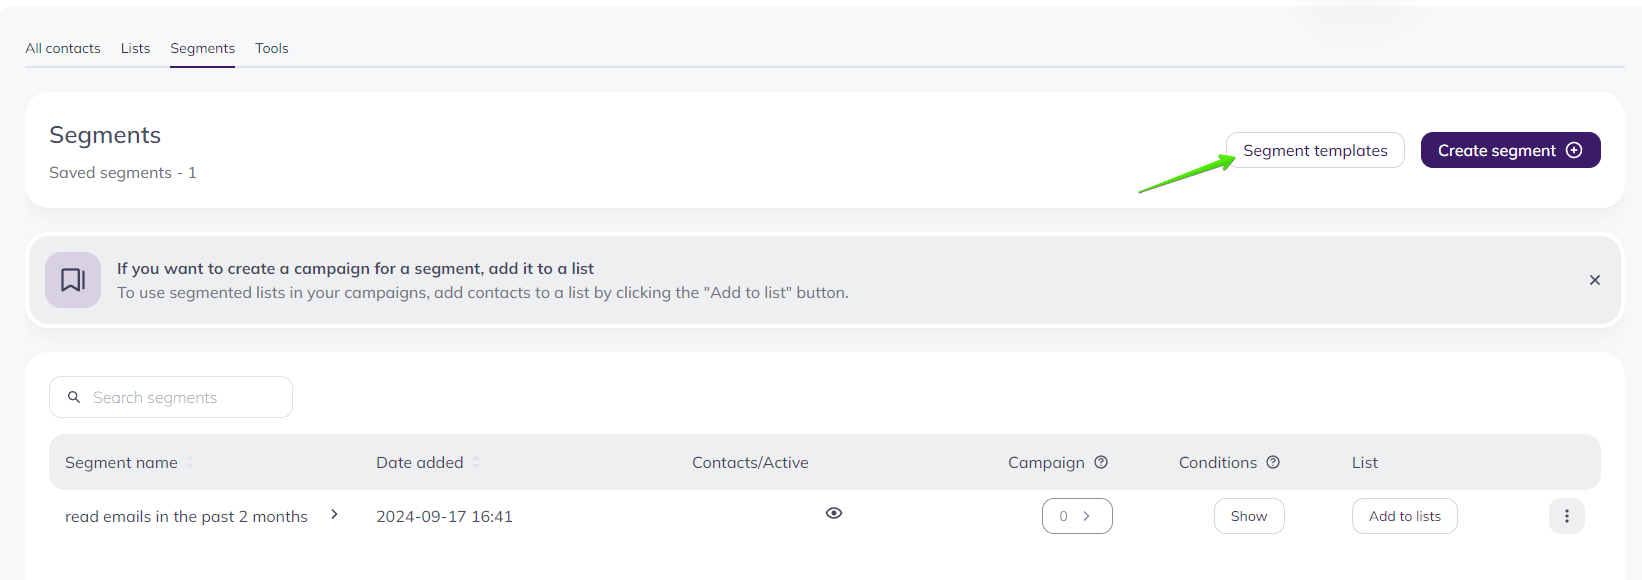
If you created segments before, click Segment templates at the top right corner of the screen next to Create segment to access the selection of segment templates.

At the moment, there are three preset segments available:
- Most active: contacts who actively engaged with your email campaigns in the past 30 days
- Dormant: contacts who have not engaged with your email campaigns in the past 31-90 days
- Inactive: contacts who have not engaged with your email campaigns for more than 91 days
If needed, you can further customize the segment template. Just make sure to save the segment after adjusting its settings.
Useful links:
Working with contacts lists
Email segmentation 101
Email segmentation ideas and campaigns examples


