



Key takeaways
- Mass emails are messages sent to a large group of people at once, commonly used for newsletters, promotions, and surveys.
- Gmail is user-friendly, integrates with Google products, offers basic analytics, and is accessible from any device.
- Three methods for sending mass emails in Gmail: using your Gmail account, Yet Another Mail Merge (YAMM), or Google Workspace.
- Disadvantages of using Gmail for bulk emailing include sending limits, risk of spam, lack of advanced features, design limitations, and compliance issues.
Do you ever find yourself wondering how you can send an email to multiple recipients using your Gmail account? You’ve come to the right place!
In this article, we’ll cover all the basics of how to send a mass email in Gmail, the advantages and disadvantages of doing so, and some of the best alternatives to it.
What are mass emails?
As the name suggests, mass emails are messages sent to a large group of people at once. Businesses and organizations use them to efficiently share information with many recipients.
Some examples of mass emails are newsletters, promotional emails, event invitations, survey and feedback requests, and cold emails. For marketers, mass emails are useful because they reach a large audience, are cost-effective, can be personalized, offer trackable metrics, and help sales.
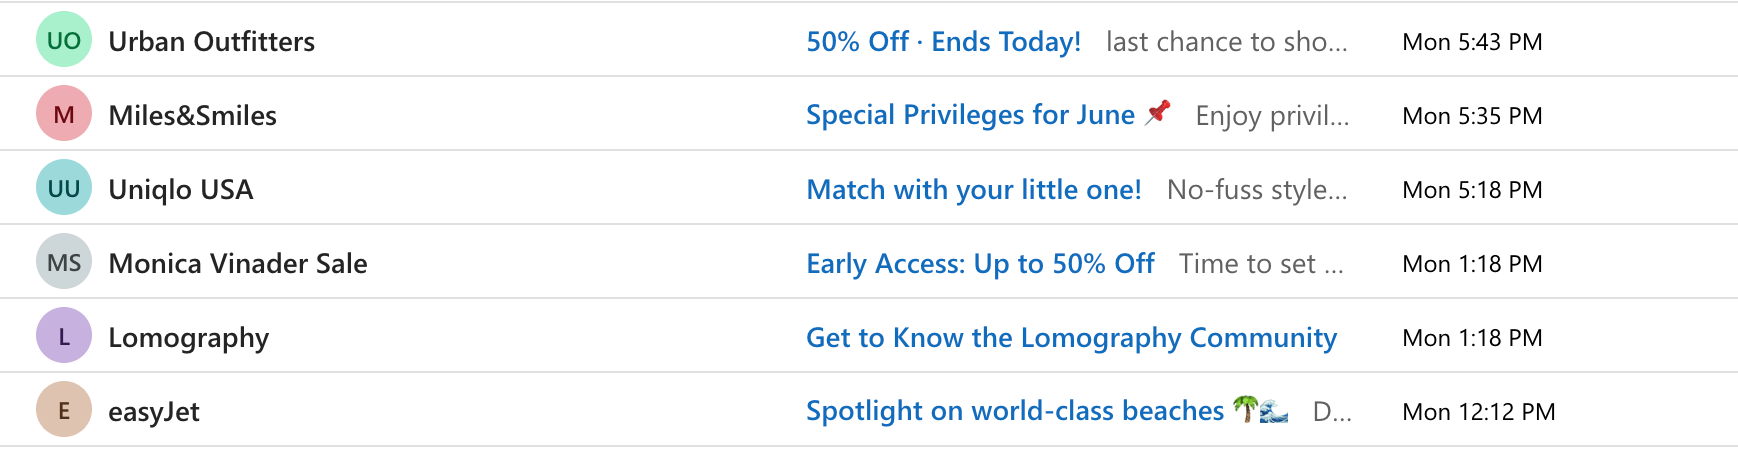
Here’s an example of a few mass emails in my own email inbox:
Benefits of Gmail for sending bulk emails
While you can use any email client to send your mass emails, here, we’ll focus on Gmail, an email client developed by Google. Here are some advantages of using Gmail:
- It’s user-friendly. Gmail’s interface is intuitive and straightforward, there’s no need to be an expert to use it. It may be a great choice for you, especially if your company is just getting started and you’ve never sent a mass email before.
- Easy integrations with Google products. Gmail integrates seamlessly with other Google services. This means that you can easily attach files from Google Drive, schedule emails using Google Calendar, and manage your contact list in Google Contacts.
- Basic analytics. With Google Analytics, you can monitor open rates, click-through rates, and other metrics to gauge the effectiveness of your email marketing campaigns and make data-driven changes. You can also install tracking and analytics add-ons to your Gmail account.
- Availability. Gmail is accessible from any device with an internet connection. Whether you’re using a laptop, tablet, or smartphone, you can easily access your Gmail account and manage your emails on the go.
3 methods for sending mass emails in Gmail
There are three ways to send bulk emails in Gmail — using your account, Google Workspace, or an add-on.
First things first, make sure you’re signed into your Gmail account!
Gmail account
Follow the steps below to send an email to multiple recipients using just your Gmail account. With a standard Gmail account, you can only send one email to a total of no more than 500 recipients in a single email or no more than 500 emails a day.
You can simply use BCC, but the method below allows you to add contacts in bulk easily, and not copy them one by one to the recipients’ field of an email.
Step 1: Add your contacts
Firstly, add the contacts you want to message. Go to Google Contacts where you’ll have the option to either enter your contacts manually or import them.
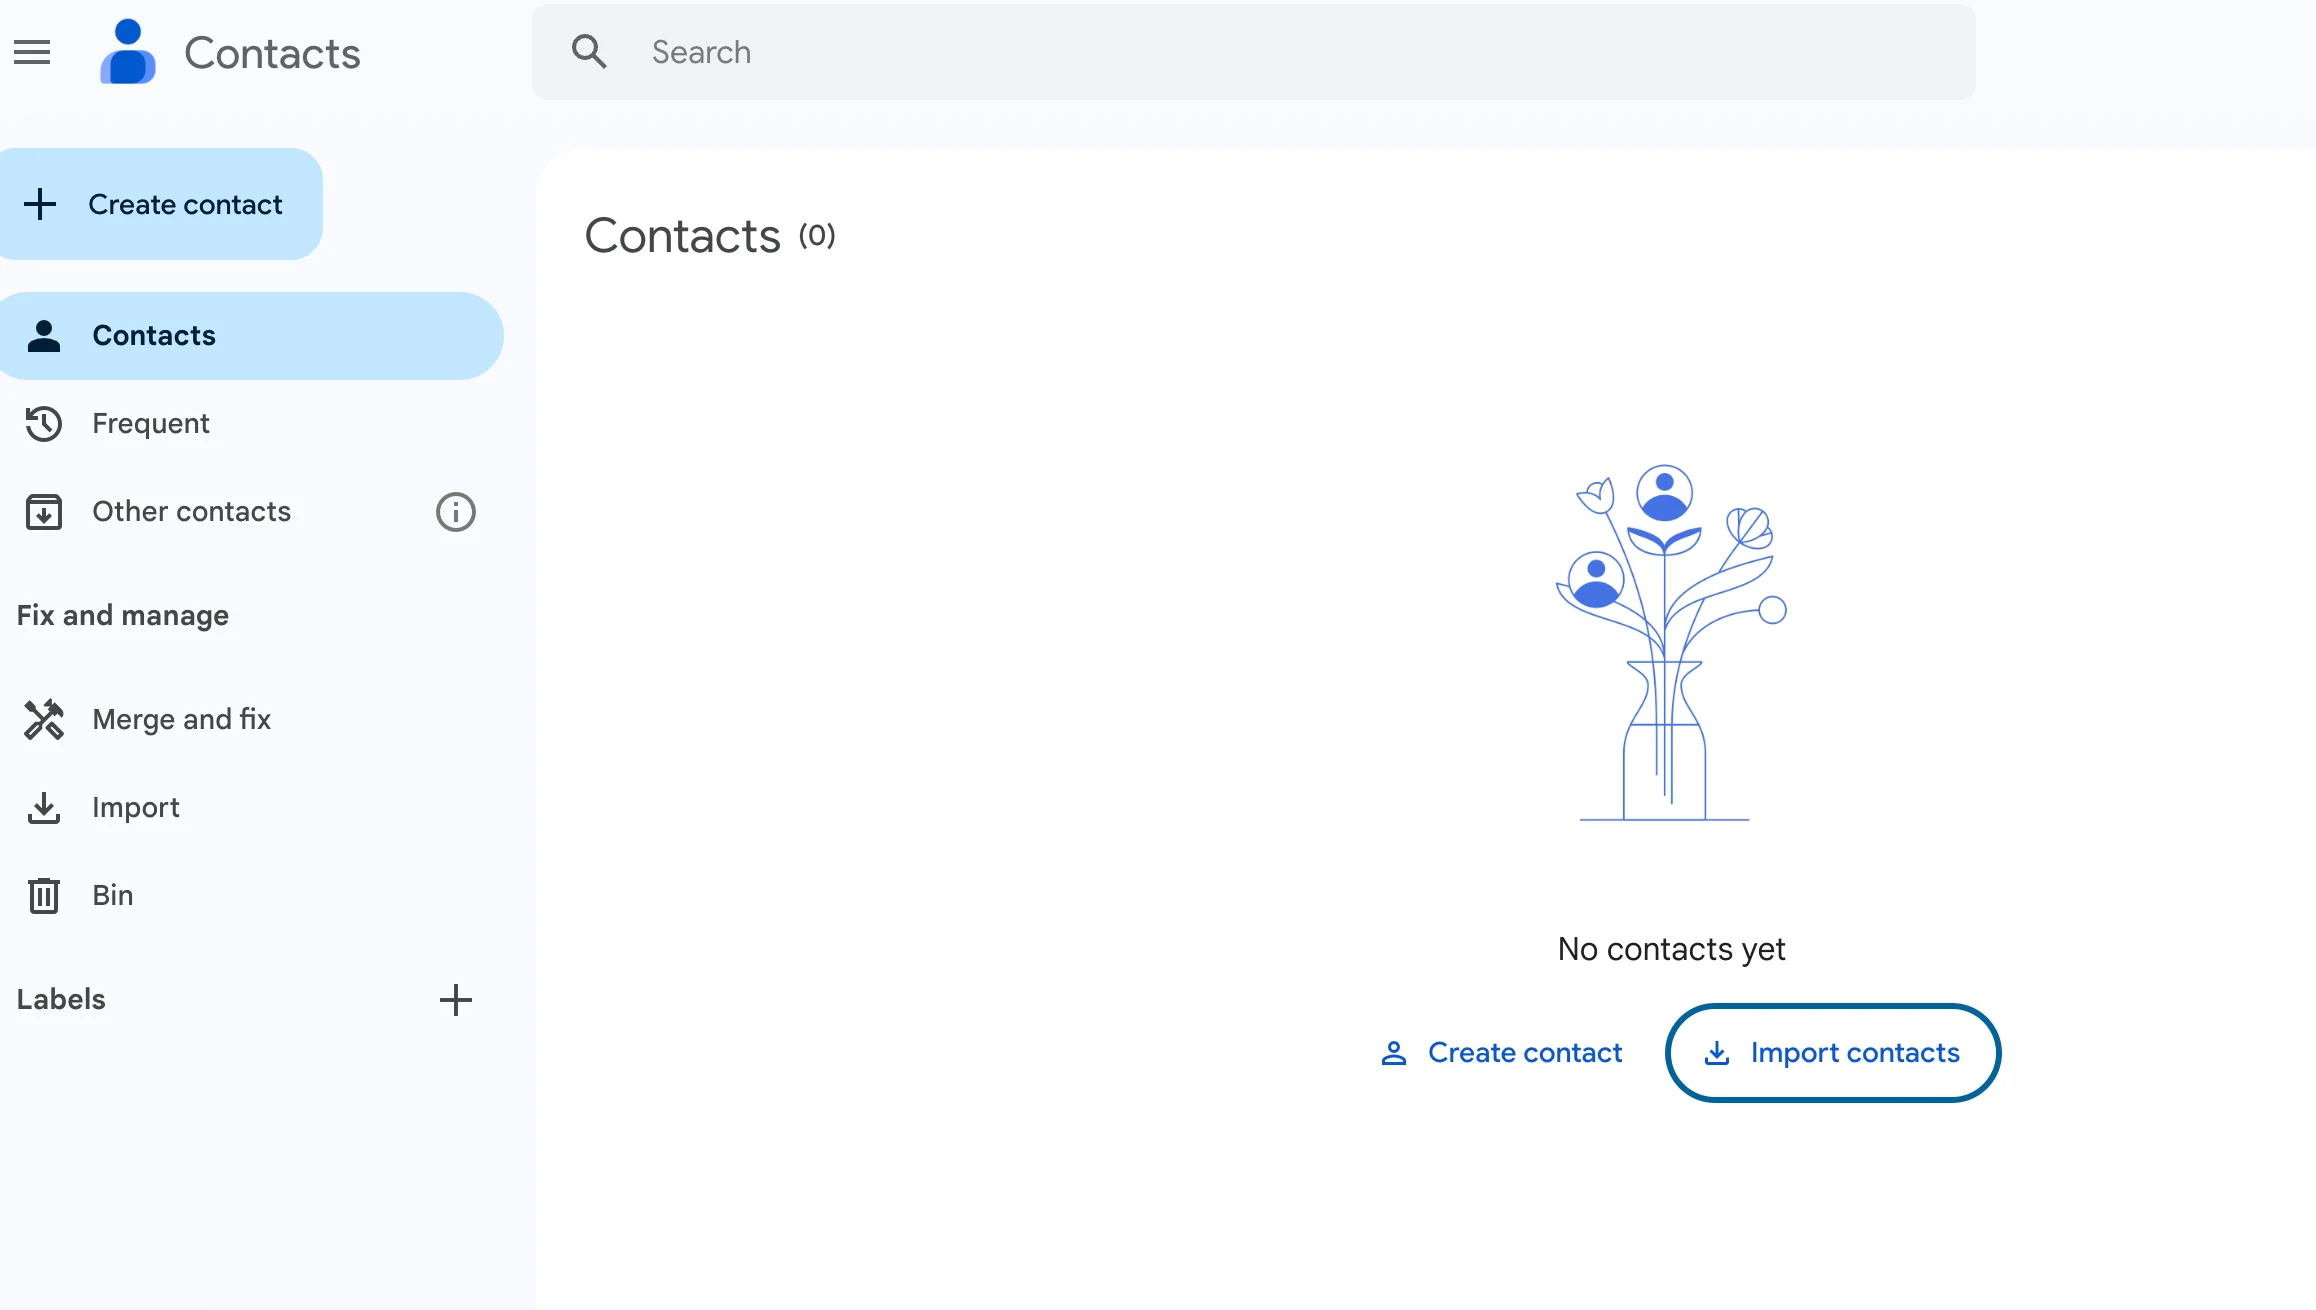
Importing contacts automatically is super easy — just click Import contacts and upload your file in the required format.
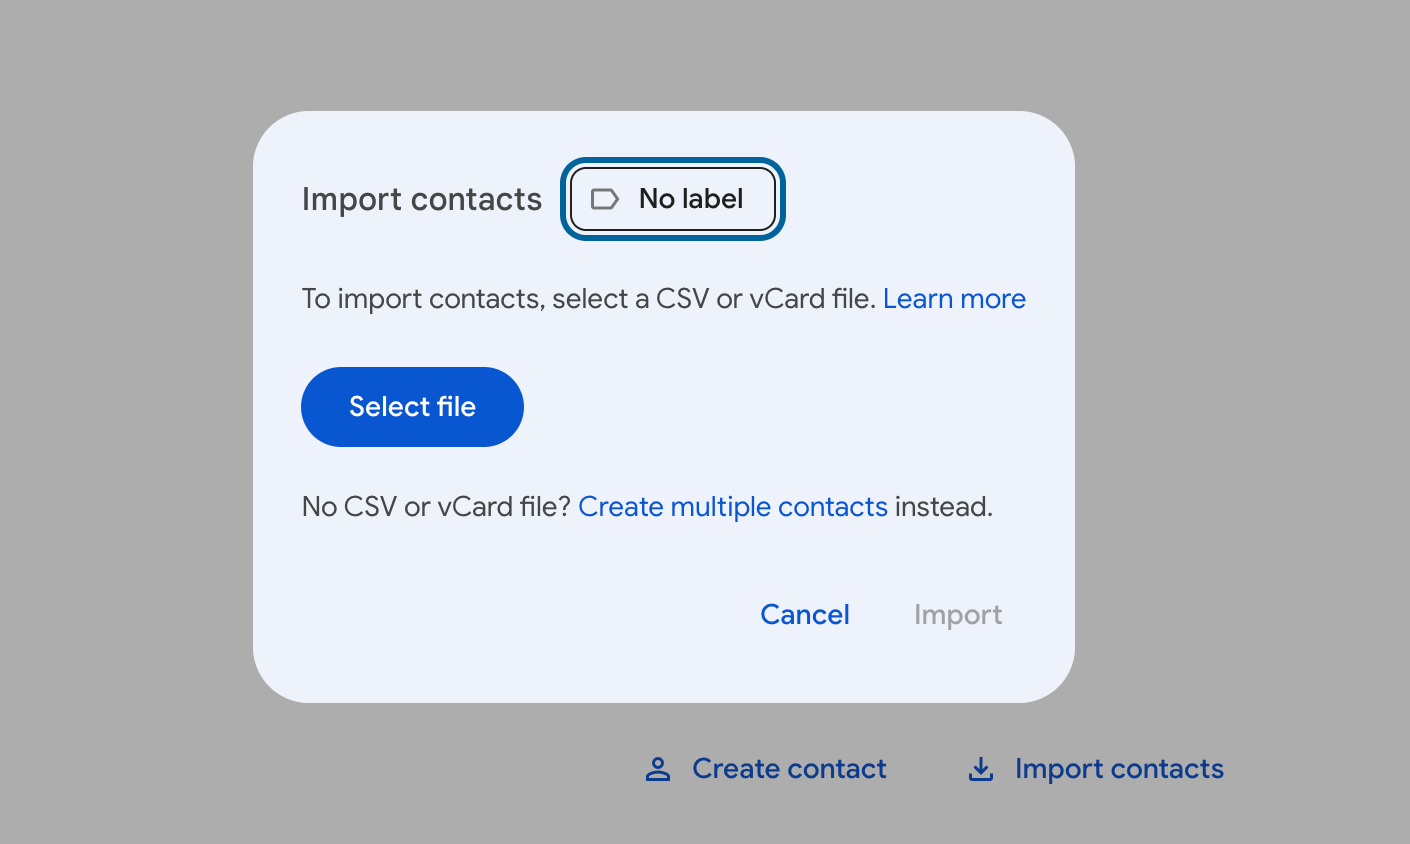
If you don’t have a file with all of your contacts, you’ll have to enter them manually. There are two options here — create several contacts at the same time or add them one by one.
To add several contacts at the same time, click on + Create contact on the left panel and select Create multiple contacts.
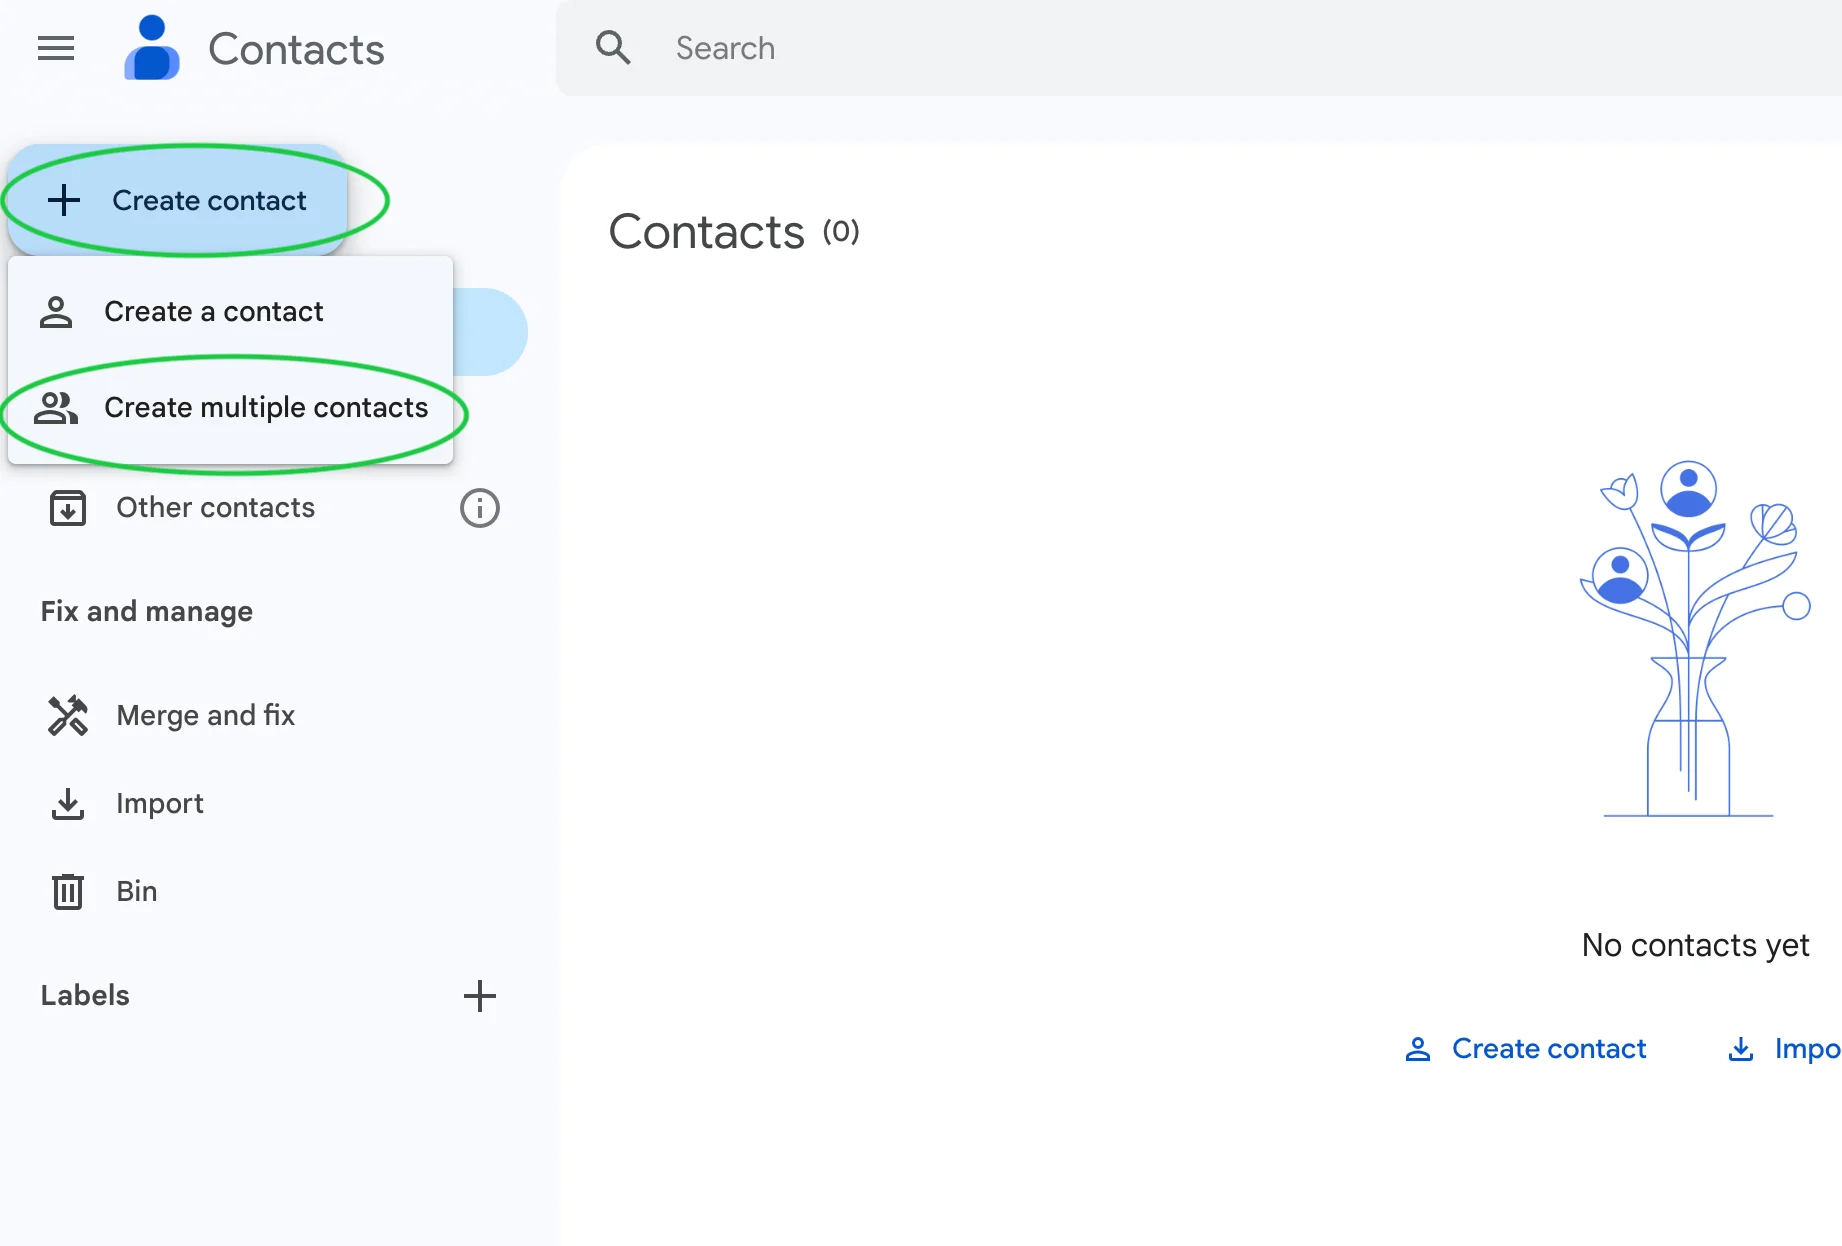
In the pop-up window, type in the names and email addresses of your contacts.
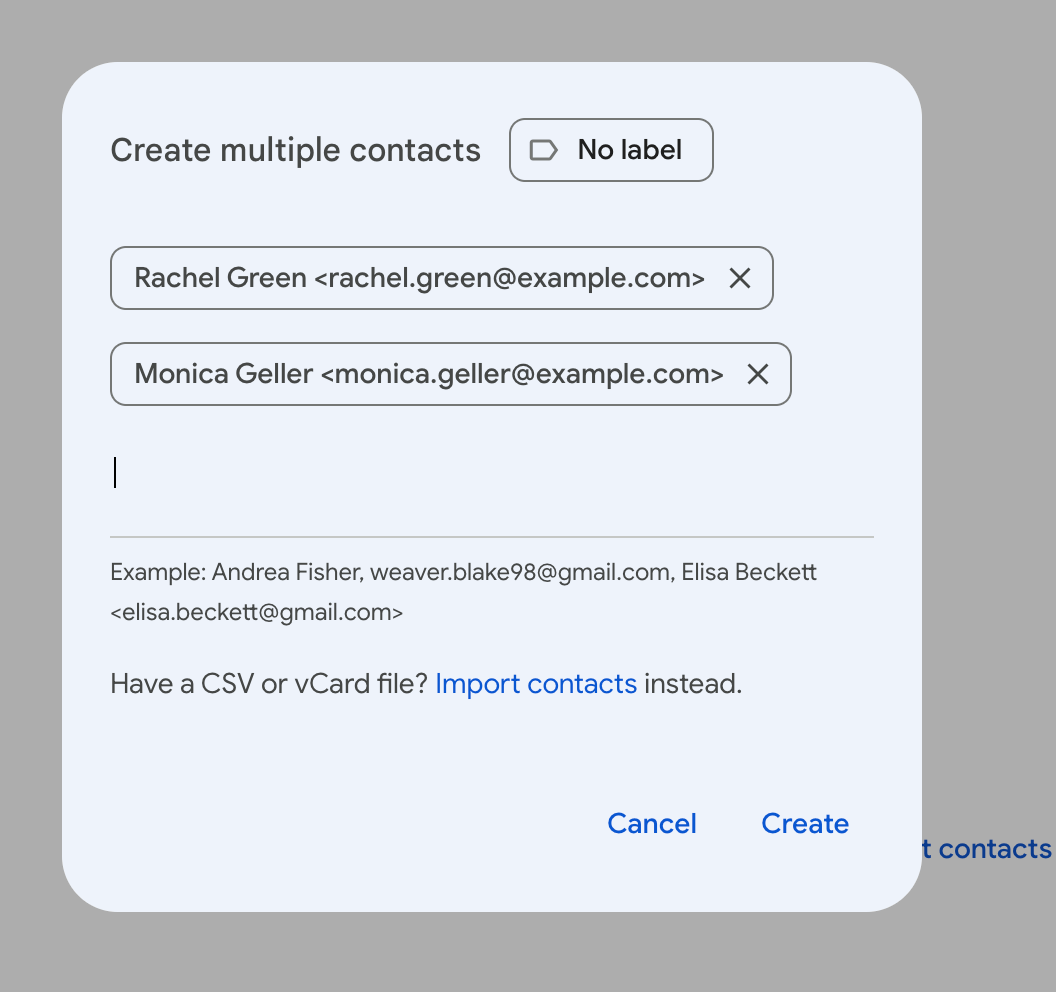
Click Create once you’re done.
As you can see, this way of adding contacts is pretty fast, but you can’t enter additional information about them. If you want to add phone numbers, job titles, or any other relevant info, you’ll have to create each contact individually.
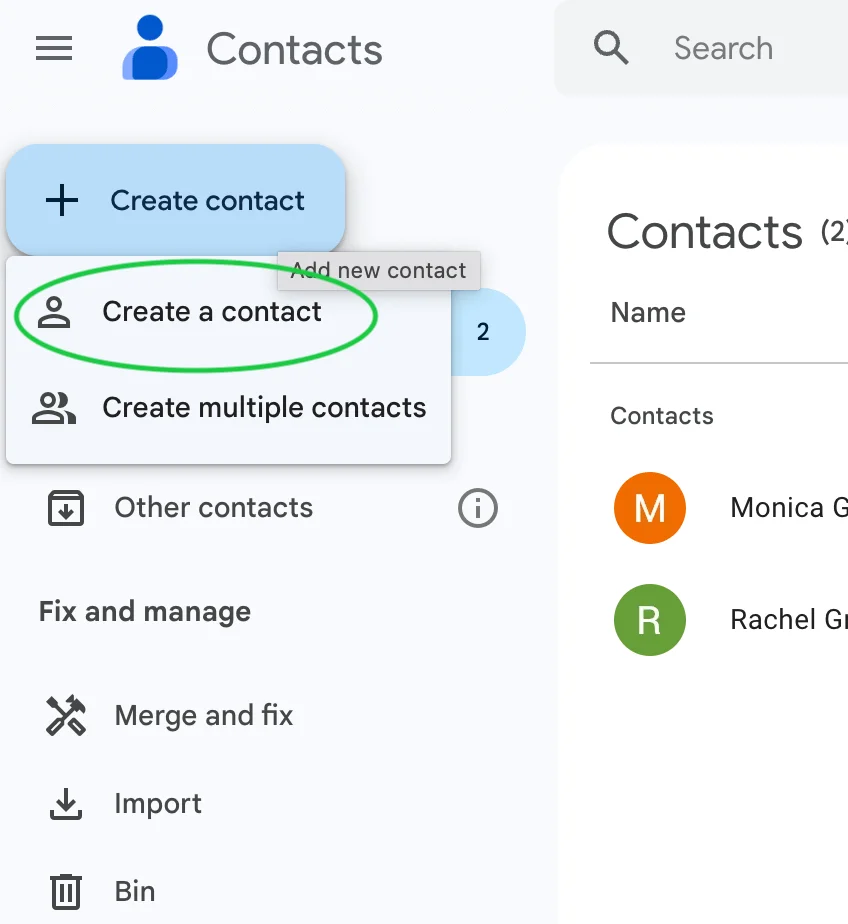
Select Create a contact from the panel on the left side or click on Create contact at the center of the page.
Fill out the fields in the contact card. You can enter the contact’s company and job title as well as add a label.
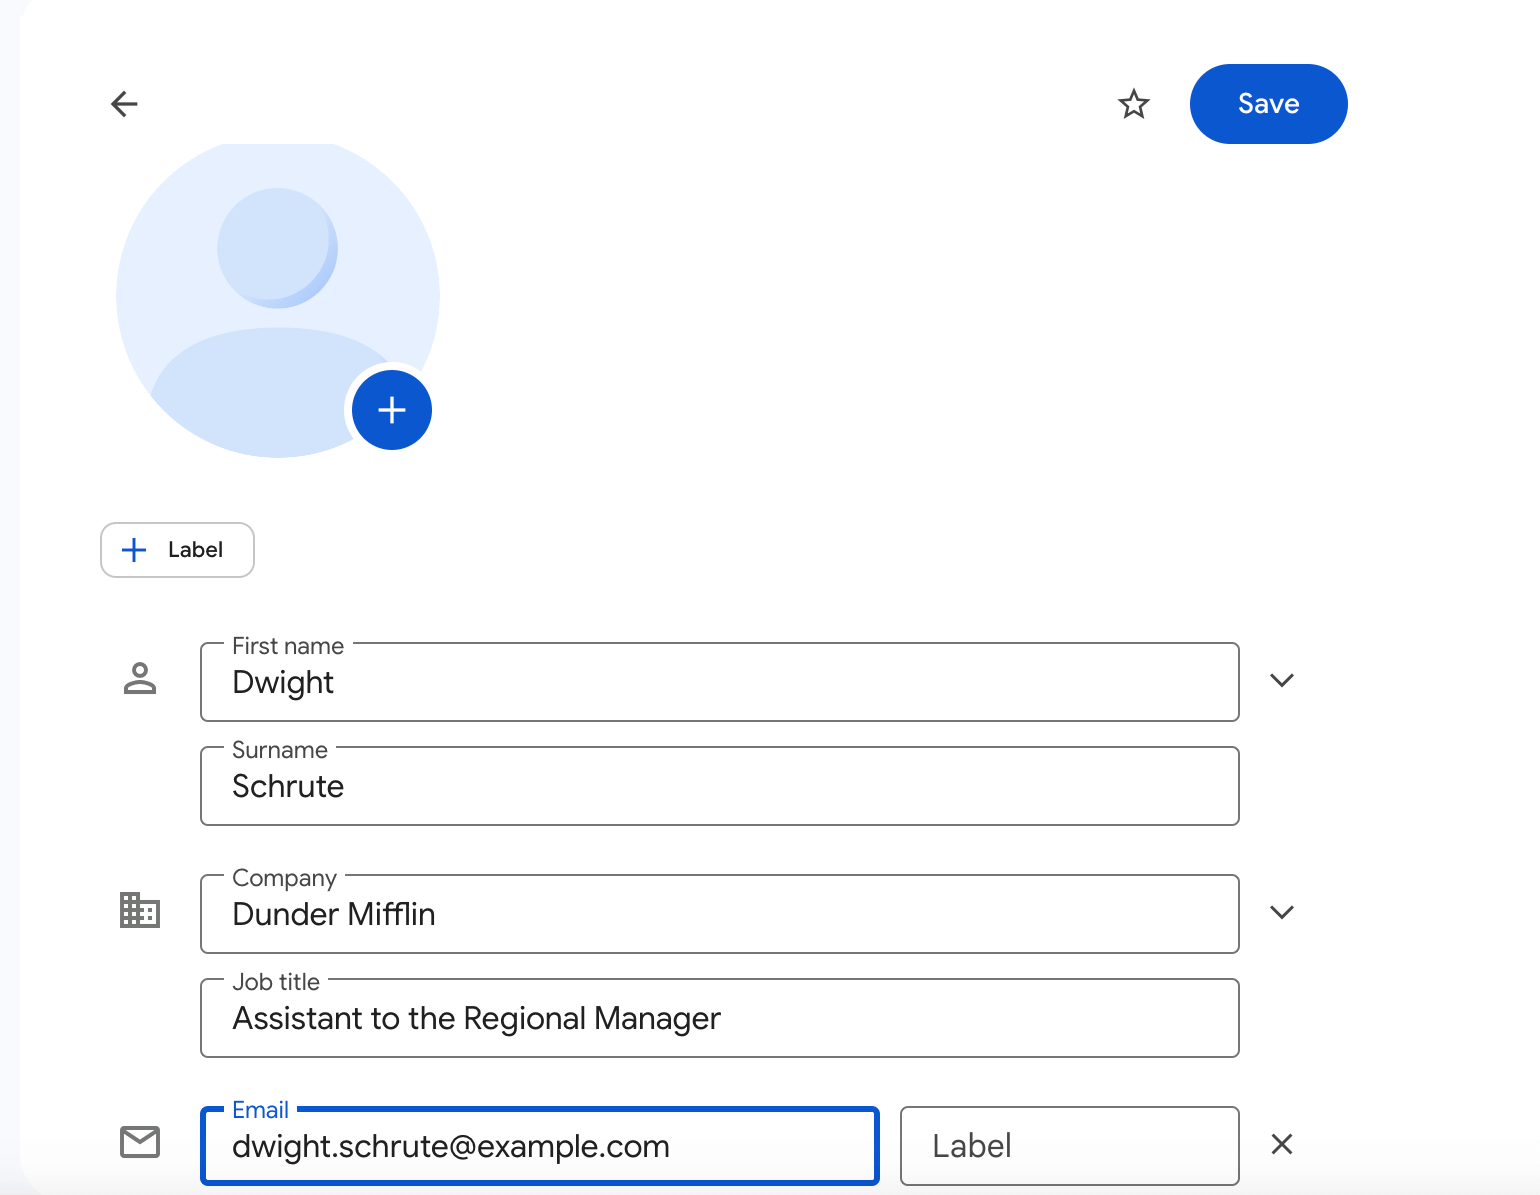
Click Save when you’re done. Add other contacts the same way.
Step 2: Create a contact group
As soon as you’ve added as many contacts as you need, it’s time to sort them into groups. To do so, you need to add labels to each contact. Labels help you organize and keep track of your contact list. You may have noticed a Label field when creating contacts manually — you can add new or existing labels to new contacts at that stage too.
Click on the image circle by any contact, select the label icon, and then + Create label.
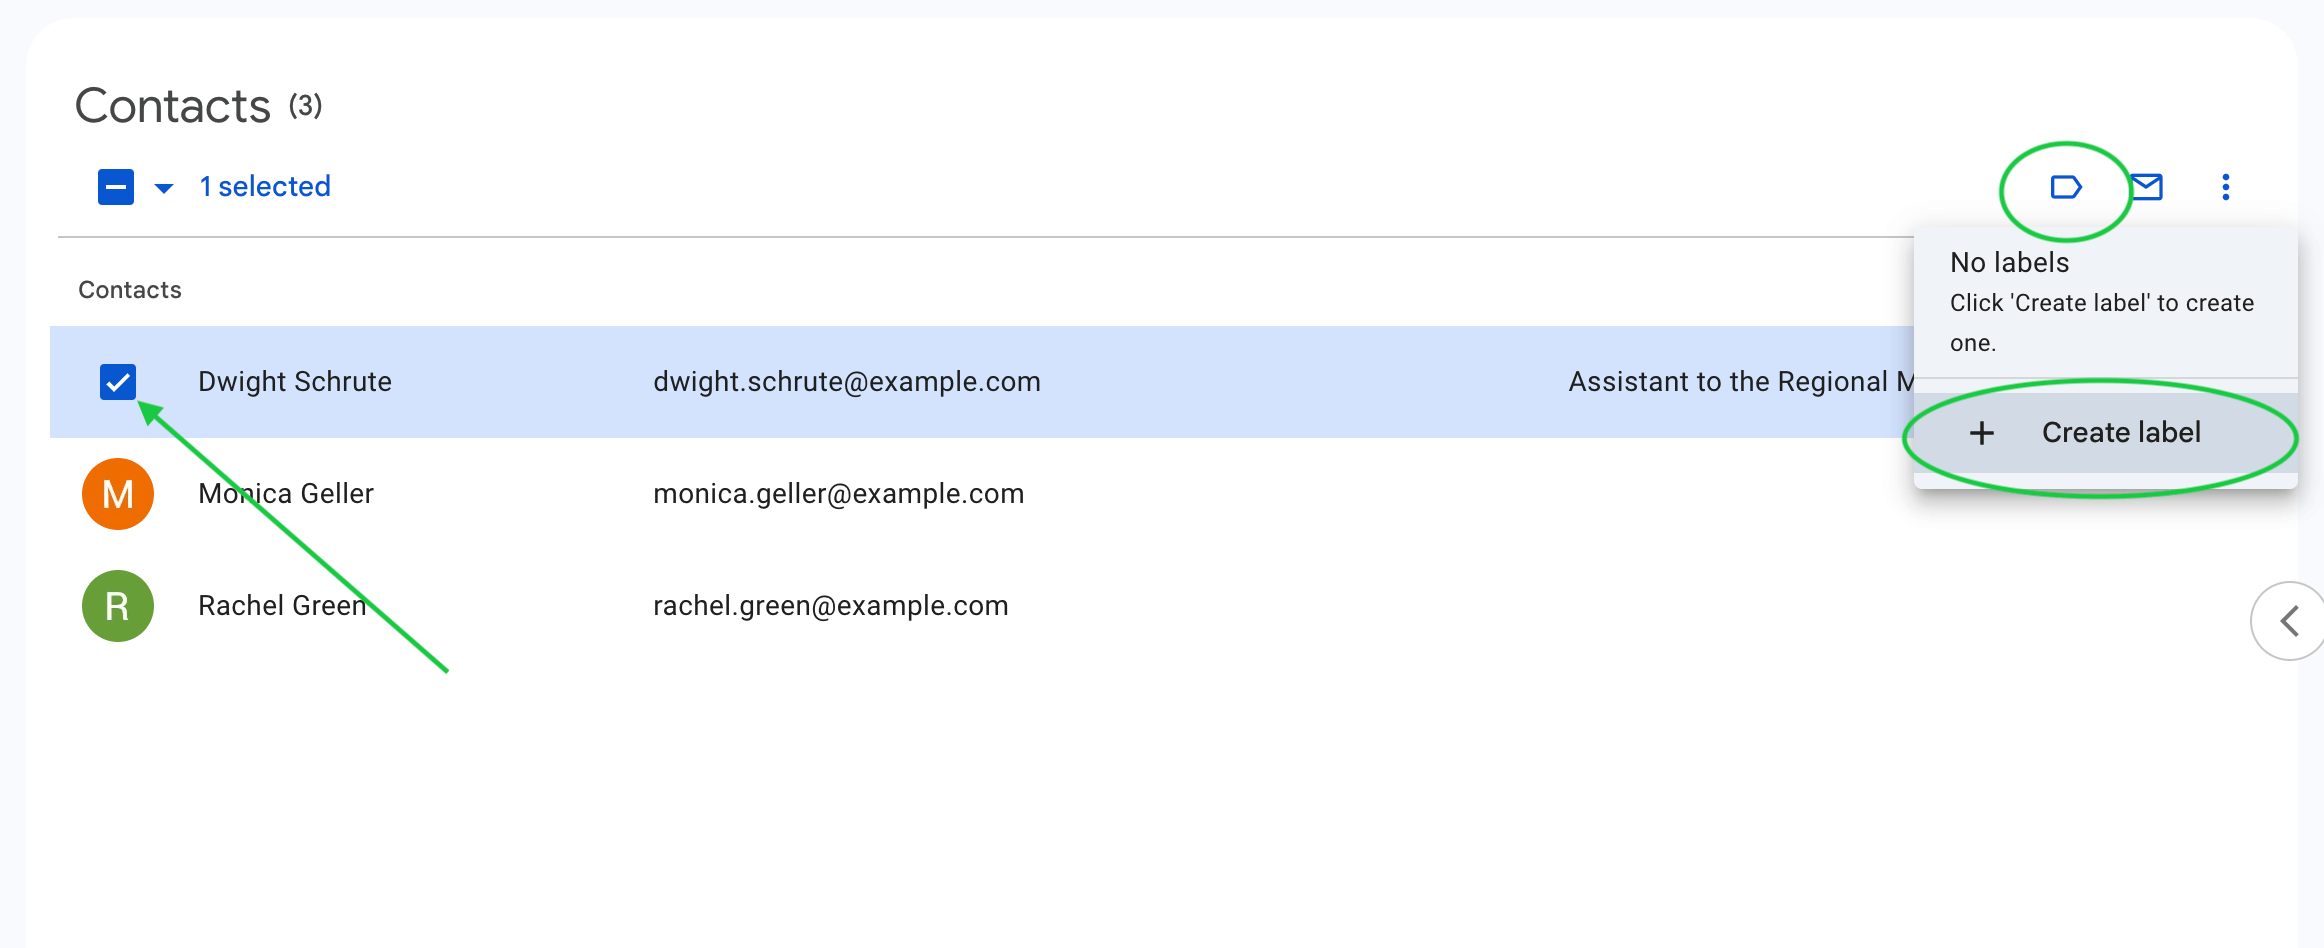
Once you’ve labeled all of your contacts, you’ll be able to see the labels on the left panel. There, you’ll also have the option of adding a new label.
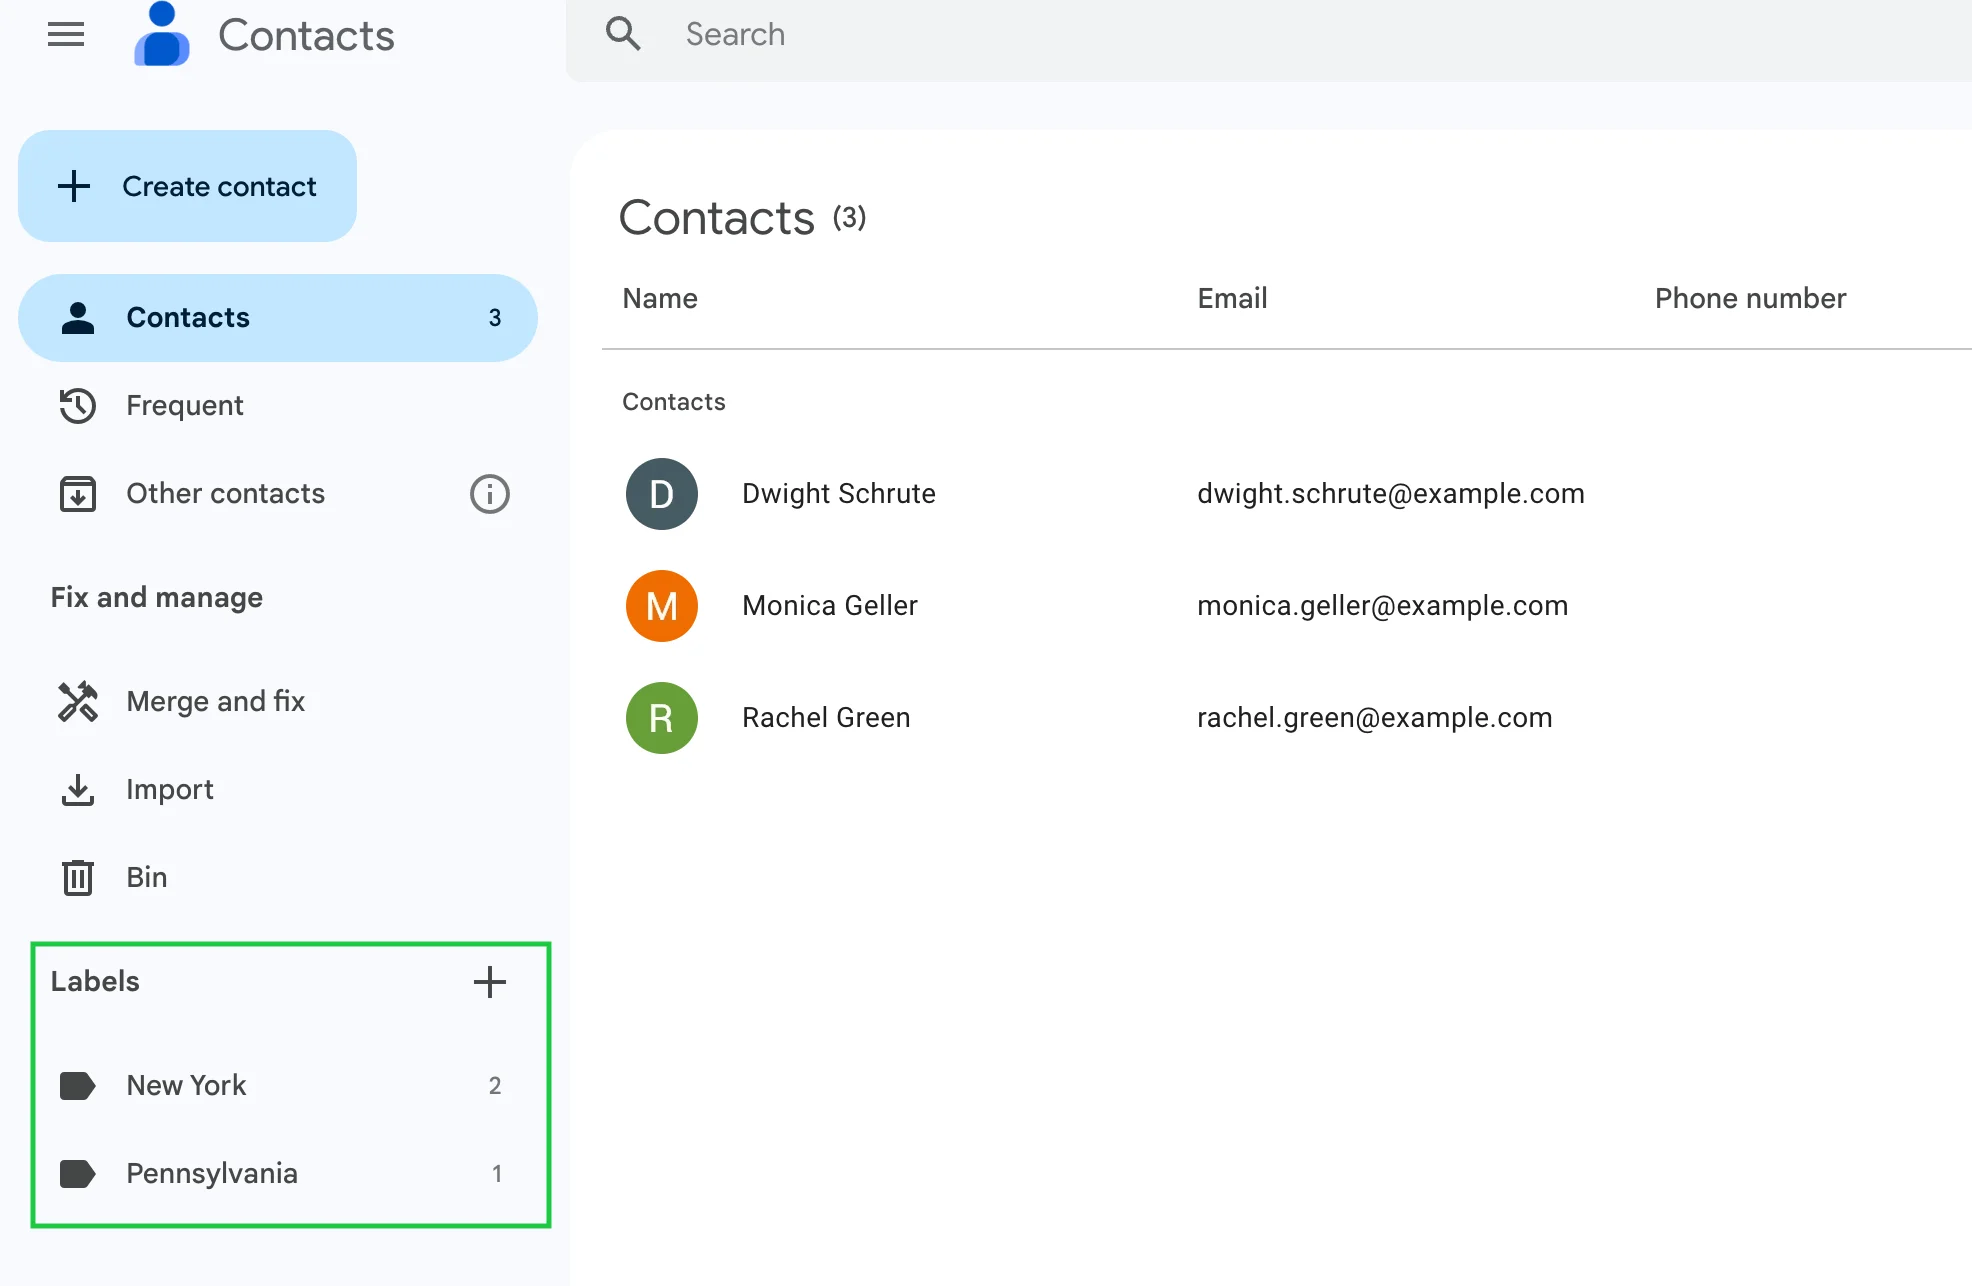
Note: if you imported your contacts from a file, they’ll all be saved under the same label. You can change that after the import.
Step 3: Compose an email
Once you’ve sorted all of your contacts, it’s time to draft the email. You can actually do this directly in Google Contacts. Click on one of the labels and select all the contacts. You can select the contacts one by one or select one and then click on a triangle at the top of the list and choose All to select all contacts in one click.
After you have selected all the contacts, click on the email button on the right.
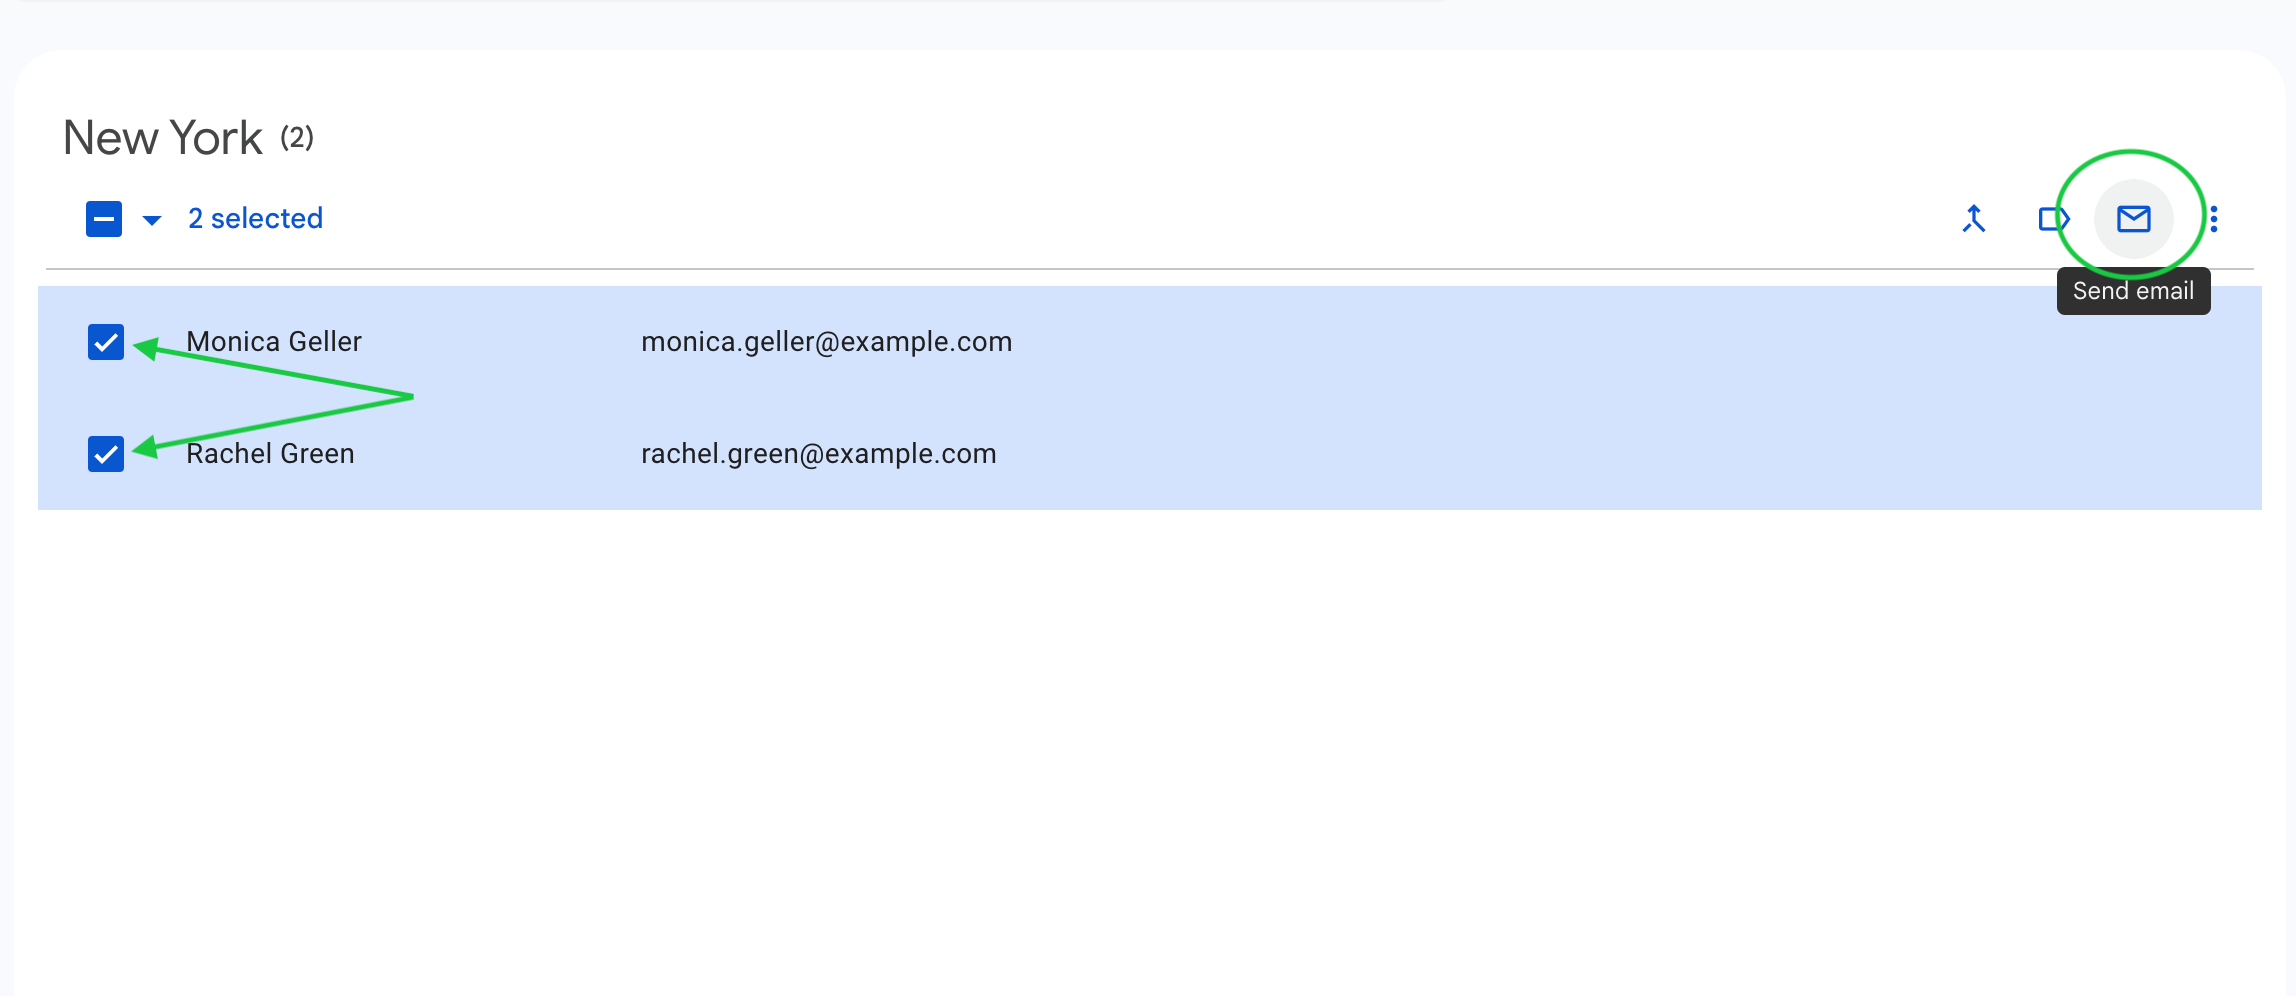
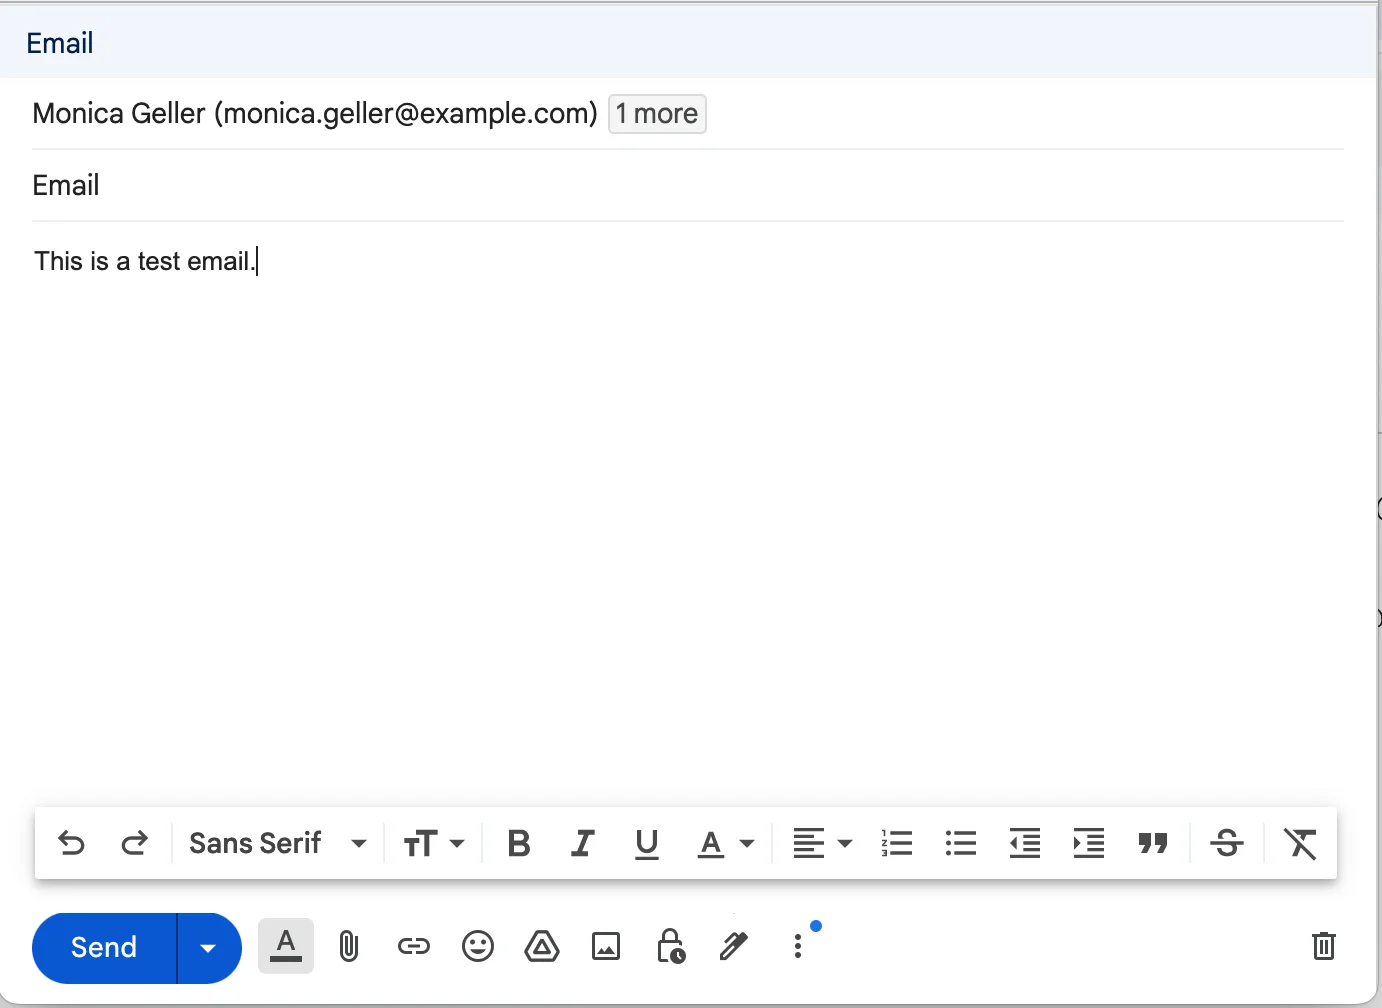
Write your email in the pop-up window, then click Send.
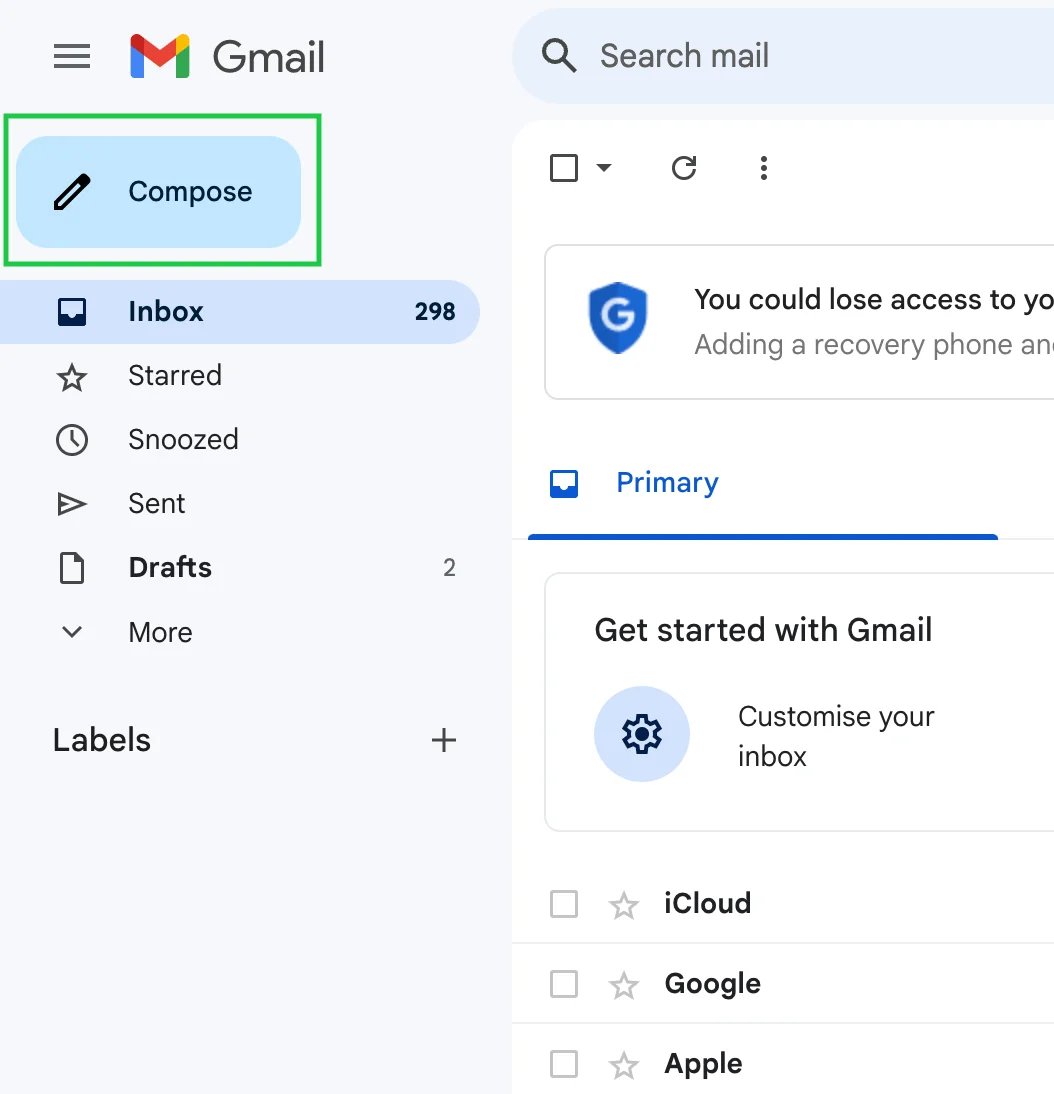
If you prefer to send your email from Gmail as opposed to Google Contacts, you can do that too. Log in to Gmail and click on the Compose button on the left.
Compose your email, enter the name of your label in the To field, and then select it.
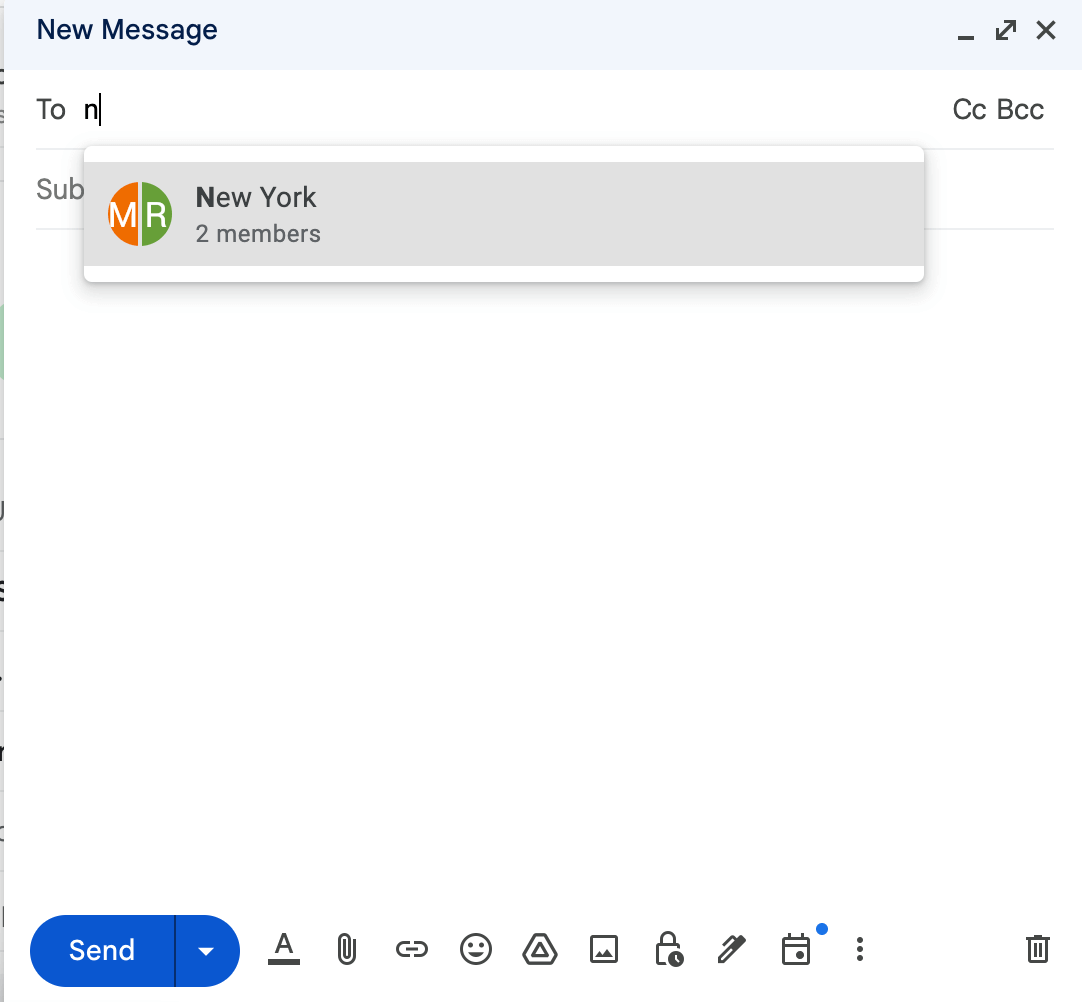
Click Send when you’re done.
Yet Another Mail Merge (YAMM)
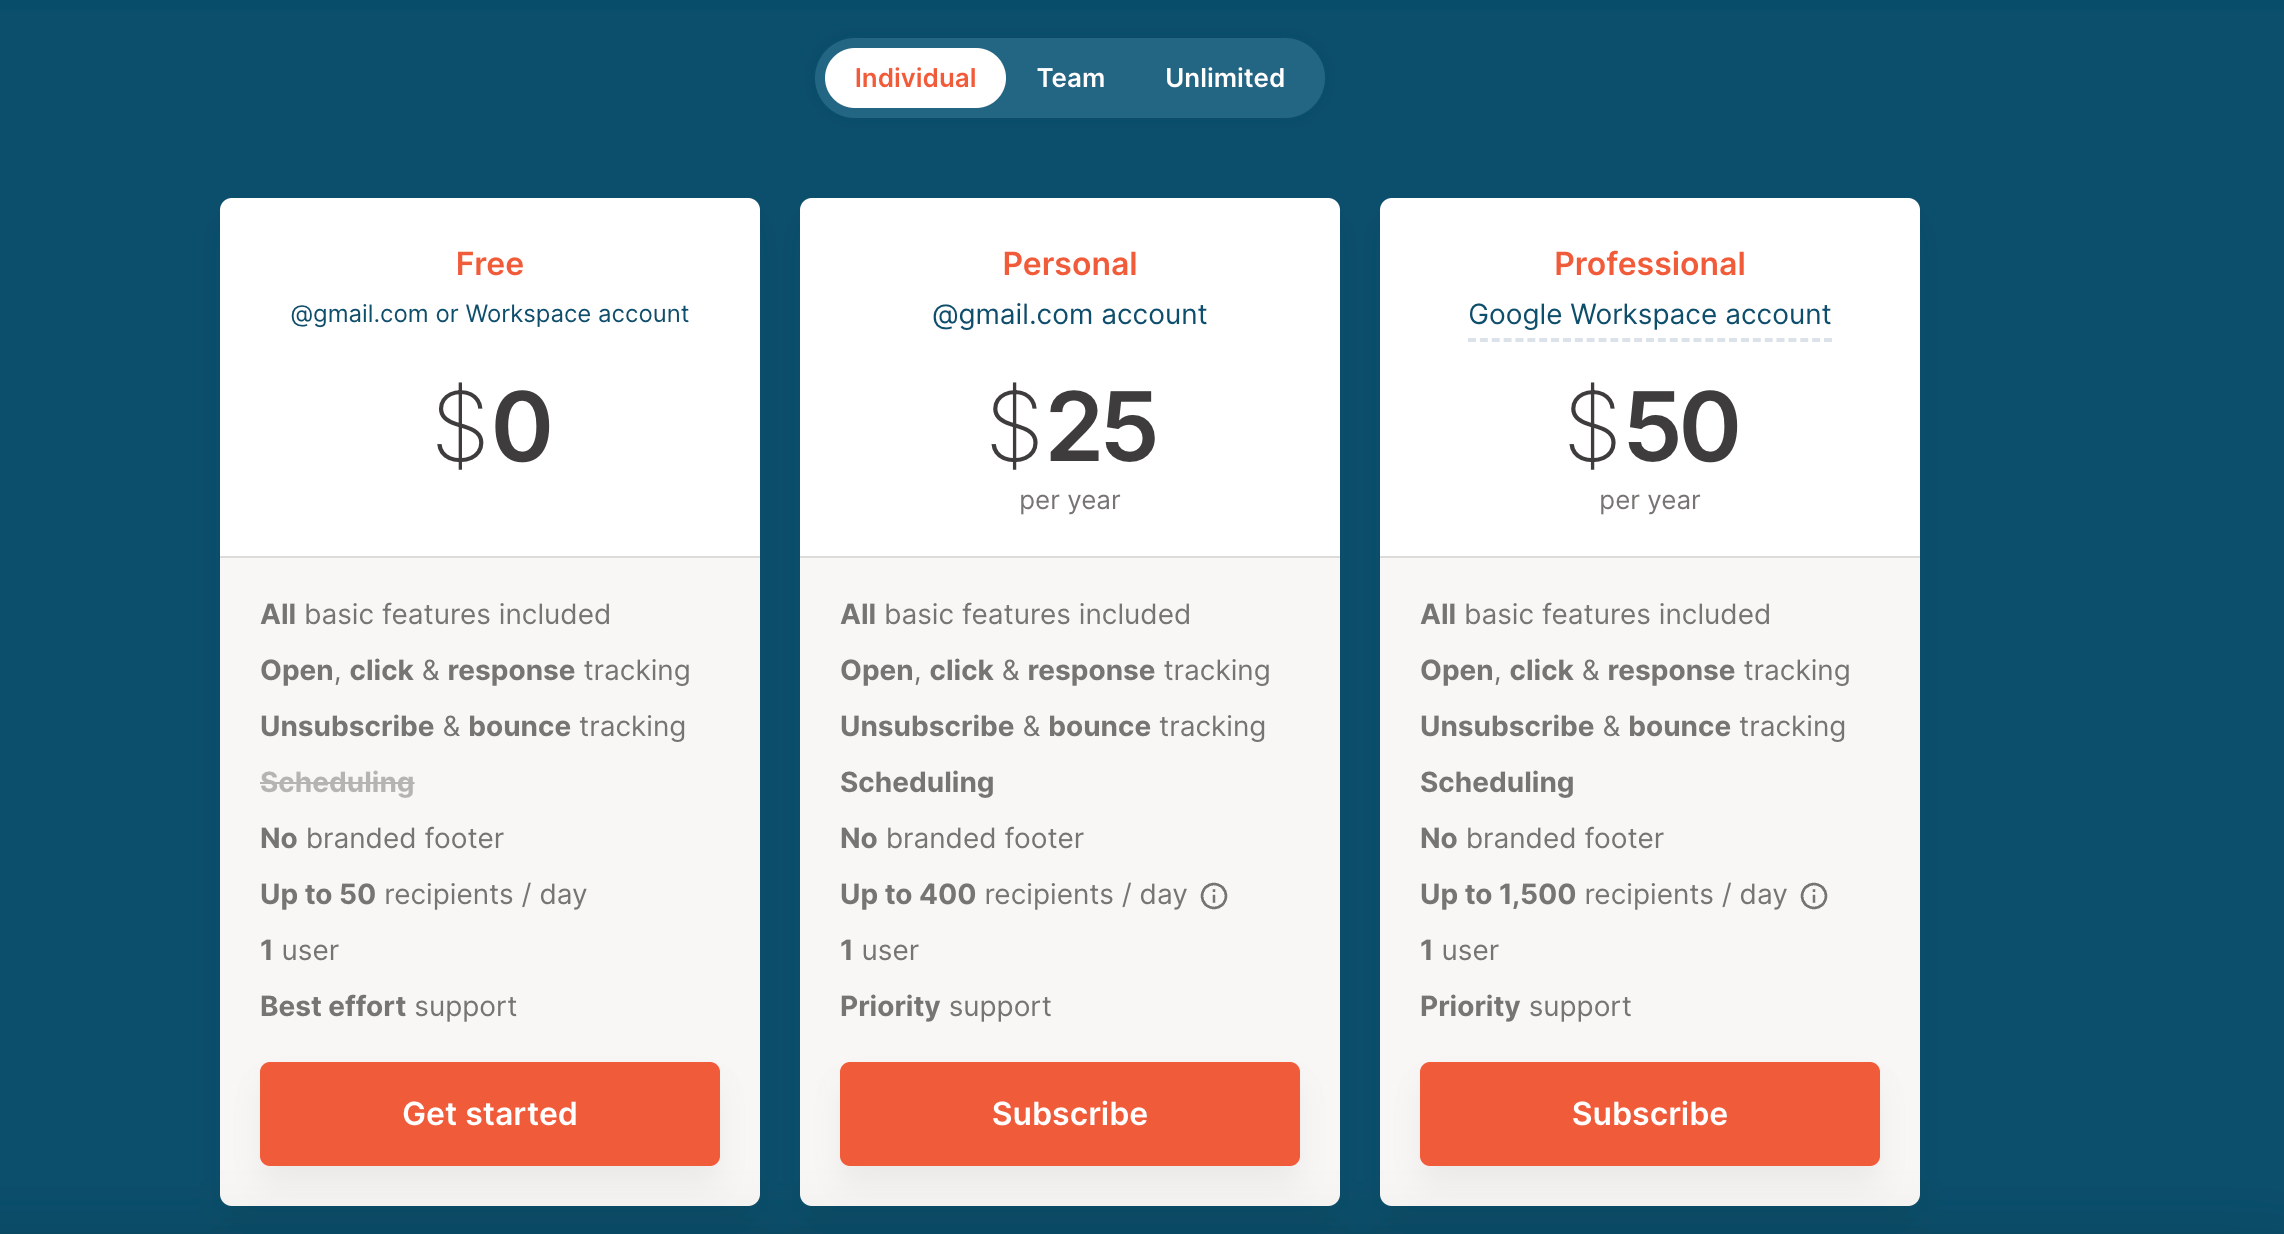
Yet Another Mail Merge (YAMM) is a popular tool for sending personalized mass emails directly from Google Sheets. It’s easy to set up and can track who opens and clicks on your emails. YAMM is great for small businesses or anyone else who needs to send lots of personalized emails quickly. YAMM has several pricing plans depending on your needs. Here’s the information about YAMM’s pricing plans for individuals.
Step 1: Draft your message
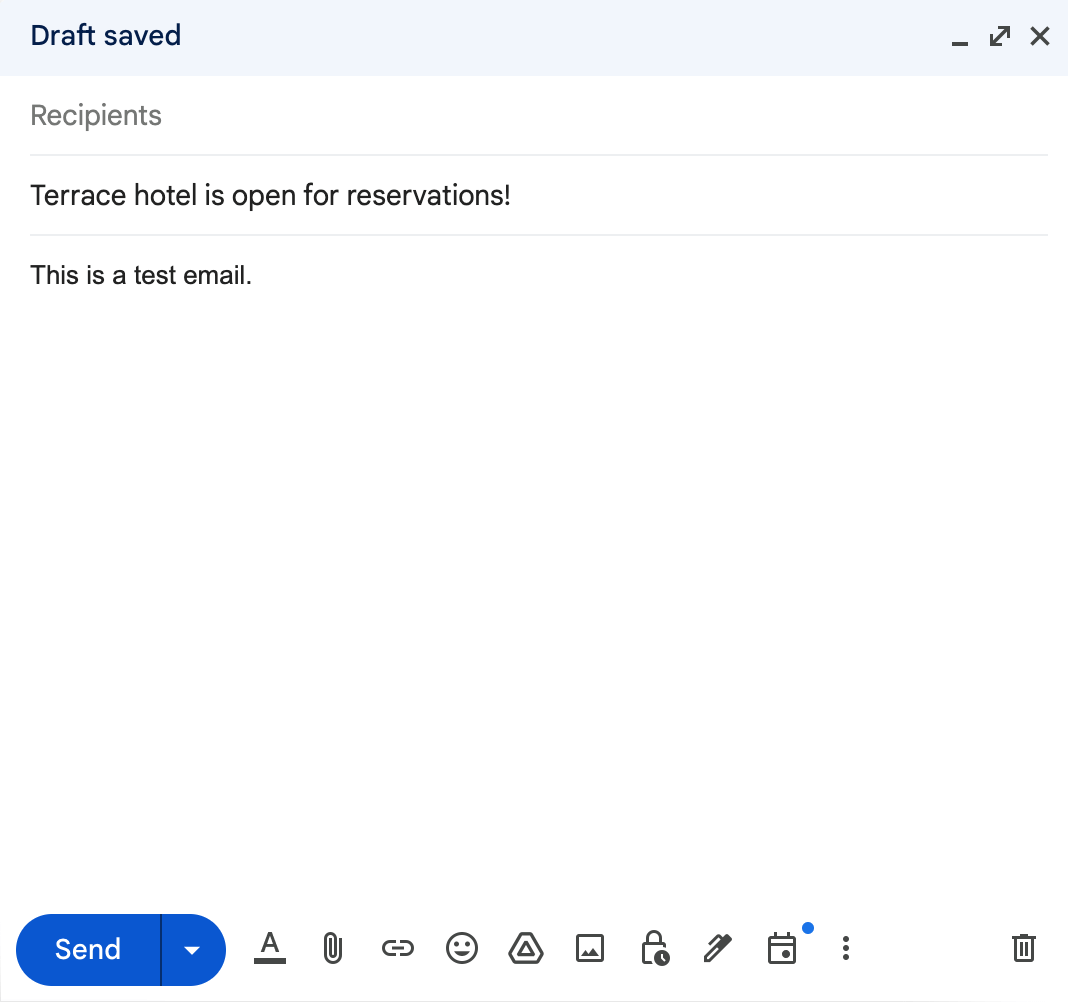
In your Gmail account, draft the email you’re planning to send to multiple recipients.
Step 2: Prepare a list of subscribers
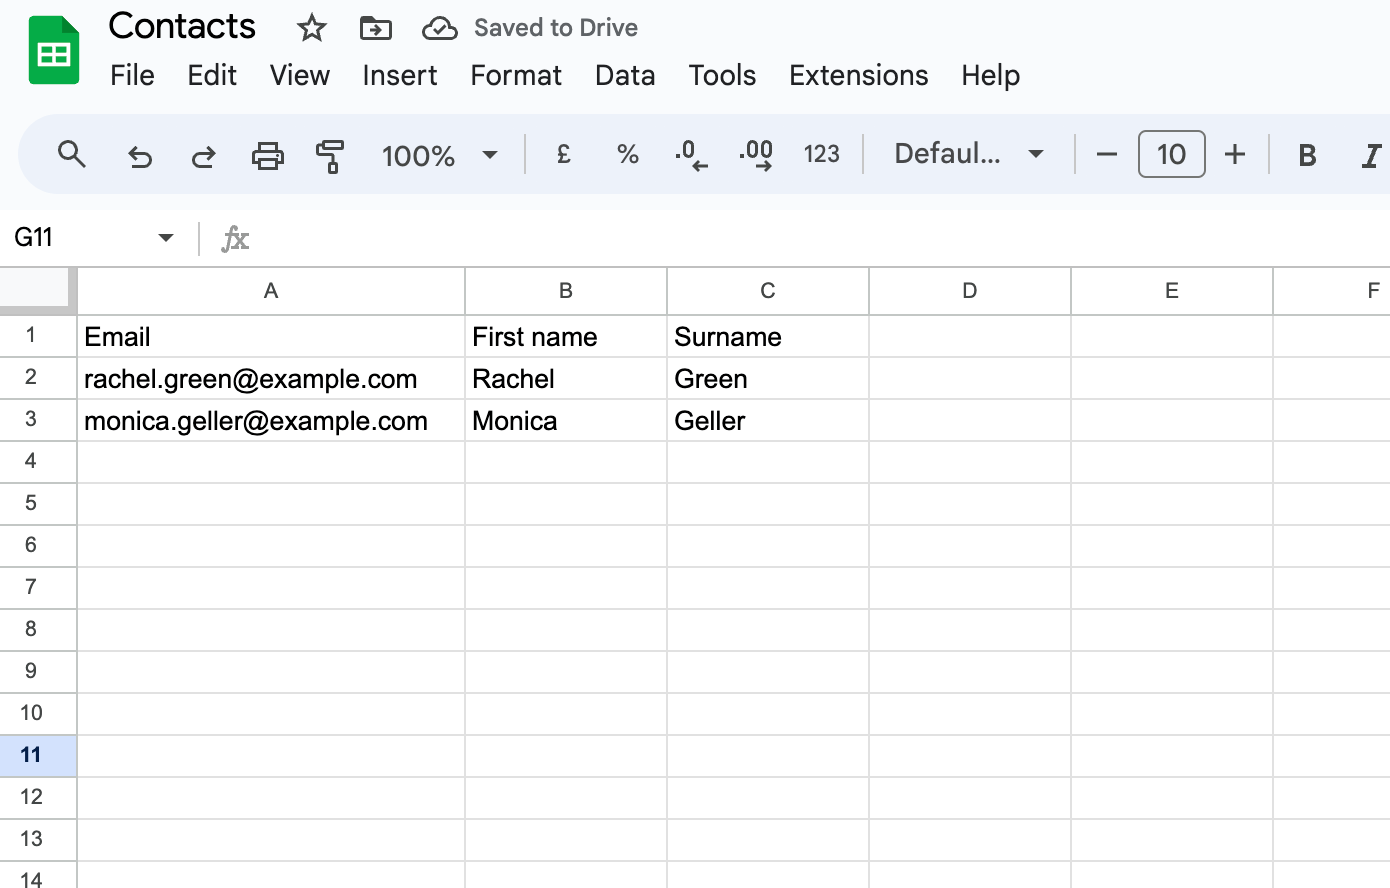
Create a list of your subscribers in Google Sheets. To do that, log in to Google Sheets (make sure you are using the same account for both Gmail and Google Sheets).
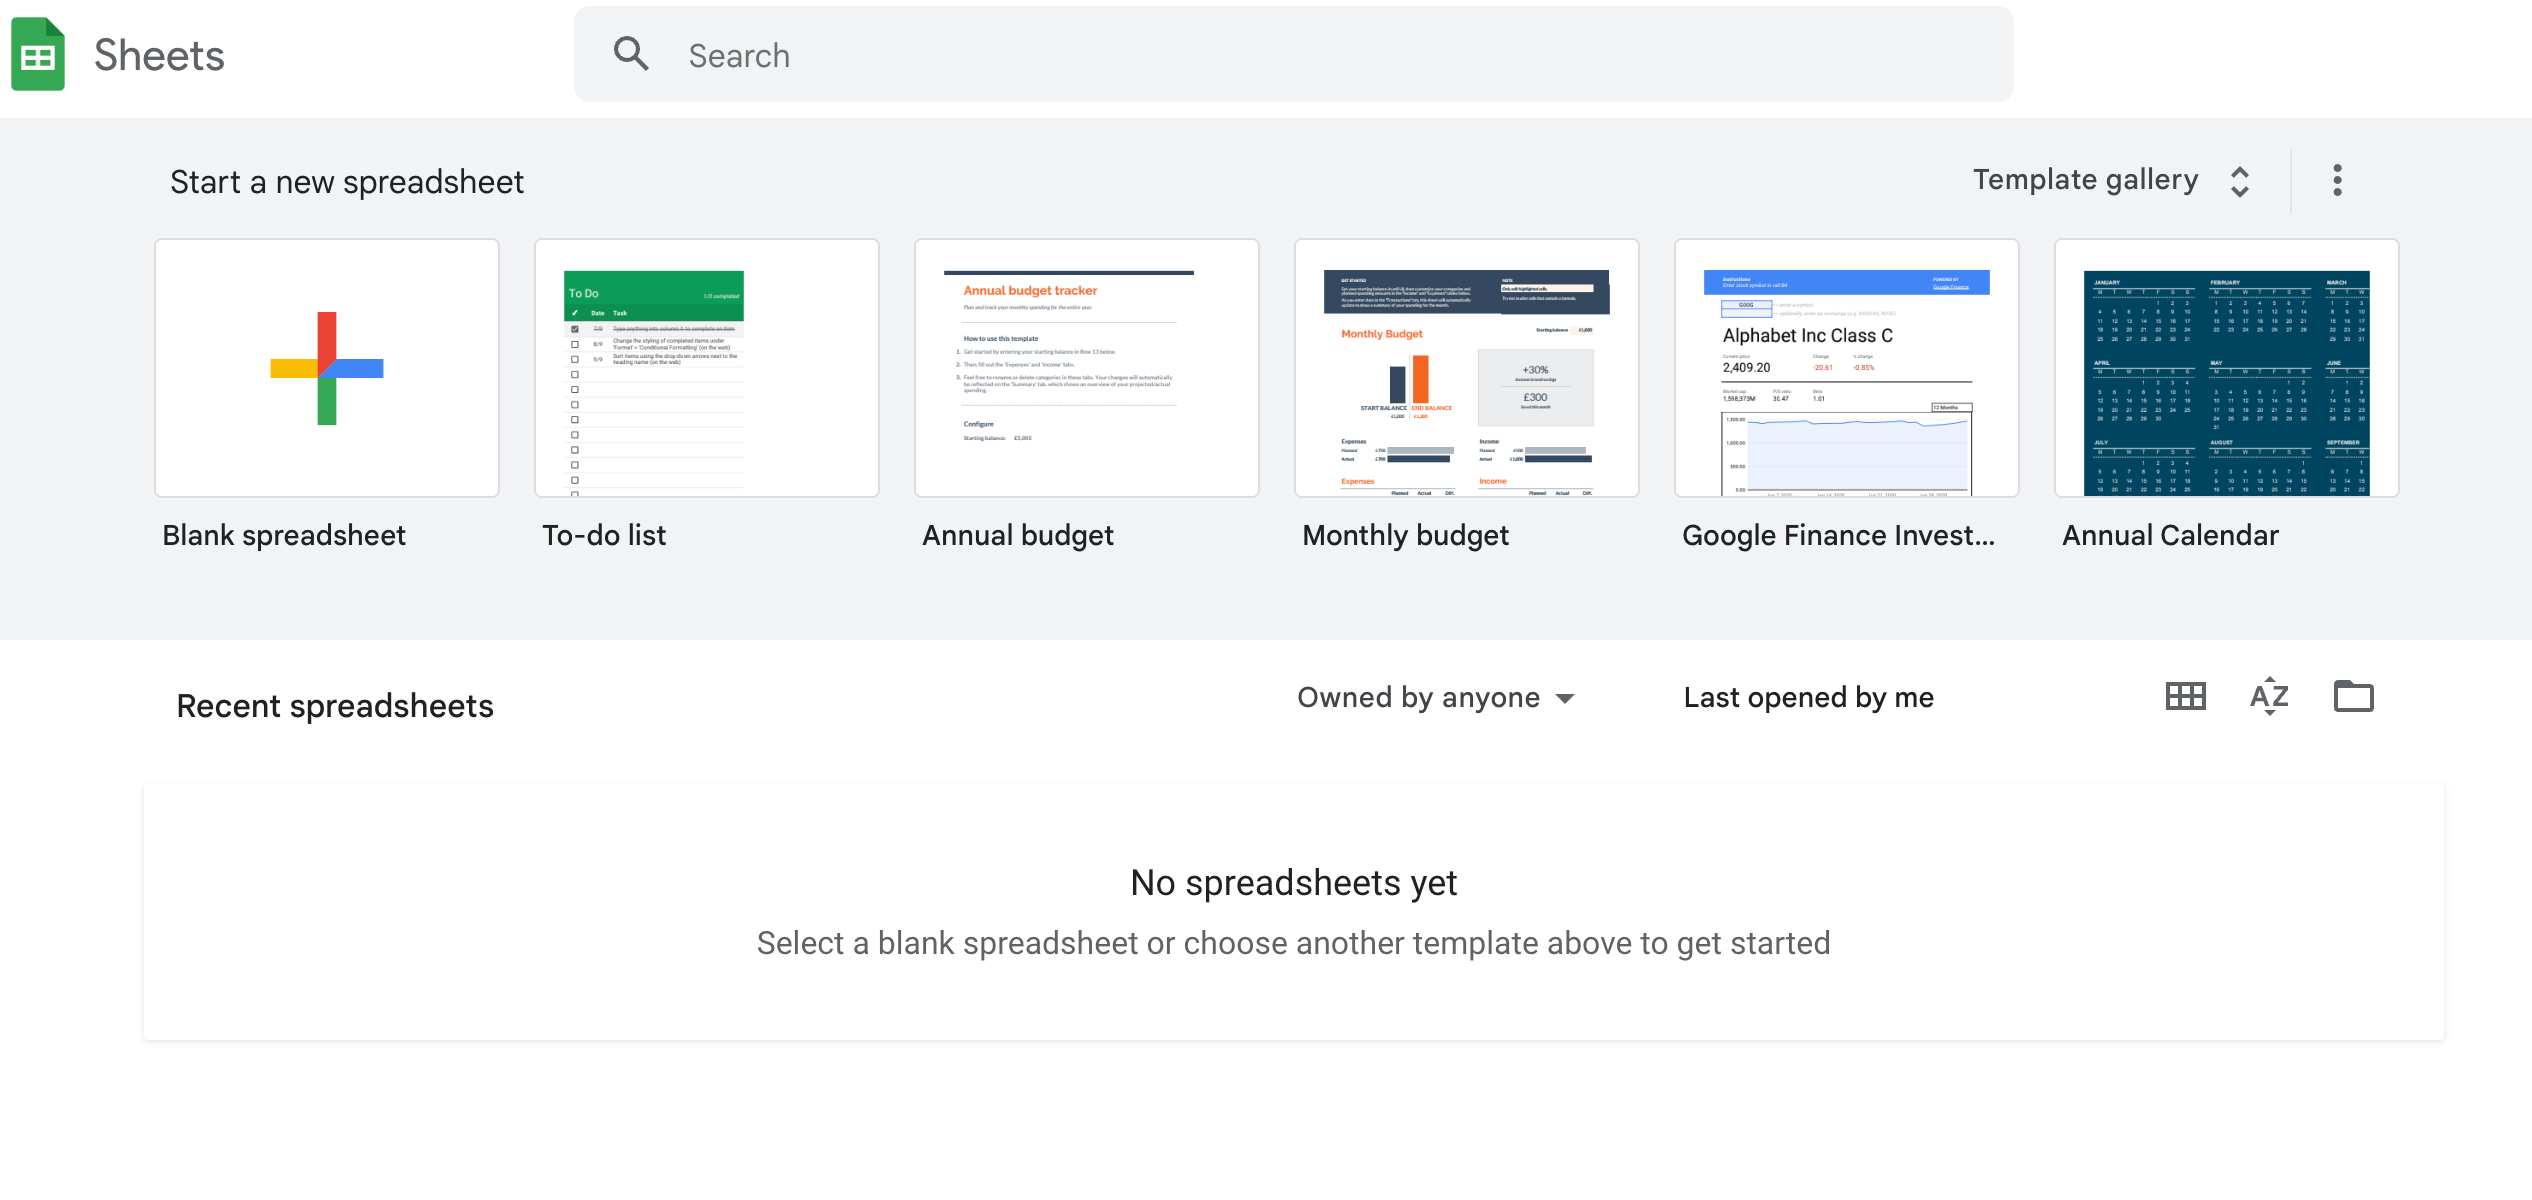
Create a new spreadsheet and insert all the relevant contact information. An Email column is mandatory.
Step 3: Install the extension
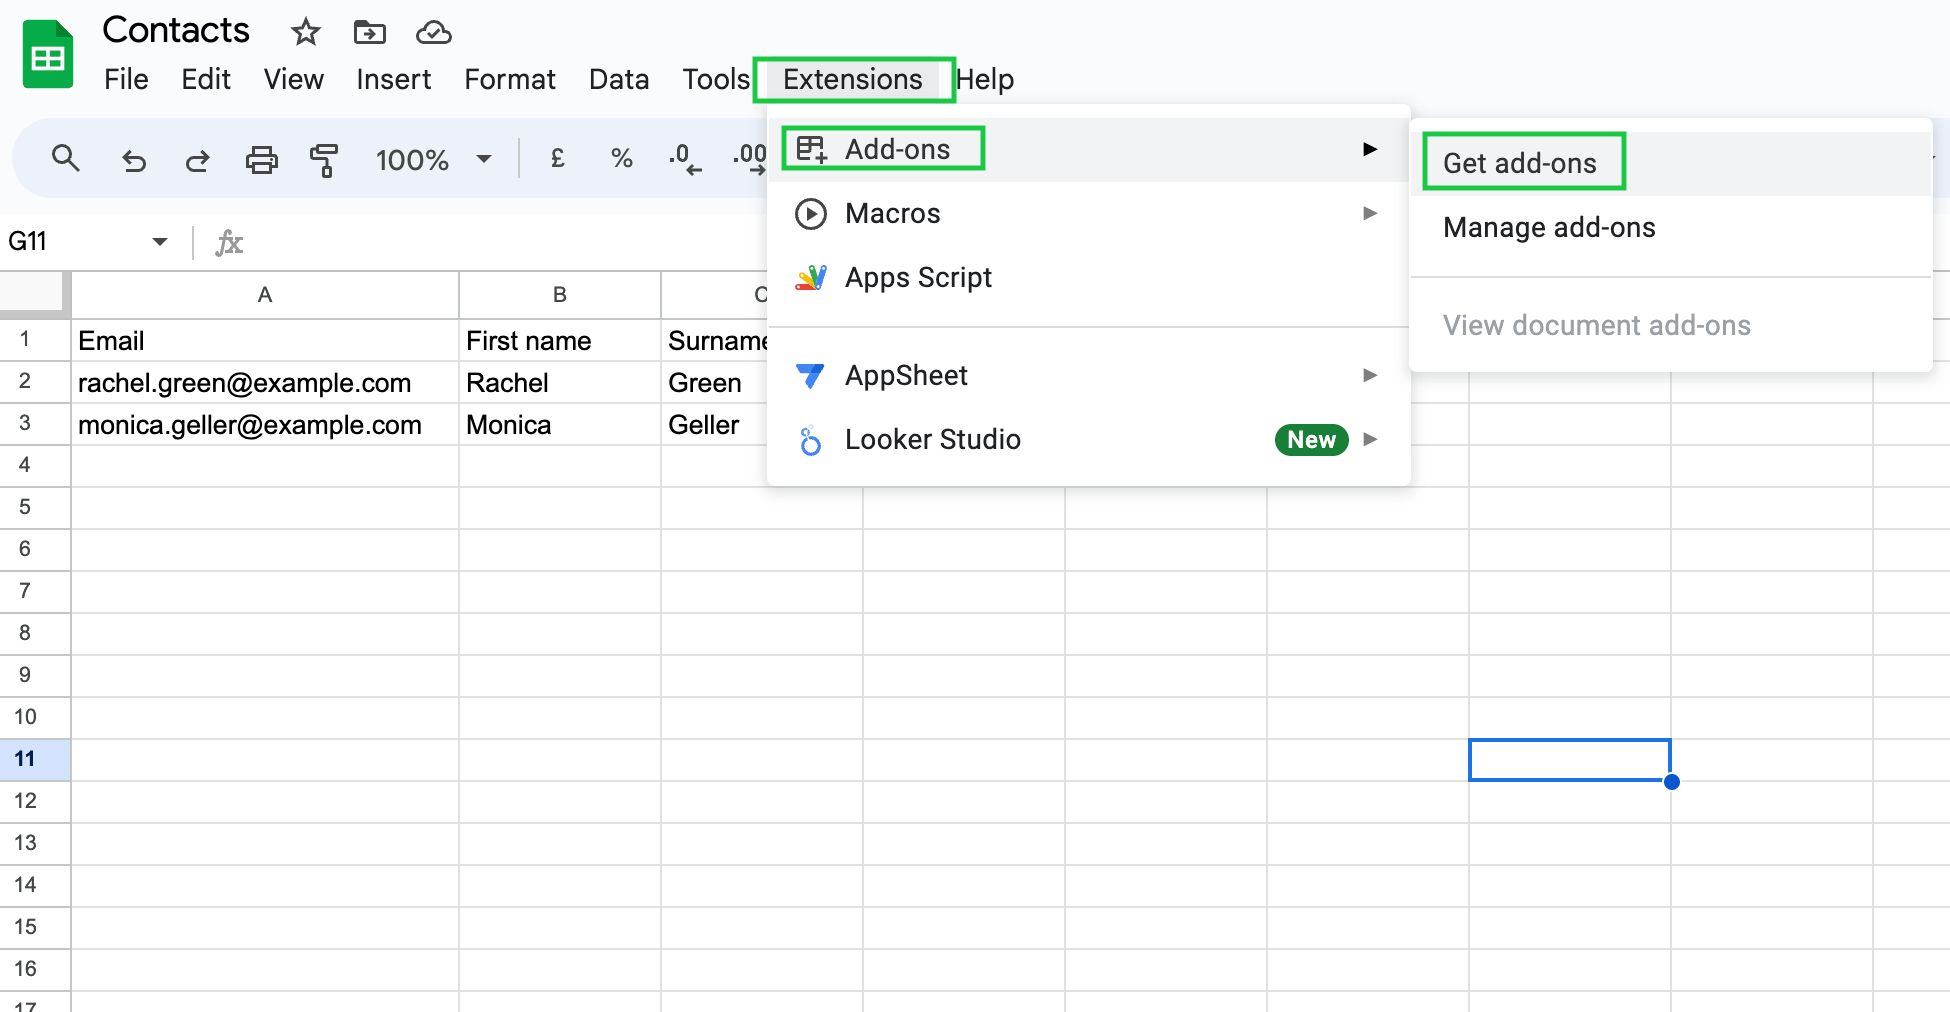
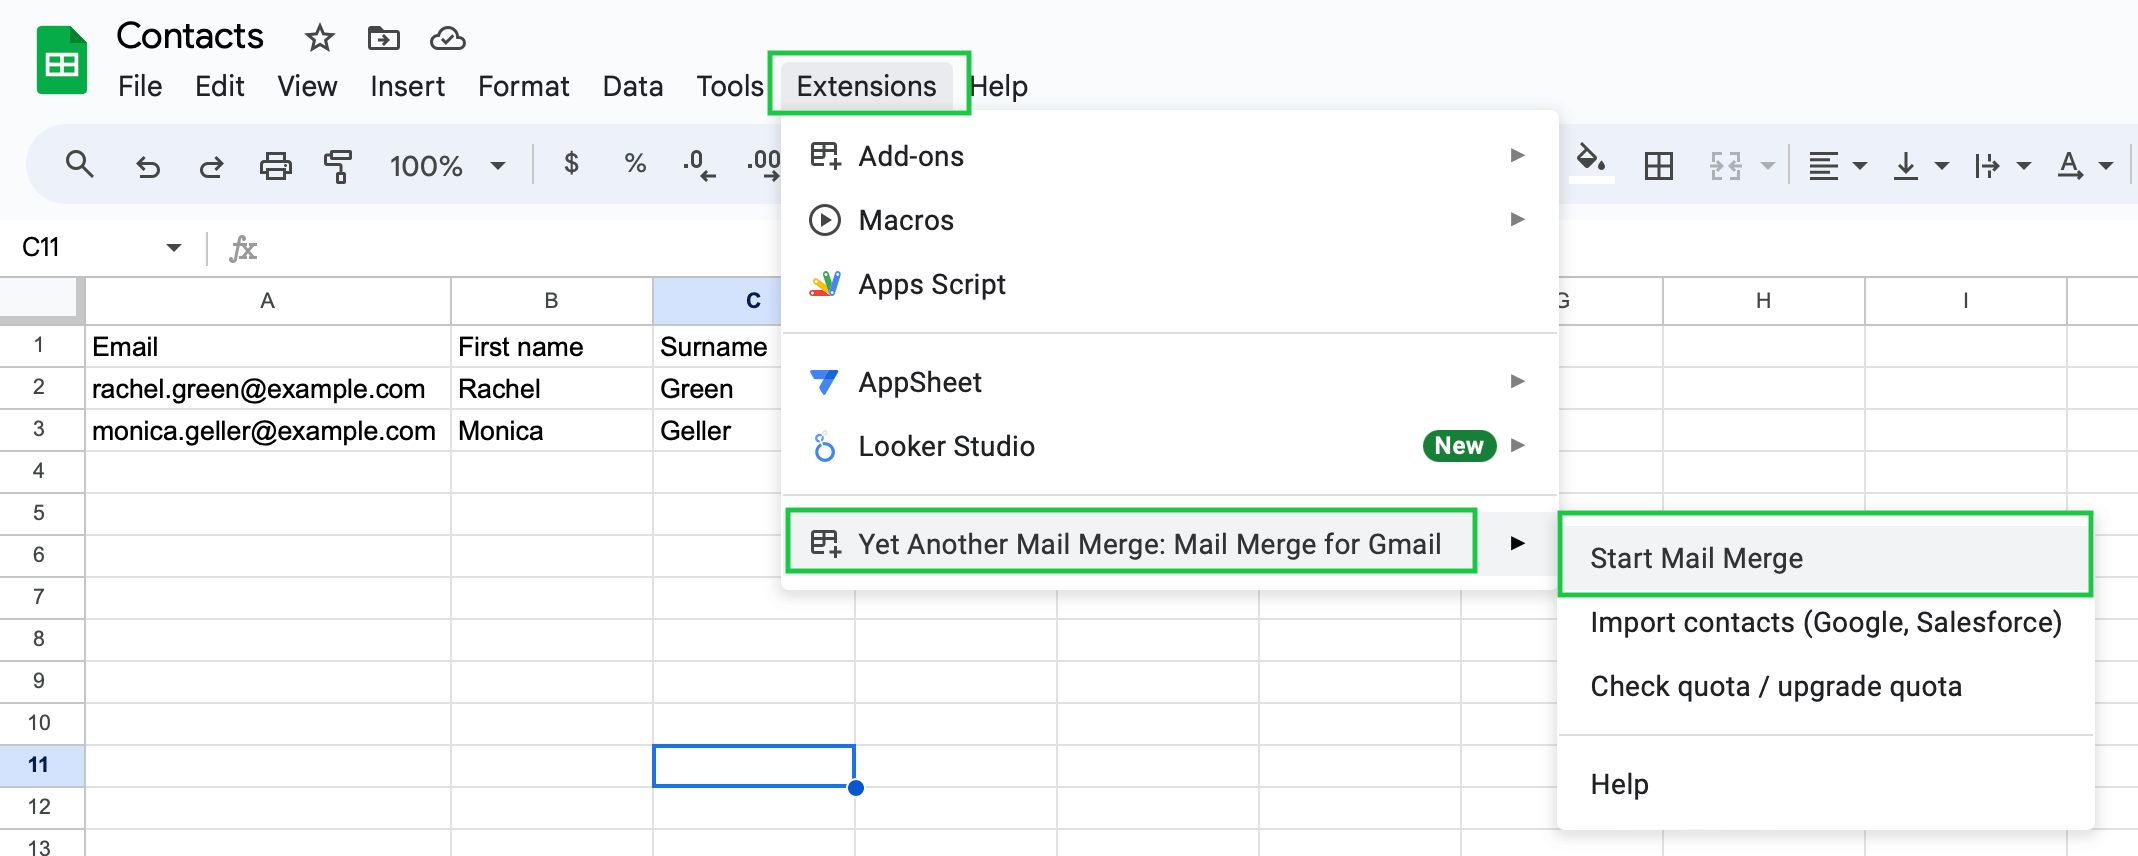
Open the Google Sheets spreadsheet with your contact list and open Google’s add-on library in Extensions → Add-ons → Get add-ons.
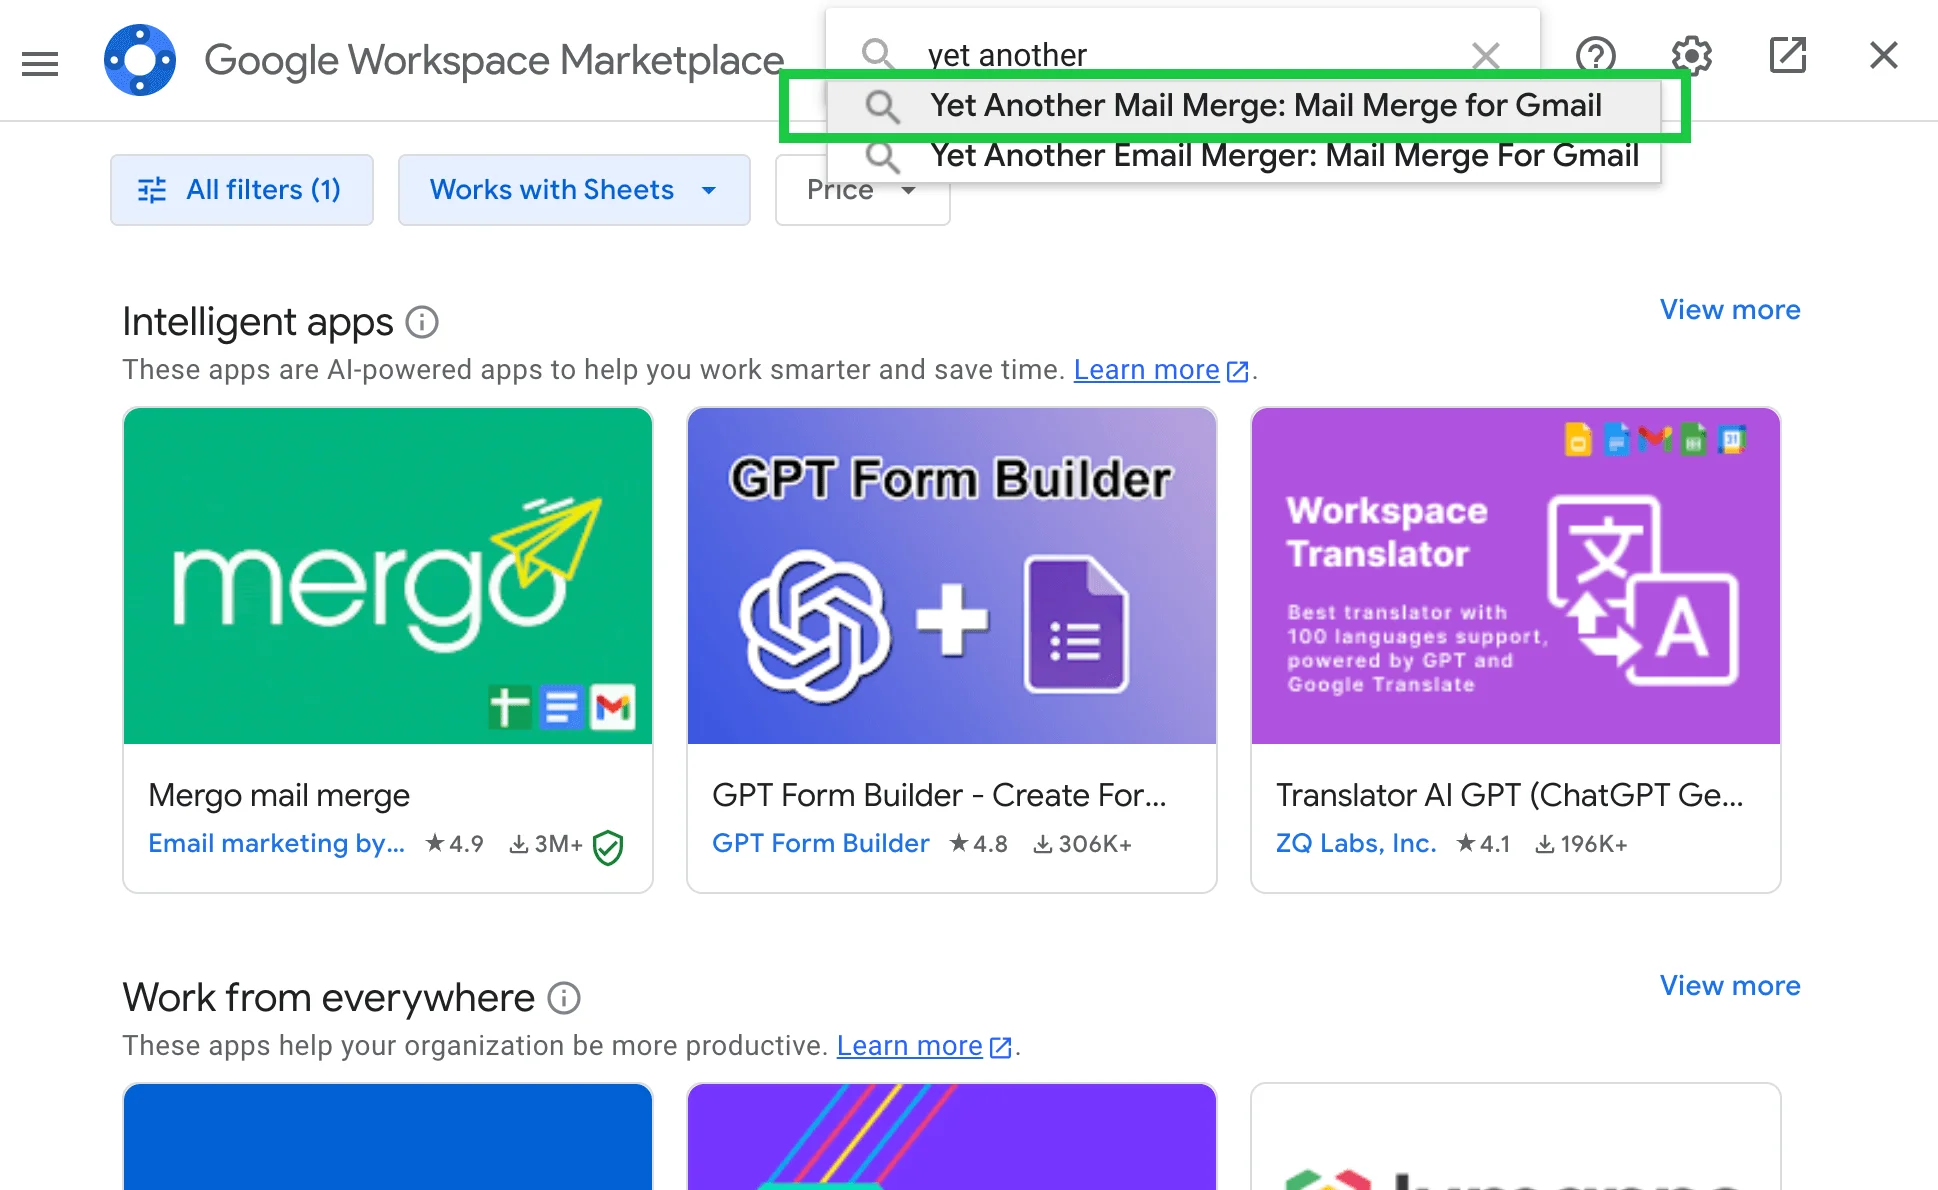
Type in “Yet Another Mail Merge” in the pop-up window.
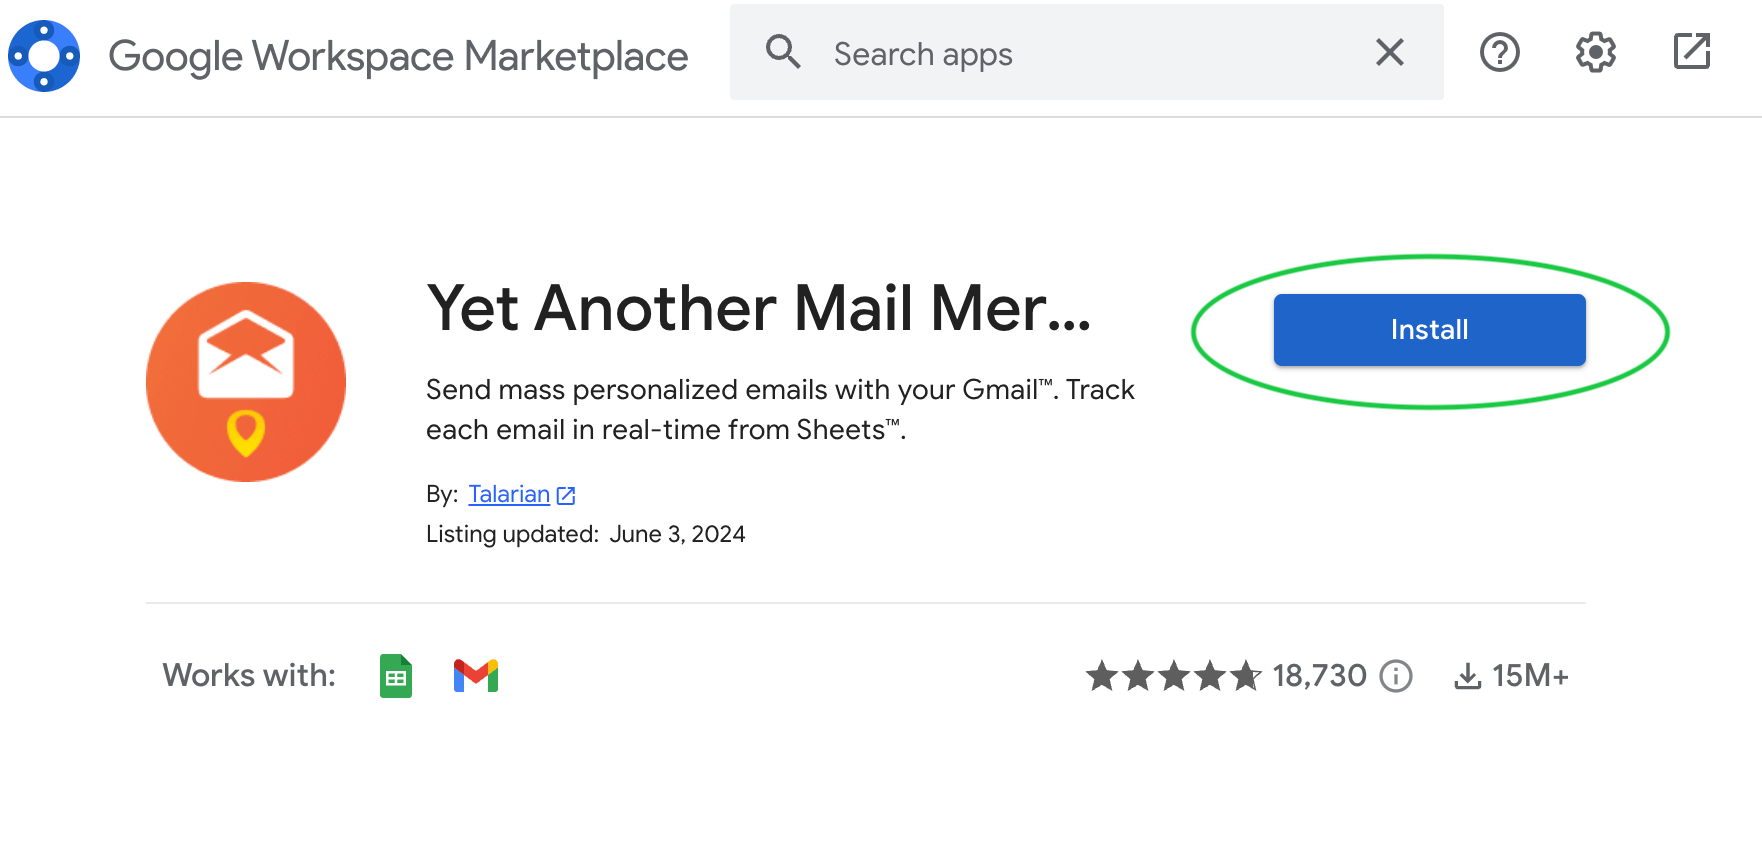
Install the add-on and give it access to your account.
Step 4: Run Mail Merge
Now you’re ready to run YAMM. Using the spreadsheet with your contact list, select YAMM in the Extensions menu. Select Start Mail Merge.
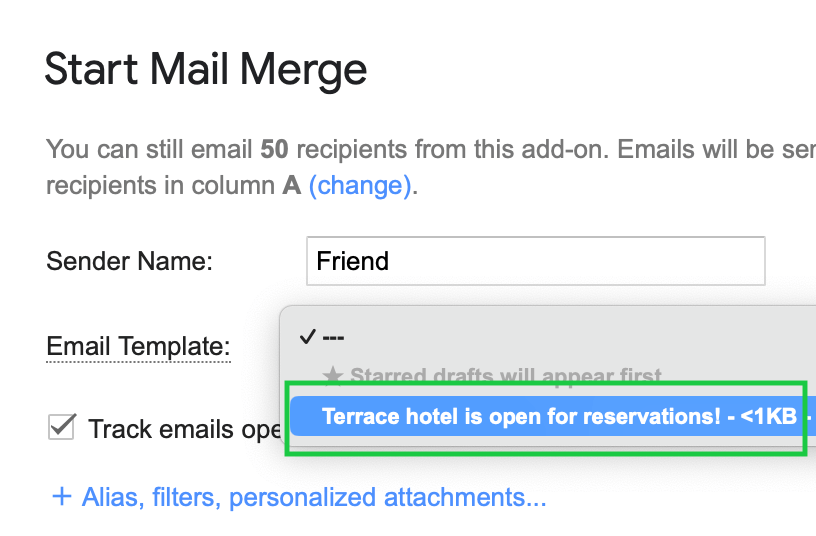
Configure your mail merge in the pop-up window and enter the name your recipients will see in their inboxes in the Sender Name field. Please note that the add-on detects column A as the column containing all the email addresses of the recipients. You can change this if it’s incorrect.

Remember the message we drafted in Step 1? Select it in the Email Template section.
Step 5: Send the email
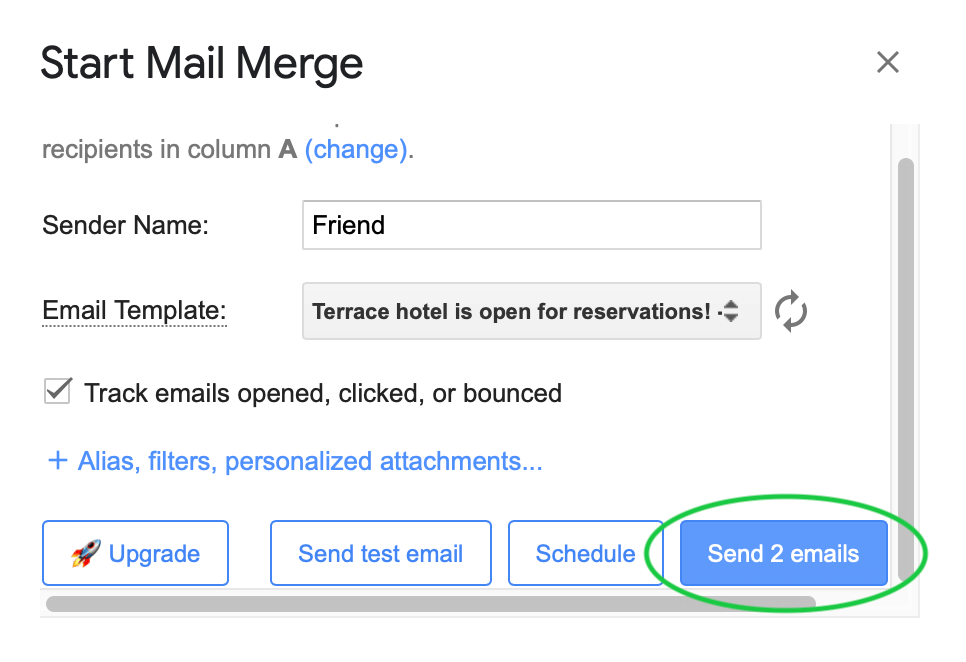
And that’s all that you need to know to use YAMM! Once you’ve completed all the steps above, click the Send x emails button. As you can see, the extension lets you track how many emails were opened, clicked, or bounced.
If you’d rather not use YAMM, plenty of other add-ons allow you to send mass emails via Gmail.
Google Workspace
Lastly, let’s consider Google Workspace. This is a set of online tools created by Google specifically for businesses, schools, and individuals to work together and be more productive. Google Workspace offers several pricing plans, with the cheapest being $6 monthly per user.
The main difference between Google Workspace and free tools by Google is that you get extra features once you sign up for the former. In our case, Google Workspace allows you to send more emails per day compared to a regular Gmail account — up to 2,000 recipients per message (maximum of 500 external recipients).
Step 1: Sign up for Google Workspace
First of all, you have to register for a Google Workspace account. Go to the Google Workspace website and fill out the form. Or you can simply log in to your Workspace account.
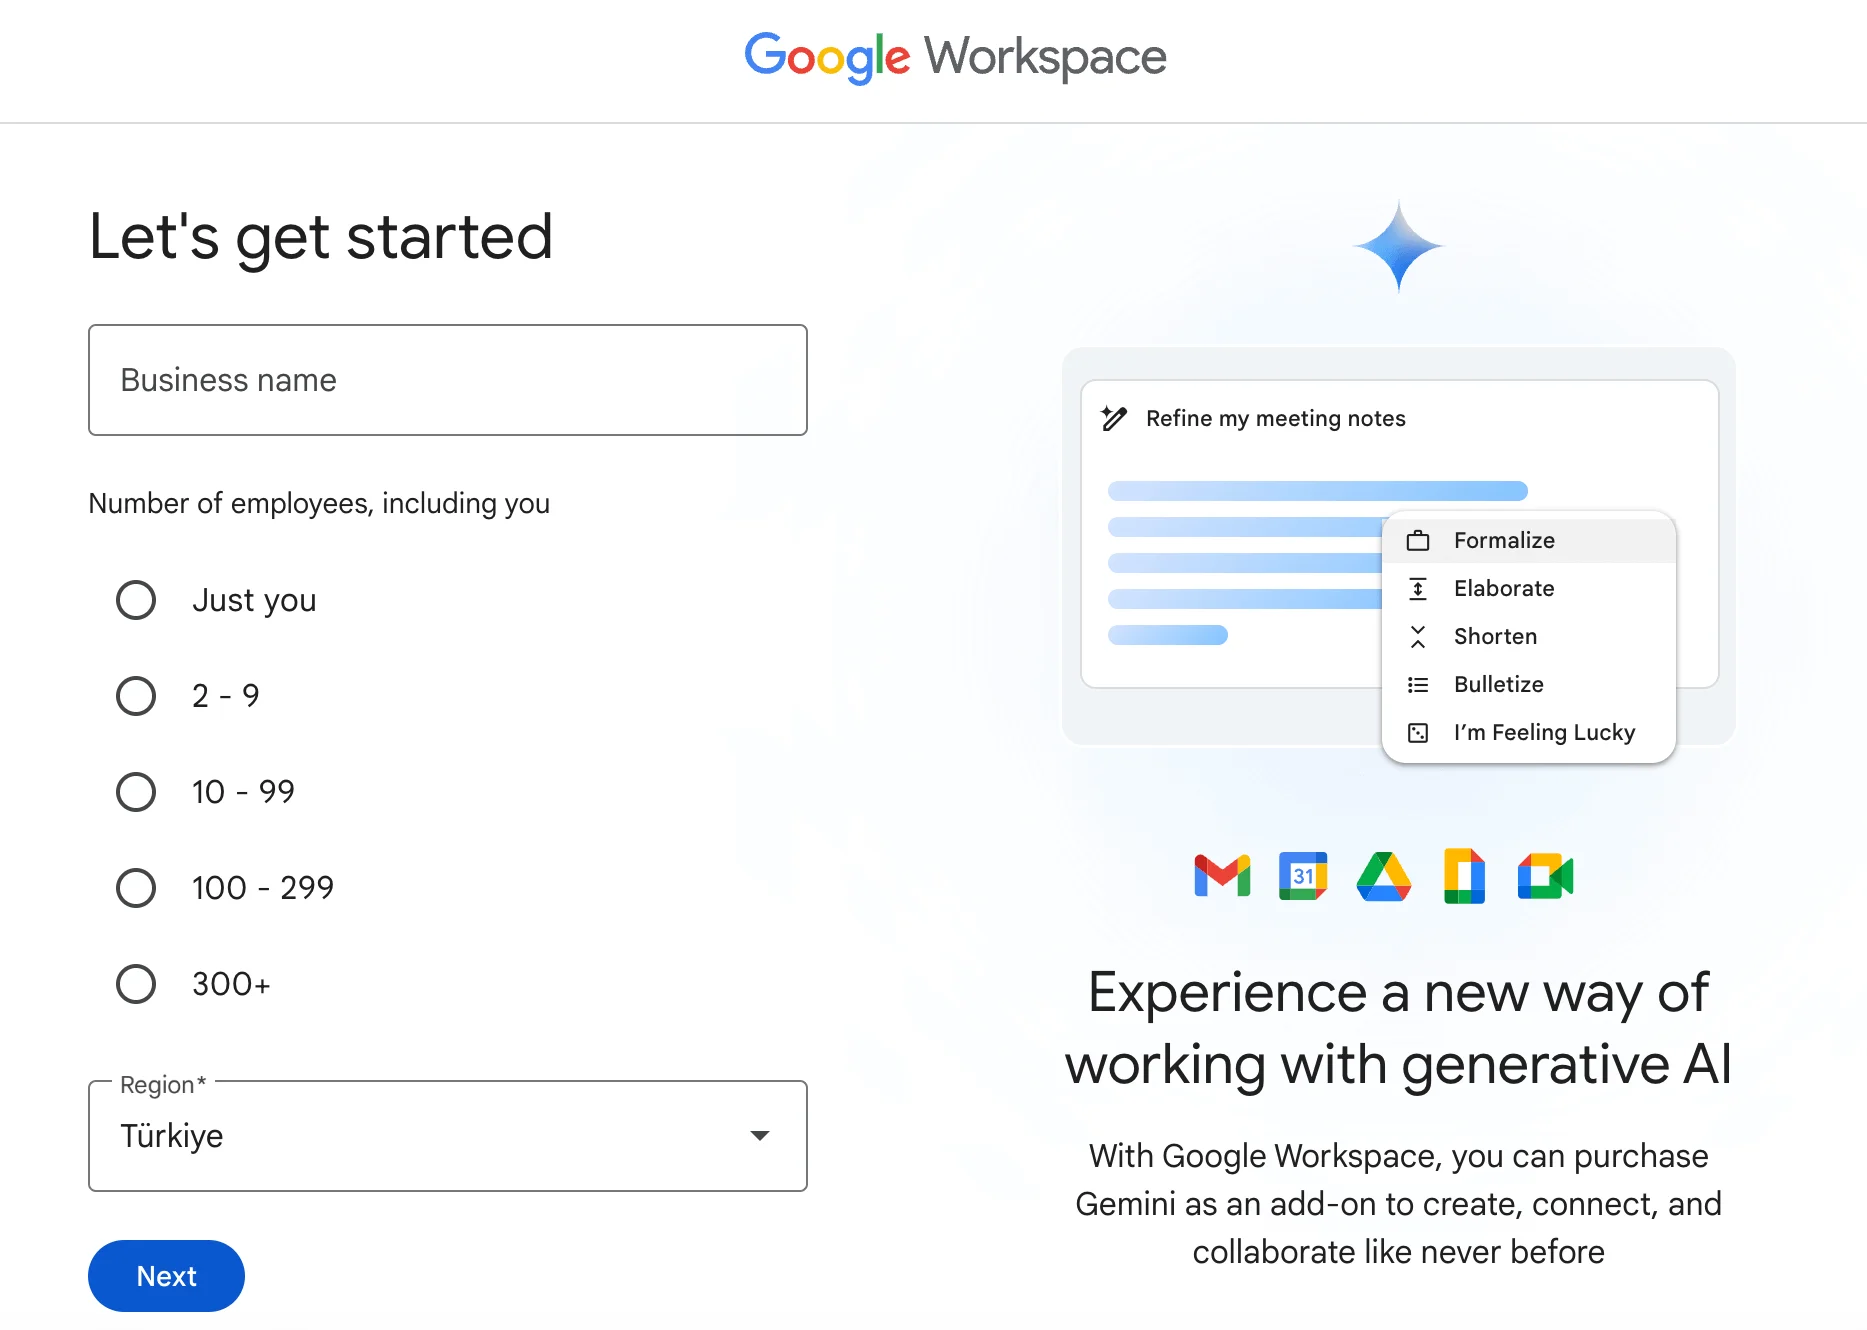
After this, you’ll have to add your contact info and your company domain. Don’t have a domain? No problem. Select “No, I need one” when filling out this section and get one from Google.
Step 2: Enable mail merge
The next step is enabling mail merge mode. To do this, go to Gmail and create a new email draft the way you normally would. Go to the To: line in the toolbar and turn on Mail Merge.
If you don’t see this option, you may need to allow it in your account settings. If you don’t have it in your settings, check in with the Workspace administrator or change the Workspace edition you are using since Mail Merge is available to a select few plans.
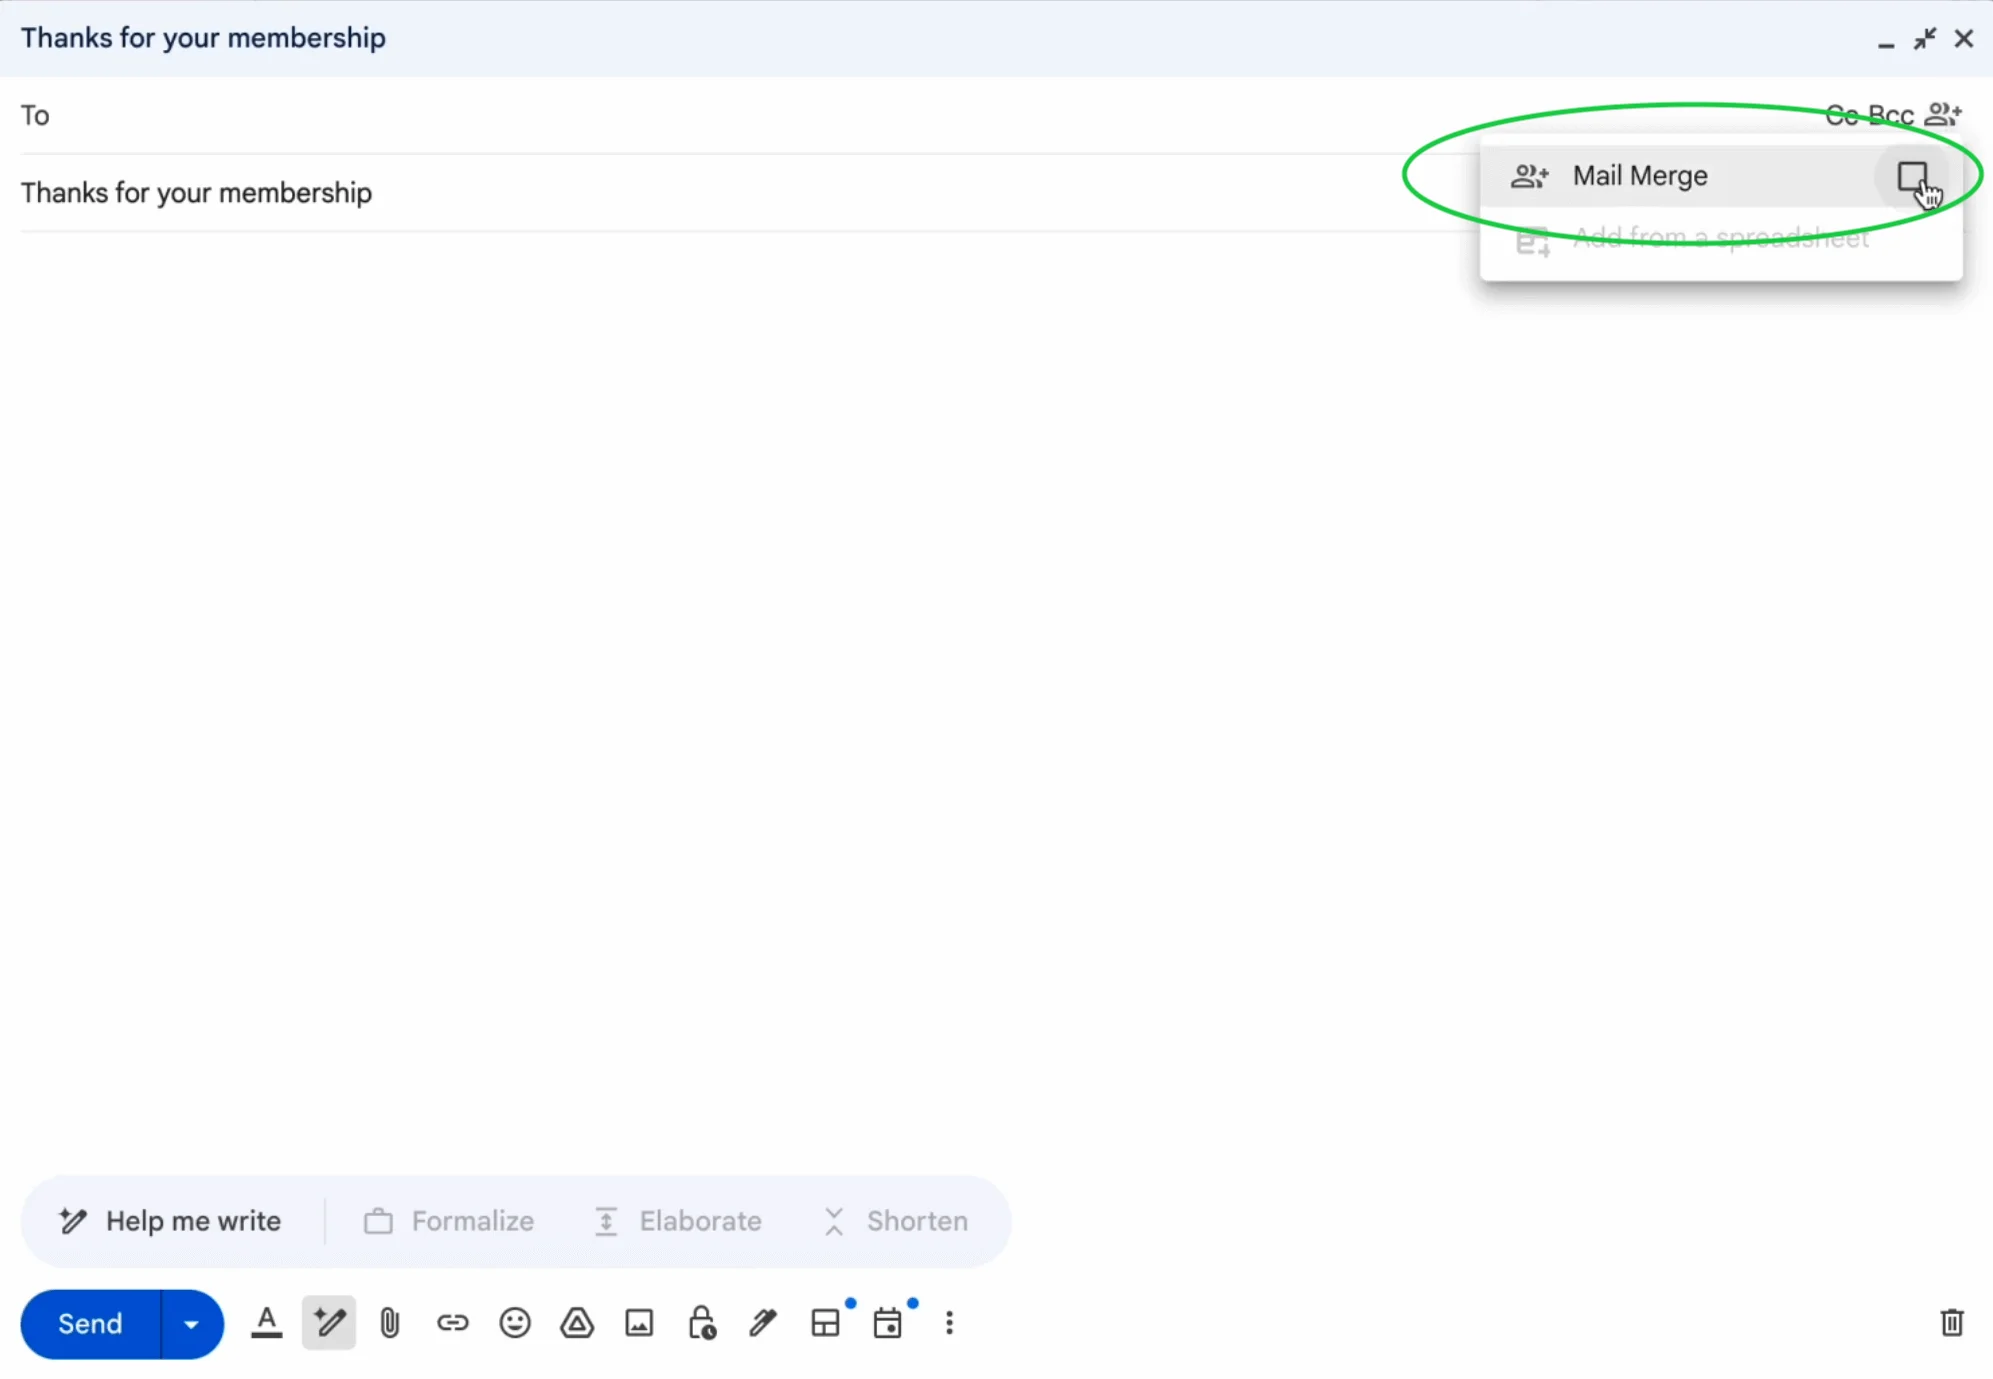
Once you’ve done this, you’ll see that your New message dialogue box has turned purple, and what was formerly the Send button now reads Continue.
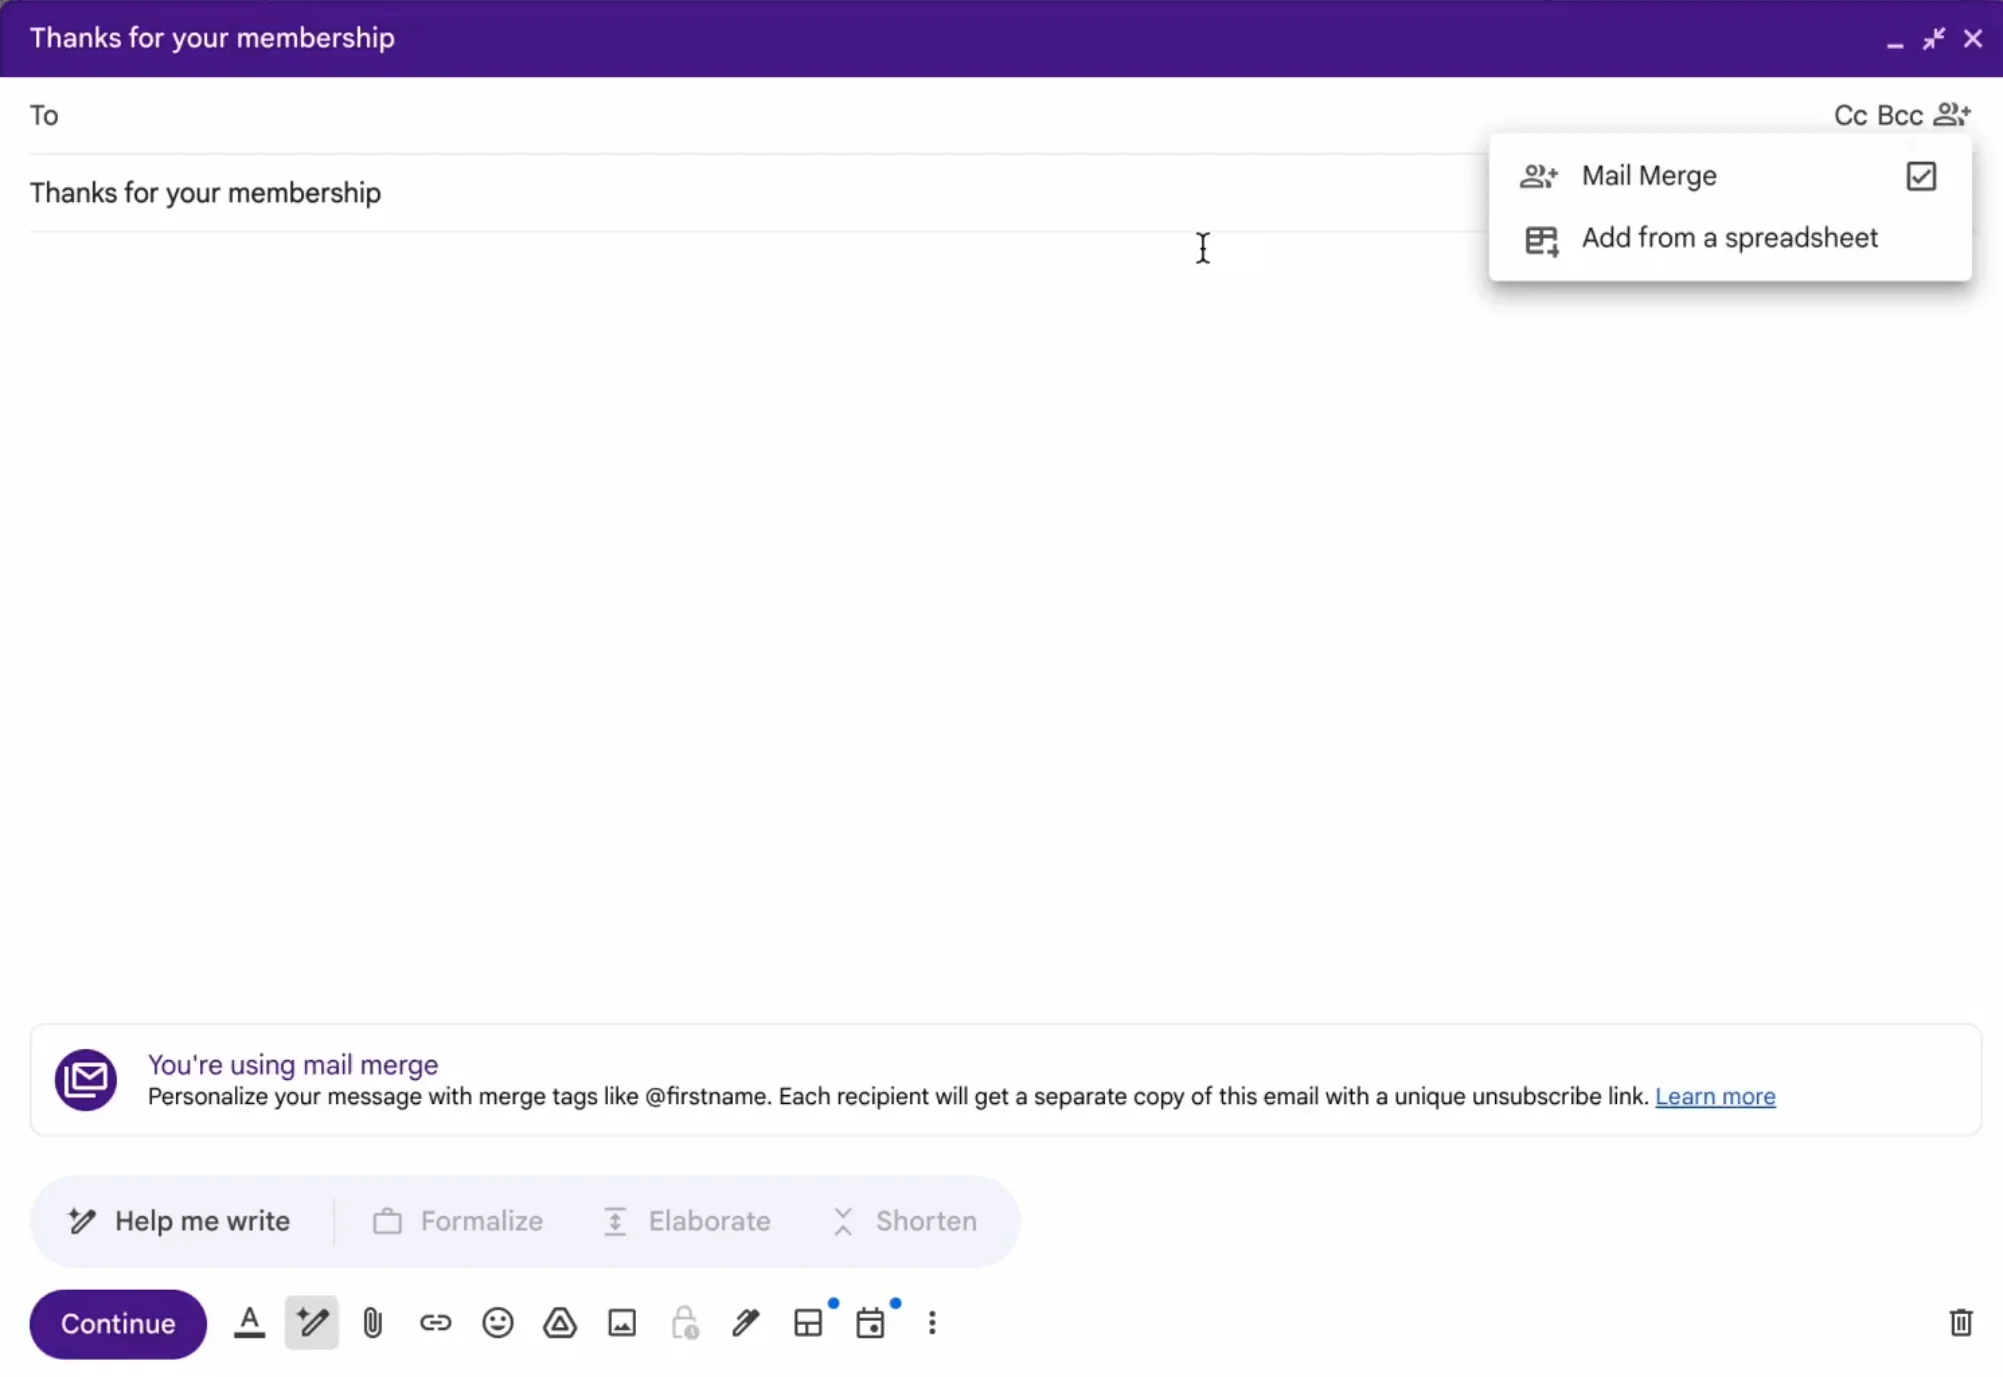
Step 3: Draft a mass email
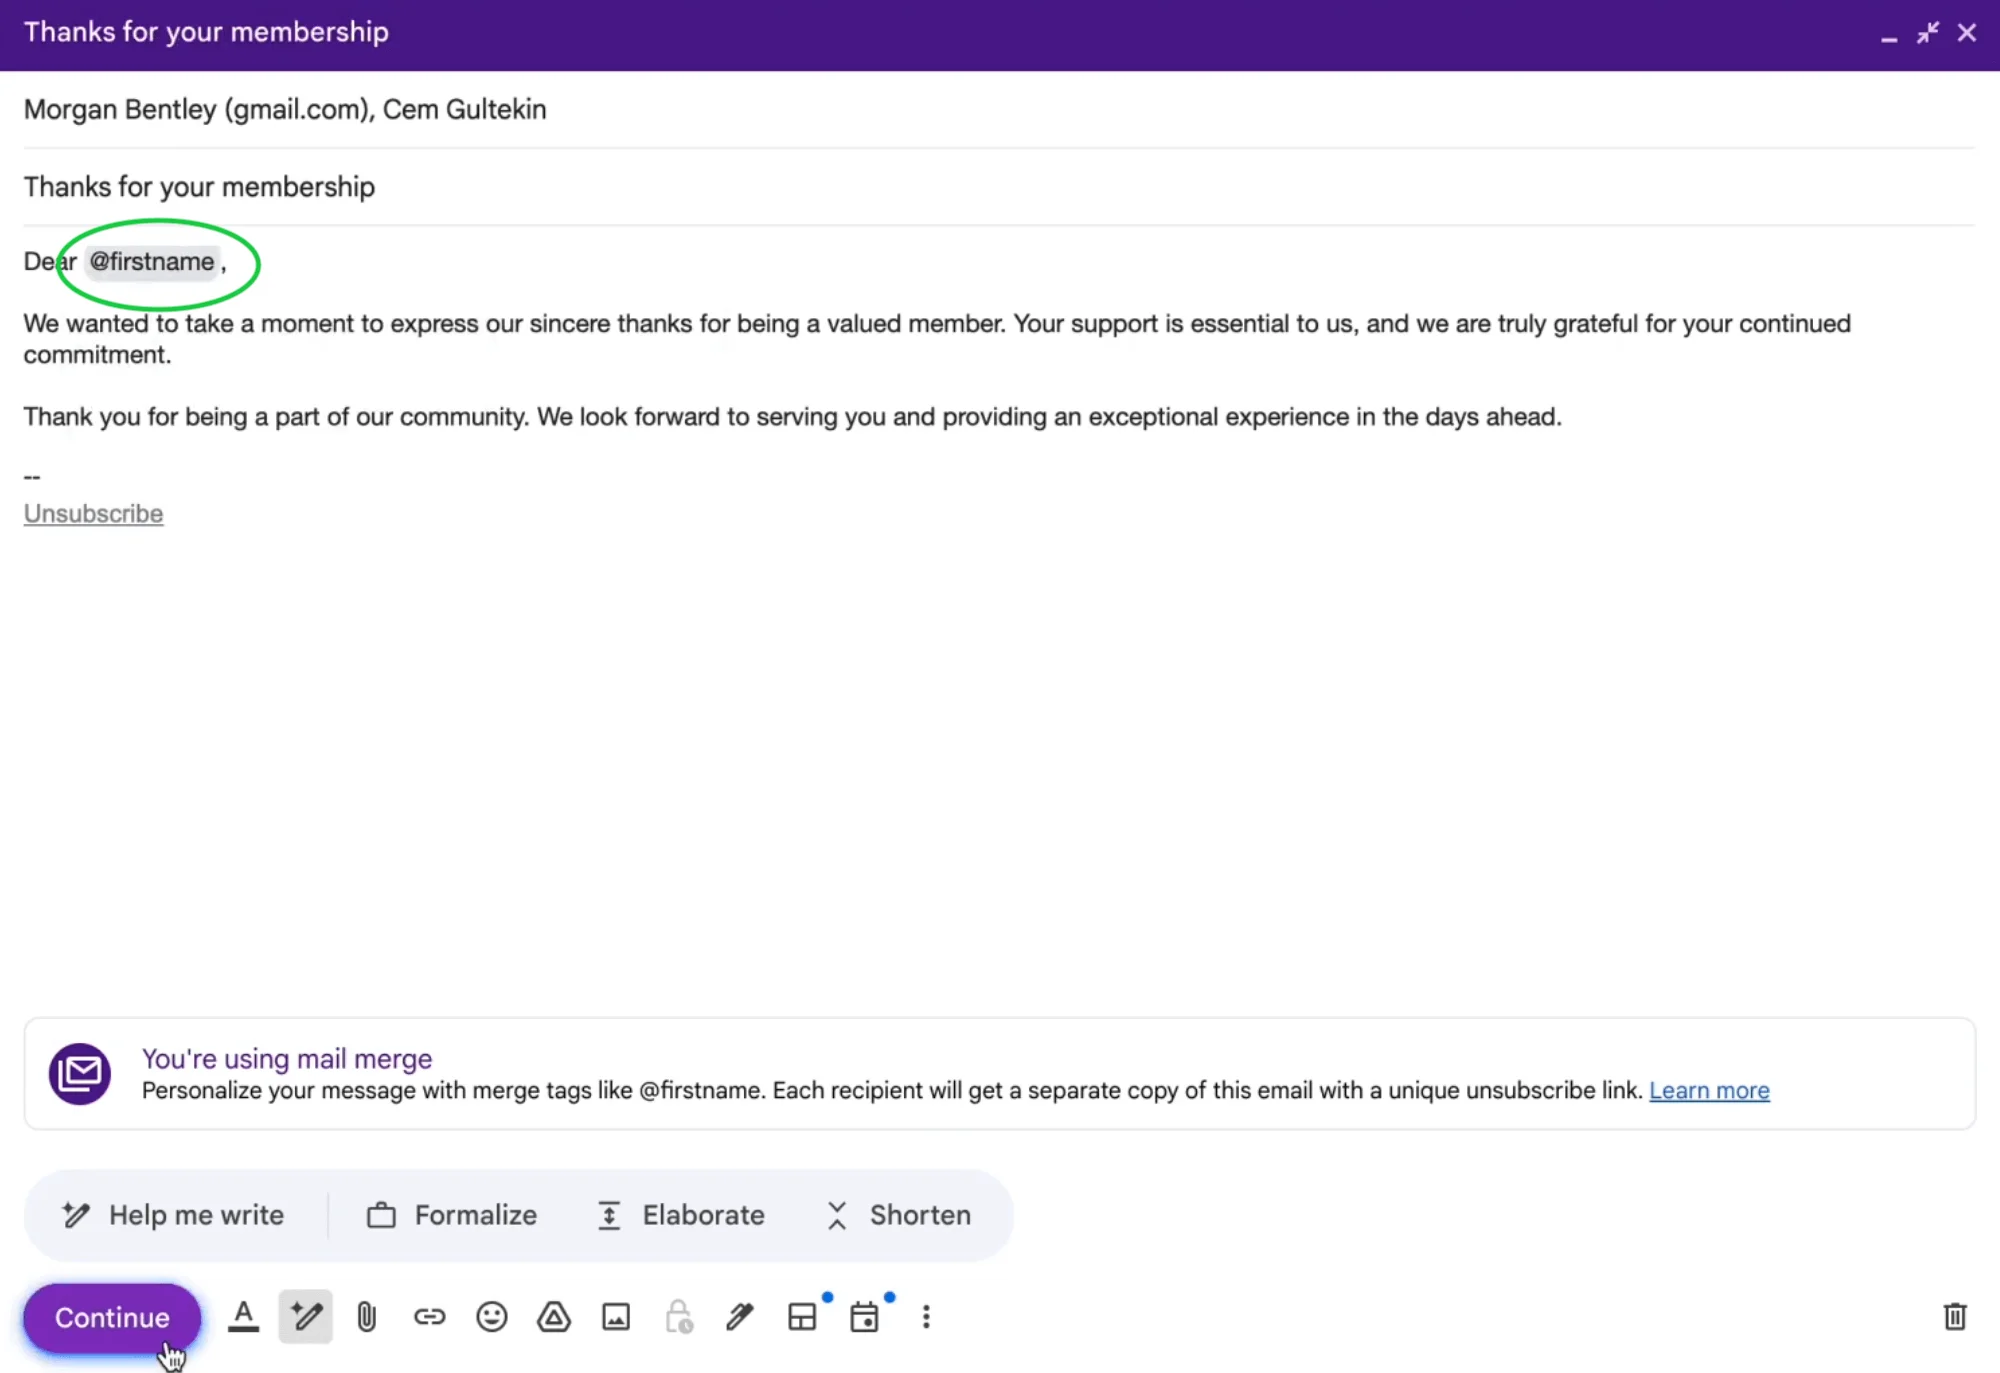
Begin drafting your email. Google Workspace allows you to personalize your emails using the @ key. For example, in the screenshot below, @firstname will be replaced with the first name of each recipient.
You may find other Google Workspace tools helpful at this stage too — for example, you now have access to Google’s library of templates (called layouts). You can access it by clicking on the Select layout icon at the bottom panel, by the Continue button.
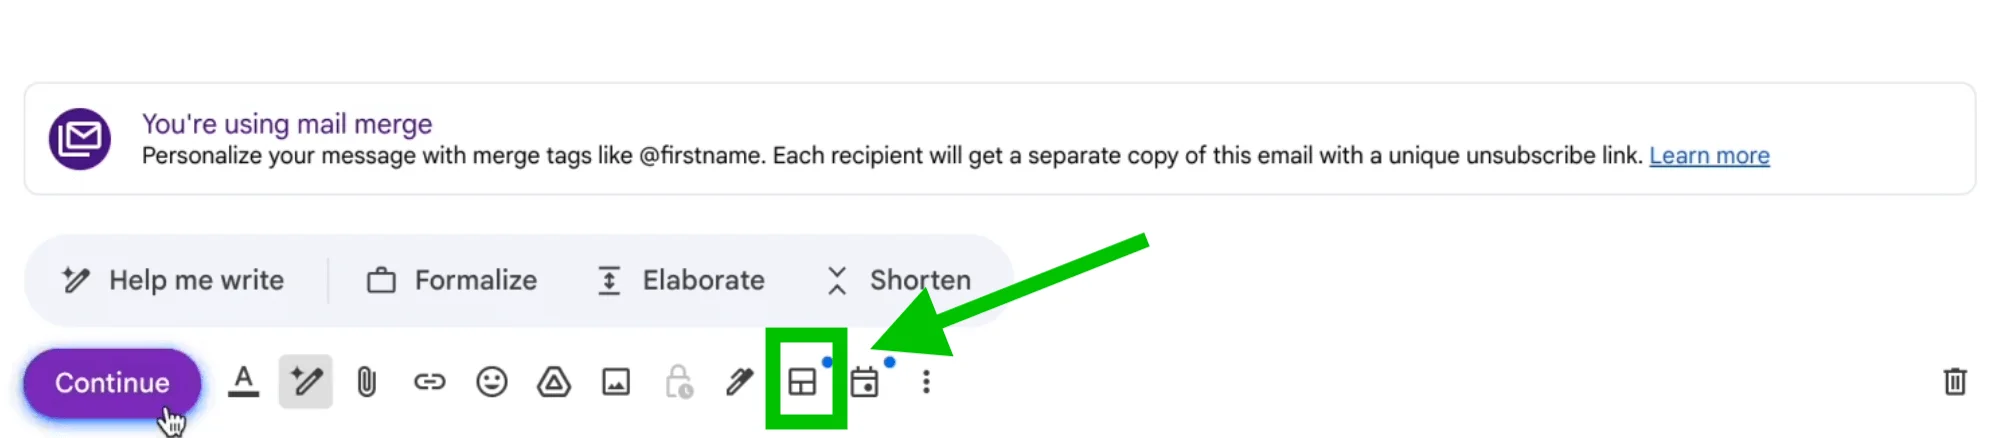
This is what Google Workplace’s template library looks like:
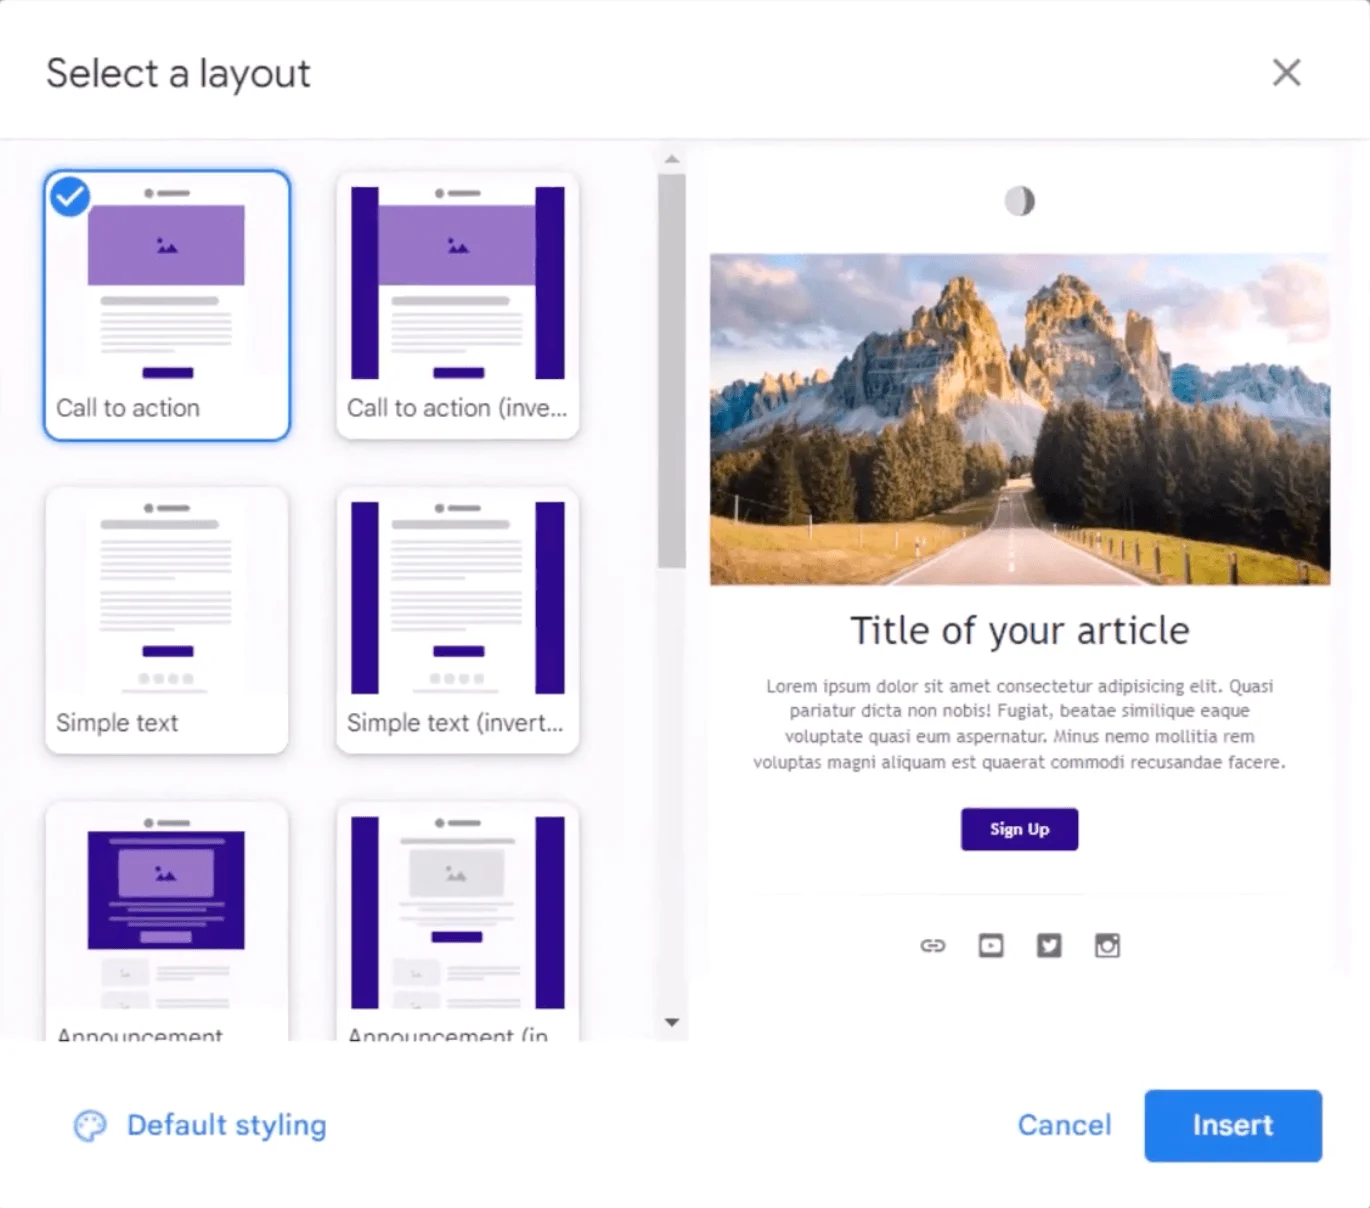
In addition to selecting the layout, you can customize it by changing colors and fonts and inserting your own images, just like you would do in a regular email marketing platform.
Step 4: Select recipients
Add recipients to the To: field by typing in their email addresses, or using a relevant Label. Alternatively, you can also add recipients by linking a spreadsheet to your email. Click Add from a spreadsheet in the To: field, select your spreadsheet, and click Insert.
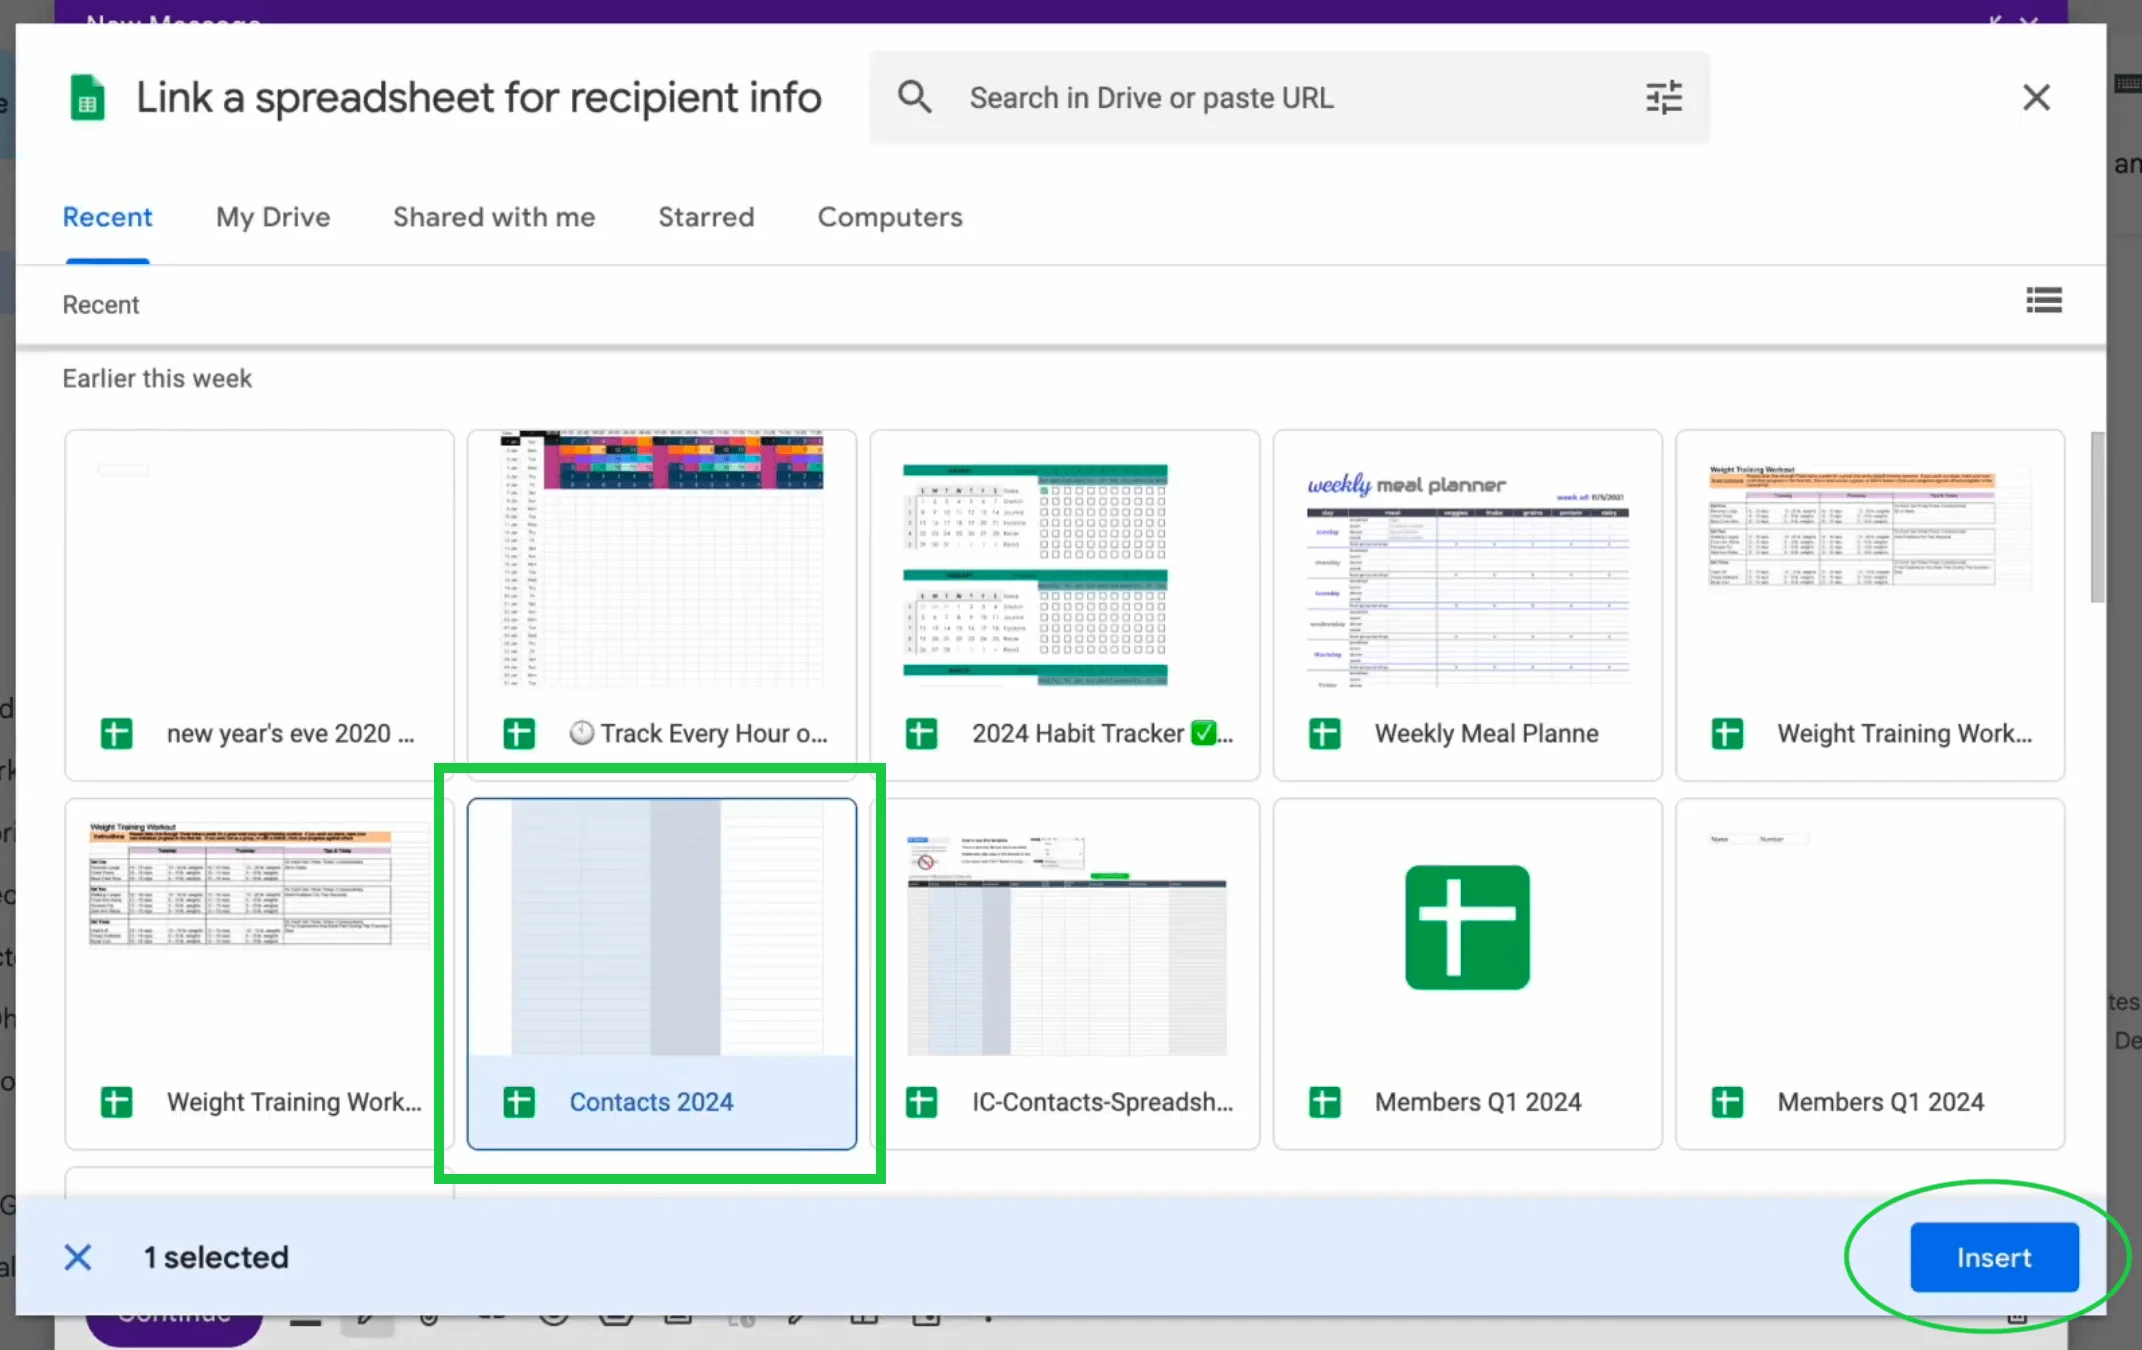
Select the columns containing the recipients’ contact info, such as email addresses and first names, and click Finish.
Step 5: Send your email
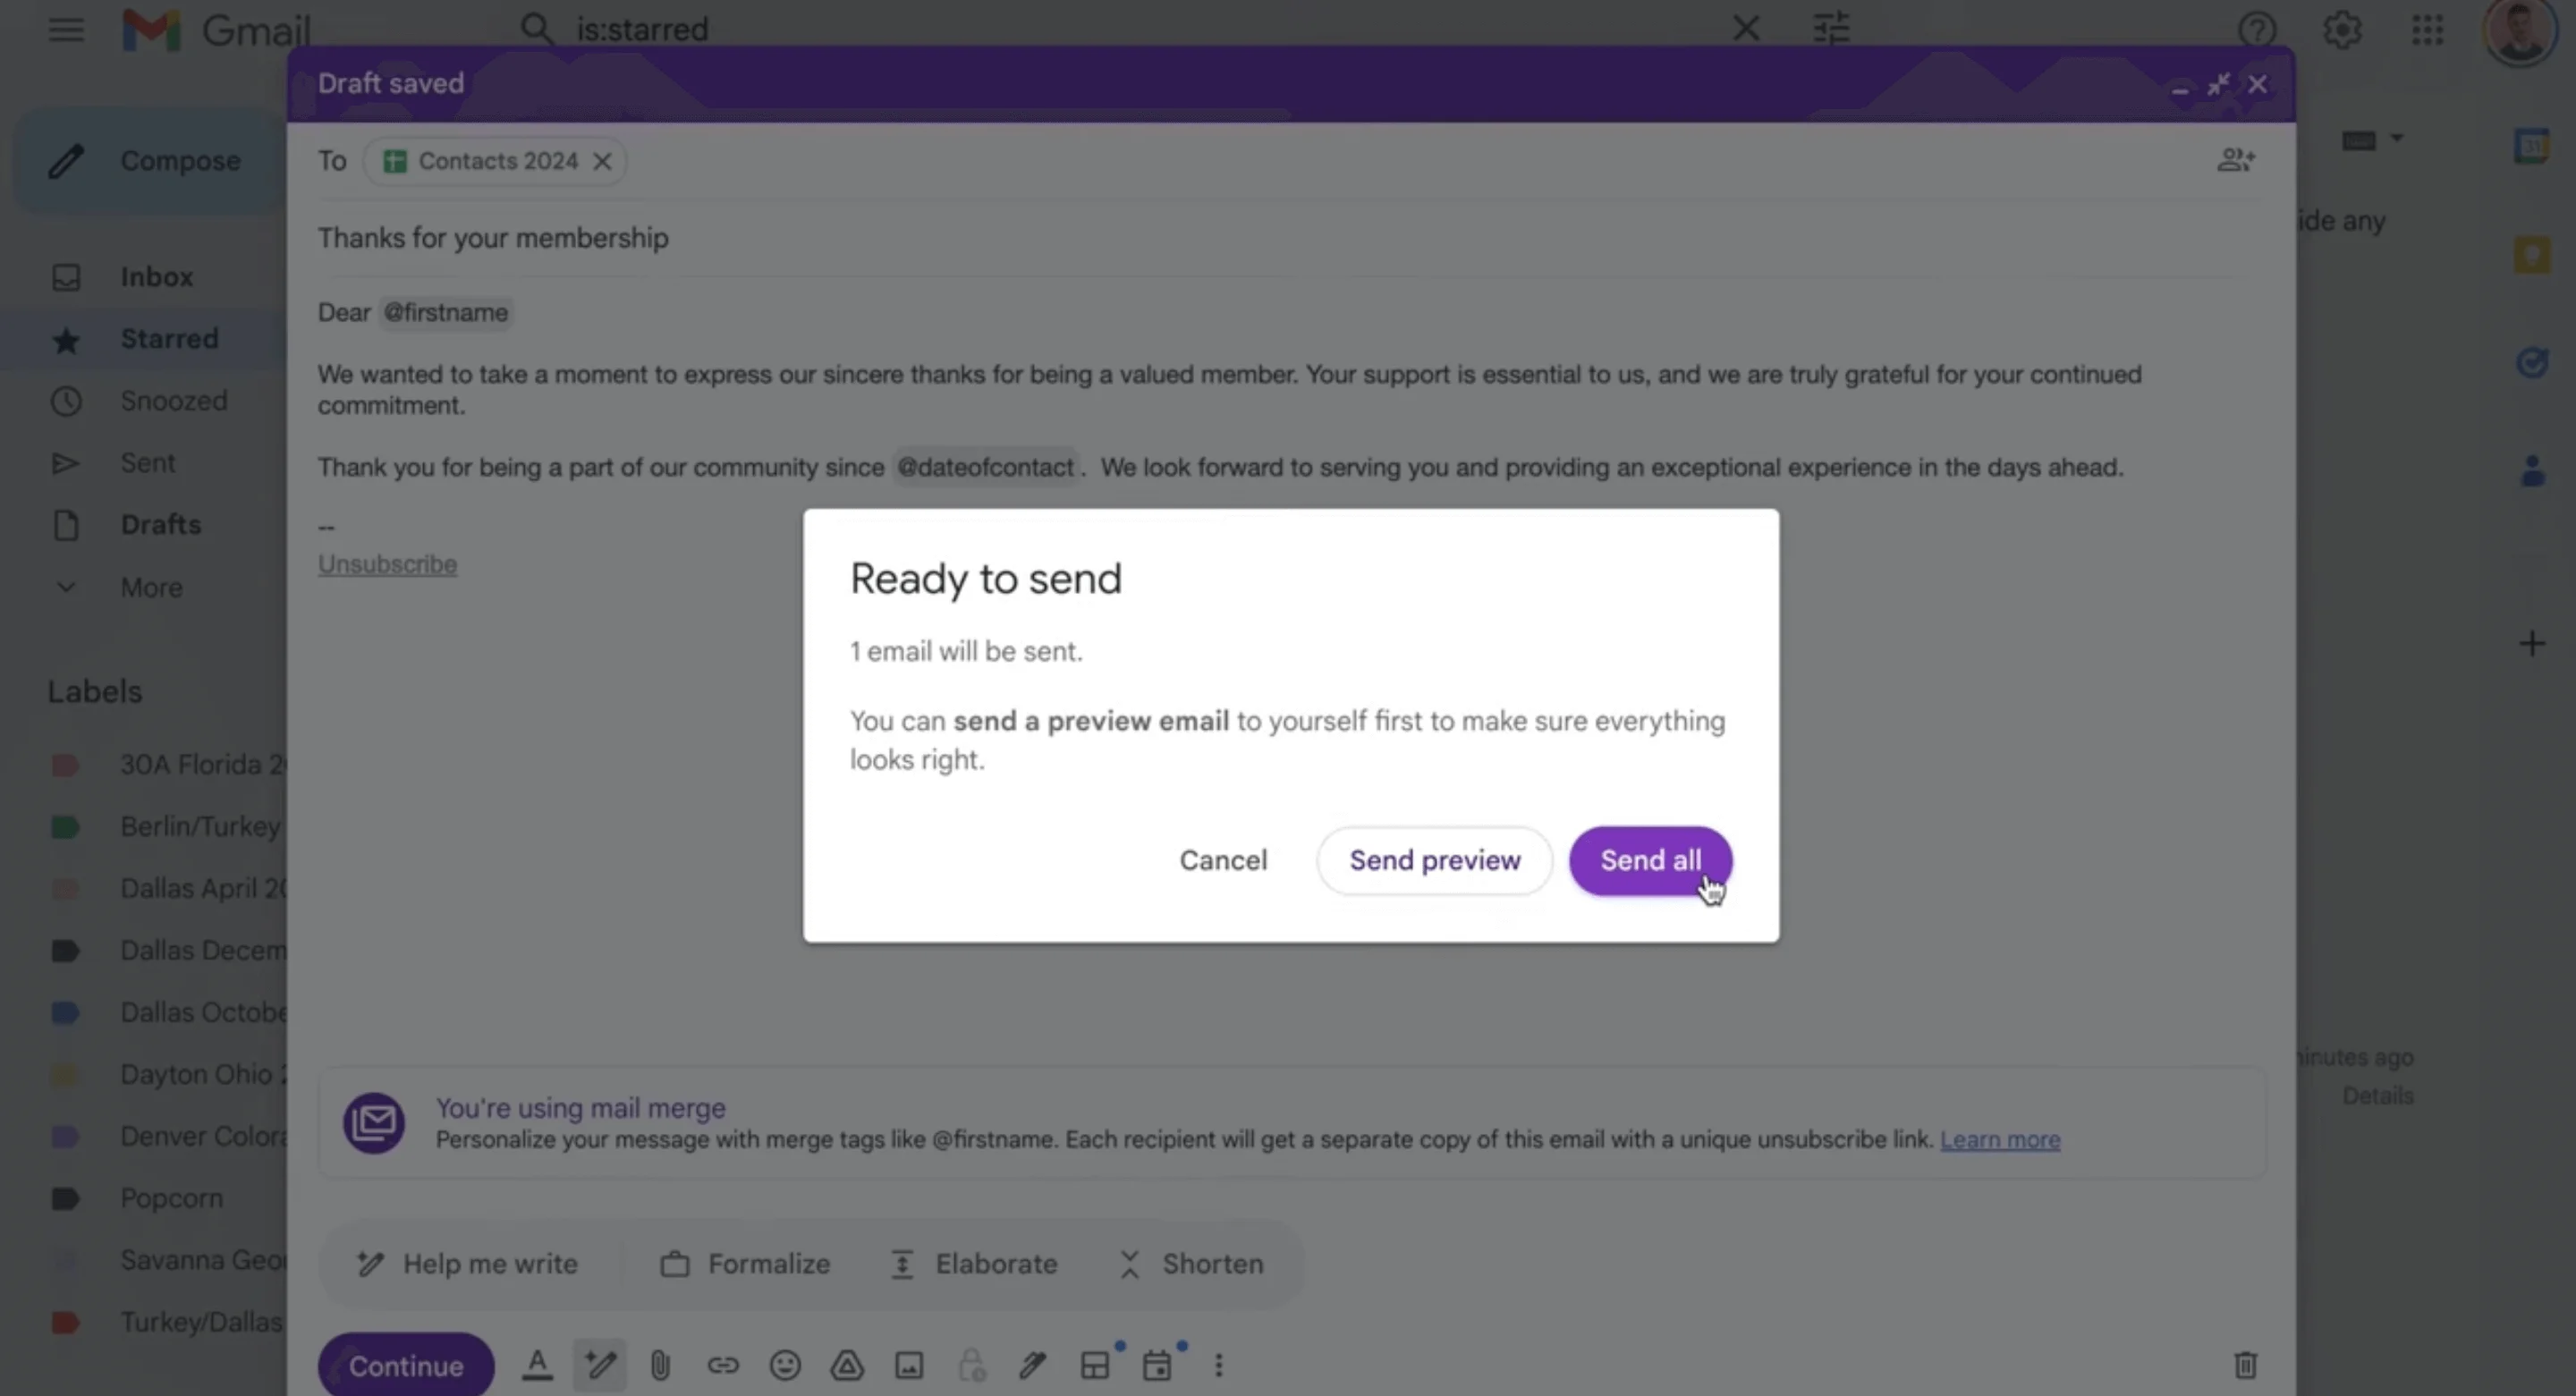
Once you’re happy with the way everything is looking, click on the Continue button. You’ll see a spam warning message from Google.
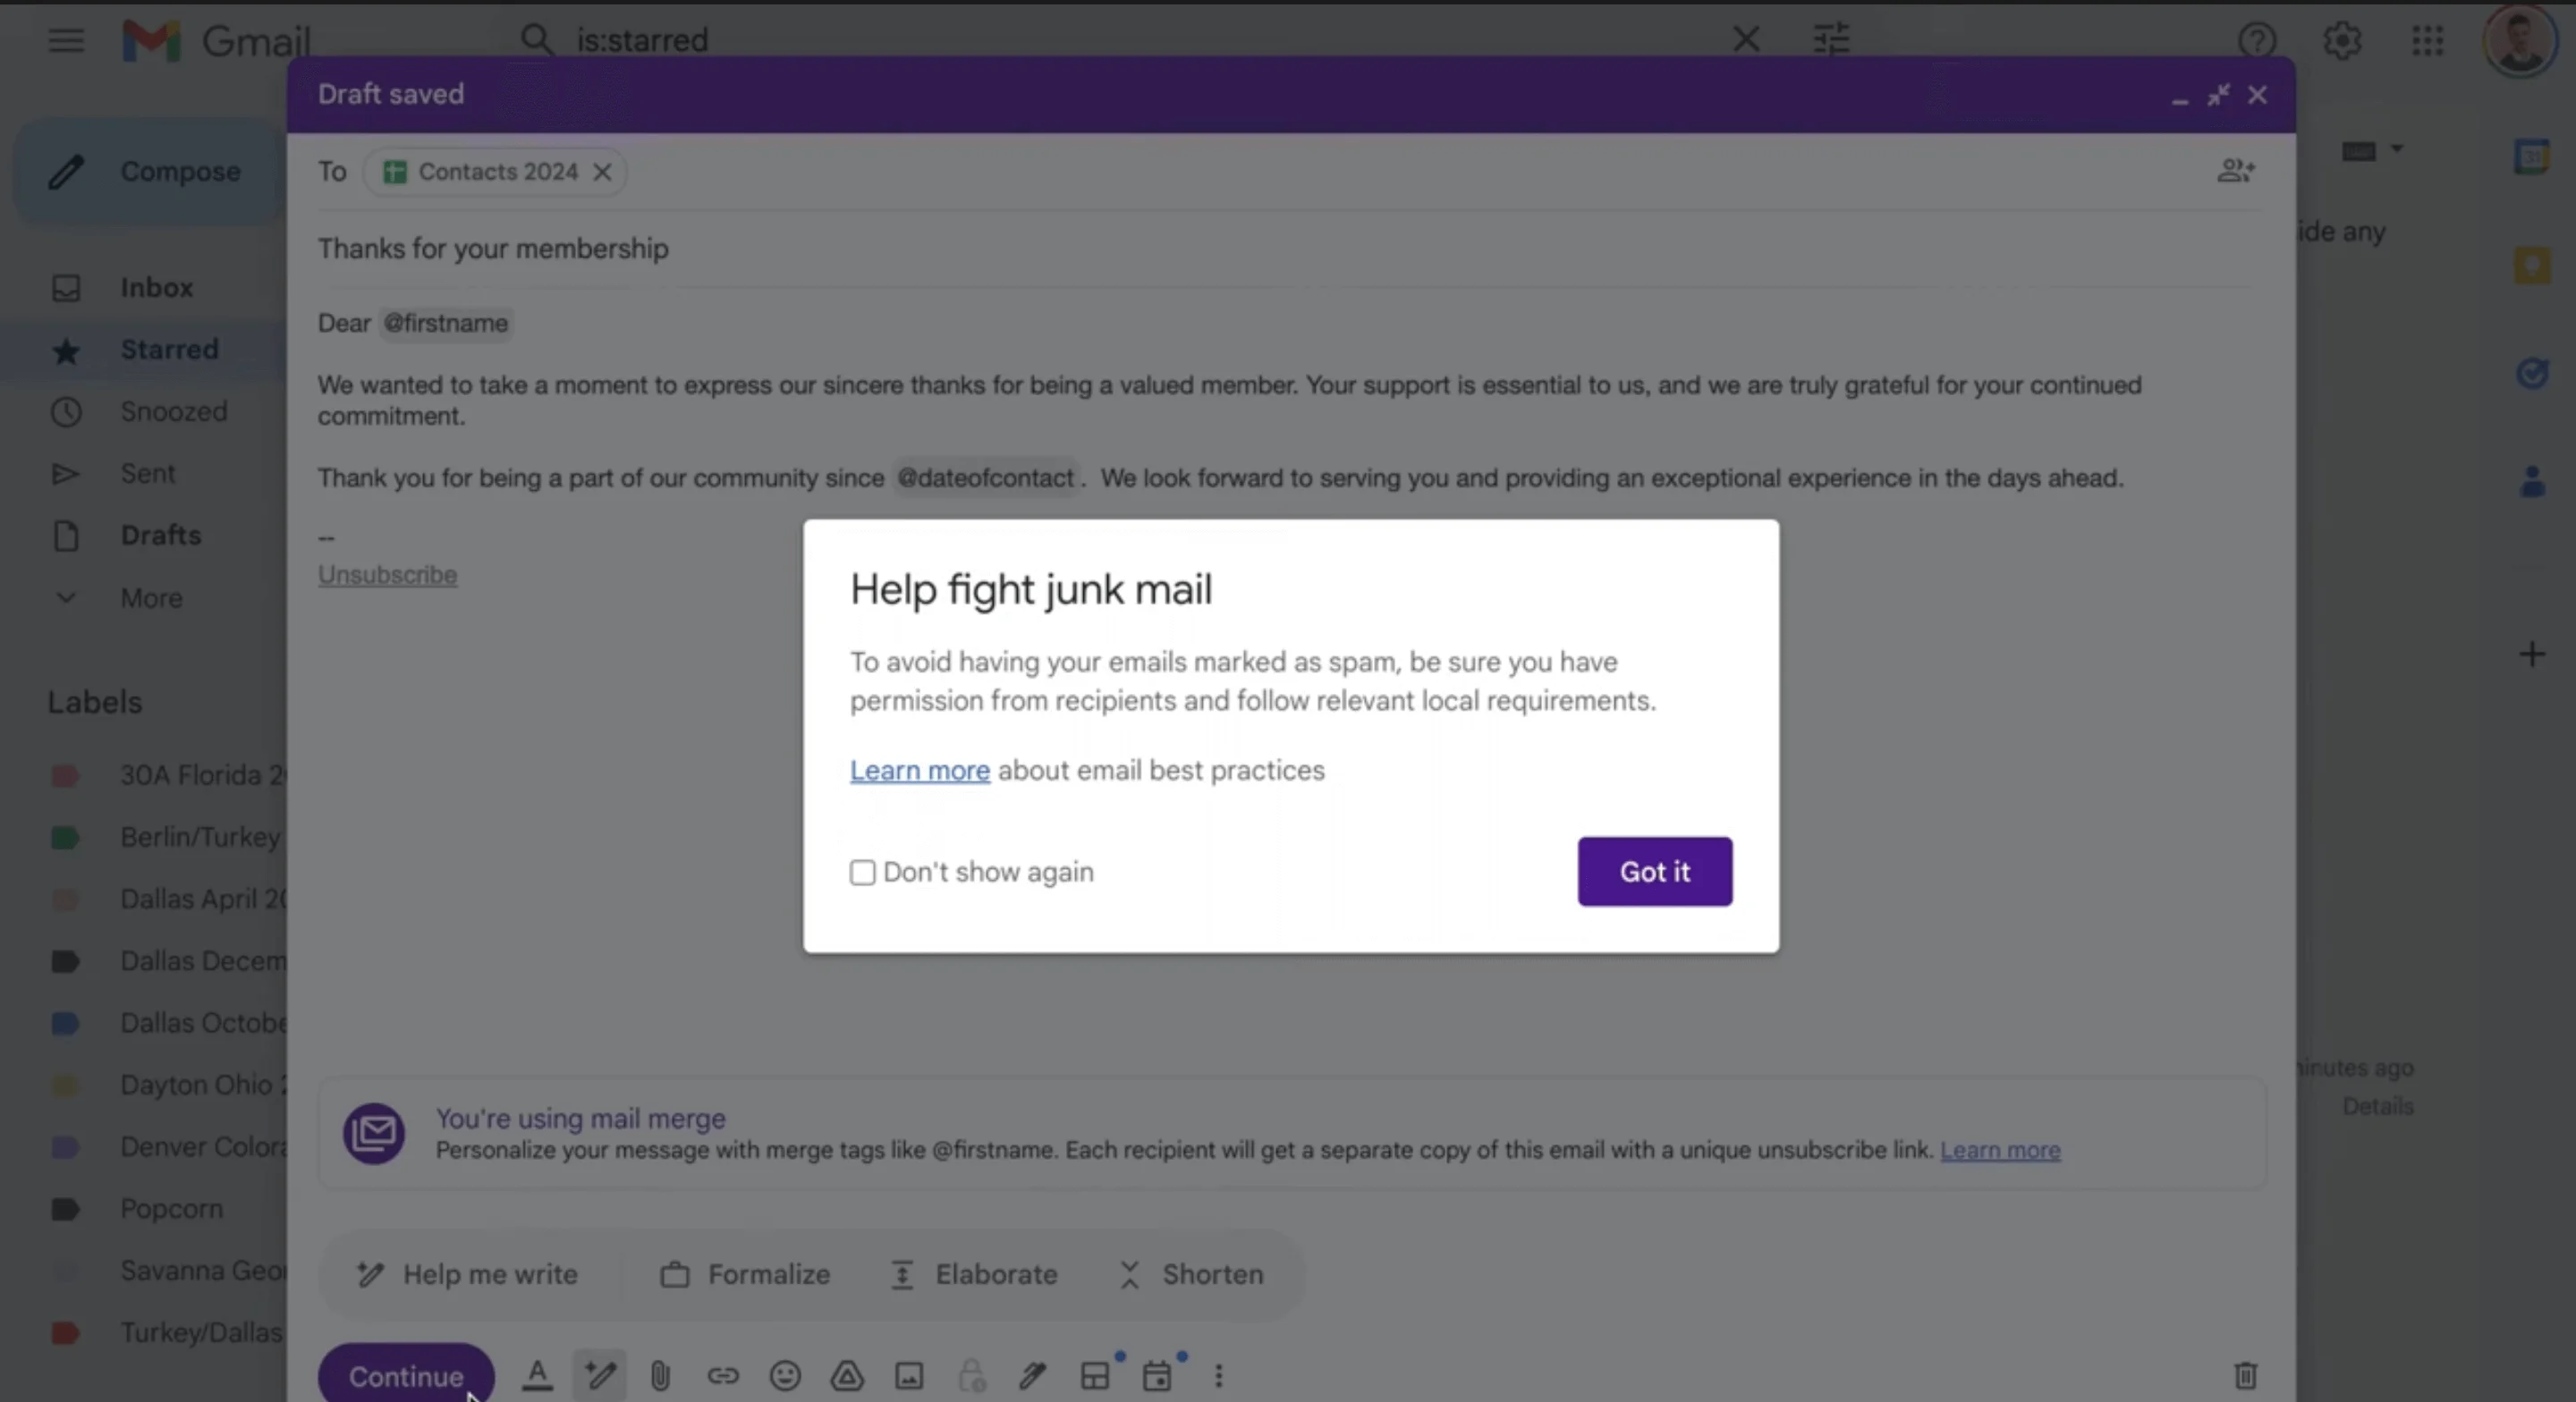
You’re almost done! Click Got it, and either send a preview of your mass email or send it to the recipients.
Disadvantages of Gmail for bulk emailing
We’ve already covered the pros of using Gmail for sending mass emails, so you’re probably wondering if there are any cons. There are a few:
- Sending limits. Gmail imposes daily sending limits (usually 500 emails per day for regular accounts and 2,000 for Google Workspace). It doesn’t matter whether you send one message to 500 recipients or 500 messages to 500 recipients, if you try to send more than that, you’ll get an error message. This can be a pretty significant limitation if you need to send emails to a large list of recipients.
- Risk of spam. Sending too many emails from a Gmail account can trigger the recipients’ spam filters. This can hinder the deliverability of your emails and affect your sender’s reputation. The worst-case scenario here is Google temporarily disabling your account.
- Lack of features. Gmail lacks advanced email marketing features such as automation, advanced analytics, segmentation, and A/B testing.
- Design limitations. There are a few ways you can customize an email if you’re using Gmail, but its design capabilities are quite basic. Building visually appealing emails with professional templates and custom layouts can be very difficult compared to using an email marketing platform.
- Compliance issues. Ensuring compliance with regulations like CAN-SPAM and GDPR is tougher with Gmail while some email marketing platforms have built-in tools to help with these laws.
Best alternatives to Gmail for sending mass emails
As you can see, despite its simplicity, Gmail is not the best tool for sending mass emails. This is where an email marketing service can help.
An email marketing service is a tool that helps businesses send emails to many people at once. It allows you to easily create, send, and manage email marketing campaigns thanks to templates, tools to design emails, and advanced analytics features. Find our top 3 best email marketing platforms below.
1. Selzy
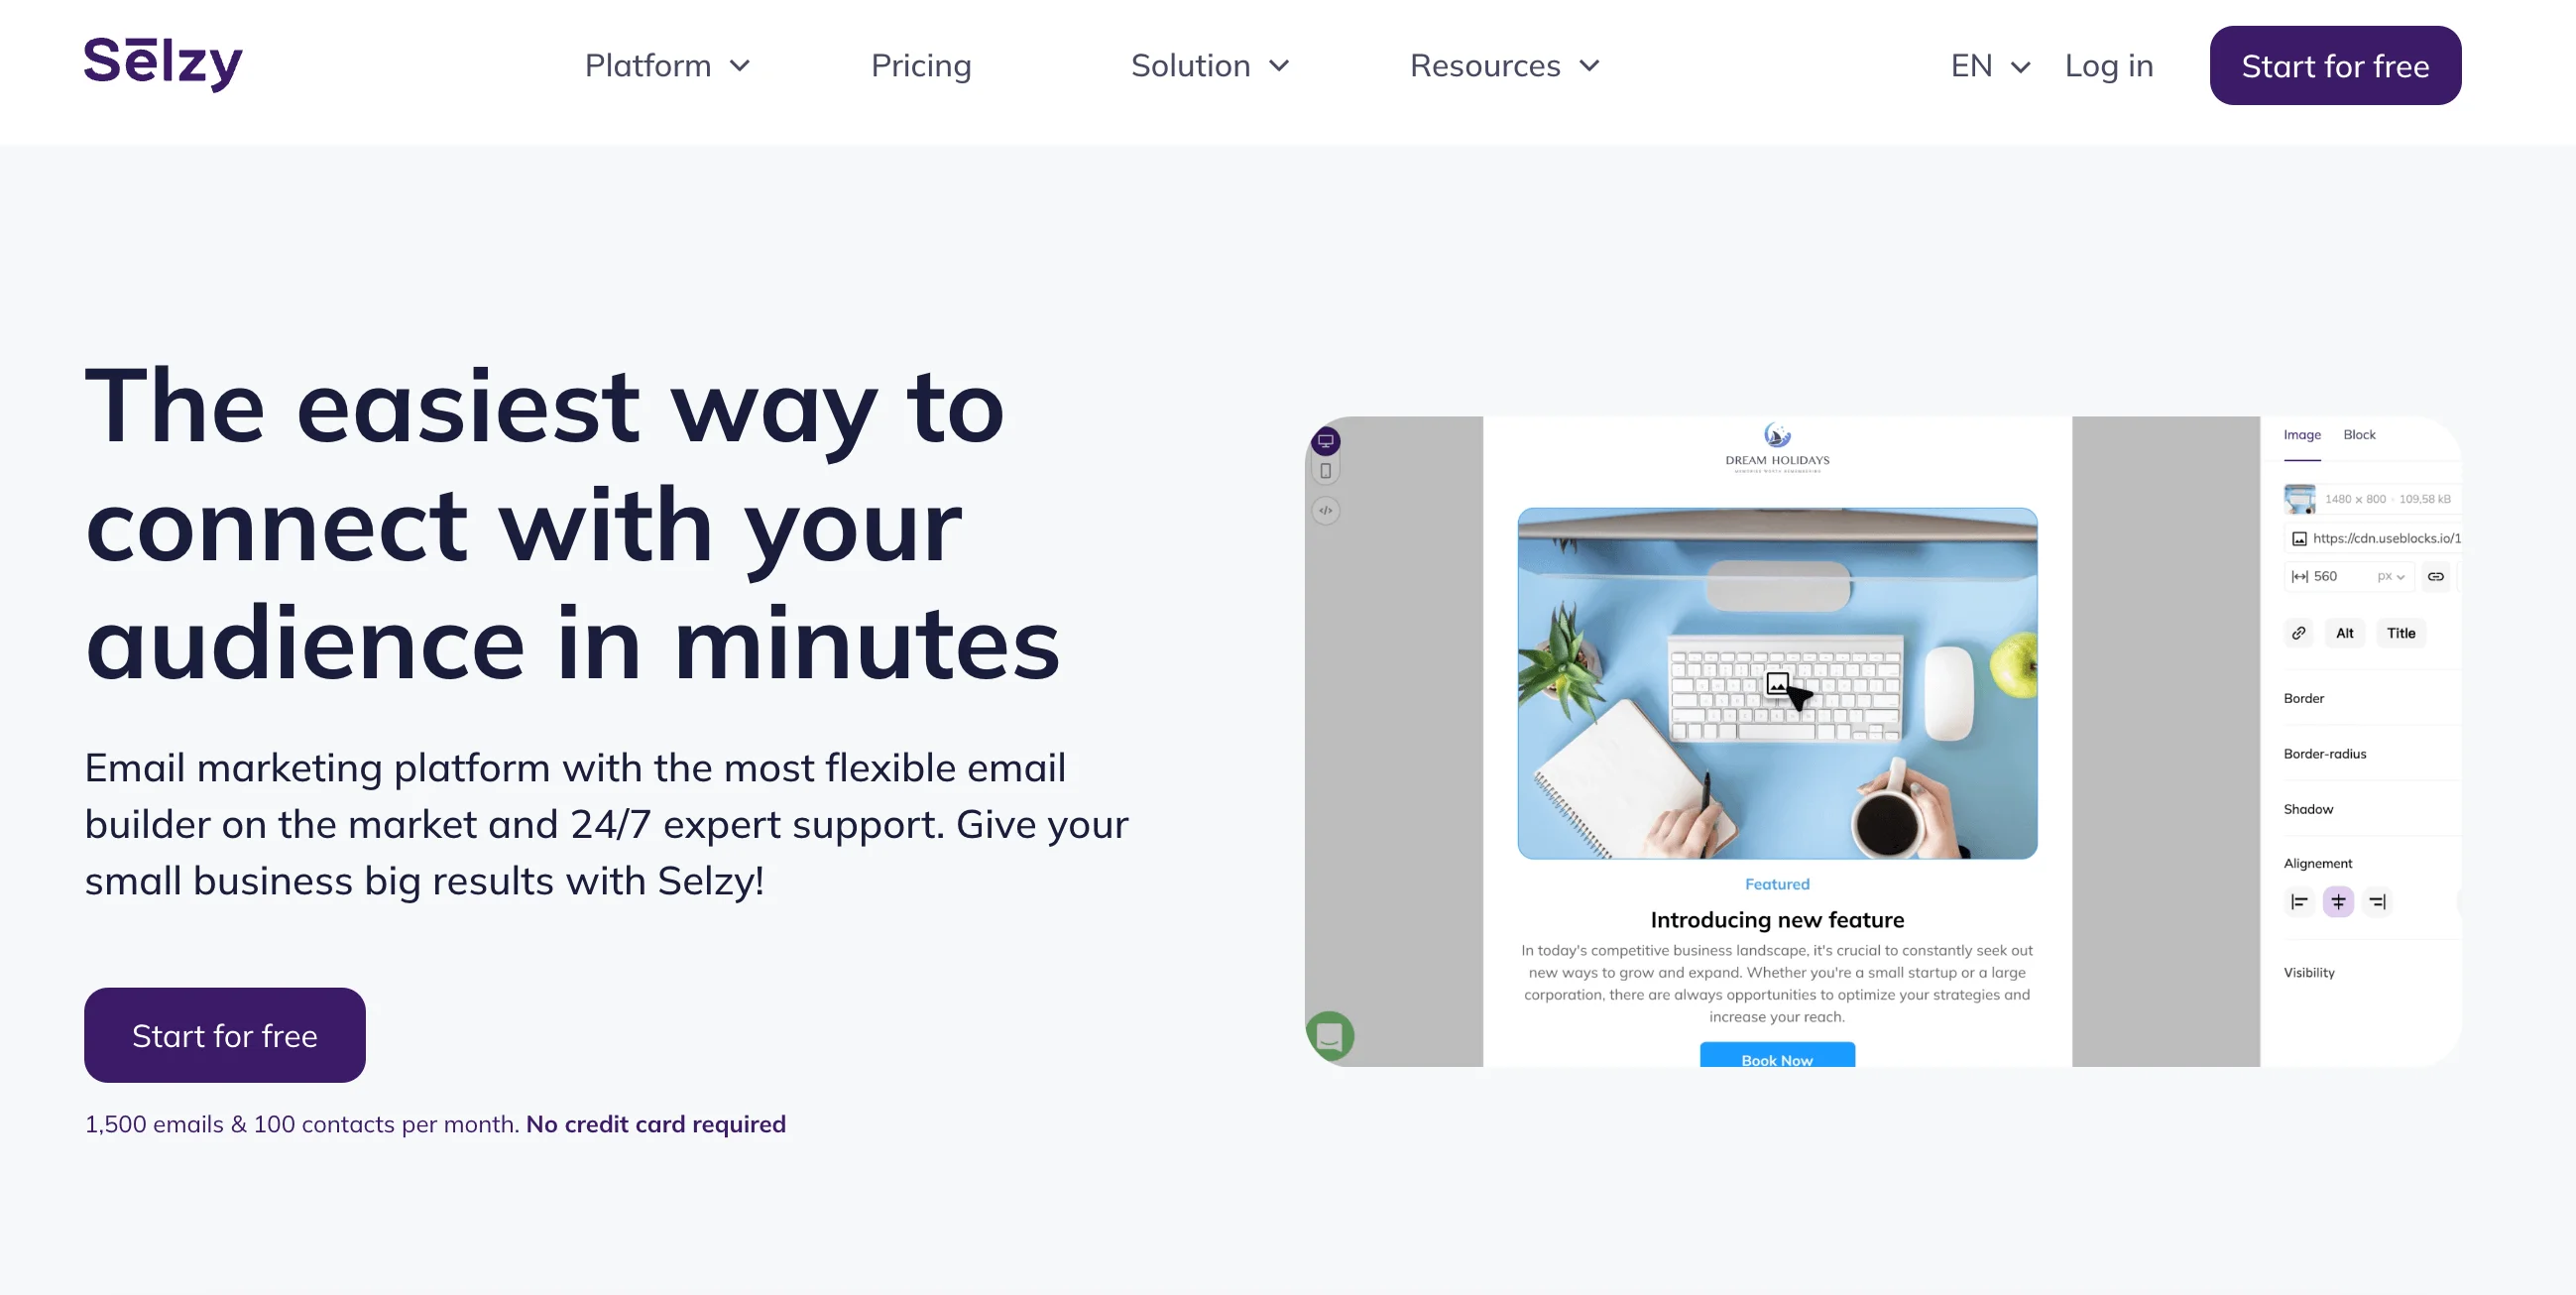
Selzy is a service famous for its easy-to-use interface and customizable templates making it perfect for small and medium-sized businesses. It’s especially helpful to those new to email marketing or with limited resources. With Selzy you can segment your audience and send personalized emails addressing customers by name automatically using tags. Selzy also has detailed analytics as well as A/B testing features.
Using Selzy to send a mass email campaign is incredibly easy. You can use one of the pre-made email templates or create your own in an AI-powered drag-and-drop editor. The resulting marketing campaigns will be responsive, with the email template size optimal for mobile and desktop alike. You can also create automated campaigns in a visual editor and quickly resend emails to those subscribers who didn’t open them the first time.
You can start with Selzy for free for up to 1,000 emails a month and up to 100 contacts or purchase a subscription starting at $5 a month (billed yearly) for 500 contacts and unlimited monthly emails.
2. Brevo
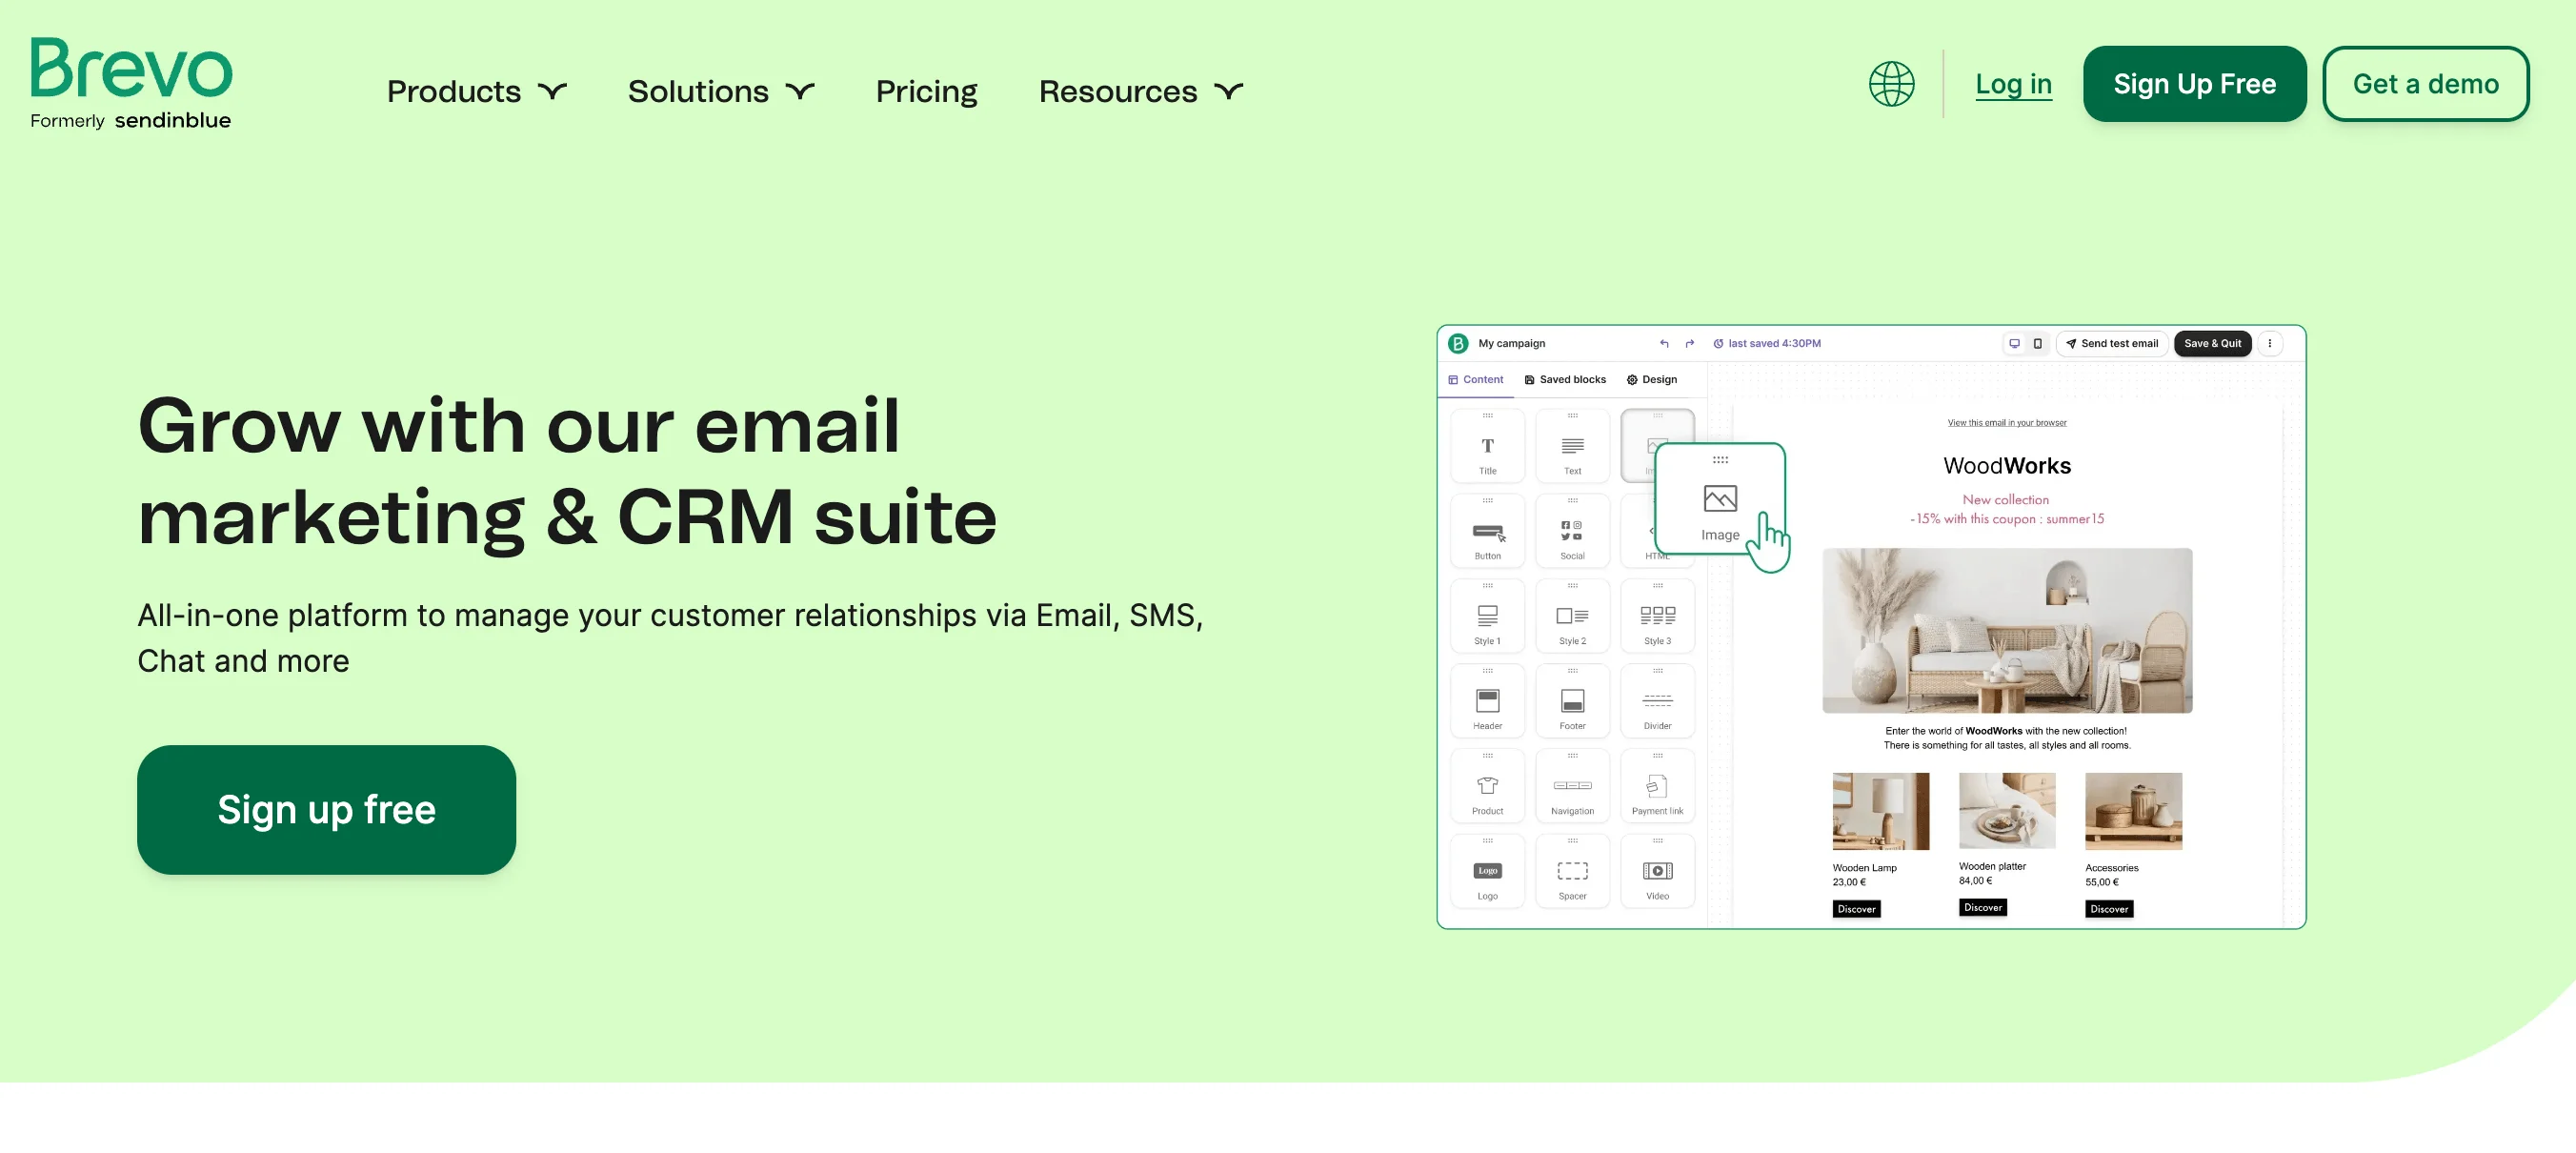
Brevo is also an email service provider, but it has other features too. With Brevo, you can send emails and SMS, manage customer relationships, and create landing pages. It’s ideal for small to medium-sized businesses, online stores, and marketers that need several communication channels and a CRM in one place.
Brevo offers segmentation and personalization as well as email templates for one-off marketing campaigns and automations. The platform’s drag-and-drop editor comes with AI for email content and copy generation. As with any other email marketing service, you can track your campaigns and analyze their results.
Brevo has several pricing plans including a free plan for up to 300 emails per day. Its cheapest plan starts at $9 a month for 500 contacts and 5,000 emails a month.
3. Mailchimp
Mailchimp is one of the most recognizable email marketing platforms. It has a broad range of features like email marketing, automation, landing pages, CRM, and social media ads and is targeted at small to medium-sized e-commerce businesses.
Mailchimp’s email editor has an AI for designing email marketing campaigns, writing subject lines, and making product recommendations. Mailchimp offers email automation and resending to subscribers who haven’t opened previous emails. Apart from standard analytics, users can also compare their results to industry-specific averages.
Mailchimp has several pricing plans, including a free one for up to 500 contacts and 1,000 monthly emails or 500 daily emails. Its cheapest plan, Essentials, will cost you $13 a month for 500 contacts and 10 times the amount of emails.
Conclusion
And there you have it! We hope this tutorial answered all the questions you had about sending mass emails via Gmail. So, here are some key takeaways:
- Mass emails like newsletters or promotions reach many people at once and are useful for marketers because they are efficient, cost-effective, and provide valuable insights.
- You can use Gmail to send mass emails. The benefits of doing so include user-friendliness, easy integrations with other Google services, and wide availability.
- When using Gmail to send mass email, you can either use your account, install an add-on, or subscribe to Google Workspace.
- However, if you’re running a business or working as an email marketer, using Gmail to send bulk emails isn’t the best idea. The cons of doing so include daily limits, limited design options, and the risk of your email marketing campaigns being marked as spam.
- Ideally, you should use an email marketing service instead of Gmail.
 New and noteworthy on our blog