This article describes the old Selzy email builder. You can find information about key features of the new email builder in the overview article available in English.
If you need help with the functionality described in this article but in the new builder and can’t find it in the overview article, please contact our Support Team.
Selzy Support Team is available for all users 24/7.
A subscription confirmation email is an automatic response message that the user receives immediately after Double Opt-In subscription. A confirmation link is added in this email. The subscriber must click on it to complete the subscription procedure and start receiving newsletters.
Сreating a Subscription Confirmation Email
A subscription confirmation email is created for each contact list separately.
When you create a contact list, it is automatically assigned a standard subscription confirmation email.

The subject line is automatically written for the email: "Please confirm your email address", while the last confirmed email address is specified as the senderaddress.

Editing a Subscription Confirmation Email
You can edit the subject line, the sender email address and the sender name on the page of a contact list in the section "Opt-in and opt-out tools". All fields are required. To do this, click on three dots and choose Go to campaign defaults.

You can choose any confirmed email address as the senderaddress, and in the field "From", you can specify the company name or the name of the responsible employee.
You can also customize the subscription confirmation email. Copy an already created subscription confirmation email from another list, or edit the default subscription confirmation email.
To copy an already created subscription confirmation email, click on the icon "Copy email from another contact list". Insert the ID of the list from which you want to take the subscription confirmation email, and click Select.

To change the default subscription confirmation email, select the editor you want to want to work with. By default, the email builder opens for editing the email. To select the HTML editor, move the slider next to the corresponding text box to activate it.
If you shift editors, all changes you made earlier in the other editor will be lost.

You can go to the editor either from the page "Opt-in and opt-out tools" or from the email view mode.

Working With a Subscription Confirmation Email in the Email Builder
Editing a subscription confirmation email is no different from creating a regular email in the email builder. You can add/remove rows and blocks, edit them, and select preset or saved rows.
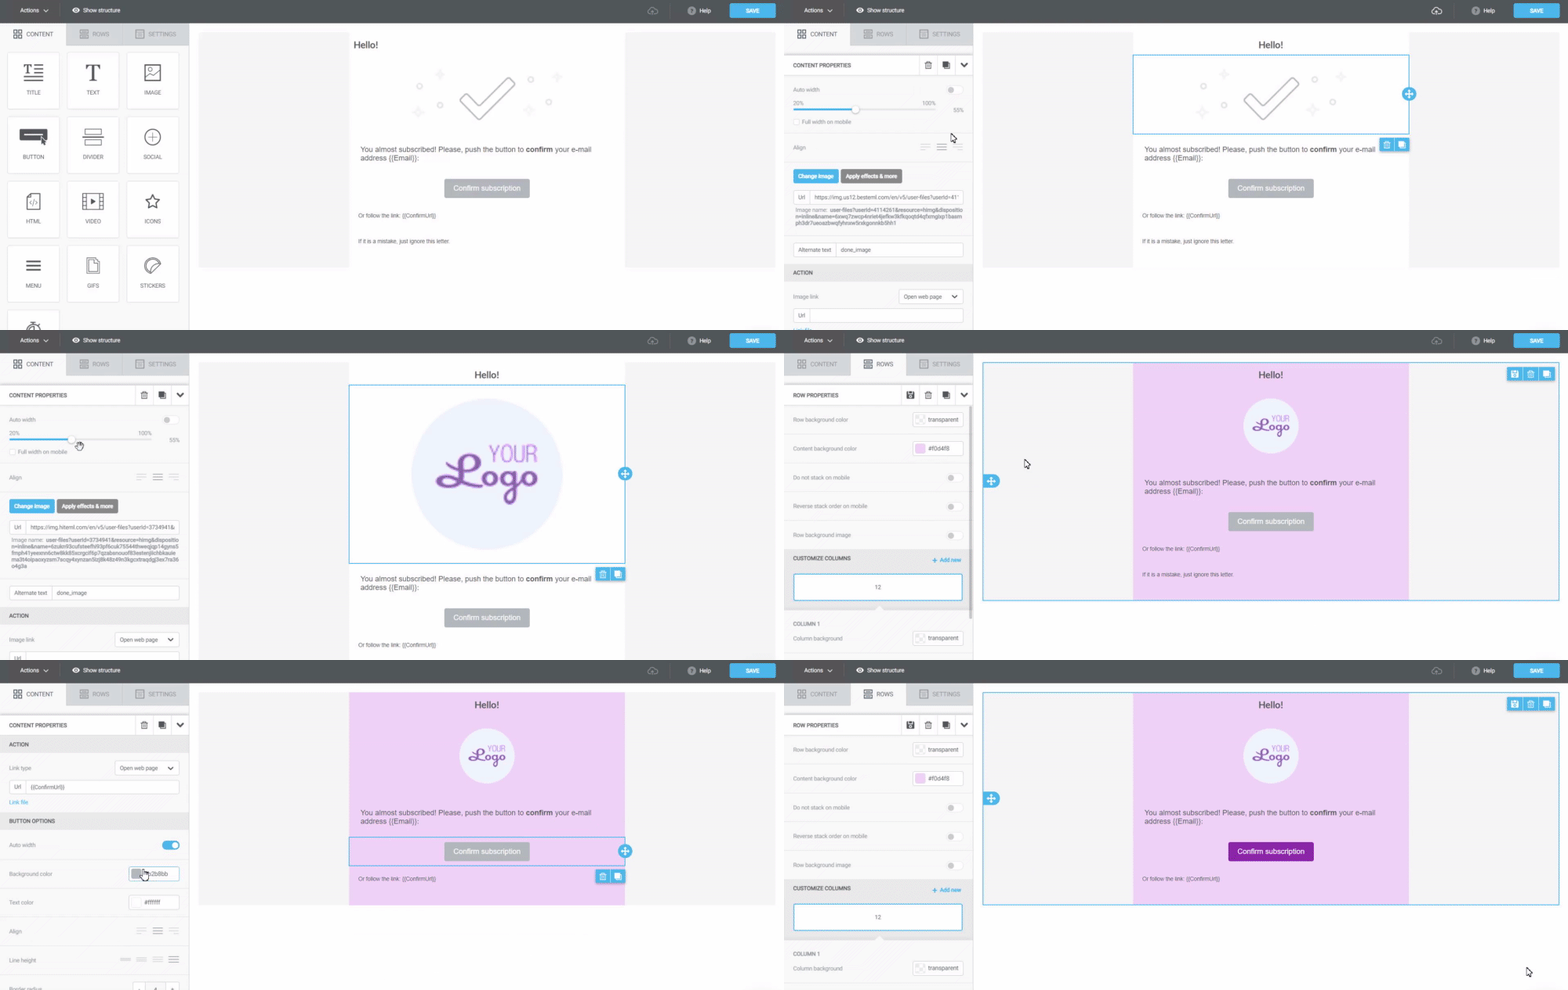
A mandatory condition for a subscription confirmation email is that it should contain the {{ConfirmUrl}} variable for merging the subscription confirmation link. It is best to place the variable on the button in the central part of the email.

You can also add the {{ConfirmUrl}} variable to the text or as a hyperlink. In the first case, the subscription confirmation URL will be shown instead. To add a hyperlink, select a part of the text and click on Insert/Edit link. In the "URL" field, insert the {{ConfirmUrl}} variable.
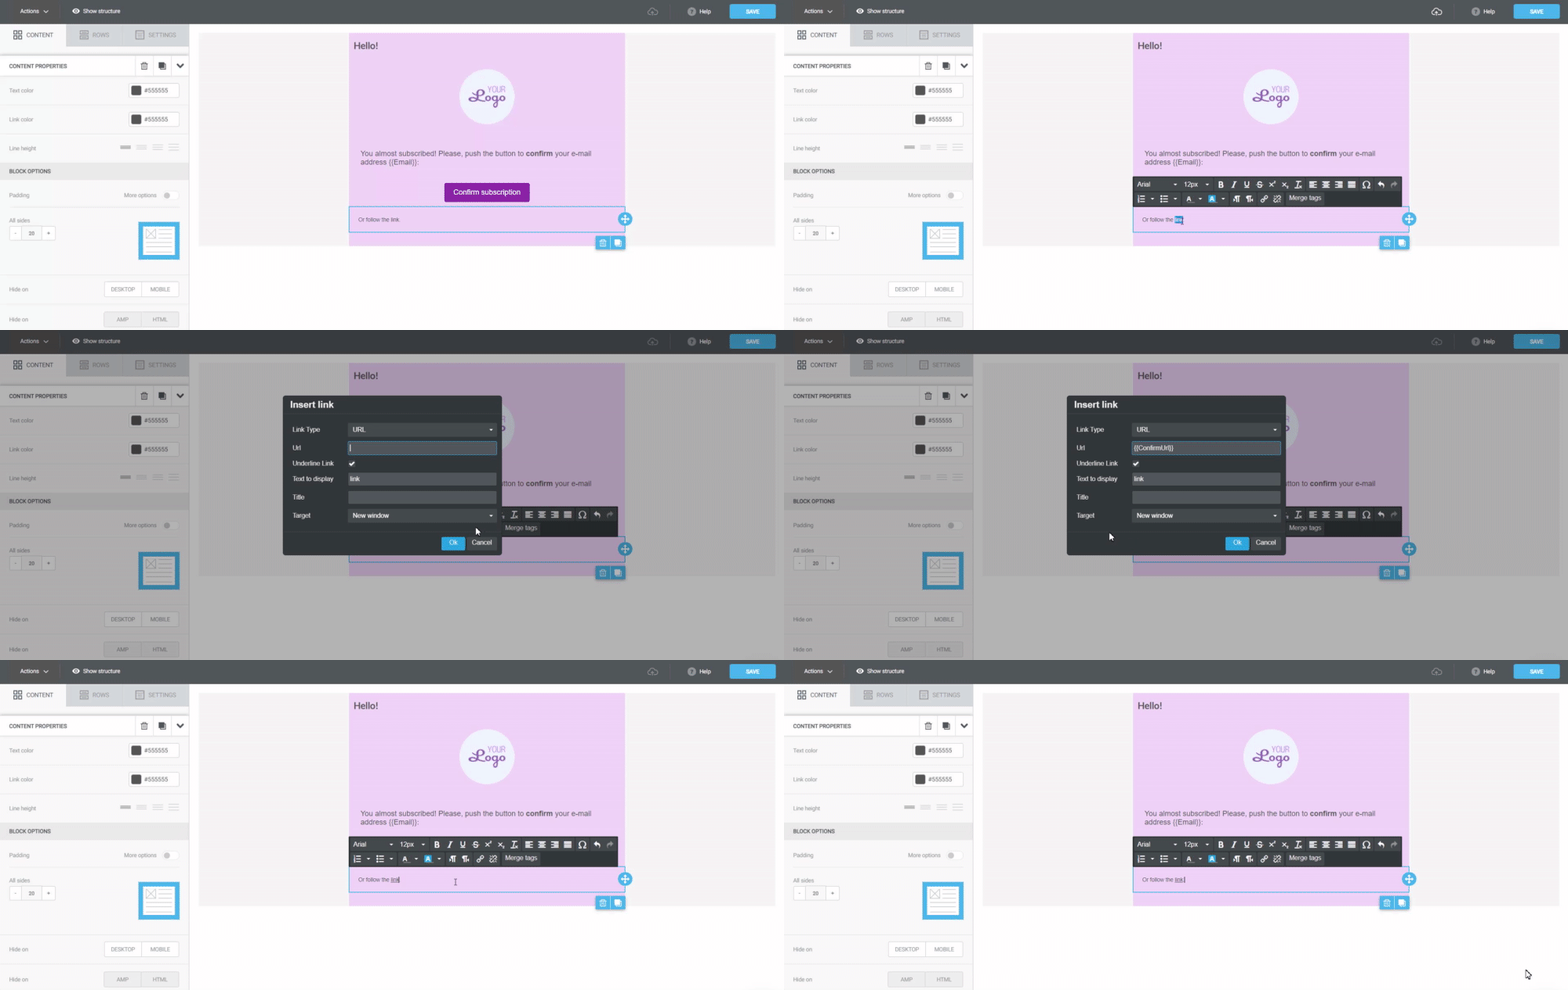
Make the confirmation link visible and place it in a prominent place. Otherwise, the subscriber may not understand where to click, and will not complete the subscription process.
After making changes to the email, click on the Save button in the upper-right corner of the editor.

Working with Subscription Confirmation Email in the HTML Editor
We recommend using the HTML editor only if you have HTML skills. Otherwise, we recommend using the email builder.
In the HTML editor, you can make minor changes to already created blocks without changing the email code. You can edit the text of the standard subscription confirmation email or change the picture by double-clicking on it and selecting another picture in the file manager. In this case, the styles specified for this block will be applied to the changes made.
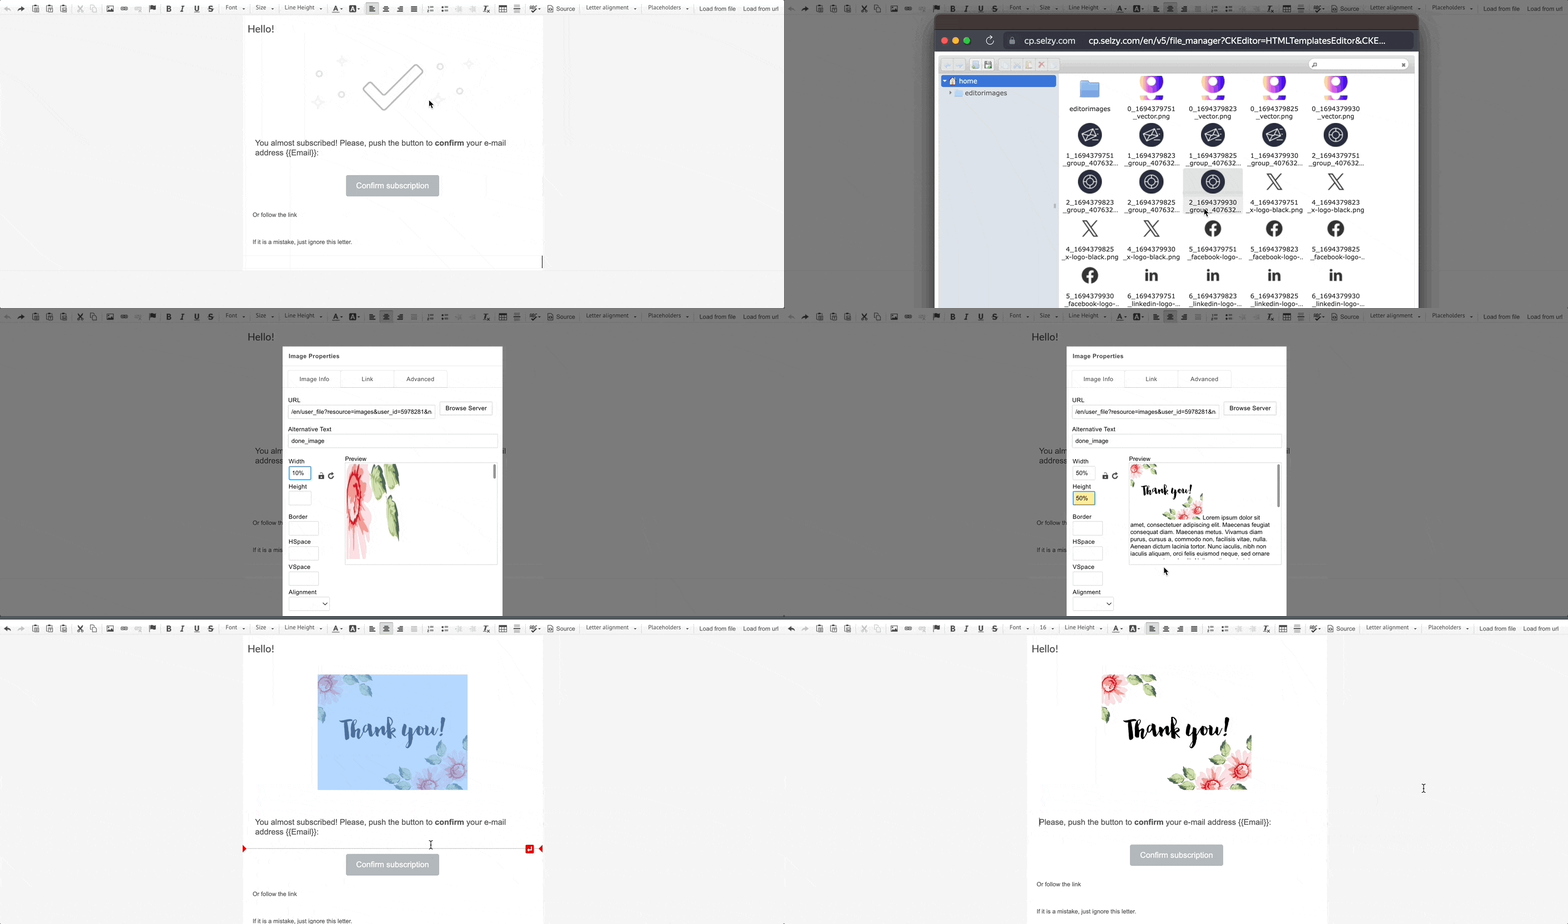
The main changes in the HTML editor are made on the Source tab, where you work with the email code.

Here you can change the code of the default email or use the code of the already-made email.
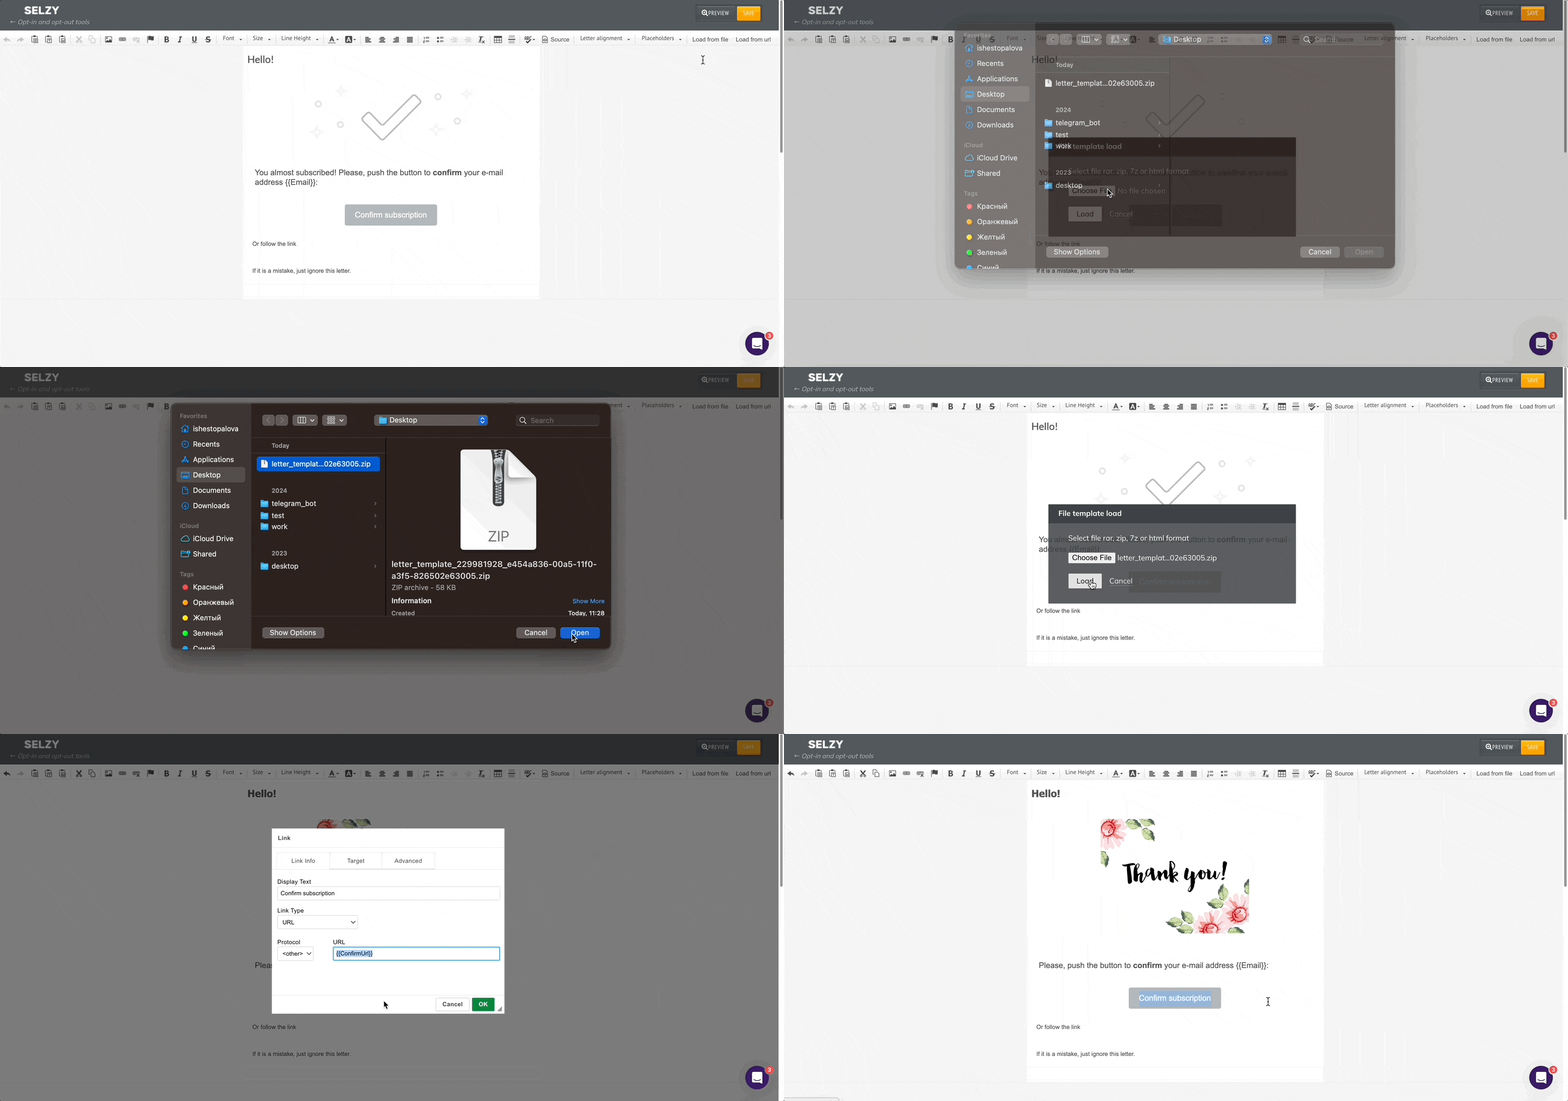
You can also download the email template from a file. The main thing is that the new email contains a variable for the {{ConfirmUrl}} merge tag. It should be placed in a prominent place and be visible. You can add a variable as a link to an image, button, text, or enter it in the text of an email.
You can also change the link to the confirmation page that opens after the user confirms their subscription in the email. On the Opt-in and opt-out tools tab, select Pages and links. Insert your link in the row "Confirmation Thank You Page".

