What is a webhook
Webhook is a mechanism that allows various services and applications to exchange data in real-time. This makes it different from an API call since the API requests data, checks for changes, and only then fetches the response.
Webhooks trigger HTTP requests (usually POST) to a specific URL when a specified event occurs. This allows you to automate tasks and create complex workflows that react to changes in data in one service and transfer these changes to the other.
Some services that can be integrated with Selzy, for example, Webflow, Formaloo, and Typeform, require webhooks when setting up a new connection. For such a service, the system will automatically generate a webhook, which you need to specify in that service’s settings.
Please note that the "Webhook" connection can only be a trigger.
If you try to add it as an action, you will see the following error message: "No actions found. This service only supports triggers."
Adding a webhook as a new connection
To integrate with Selzy via a webhook, add a webhook as a new connection. There are two ways to do it: from the Apps list in the My Integrations section of your Selzy account or when setting up a trigger for a different connection.
In the first case, Webhook will appear in the list of connected services and you will be able to create new automations with it at any time.
In the second case, you generate a webhook in the process of creating an automation with a specific service.
In both cases, you will end up with a webhook that enables the transfer of data between Selzy and the other service.
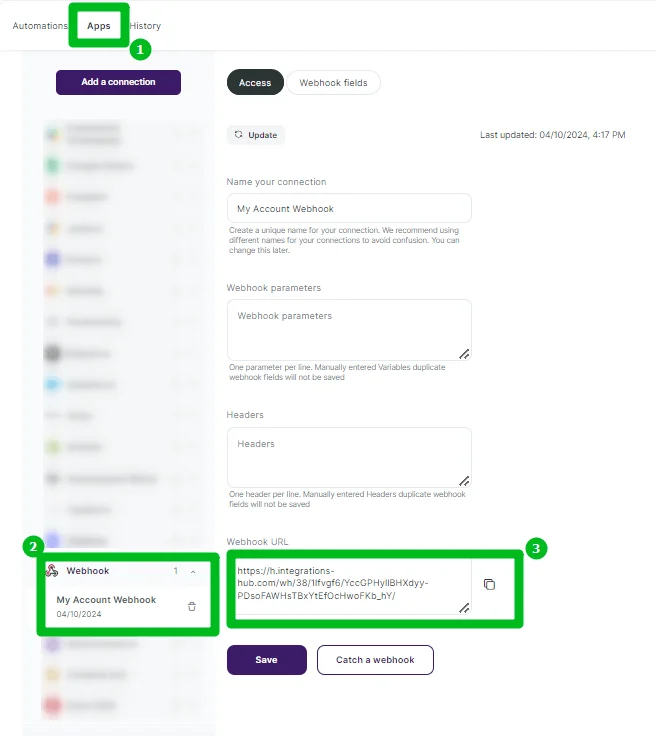
From the Apps list in My Integrations
To have Webhook appear in the list of connected services in your Selzy account, go to Integrations — My Integrations — Apps. Click the Add a connection button.
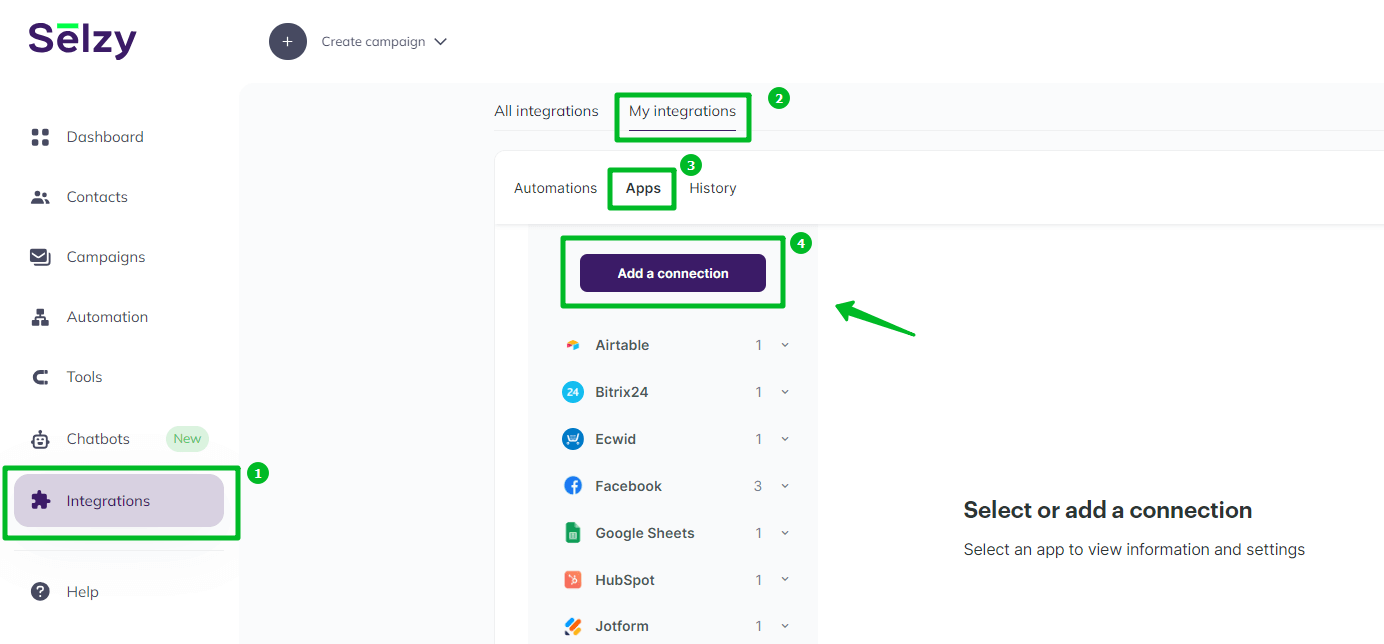
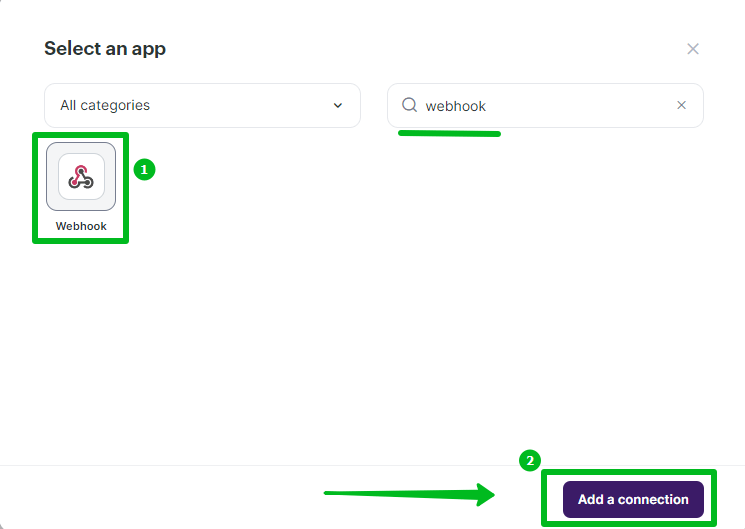
The Select an app window will open. Find the Webhook icon in the collection of apps or type “webhook” in the search field. Click the Webhook icon, and then click Add connection.
When setting up a trigger for a different connection
To add Webhook as a new connection when setting up a trigger for a different connection, choose Webhook as an app to send your data and set the trigger event to Incoming webhook. Then, in the Connecting the account field, click Add Connection.
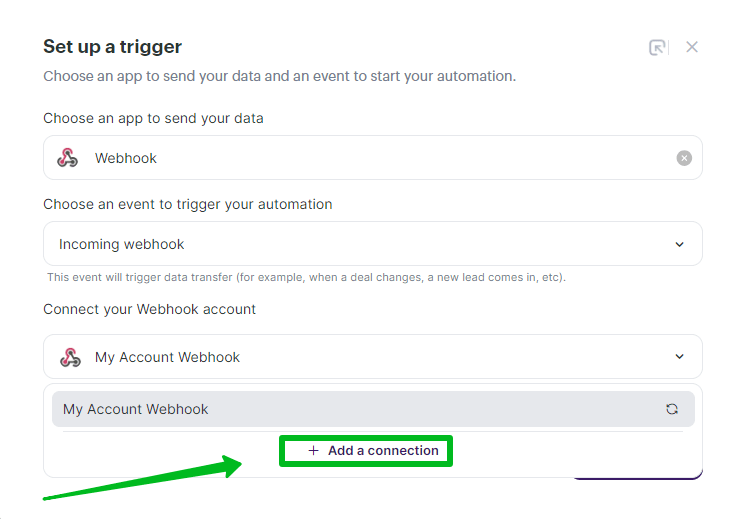
The Create a connection to Webhook window will open. If necessary, you can change the name of the connection. Click the Continue button.

Copying the generated webhook
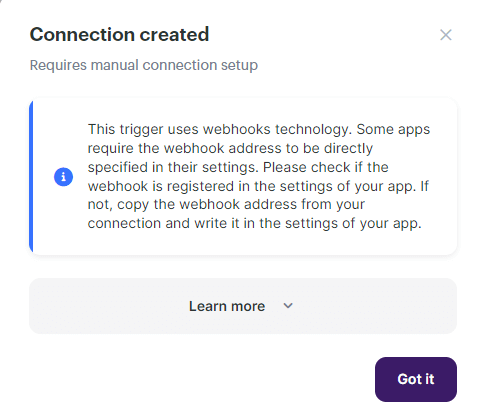
After you enter a name for your webhook, Selzy will automatically generate a new webhook. A notification will appear on the screen. You can now copy the generated webhook by clicking the Copy icon or by highlighting the webhook URL in the corresponding field and pressing the Copy keyboard shortcut.
Make sure to copy the webhook at this step, to be able to launch the webhook catcher later on in the setup process.
Alternatively, you can go to Integrations — My Integrations — Apps. Select Webhook from the list of connected apps, then press Access, and the webhook URL will be in the corresponding field for you to copy it.
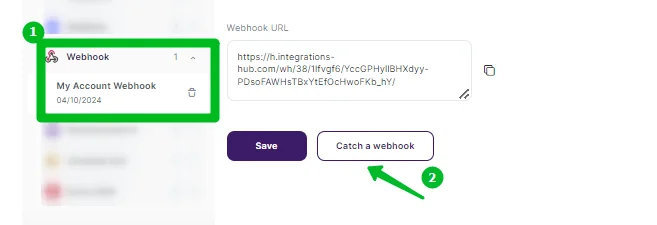
If you created the webhook from the Apps list in the My Integrations section, you can copy the webhook only from the Webhook URL field in Webhook settings.
Now, you need to add the copied webhook to the settings of the service you want to connect to Selzy.
To do this, in the new browser tab, go to that service, find the settings related to notifications or integrations, and add the copied webhook there.
Don't forget to save the changes to activate the webhook.
Launching the webhook catcher
Return to Selzy to launch the webhook catcher.
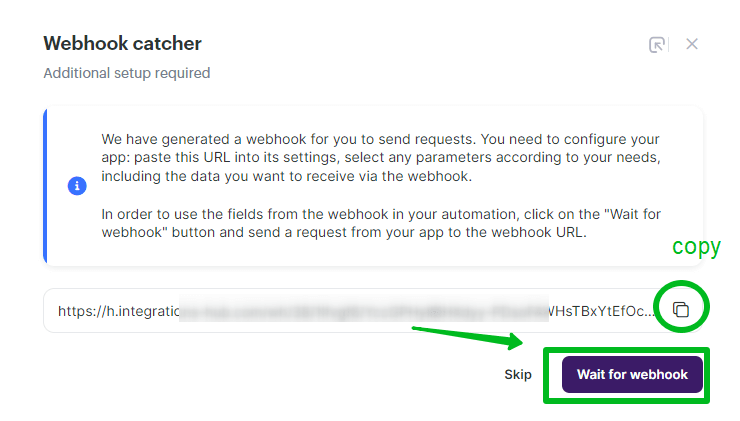
Webhook catcher is a tool that receives incoming webhooks. It is commonly used for debugging, testing, and monitoring purposes. Selzy webhook catcher registers responses from a service you are integrating and, as a result, accurately identifies changes in data and their source in real-time.
If you left Selzy at the Webhook connection settings page, first click Catch a webhook below the Webhook URL field, then click Wait for webhook.
If you left Selzy when setting up a trigger for a different connection, click Add a trigger to add the trigger event you were setting up. Then, click Catch a webhook at the very bottom of the settings and Wait for webhook.
After launching the webhook catcher, you need to send a test request from the service that is being integrated. Go to that service and perform the trigger action to activate the webhook. For example, fill out a form in Typeform or Jotform, and submit test data.
Then, return to Selzy. If everything is configured correctly, the webhook catcher will fetch the data and you will see the message: “New fields are available:” followed by a list of fetched data.
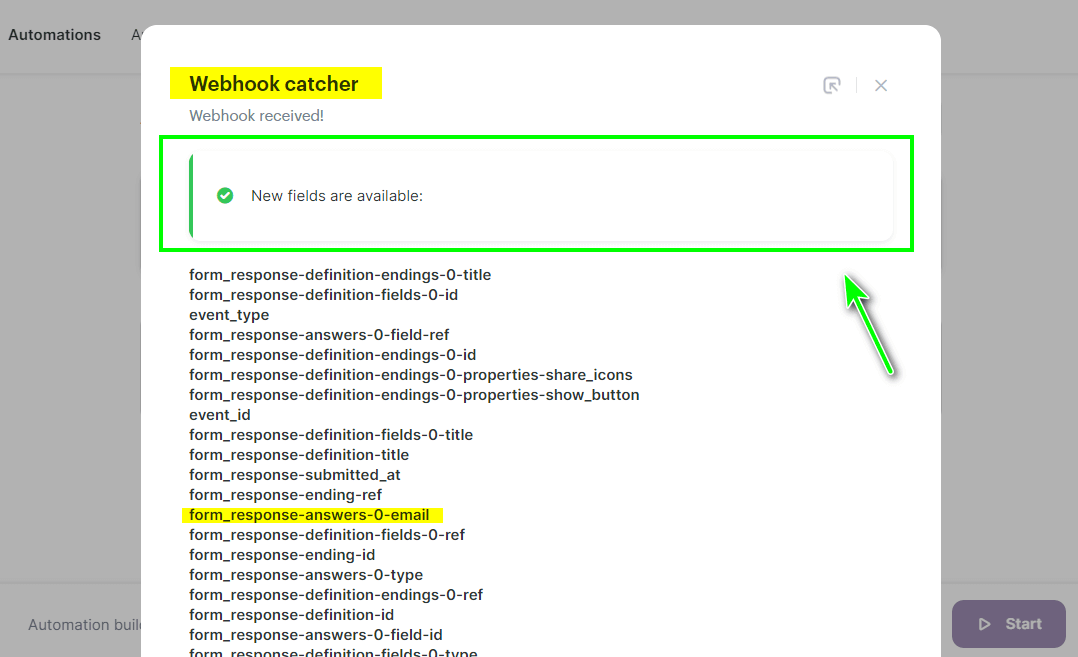
If you are unable to retrieve the data, check the webhook settings and run another test.
Once you fetch the data, you can perform mapping and assign the transferred fields with the fields in Selzy. For example, you can have an email address added to the email list in Selzy.
If you do not assign the fields, the connection will still work, but the data — in our example, email addresses — will not be transferred, and new contacts will not be added to the email list.
Adding multiple webhooks
To use multiple webhooks, add them as new connections from the Apps list in the My Integrations section using the instructions above. The number of such connections is not limited.
If you use several forms to collect requests and want contact data to be added to different lists, create a separate webhook for each list. This will ensure the correct transfer of data to Selzy.


