How to create a connection in Selzy to the Shopify service, in order to automatically add new customers or orders to your Selzy contact list, you will learn from the instructions below.
Creation of a new integration
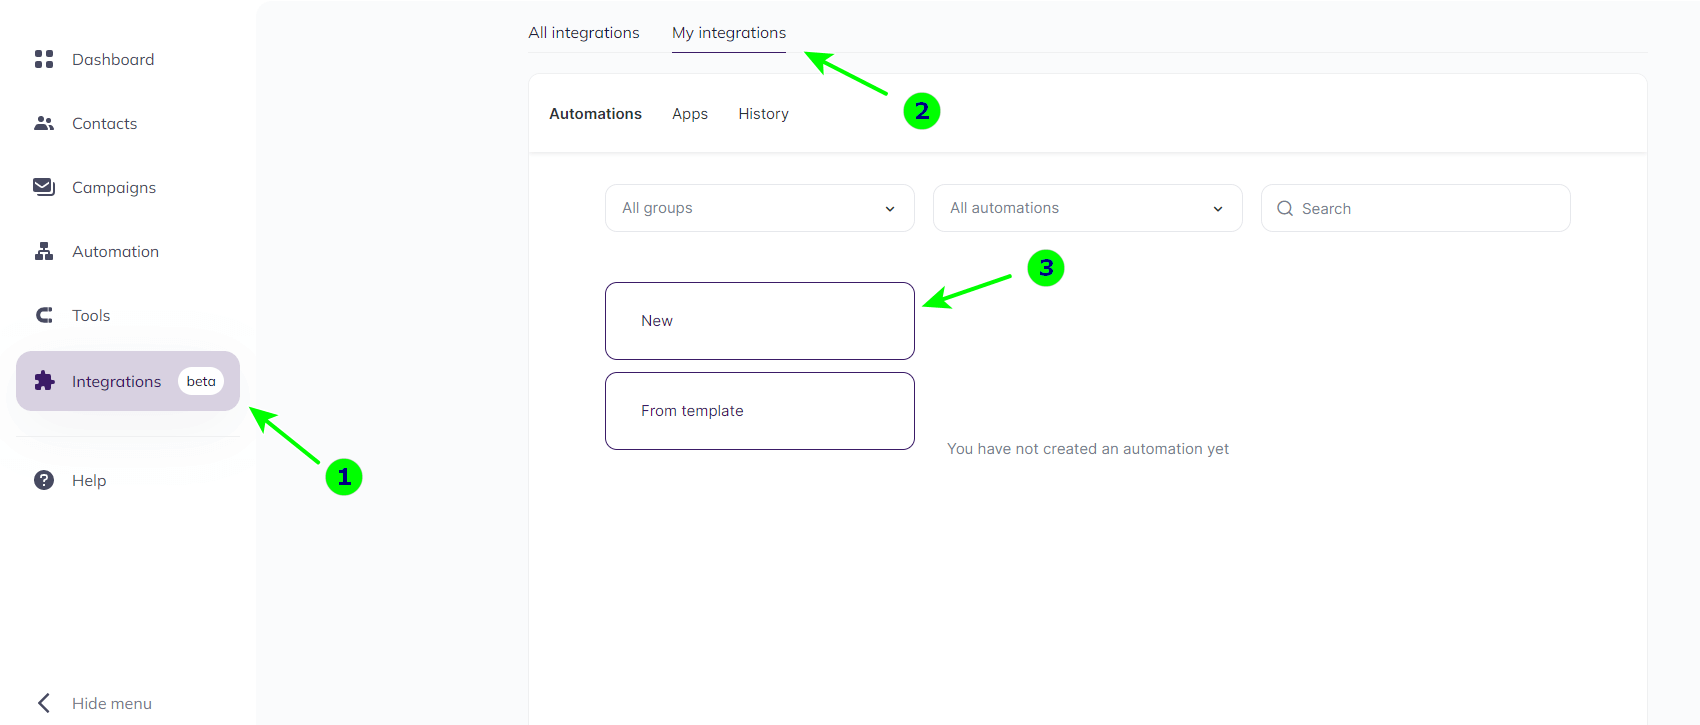
In section Integrations, go to My integrations and create a new connection (New):
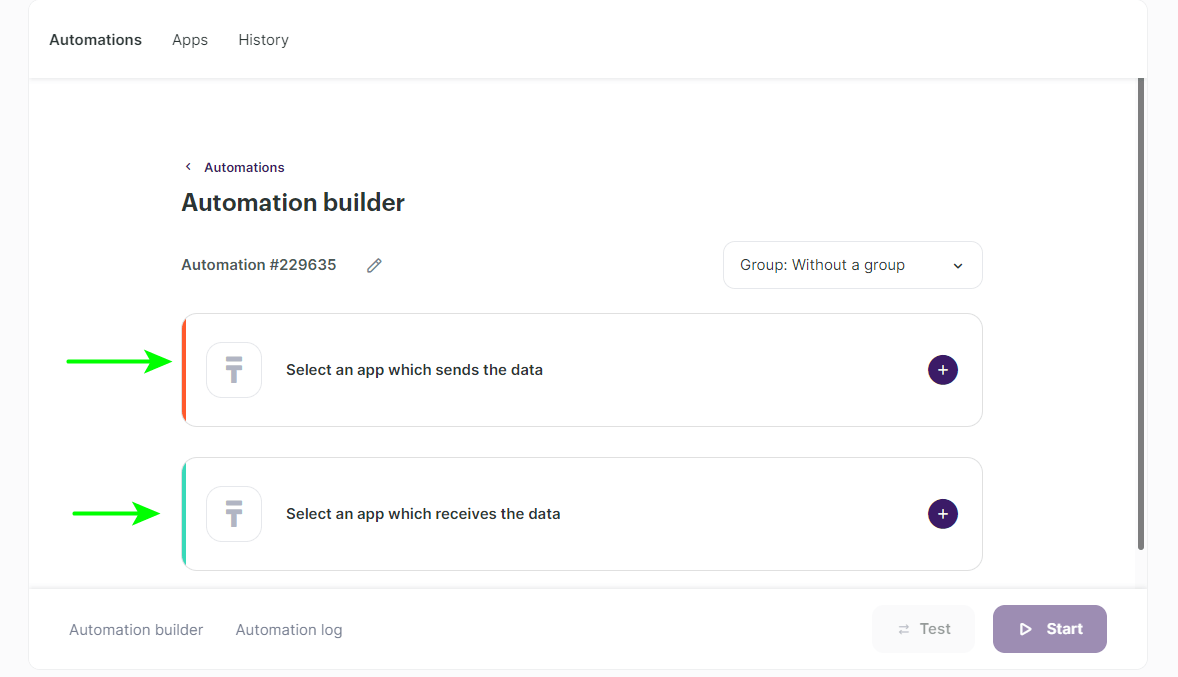
You are looking at the integration editor. Here you choose from which service you will receive data and to which service you will transfer it.
Select an app which sends the data — selecting the service from which the data is sent and setting a trigger for the transfer;
Select an app which receives the data — selecting the service that receives the data and configuring the action to be taken on the data.
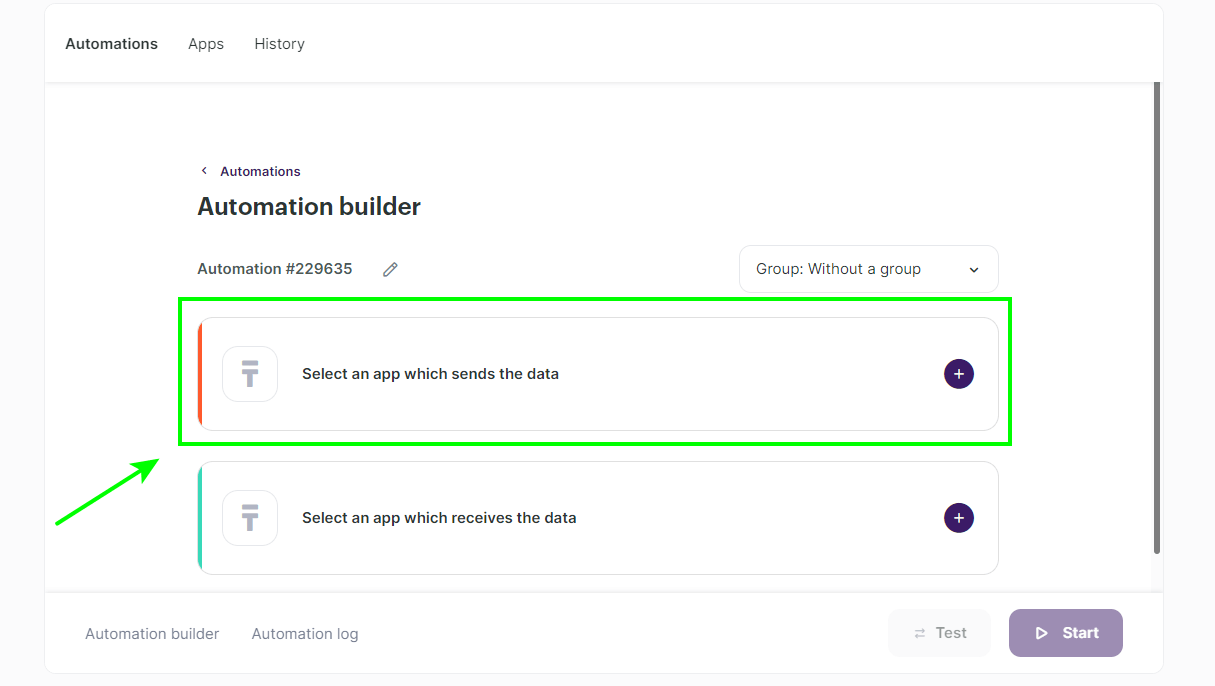
Selecting the trigger for the data transfer
- Click on Select an app which sends the data:
- Select Shopify in the App field and New customer in the Event field. In this case, when a new customer is added to Shopify, the new contact will be automatically added to the list in Selzy.
If you need to transfer data about new orders, select the Order created event.

Set up a connection to Shopify
To complete the configuration of the trigger, you need to create a connection to the Shopify service.
- Click Add a connection to add a connection to your Shopify account:

- Enter a name for the connection:

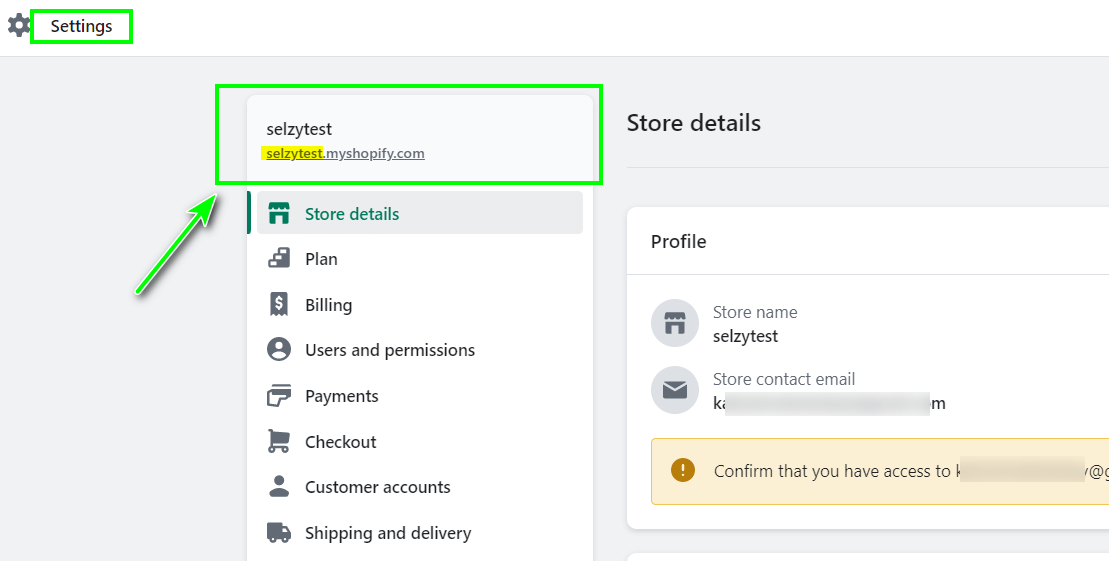
- Insert a link to your Shopify shop:

The shop link can be found in your Shopify account in the Settings section:

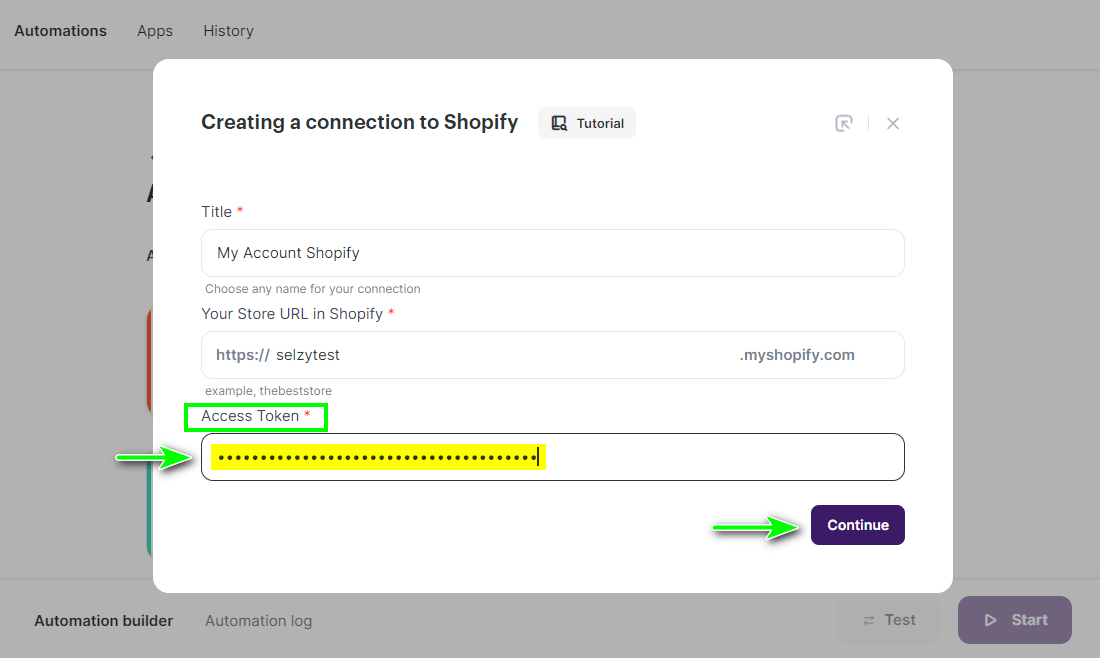
- Insert an Access Token from Shopify and click Continue:
How to get an Access Token from Shopify
To connect your Shopify shop to Selzy, you need to create a new app in your Shopify personal account.
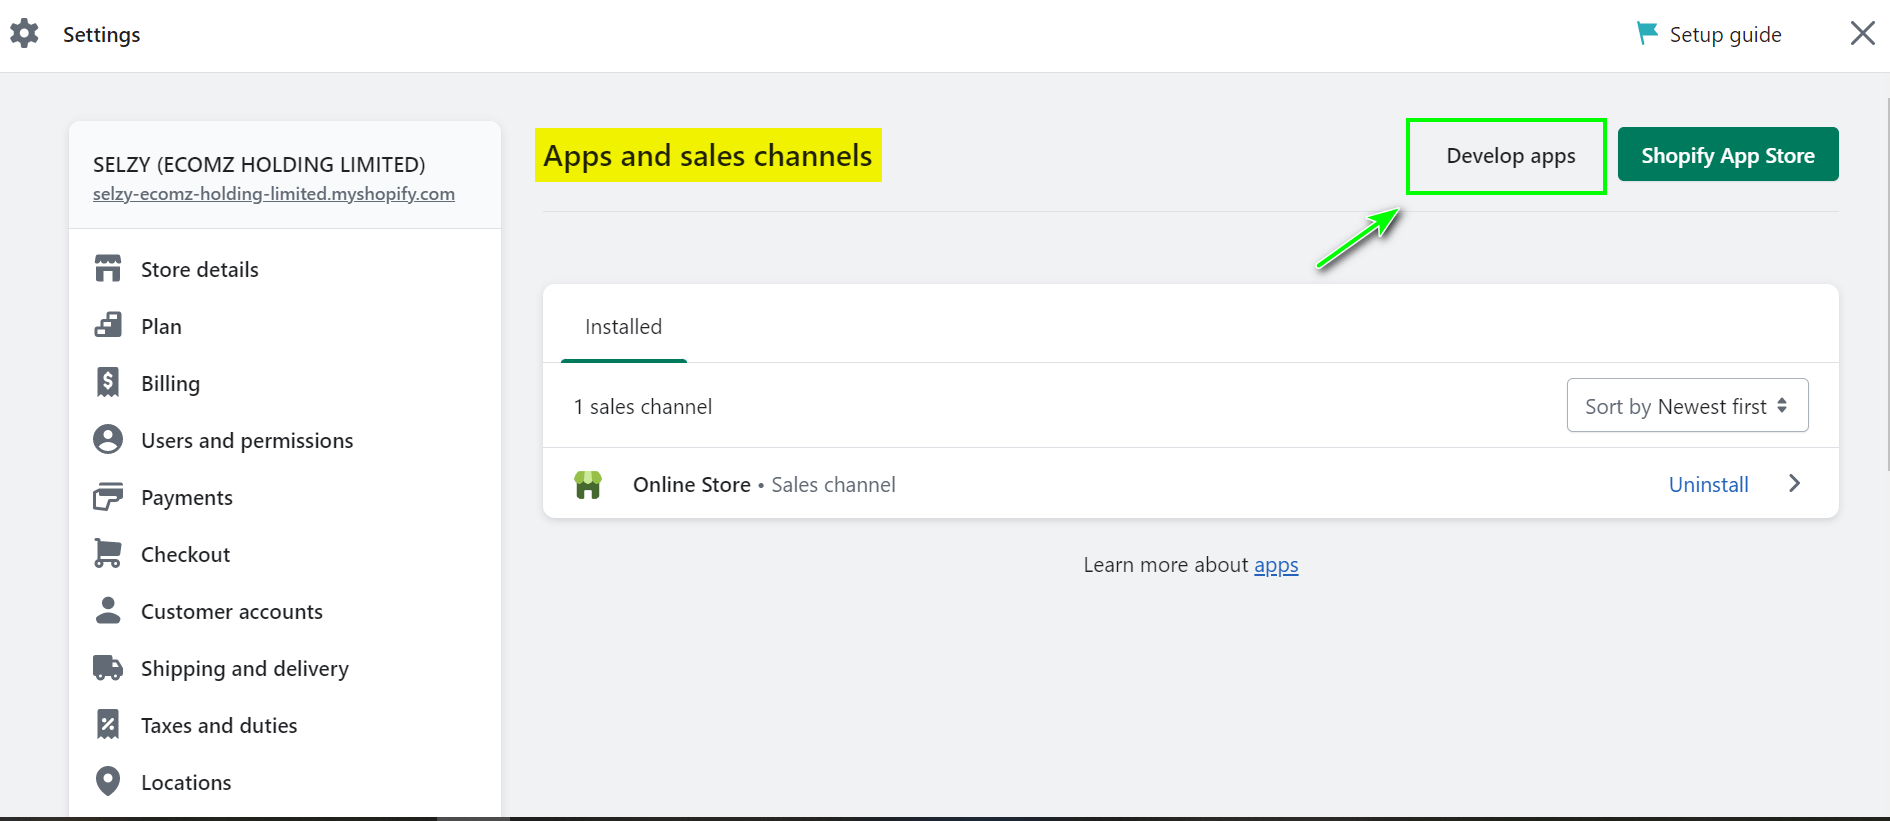
- In Shopify personal account on the home page, click on Apps and select App and sales channel settings:

- Then go to Develop apps:
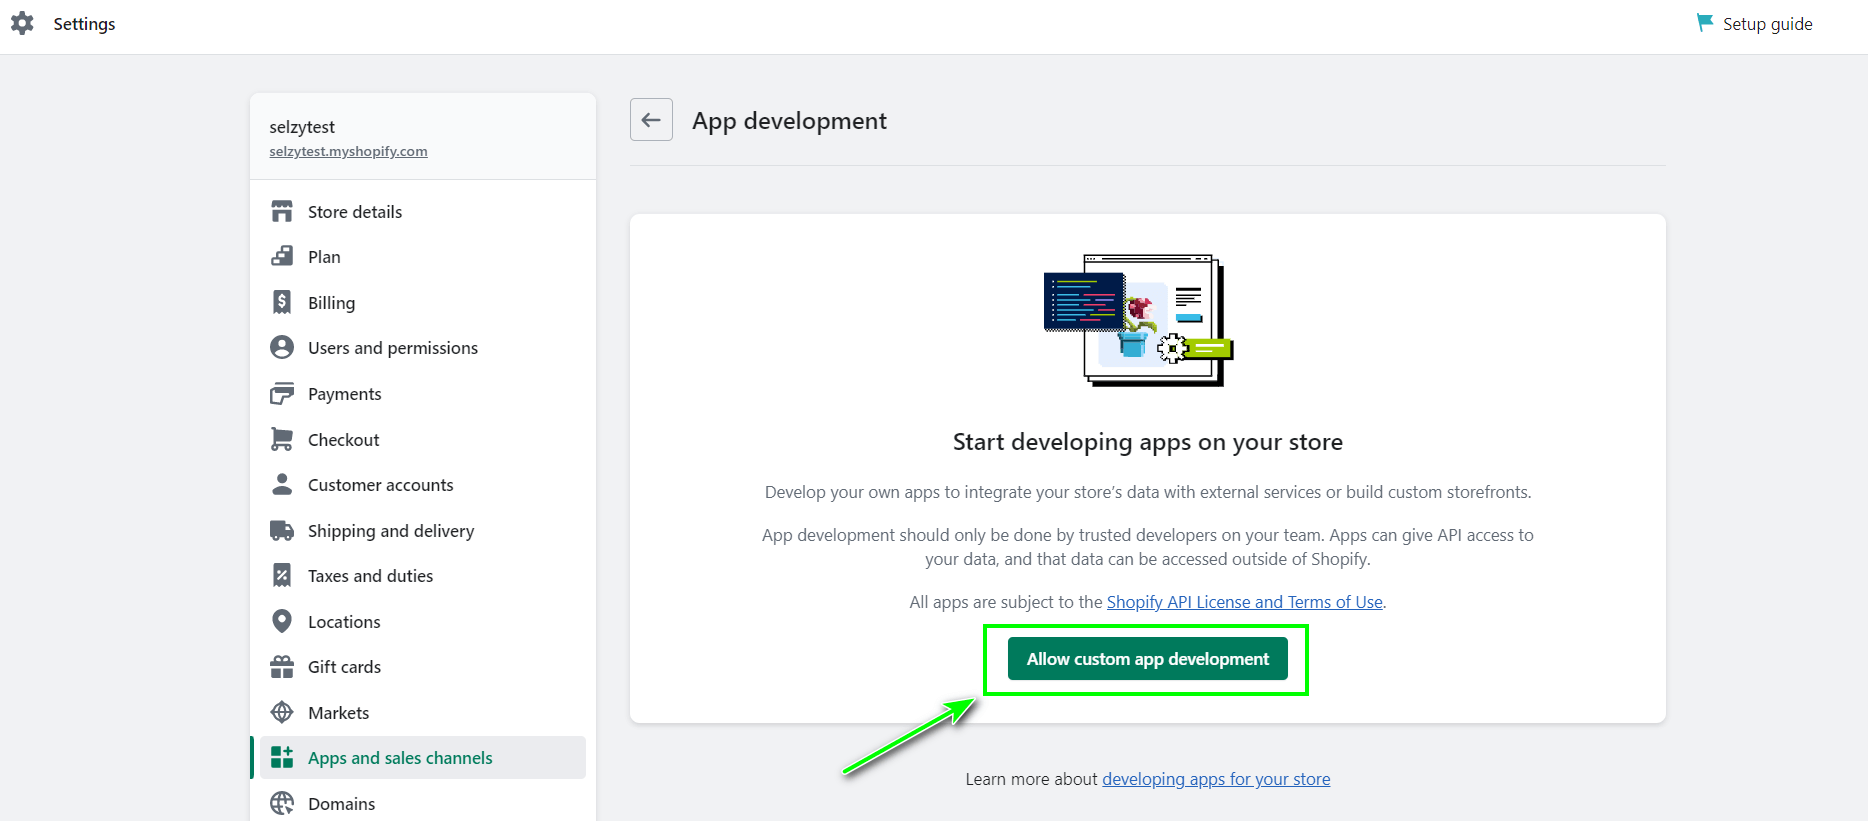
- Give your consent to custom app development by clicking on the Allow custom app development button:
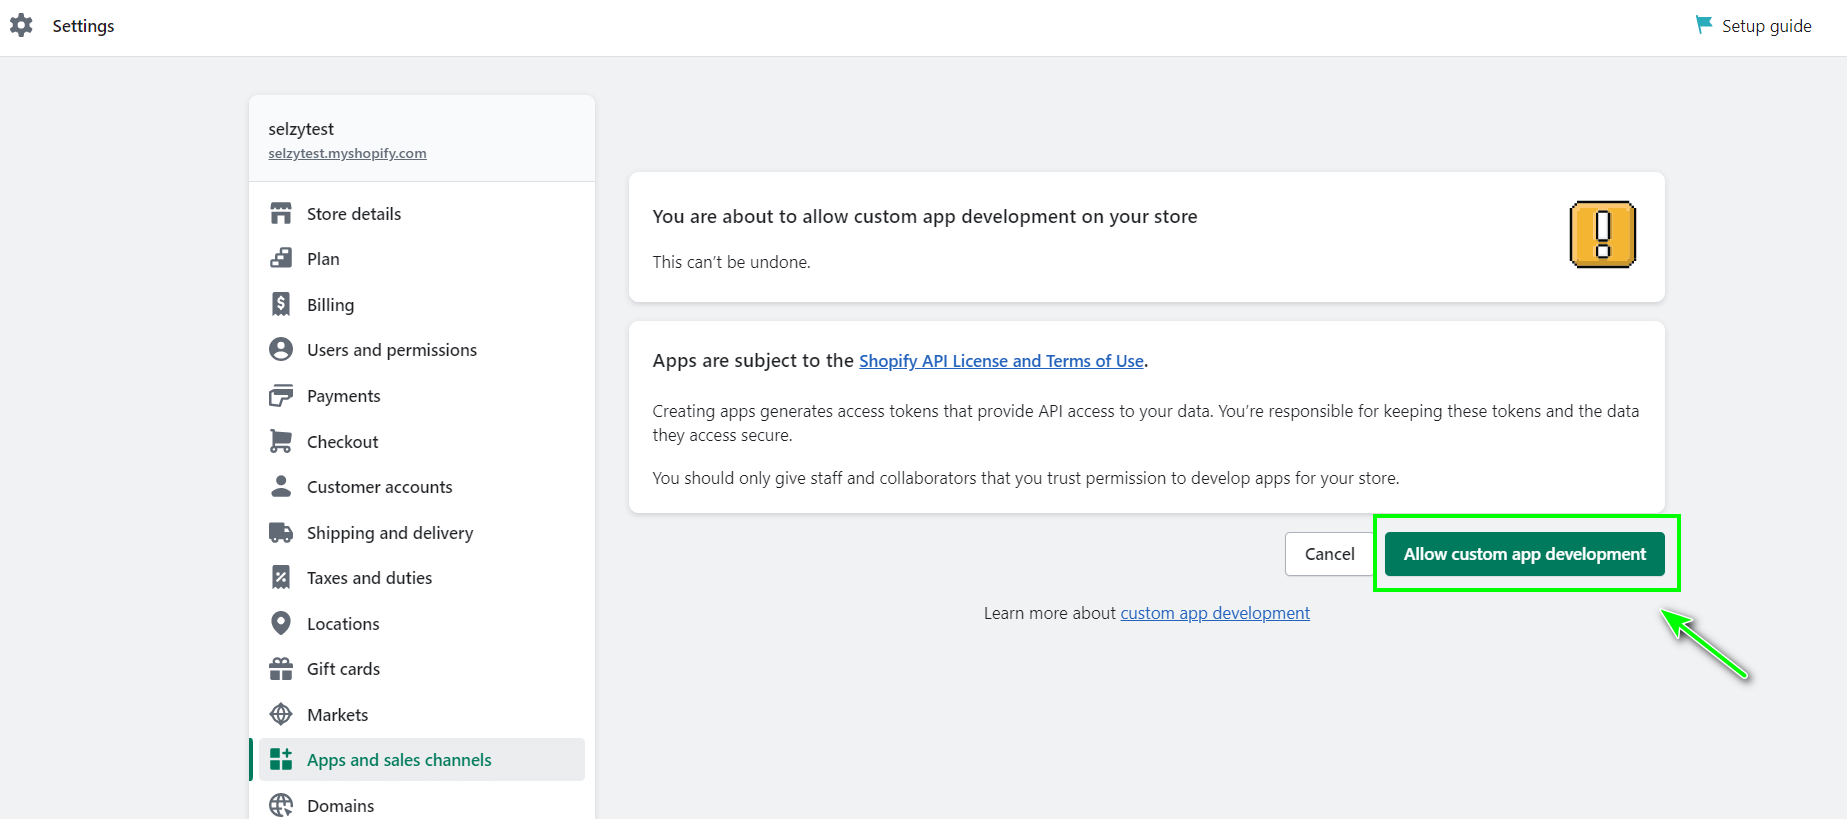
- Click again on Allow custom app development:
- Create a new app by clicking on Create an app:
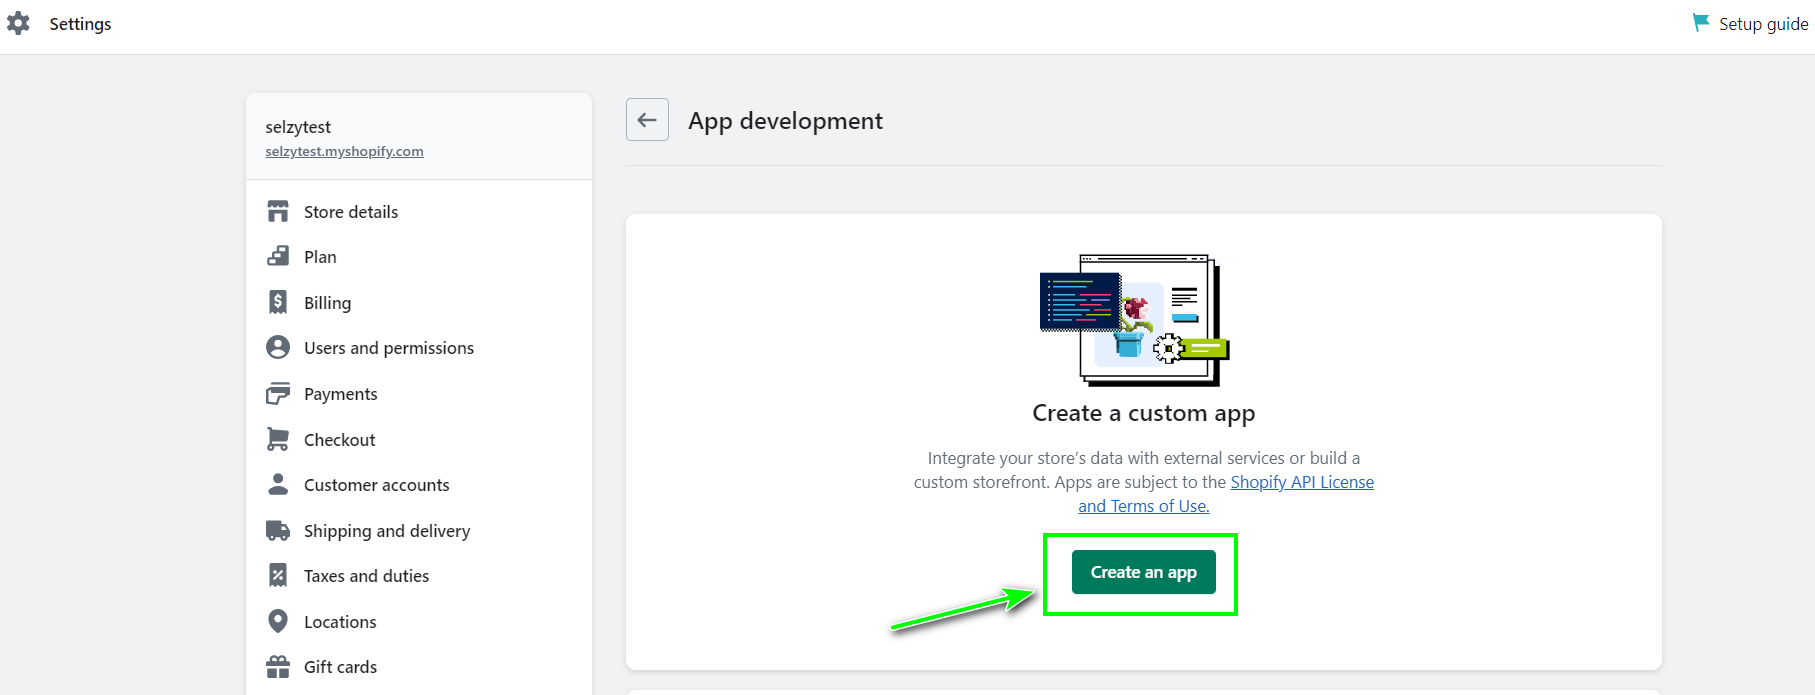
- Enter a name for the app and click Create app:

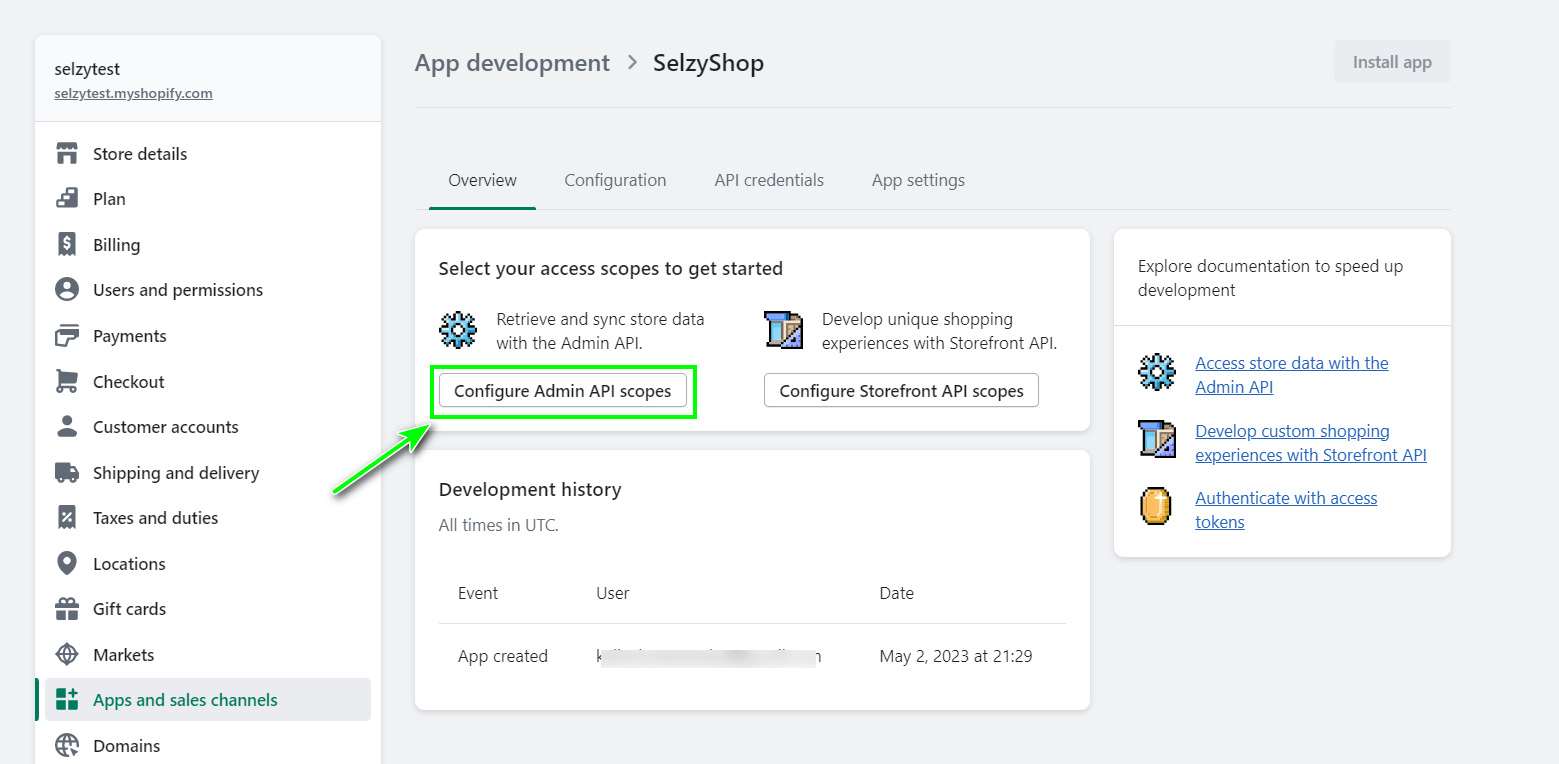
- The app has been created. To get the API keys and Access Token, click on Configure Admin API scopes:
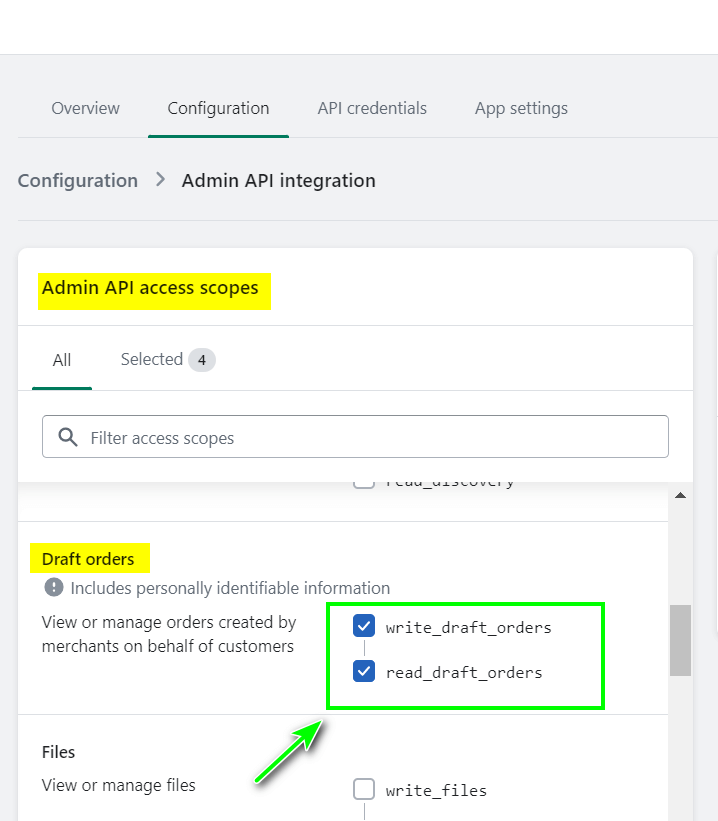
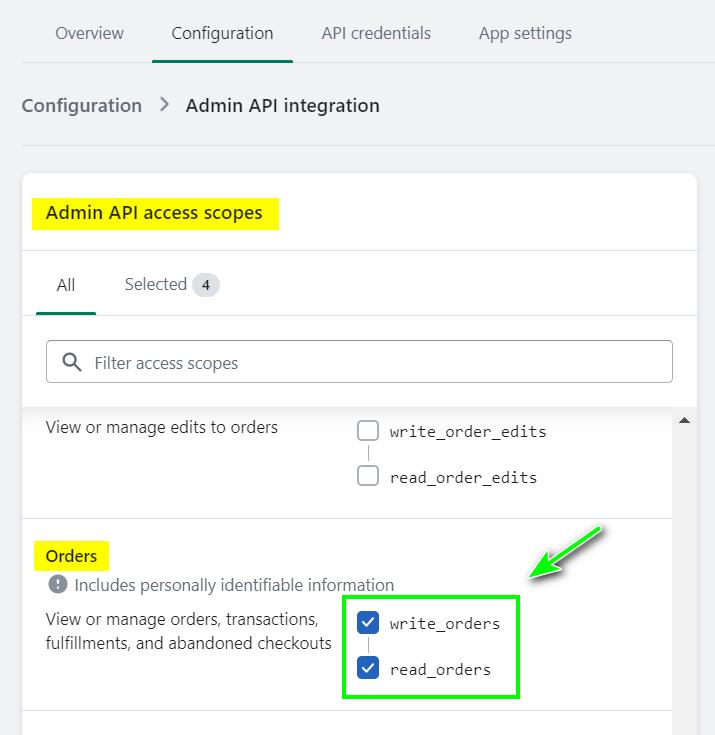
- In the Admin API access scopes window, on the tab All, check the boxes for:
write_draft_orders
read_draft_orders
write_orders
read_orders
write_customers
read_customers
This is to allow the app to retrieve order data from the shop.
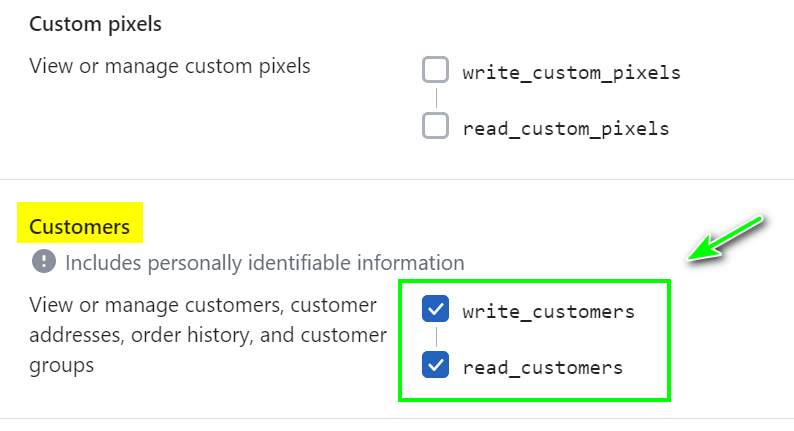
- Then click Save at the bottom of the page:

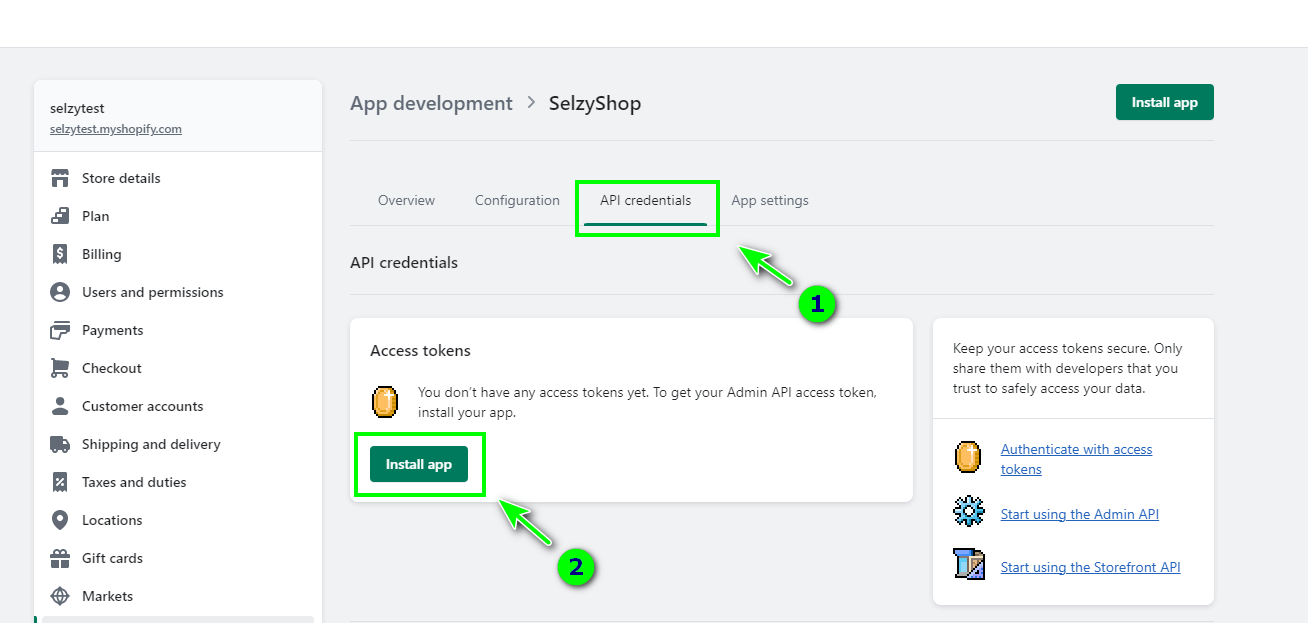
- Then go to tab API Credentials and click in the window Access tokens → Install app:
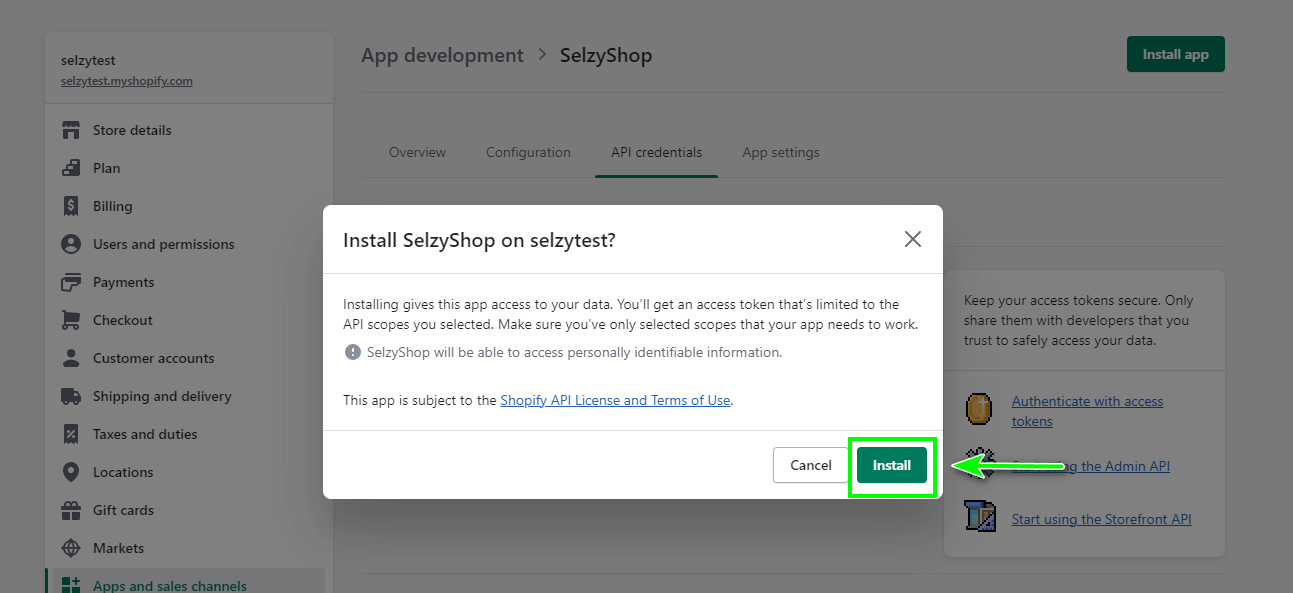
- Confirm the installation of your application by clicking on Install:
- Here are the API keys for connecting the application with other services: Admin API access token, API key, API secret key. It is important to copy and save them in a separate file, e.g. in Notepad, as the keys appear only once.
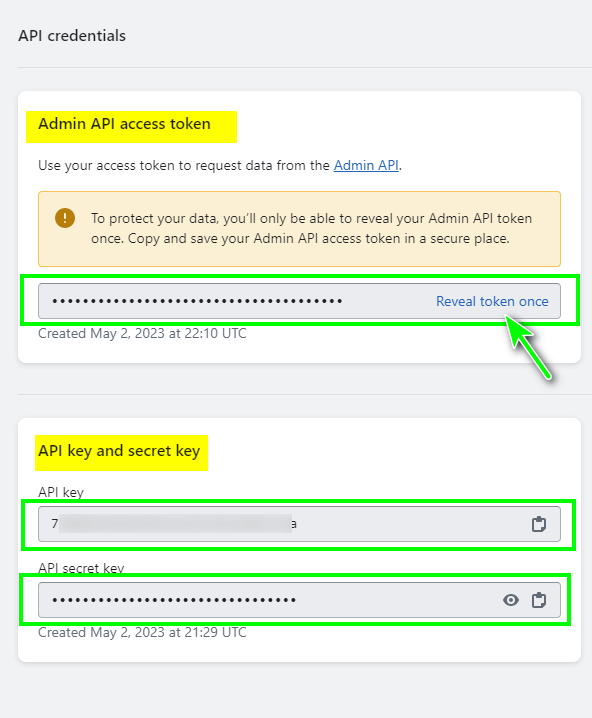
To connect Shopify and Selzy, you will need the first key: Admin API access token. Copy it and paste it into your account in Selzy in the window for creating a connection with Shopify:


Adding a trigger
- In the connection creation window in Selzy, after entering the connection name, inserting the link to Shopify and the Access Token key, click Continue:

- After a successful connection, a notification window will appear. Press any button, e.g. OK:

- Then click Add a trigger:

Setting up the trigger
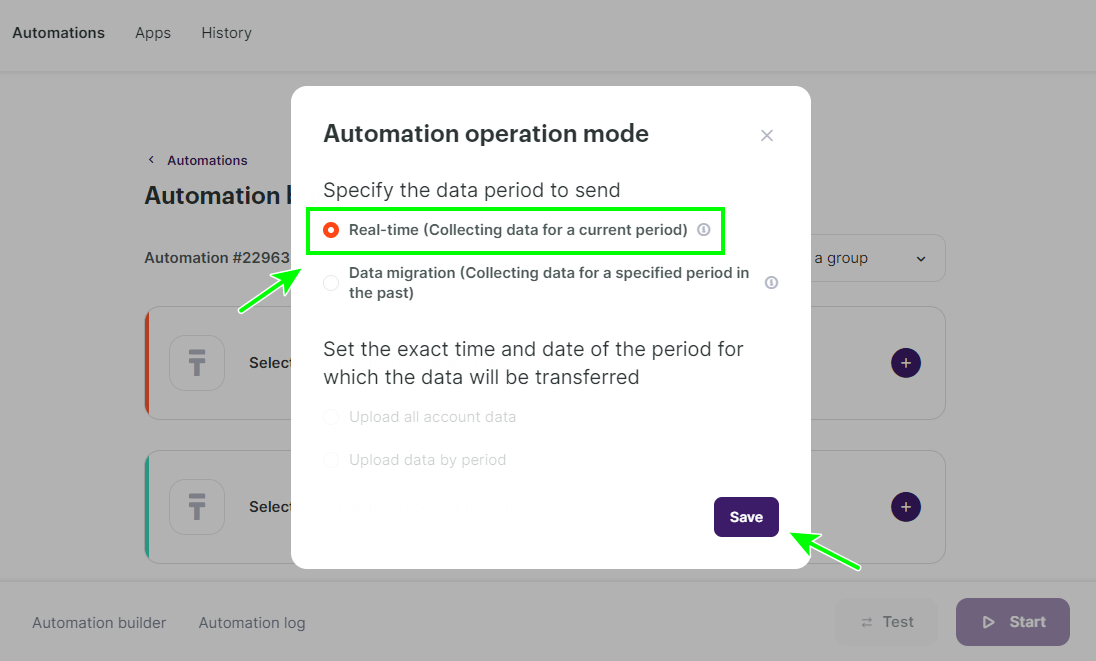
In the Automation operation mode pop-up window, select data transfer mode.
Real-time — real-time data transmission.
Data migration —transfer of data for a certain period of time. If you need to transfer your existing Shopify contacts' data to Selzy, the Data migration option is suitable. In this case, select Add many contacts as an action in Selzy, rather than Add a new contact. This method of contact transfer can be chosen as an alternative to manually exporting a file from Shopify and importing it into Selzy.
Select Real time to transfer the new rows:
Setting up the action
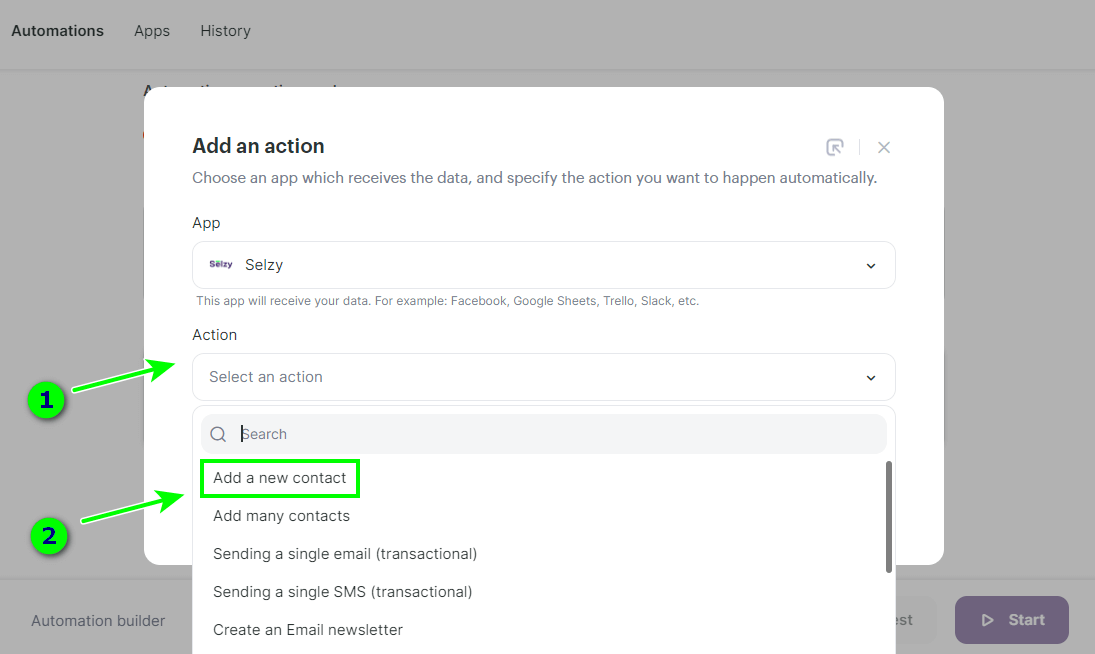
- Click Select an app which receives the data and select Selzy in the App field:


- In the Action field, select Add a new contact:
- In the Selzy Account field, select your Selzy connection and then click Add an action:


Setting up the fields for transmission
In a new window, set up the rule for overwriting data, the fields for transmission, the list where the contacts will go, and the list subscription confirmation is connected.
- In Overwrite rules select overwrite mode for custom fields, e.g. All fields will be overwritten. The overwrite rule will be valid for those contacts that are already in the list.
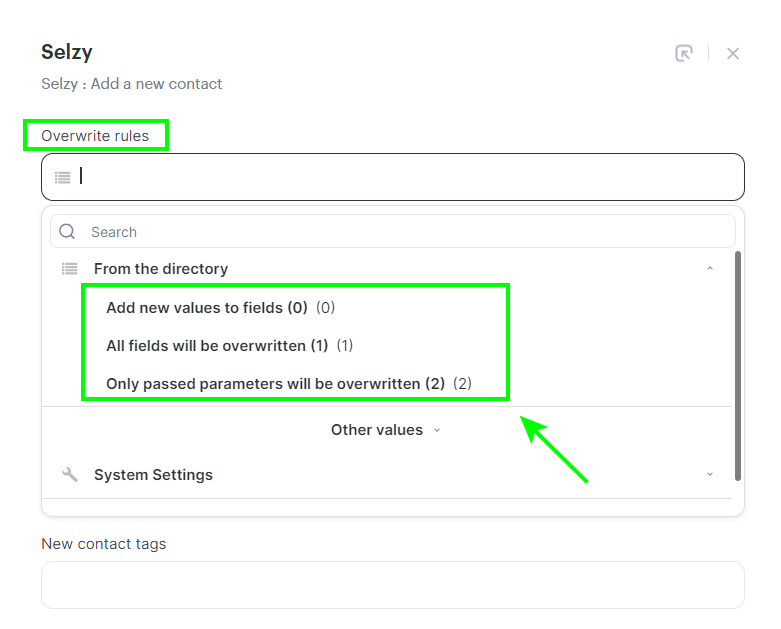
Add new values to fields (0) is selected if you only want to pass unfilled or new contact fields and not to change existing ones. If the contact was in other lists, it will be added to the new list and remain in the old lists.
All fields will be overwritten (1) is worth selecting if you want to replace all field values with new ones: the old field values will be deleted and replaced by the new ones. If the contact was in other lists, it will be removed from them and will only be added to the one specified in the Contact List field.
Only passed parameters will be overwritten (2) — only those fields that are transferred from Shopify service will be changed. If the contact has other fields in Selzy, they will not be changed.
How overwriting looks like in practice:
| Name | Lists | Tag | Product | Order | ||
| Selzy | 1@ex.uk | Ann | 1 | a | - | 444 |
| Shopify | 1@ex.uk | Maria | 2 | b | 🍋 | - |
| Result (0) | 1@ex.uk | Ann | 1, 2 | a, b | 🍋 | 444 |
| Result (1) | 1@ex.uk | Maria | 2 | b | 🍋 | - |
| Result (2) | 1@ex.uk | Maria | 1, 2 | b | 🍋 | 444 |
Selzy row — contact fields before transferring a contact from Shopify.
Shopify row — fields that are transferred from Shopify.
Afterwards, you see the result of each overwrite rule:
Result (0) — Add new values to fields (0)
Result (1) — All fields will be overwritten (1)
Result (2) — Only passed parameters will be overwritten (2)
You specify the Lists and Tag fields when setting up the connection in the second step of Add a new contact. Email, Name, Product, Order fields are transferred from Shopify.
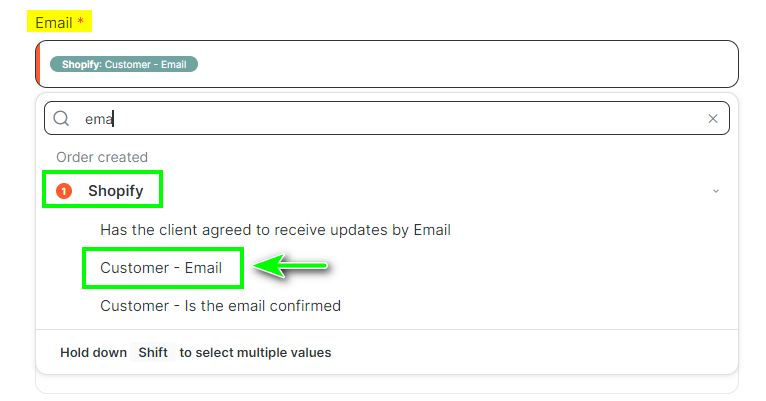
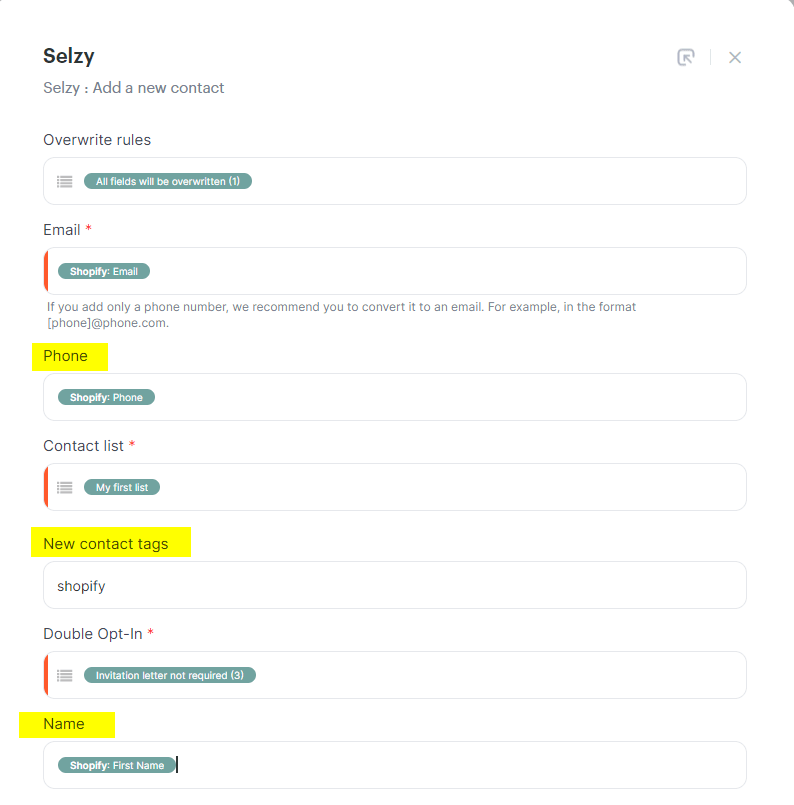
- In the Email field, select the same field from the Shopify app from which the contact's email address will be transmitted:

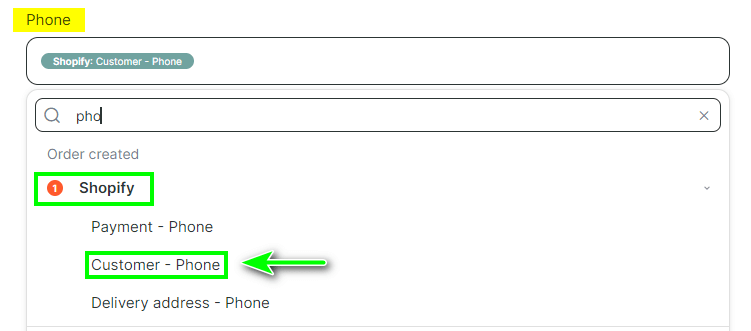
If you selected the Order created trigger in the first step, here you must select Customer — Email in the Email field. In the Phone field, select Customer — Phone:
In the same way, you can select from where the phone number and name will be transmitted and add new tags for contacts:
If you need other contact fields than the standard Email, Name, Phone, you can create them in Selzy section Contacts → Tools → Custom Fields:
How to create custom fields in Selzy

- In the Contact List field, select the list in Selzy where the contacts will go:

- In the Double Opt-In field, select whether or not an opt-in email is required to sign up for the contact list. If an opt-in email is not required, select «3».
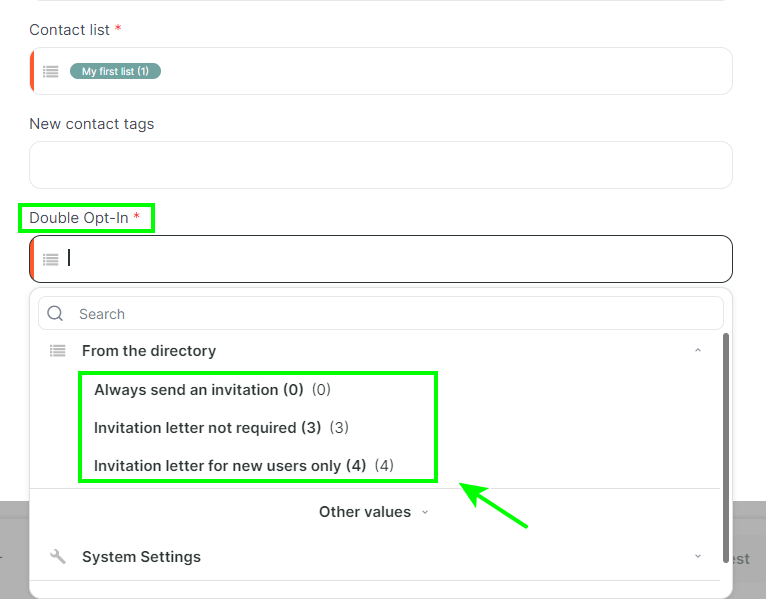
Always send an invitation (0) — invitation email required to subscribe to the list.
Invitation letter not required (3) — invitation email not required, contact is immediately added to the list with «new» status.
Invitation letter for new users only (4) — the system will check: if the contact has not been in your lists before, an invitation email will be sent; if the contact is already in the lists, it will be added to the specified list immediately.
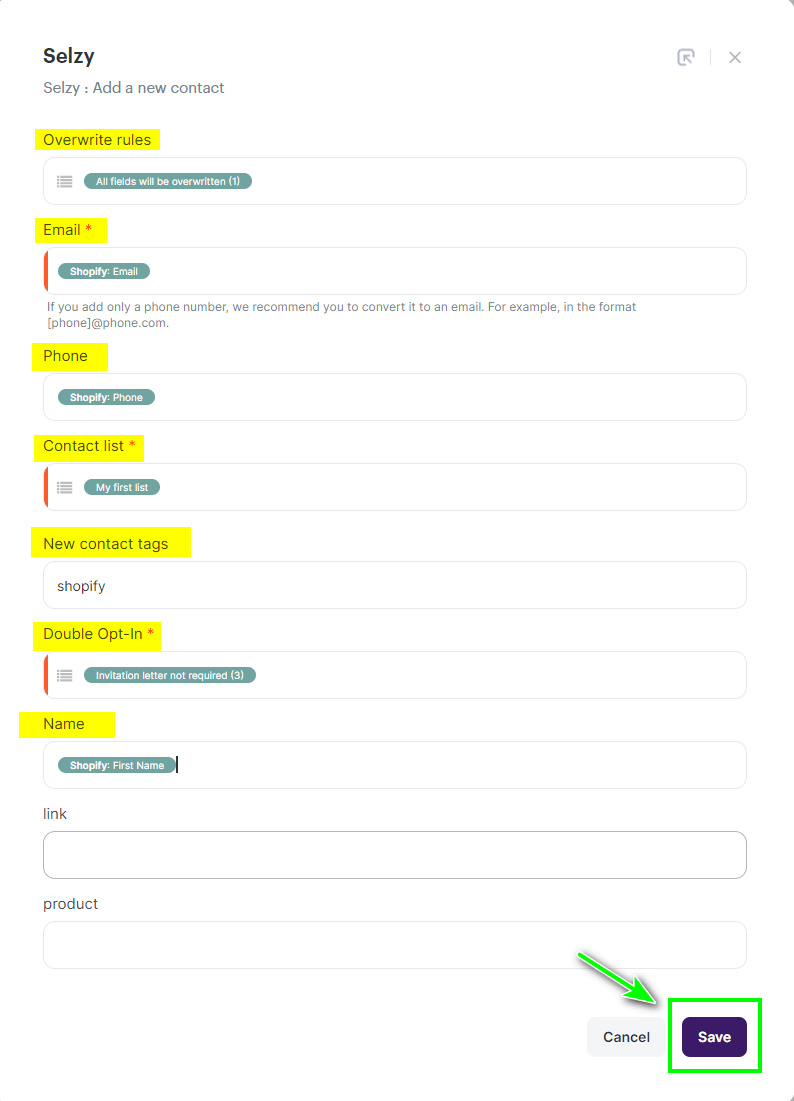
- Save the settings by pressing Save.
In the screenshot below you can also see an example of filling in the fields:
- Click Start to start the integration:

The integration between Shopify and Selzy is set up: now, when a new contact is added in Shopify, it will be automatically transferred to the selected list in Selzy.


