In the instructions below we will show how to create a connection to Webflow and set up the transfer of subscribers from a form on the Webflow site to the contact list in Selzy.
How to create a connection with Webflow
In your Selzy account, in the Integrations section, go to My Integrations and click on Apps:

This section contains connections you have made to other services. Click on Add a connection to add a new connection:

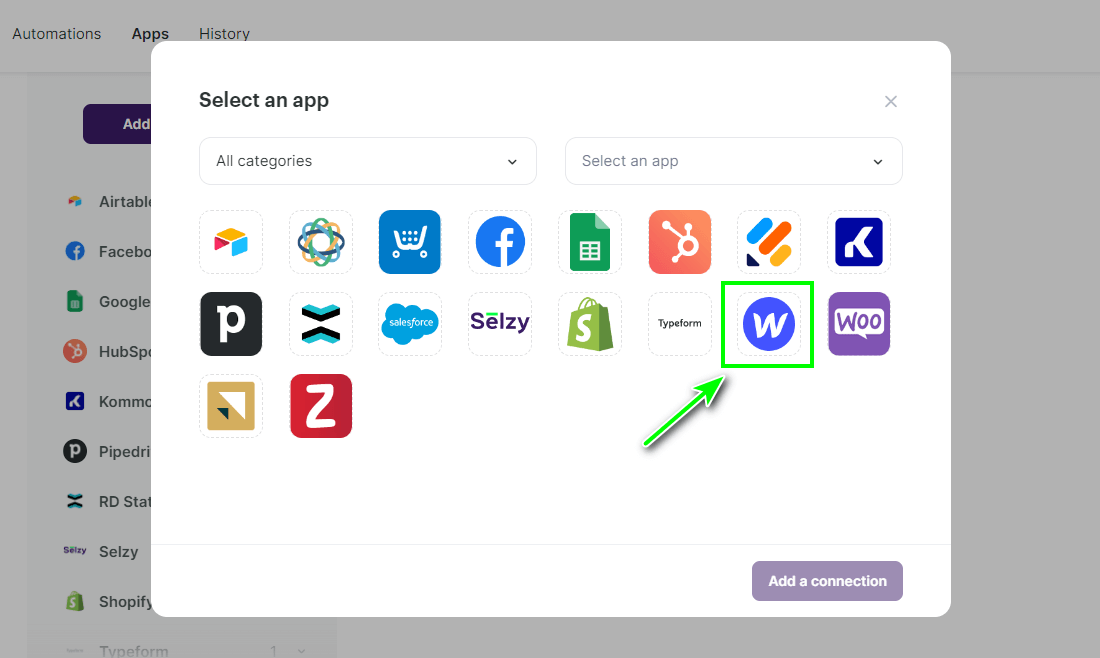
From the list of applications, select the Webflow service:
Click on the Webflow icon again and then the Add a connection button:

In the window that appears, enter a name for the connection. Then click Continue:

Agree to access your Webflow account by clicking on Grant Access:

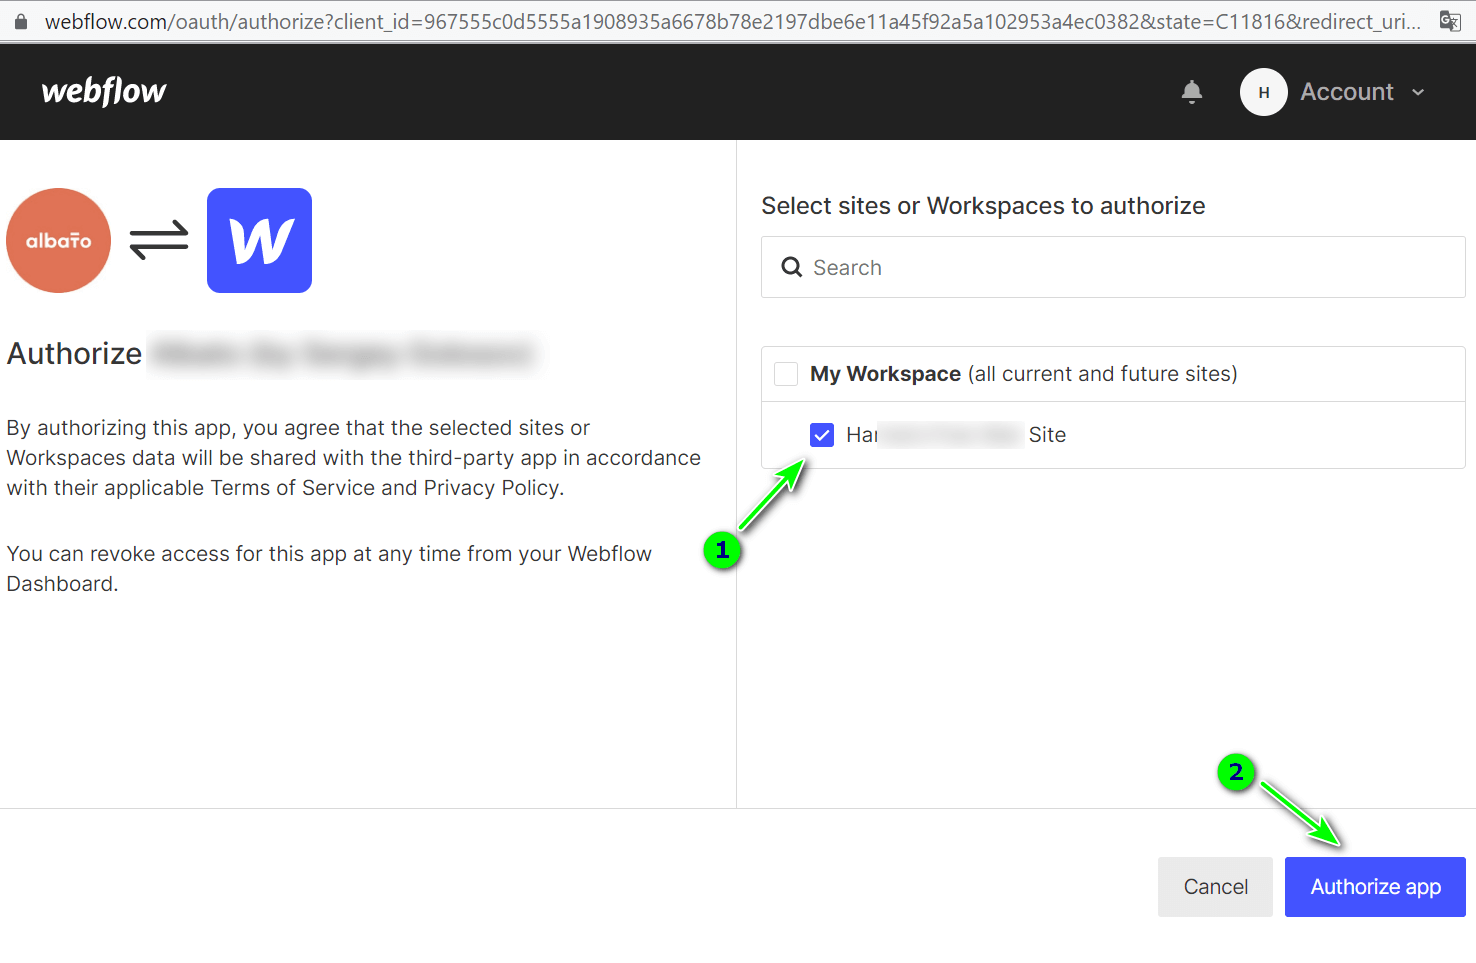
In the pop-up window, select a website on Webflow and click Authorize app:
When the connection is successful, a notification window will appear. Click any button. For example, on OK:

The connection has been made. You can now move on to setting up the trigger.
How to transfer data from a form on a Webflow website to Selzy
Using the trigger below, you can pass the details of a contact who has completed a form on your website, created on Webflow, to the contact list in Selzy. To do this you will need to create a connection from the Form Submission trigger and Add a new contact action.
Selection of the trigger for data transfer: «Form Submission»
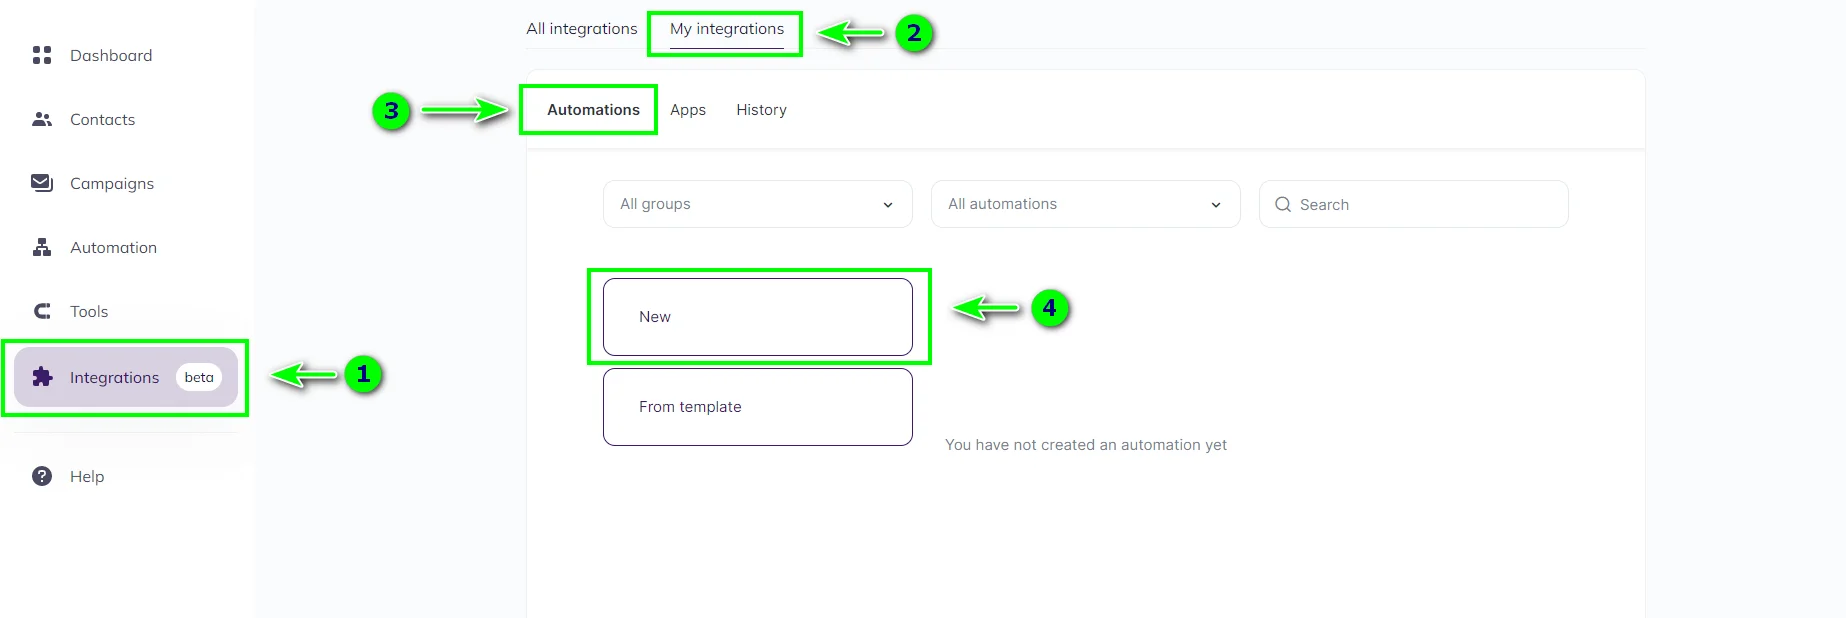
- In your personal Selzy account, in the Integrations section → My integrations → Automations click on New to create a new connection:
- You are looking at the integration builder. Click on Select an app which sends the data to select the service from which the data will be sent and the trigger for the transmission:

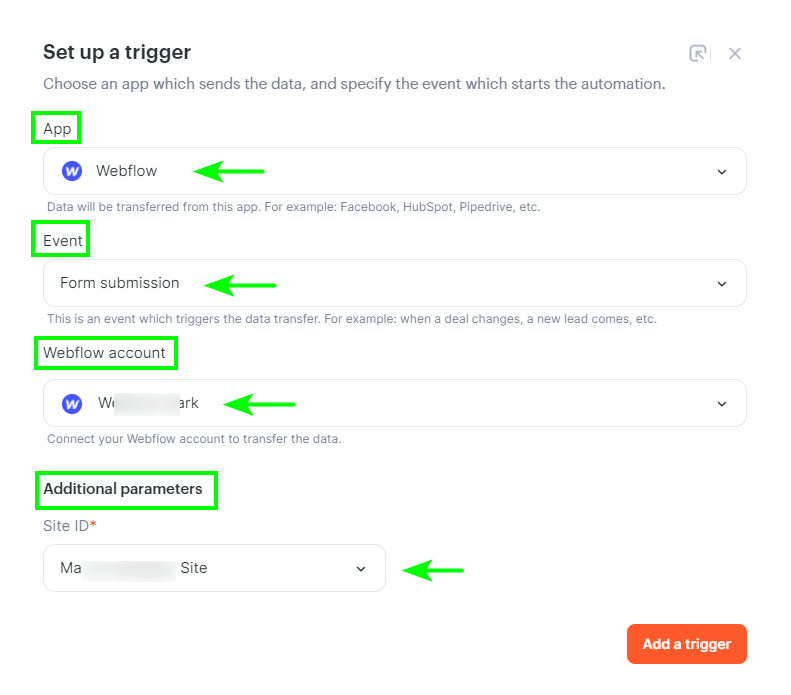
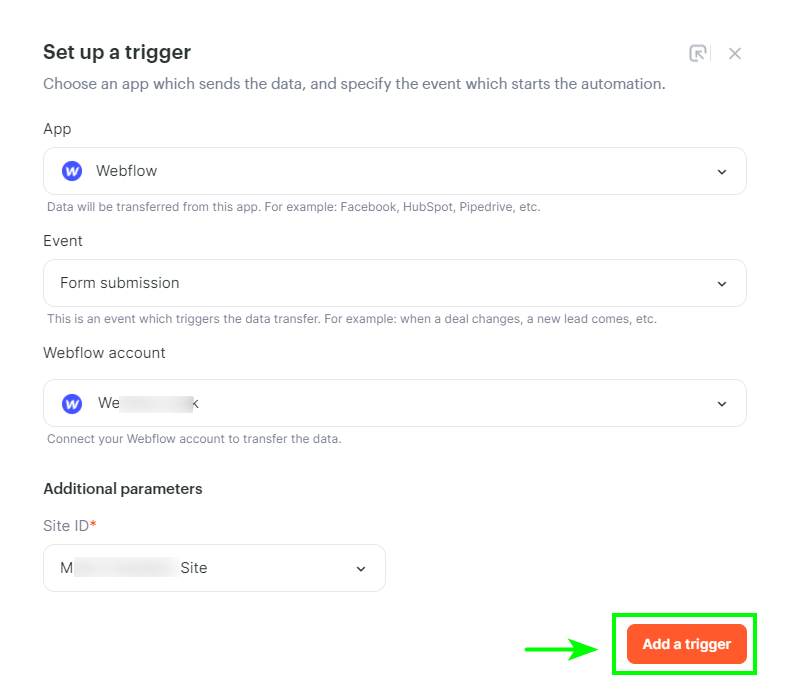
- In the window that appears, configure the trigger settings. In the App field select Webflow, in the Event field select Form Submission, in the Webflow account select the connection to Webflow already created. After selecting the connection in Additional parameters, select the form on the website from which subscriber data will be collected:
- Then click on Add a trigger:
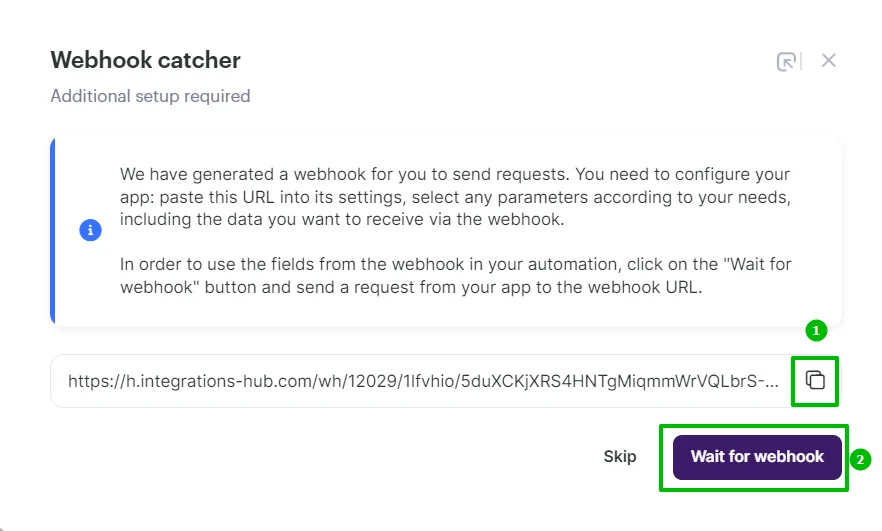
Selzy and Webflow integration works using webhooks. That’s why, when you are setting up a new automation and choose an app to send the data, you will be prompted by Webhook catcher. Copy the URL(1) — you’ll later need to paste it into Webflow. Then click on the Wait for webhook button (2).
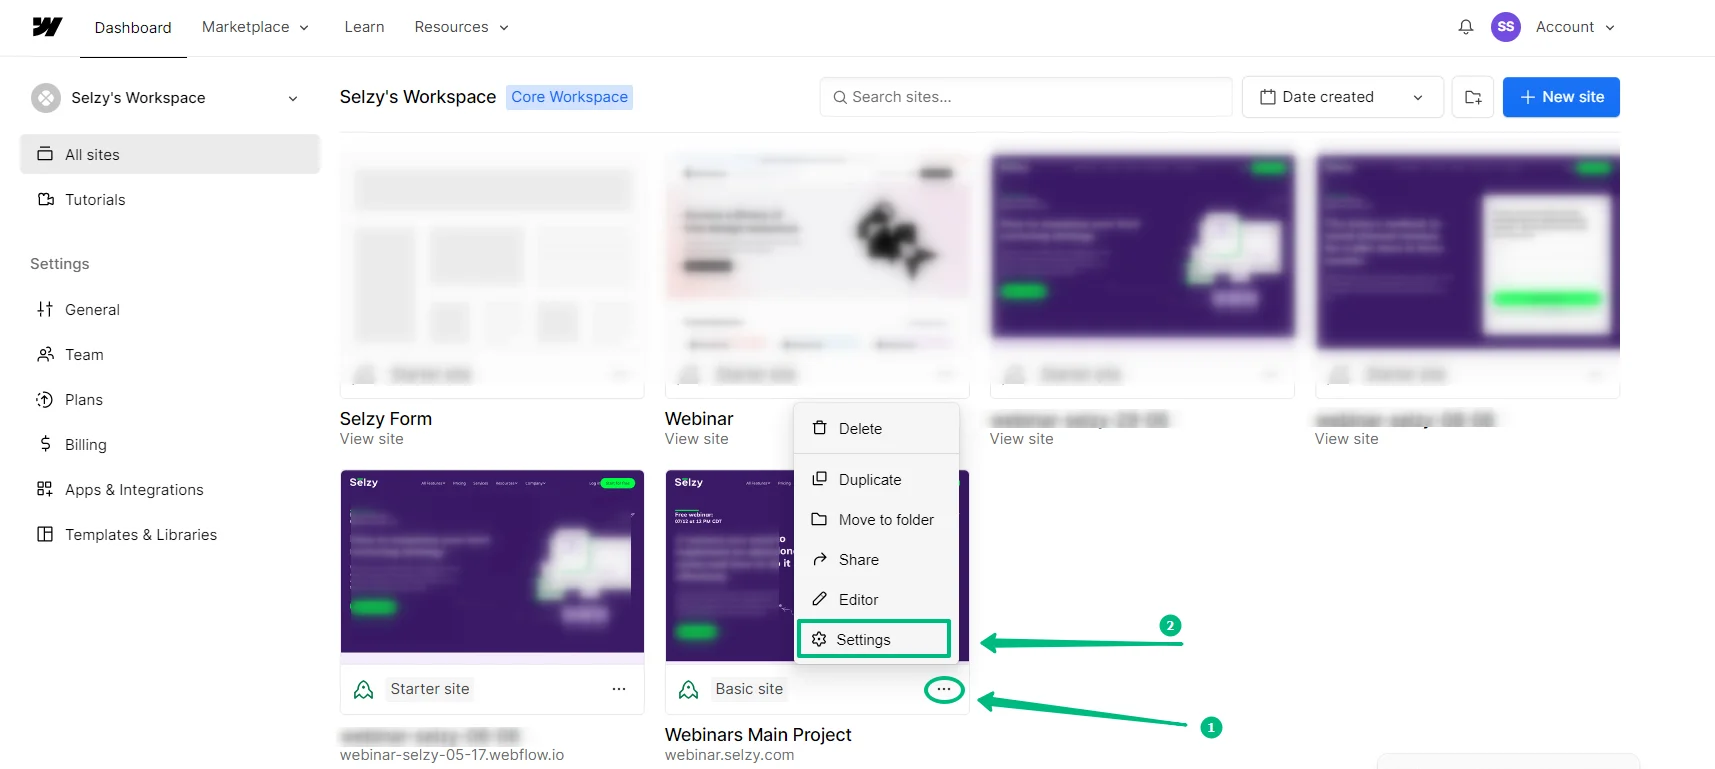
Navigate to your Webflow Dashboard. From the left-side navigation menu, select All sites. Choose a site and click the More actions (...) button, then, in the pop-up menu, click Settings.
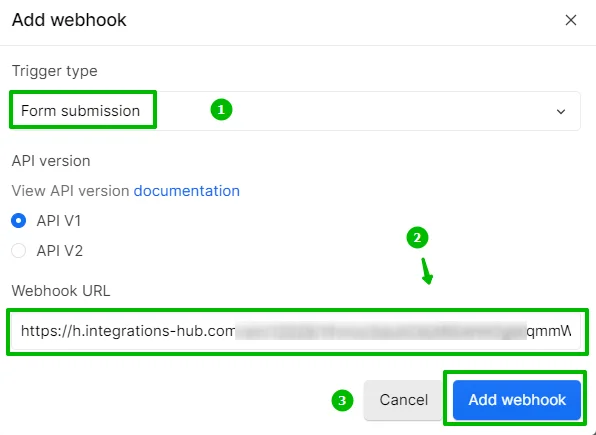
Next, from the left-side navigation menu, select Apps & Integrations. Click + Add webhook.
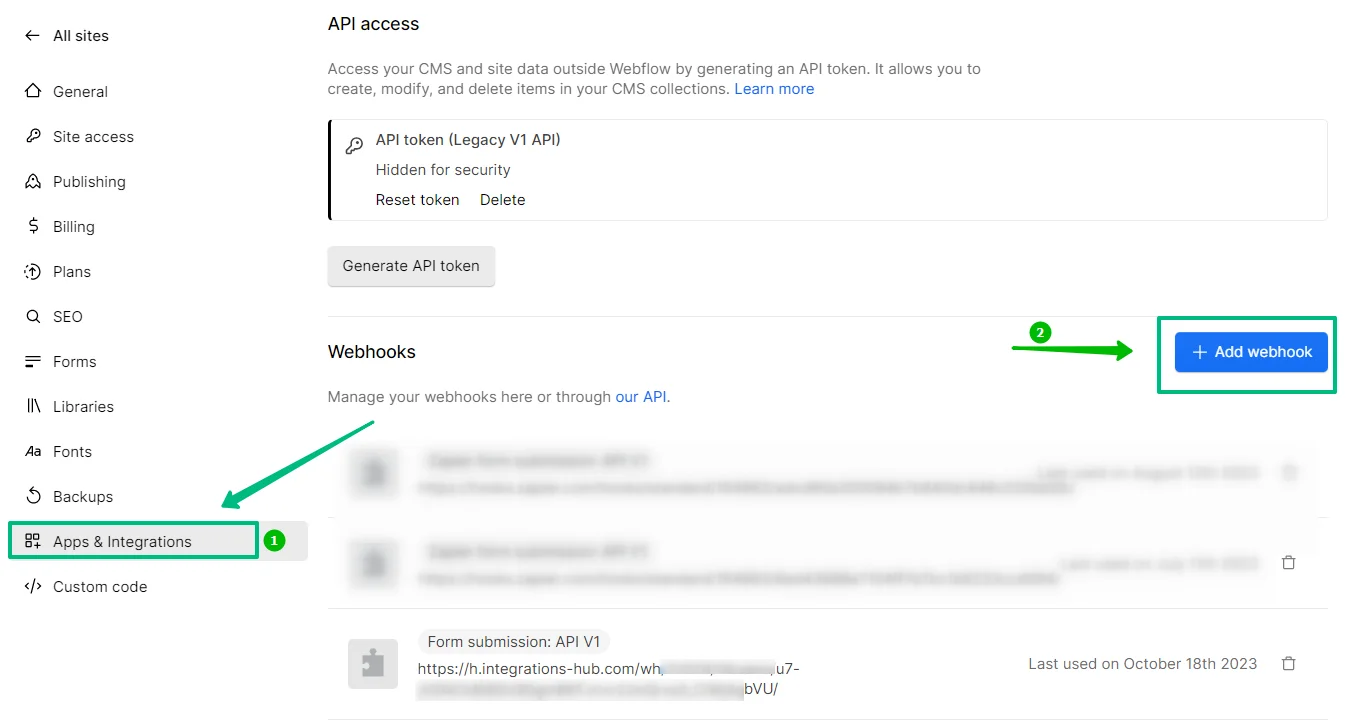
In the Add webhook pop-up window, select an appropriate Trigger type. In our case, it’s Form submission. Then paste the URL you copied earlier into the Webhook URL field. Click Add webhook.
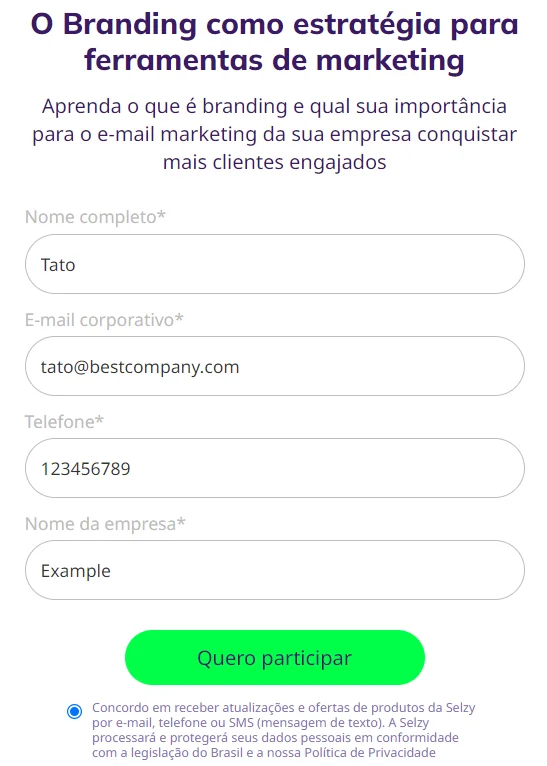
Navigate to the page containing the form from which contact information will be received.
Fill out the form with sample data and submit it. This way, you will be able to verify if the webhook is configured correctly and your automation works.
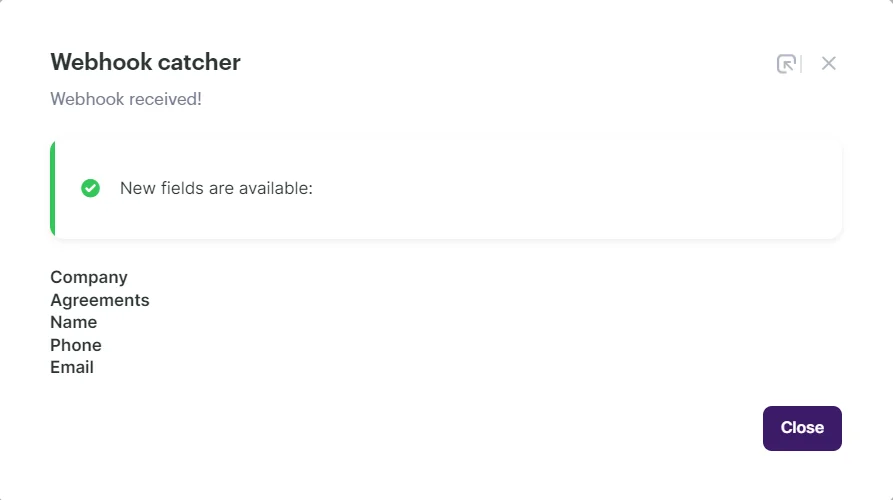
Return to Selzy. Once the data is acquired, you'll see all the fields available to you in Webhook catcher. You may now press Close.
Setting up the second step: action «Add a new contact»
The second step is to add the found contact to the Selzy list.
- In the integration builder, click on Select an app which receives the data to add the action that will take place with the data received from the form:

- In the Add an action window set the action parameters: in the App field select Selzy, in the Action field select Add a new contact, in the Selzy account select the already created connection to Selzy:

- Then click on Add an action:

Setting up the fields to be transferred
In a new window, the rule for overwriting data, the fields to be transferred, the list where the contacts will go, and the list subscription confirmation is connected.
- In Overwrite rules select overwrite mode for custom fields, e.g. All fields will be overwritten. The overwrite rule will be valid for those contacts that are already in the list.

Add new values to fields (0) is selected if you only want to pass unfilled or new contact fields and not to change existing ones. If the contact was in other lists, it will be added to the new list and remain in the old lists.
All fields will be overwritten (1) is worth selecting if you want to replace all field values with new ones: the old field values will be deleted and replaced by the new ones. If the contact was in other lists, it will be removed from them and will only be added to the one specified in the Contact List field.
Only passed parameters will be overwritten (2) — only those fields that are transferred from Webflow service will be changed. If the contact has other fields in Selzy, they will not be changed.
How overwriting looks like in practice:
| Name | Lists | Tag | Product | Order | ||
| Selzy | 1@ex.uk | Ann | 1 | a | - | 444 |
| Webflow | 1@ex.uk | Maria | 2 | b | 🍋 | - |
| Result (0) | 1@ex.uk | Ann | 1, 2 | a, b | 🍋 | 444 |
| Result (1) | 1@ex.uk | Maria | 2 | b | 🍋 | - |
| Result (2) | 1@ex.uk | Maria | 1, 2 | b | 🍋 | 444 |
Selzy row — contact fields before transferring a contact from Webflow.
Webflow row — fields that are transferred from Webflow.
Afterward, you see the result of each overwrite rule:
Result (0) — Add new values to fields (0)
Result (1) — All fields will be overwritten (1)
Result (2) — Only passed parameters will be overwritten (2)
You specify the Lists and Tag fields when configuring the connection in the second step Add a new contact. The Email, Name, Product, Order fields are transferred from Webflow.
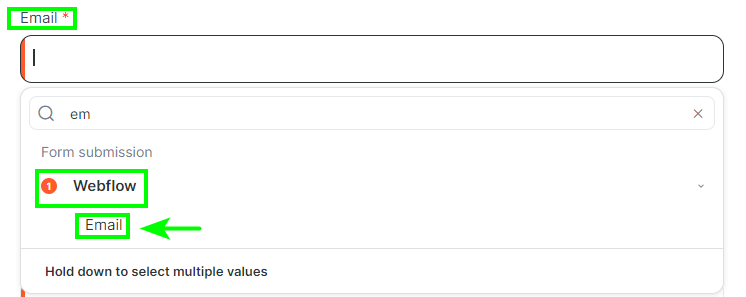
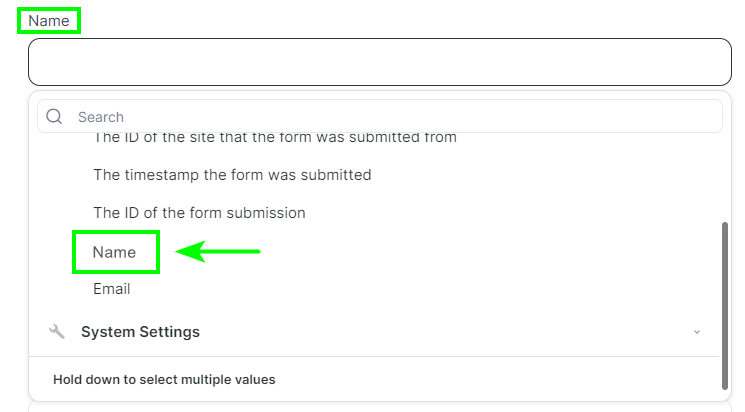
- In the Email field, select the identical field from the Webflow app from which the contact's email address will be transferred:
In the same way, you can select where the name will be transferred from and add new tags for contacts:
If you need other contact fields than the standard Email, Name, Phone, you can create them in Selzy section Contacts → Tools → Custom Fields:
How to create custom fields in Selzy

- In the Contact List field, select the list in Selzy where the contacts will go:

- In the Double Opt-In field, select whether or not an opt-in email is required to sign up for the contact list. If an opt-in email is not required, select «3».

Always send an invitation (0) — invitation email required to subscribe to the list.
Invitation letter not required (3) — invitation email not required, contact is immediately added to the list with «new» status.
Invitation letter for new users only (4) — the system will check: if the contact has not been in your lists before, an invitation email will be sent; if the contact is already in the lists, it will be added to the specified list immediately.
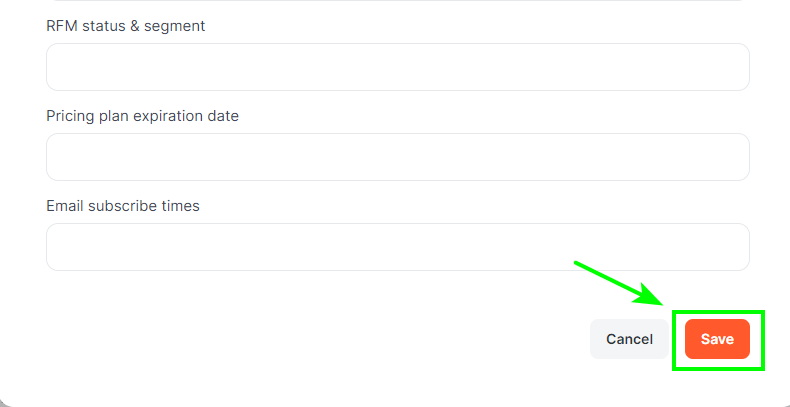
- Save the settings by clicking Save.
- Click Start to start the integration:

The integration between Webflow and Selzy is ready: now when a subscriber fills in a form on the website, their data will be automatically transferred to the list in Selzy.
Updating the data
If you have made changes to Selzy or Webflow (e.g. created a list or a field) and do not see them in the integration setup, try updating your Selzy or Webflow connection. When the connection needs to be updated:
- If you have created a new list or field in Selzy and want it to appear in the add contact setting.
- If you do not see the Webflow fields when setting up the fields for transfer
To update your connection, go to My integrations, then to Apps, and select Webflow connection. Click Update.

By going to the Selzy connection, you can also update it.

Now the changes you have made to Webflow or Selzy will be shown in the connection.


