Connect Selzy and HubSpot so that when you change the contact’s fields in HubSpot, these fields will automatically change in Selzy as well.
Following a separate instruction, you can also set up a Selzy and HubSpot integration to automatically add new contact data from HubSpot to your Selzy contacts list. These two integrations can work simultaneously.
Create a new integration
In the Integrations section, go to My integrations and create a New connection (automation):

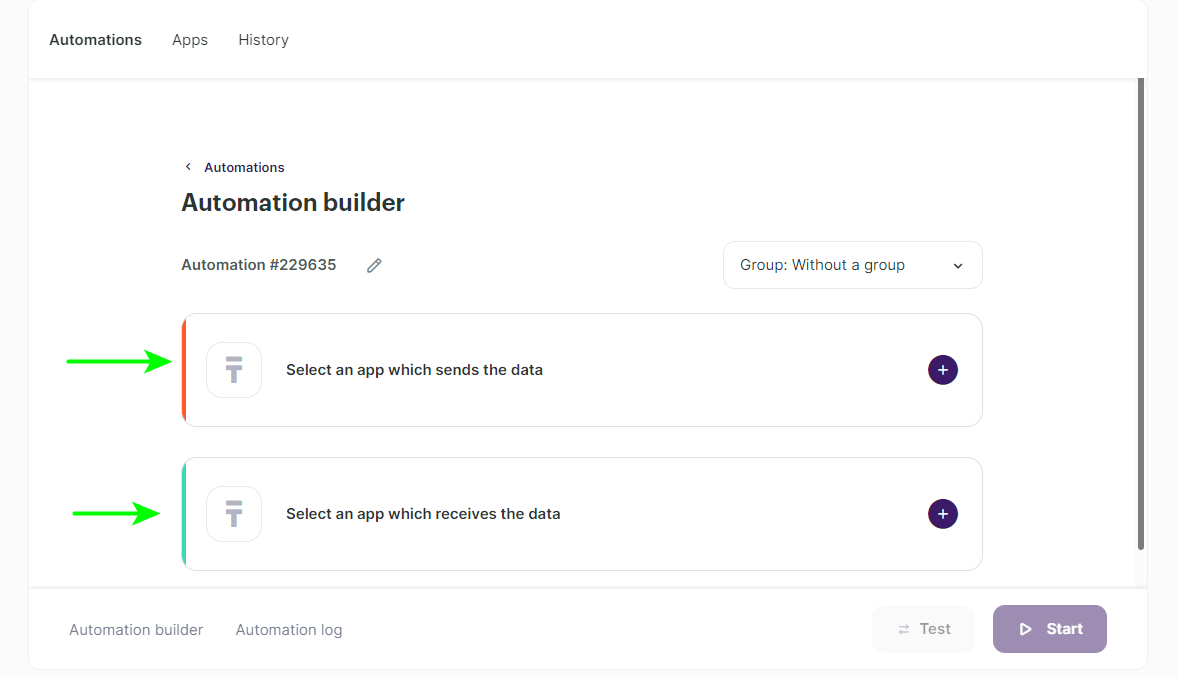
Next, you will see the automation builder. Here you choose from which app to receive data and to which one to send it.
In the Select an app which sends the data section, you choose an app that sends the data and set up the trigger for starting the automation.
In the Select an app which receives the data section, you choose an app that receives the data and specify the automatic action.
Select a trigger for the data transfer
- Click on Select an app which sends the data:
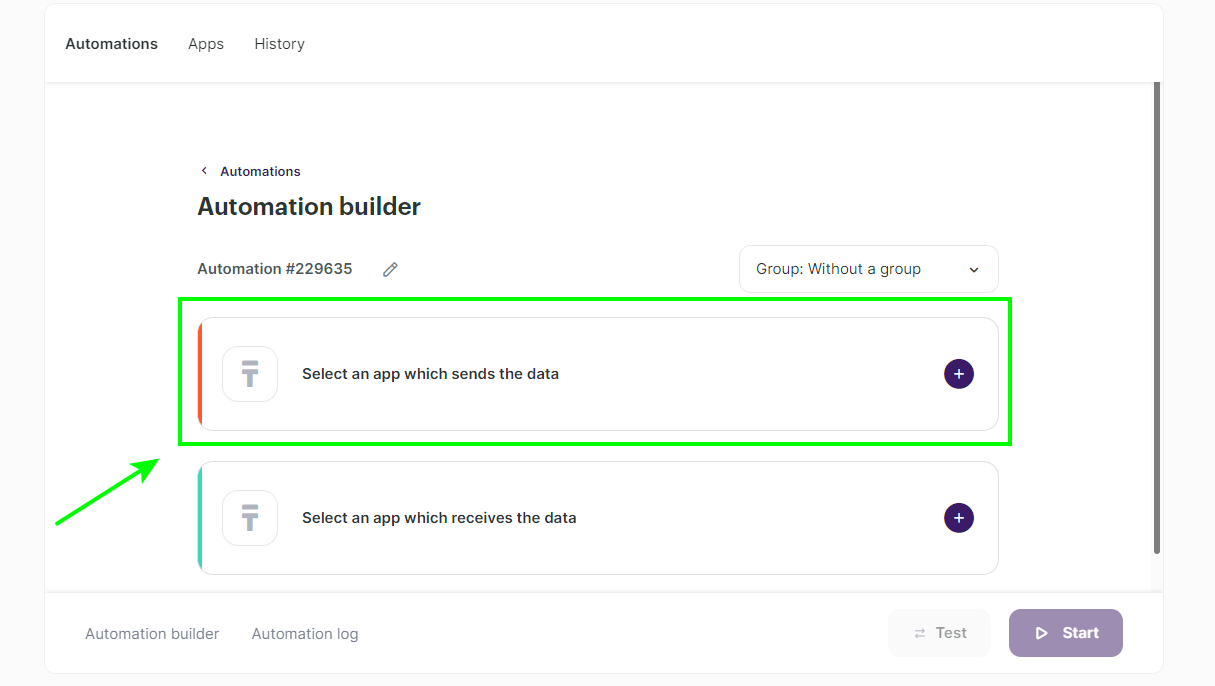
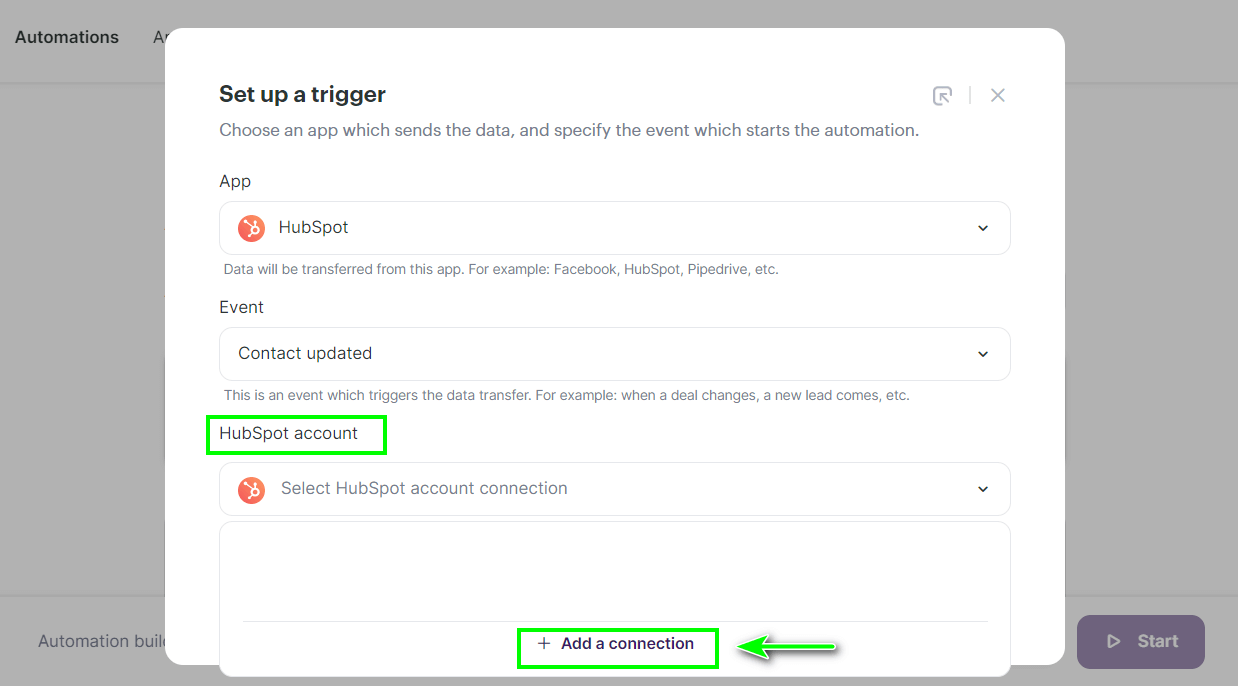
- In the App (service) field, select HubSpot. And in the Event field, select Contact updated. In this case, when a contact in HubSpot is updated, this contact will be automatically updated in a contacts list in Selzy.

Set up a connection to HubSpot
To finish setting up the trigger, we need to create a connection to HubSpot.
- Click Add a connection to connect your HubSpot account:
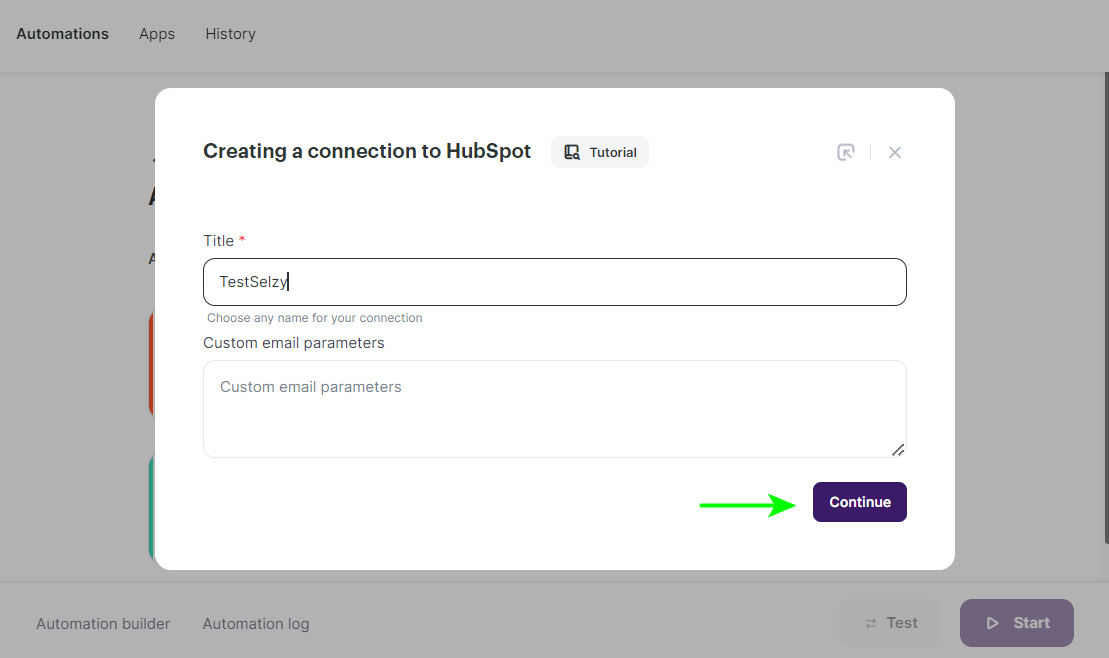
- Enter a Title for the connection and click Continue. You can leave the Custom email parameters field empty:
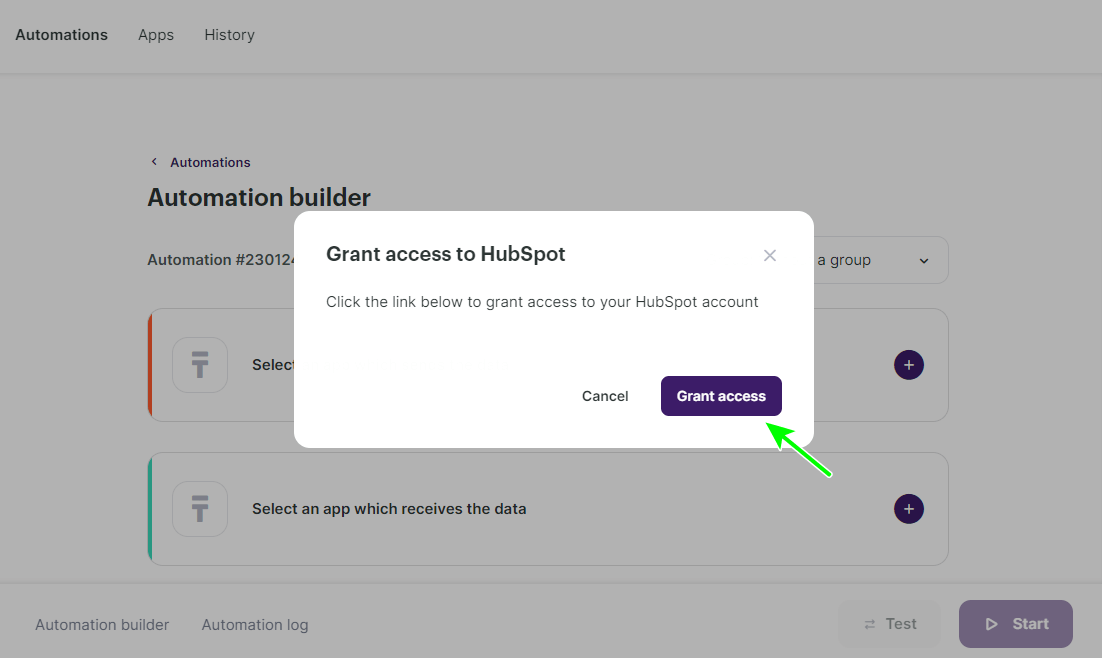
- Grant Selzy access to your HubSpot account by clicking Grant access:
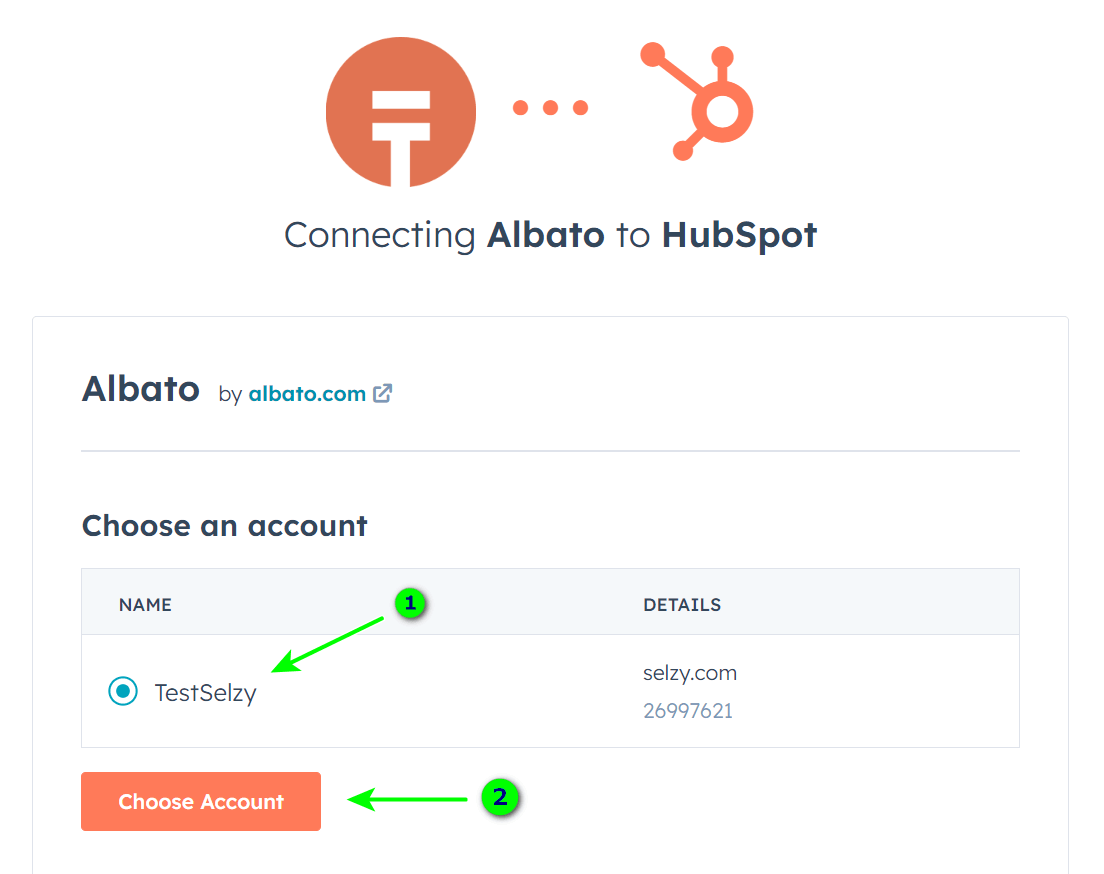
- In the popped-up window, choose the HubSpot account you want to connect and click Choose Account:
- Next, click Connect App:
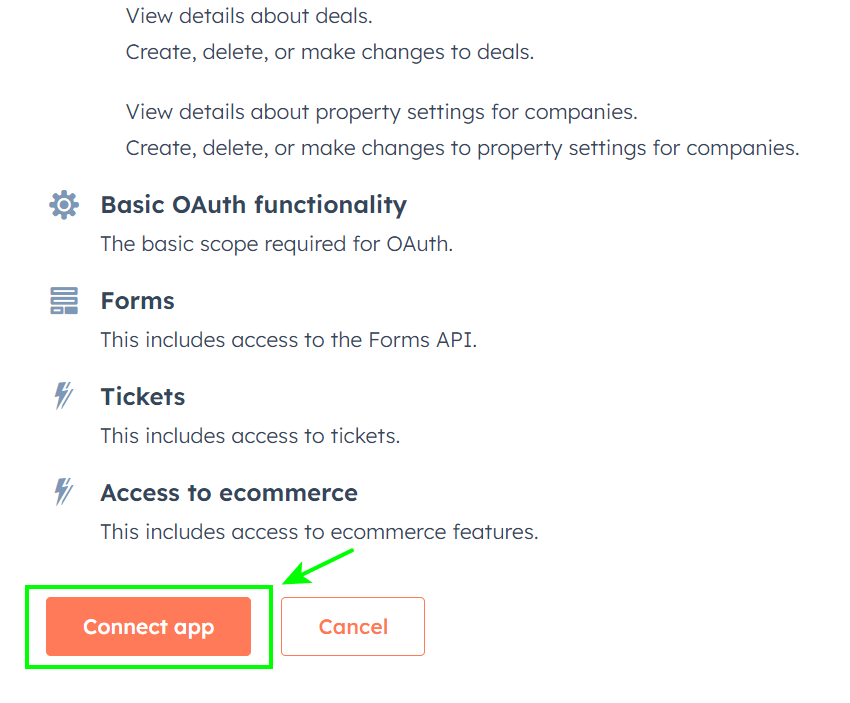
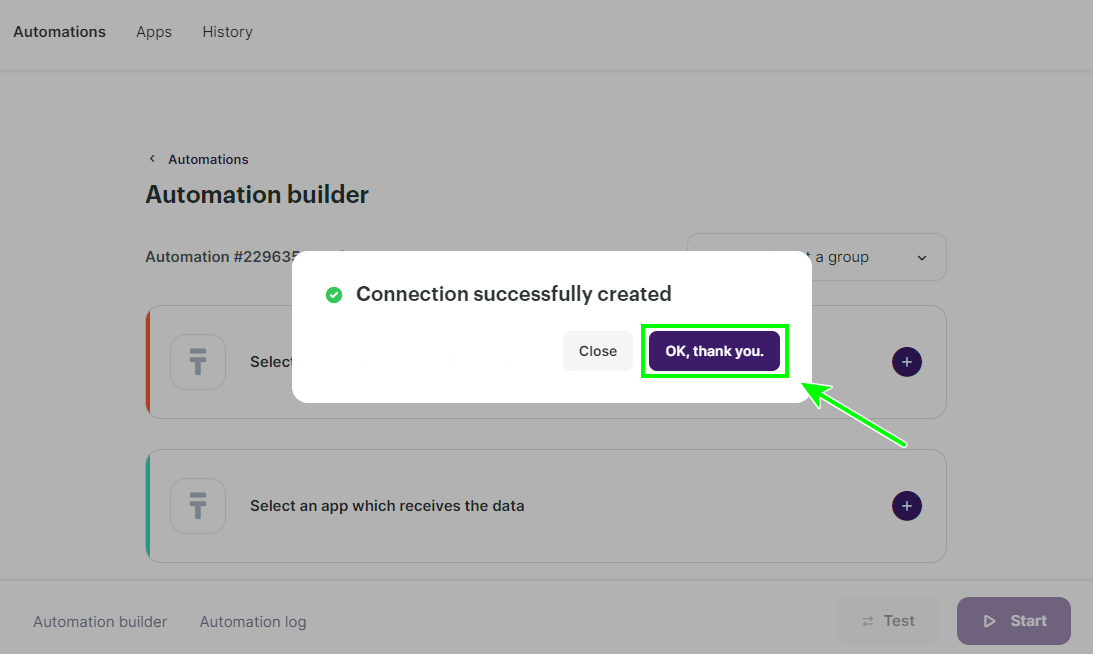
- You will see a notification if the connection is successful. Click on any button, for example, OK:
- Next, click Add a trigger:

Set up the trigger
In the Fields Setting window, select whether the changed contact needs to be transferred once or multiple times.
If you select Yes, 1, then when you modify the contact in HubSpot the second time, its data will not be changed in Selzy. The field values will not be overwritten.
If you select No, 0, then when you modify the contact in HubSpot, its data will be changed in Selzy as well. The field values will be overwritten and new changes to the contact will be added.
We recommend you pick No, 0. In that case, each modification to a field in HubSpot will be transferred to Selzy.
Select the parameter and click Save:


Set up the action
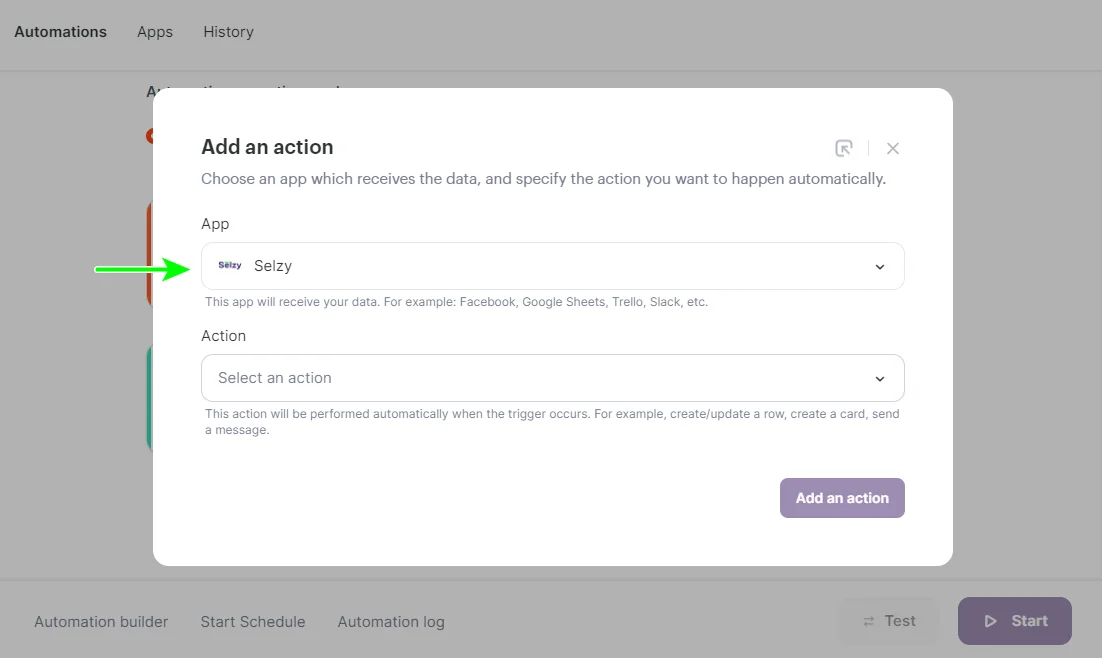
- Click the Select an app which receives the data and, in the App field, select Selzy:

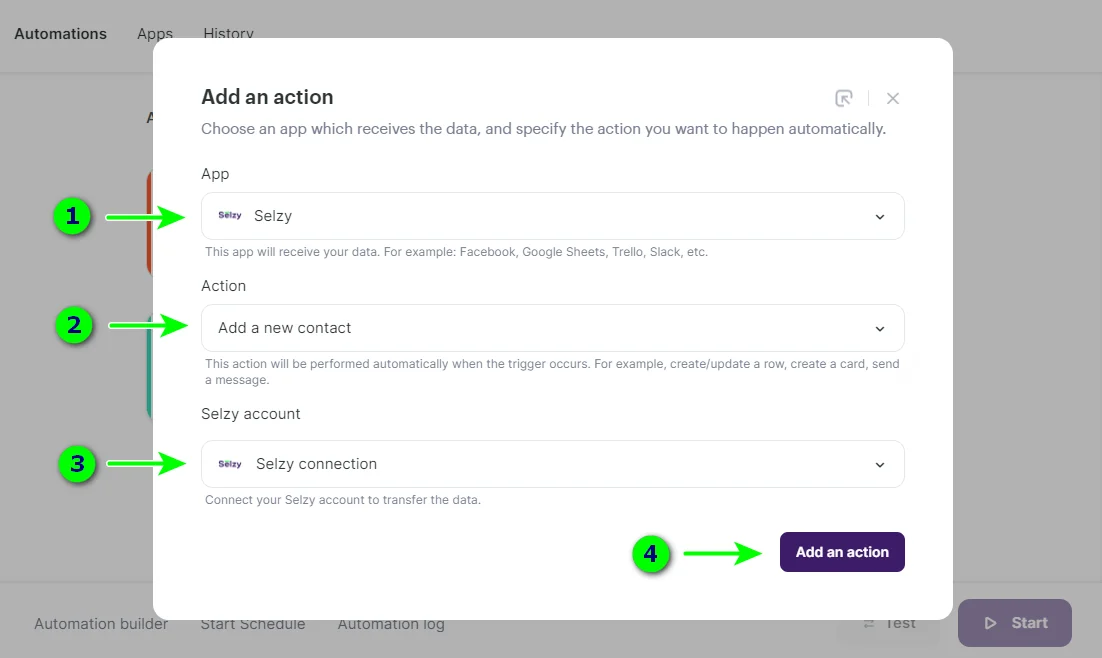
- In the Action field, select Add a new contact and in the Selzy Account field, select your Selzy connection. Next, click Add an action:
Customize the fields for data transfer
In the popped-up window, you need to set up the overwrite rules, the fields for data transfer, and the contacts list where the contacts will be added. You will also need to set up the double opt-in parameters.
- Select the mode for overwriting the fields in the Overwrite rules. For example, you can select All fields will be overwritten. The rule will affect the contacts that already are in Selzy’s contacts list.
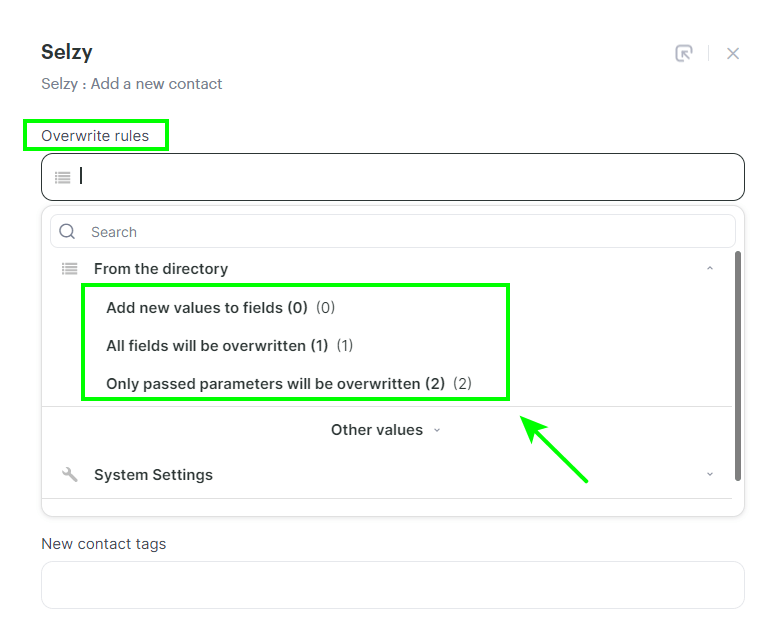
Select the Add new values to fields (0) if you need to transfer only empty or new contact fields and not change the existing ones. If the contact was in other lists, it will be added to the new list and will remain in the old lists.
Select the All fields will be overwritten (1) if you need to replace all field values with new ones. The old field values will be deleted and overwritten with new ones. If the contact was in other lists, it will be deleted from them and will be added only to the one list specified in the Contact List field.
Select the Only passed parameters will be overwritten (2) if you need to replace only the values of fields that are transferred from HubSpot. If the contact has other fields in Selzy, they will not be overwritten.
Here is an example of how the overwriting looks in practice:
| Name | Lists | Tag | Product | Order | ||
| Selzy | 1@ex.uk | Ann | 1 | a | - | 444 |
| HubSpot | 1@ex.uk | Maria | 2 | b | 🍋 | - |
| Result (0) | 1@ex.uk | Ann | 1, 2 | a, b | 🍋 | 444 |
| Result (1) | 1@ex.uk | Maria | 2 | b | 🍋 | - |
| Result (2) | 1@ex.uk | Maria | 1, 2 | b | 🍋 | 444 |
The Selzy row shows the contact’s fields before the transfer of the contact from HubSpot.
The HubSpot row shows the contact’s fields as they are filled in HubSpot.
And in the rest of the rows, you can see the result after each overwriting rule is applied:
Result (0) — Add new values to fields (0)
Result (1) — All fields will be overwritten (1)
Result (2) — Only passed parameters will be overwritten (2)
Lists and Tag fields you set up on the second step of the integration setup (Add a new contact). Email, Name, Product, and Order are fields that are transferred from HubSpot.
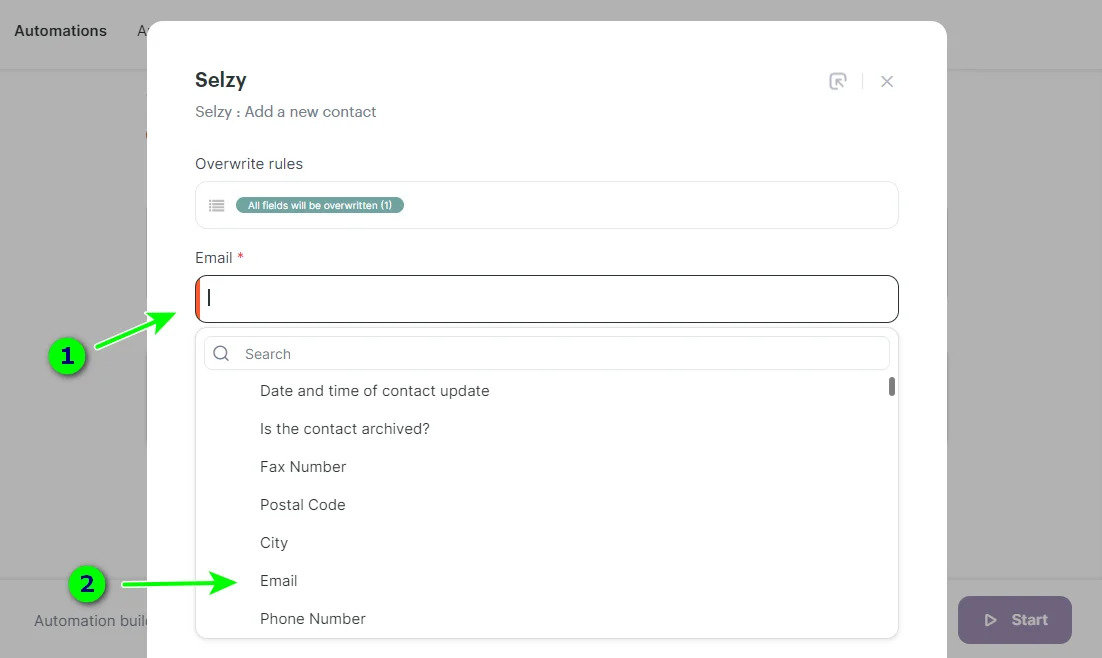
- In the Email field, select the name of the field in HubSpot from where the contact's email address will be transferred:
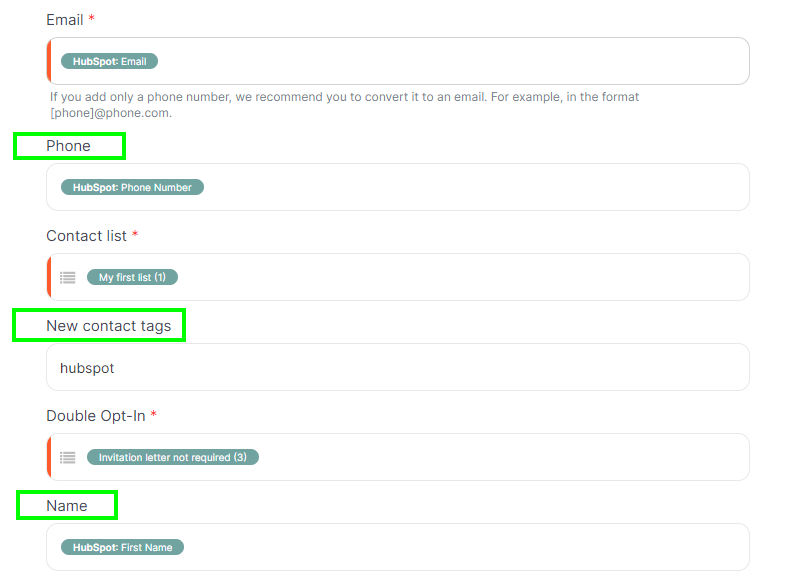
Next, you can add new contacts tags and select the fields from where the contact's phone and name will be transferred:
If you need other contact’s fields apart from the standard Email, Name, and Phone, you can create them in Selzy’s Contacts → Tools → Custom Fields subsection.
Follow the instruction on creating a custom field in Selzy for more details.

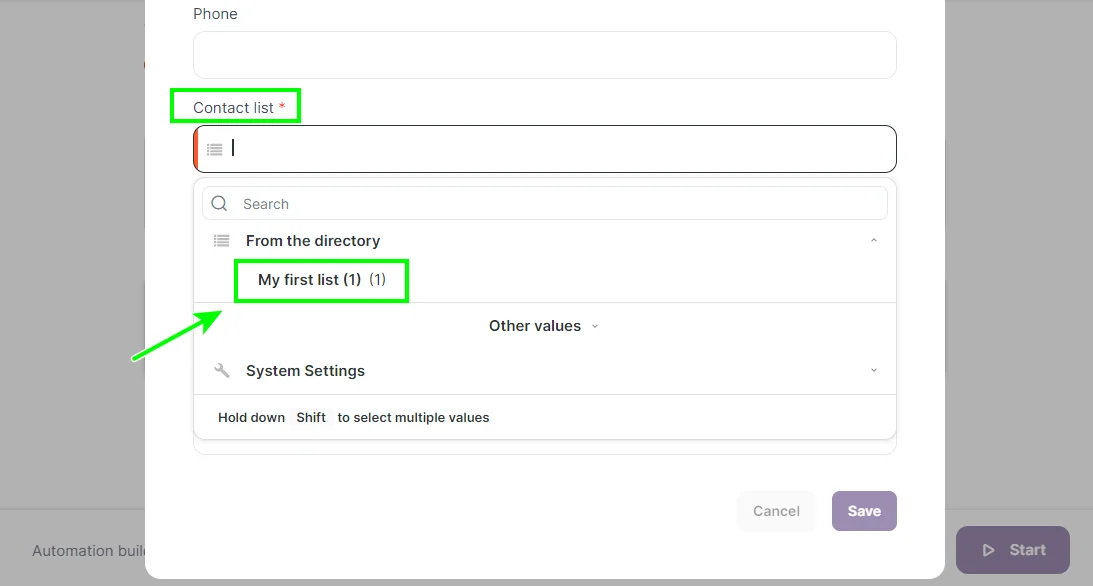
- In the Contact List field, select the contact list in Selzy where the transferred contacts will be added:
- In the Double Opt-In field, select whether you need an invitation letter to confirm the subscription to the contact list. If you do not need an invitation letter, select 3:
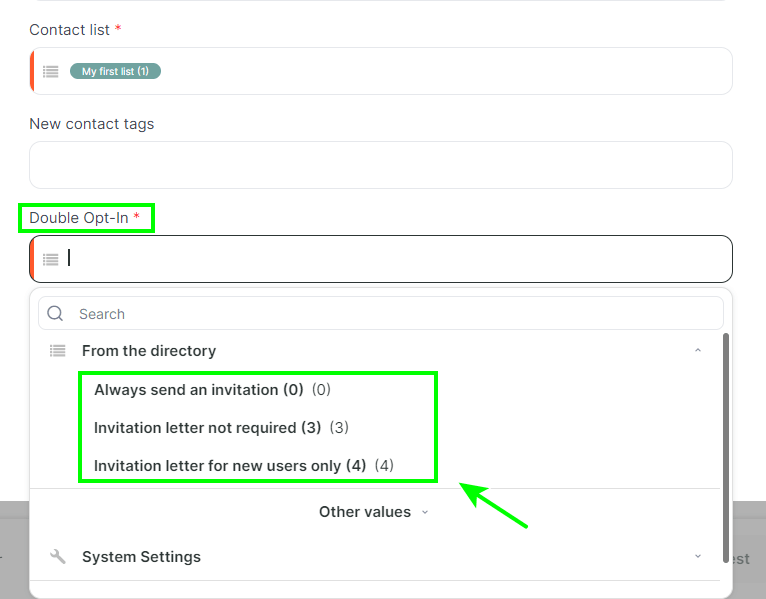
Always send an invitation (0) means that sending an invitation letter is required for the subscription to the contacts list.
Invitation letter not required (3) means that sending an invitation letter is not needed. The contact will be added to the contacts list right away with the status “new”.
Invitation letter for new users only (4) means that the system will check whether the contact already was in your lists. If the contact was not in any of your contacts lists, it will receive an invitation letter. And if it already is in the contacts lists, it will be added to the dedicated list right away, without an invitation letter.
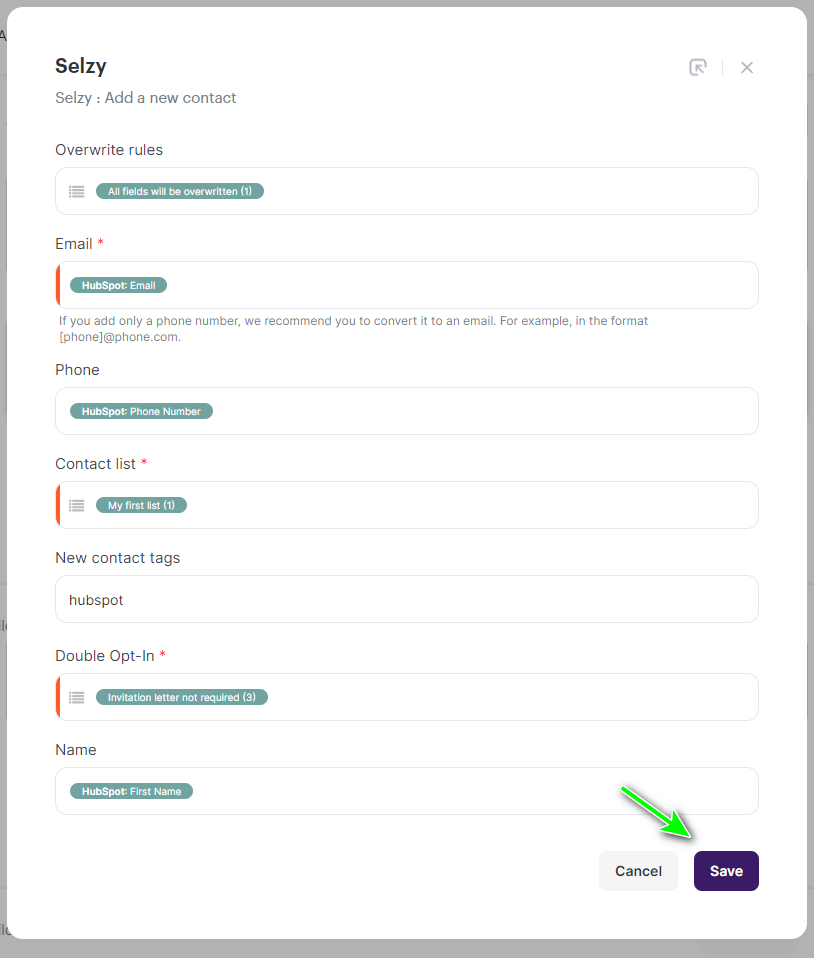
- Save the settings by clicking Save.
You can also see an example of the filled-out fields below:
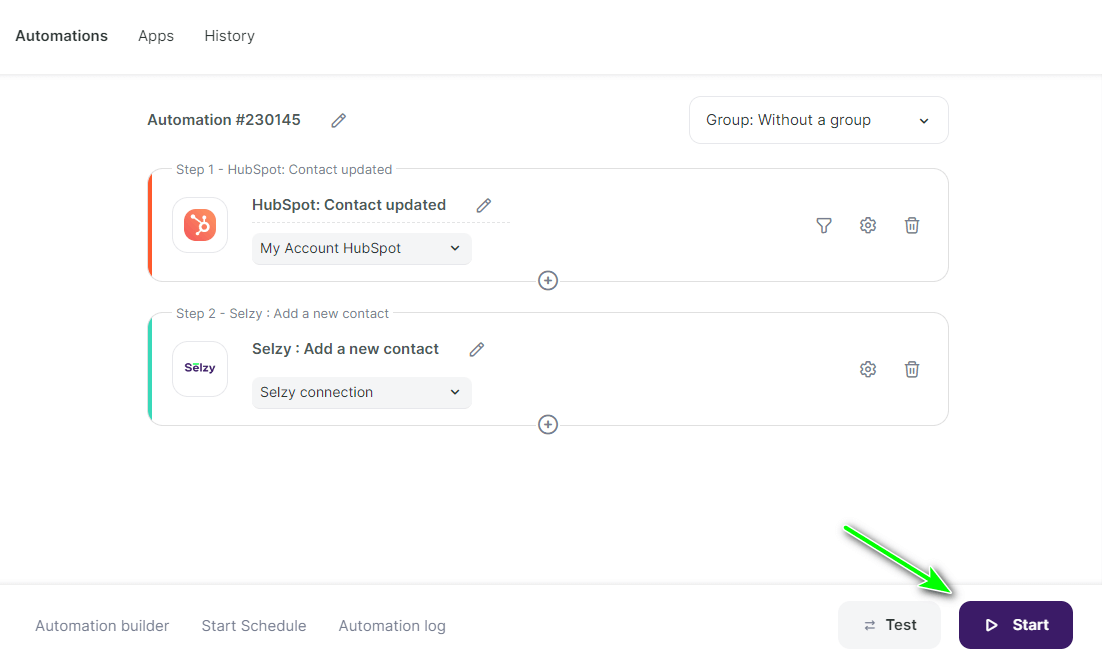
- To launch the integration, click Start:
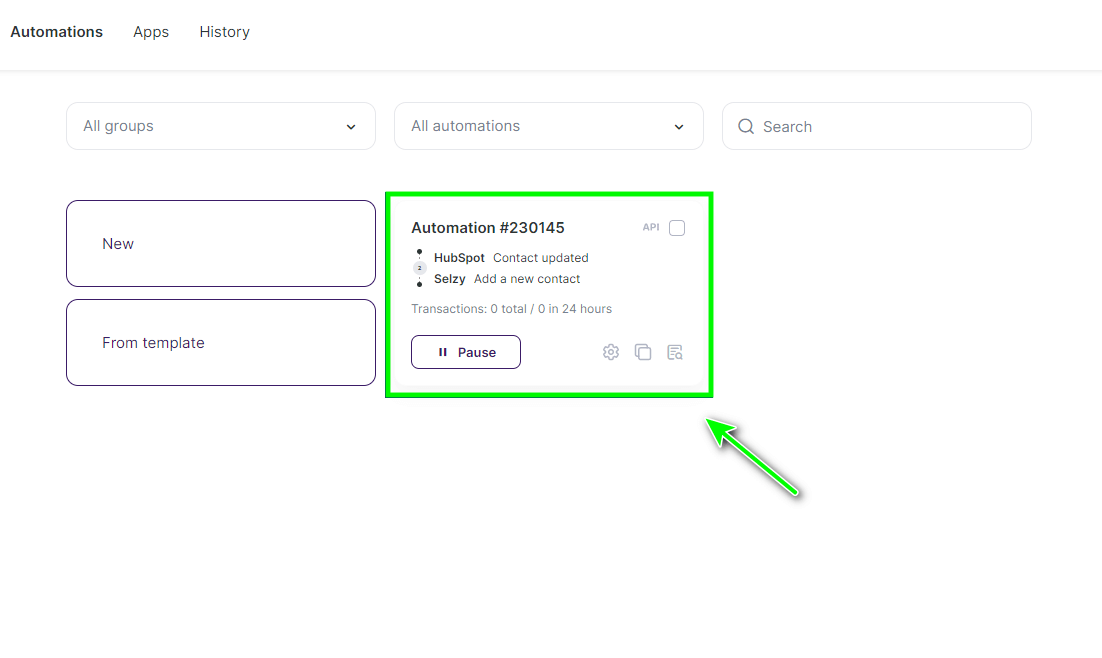
The HubSpot and Selzy integration is ready. Now whenever the contact’s data in the HubSpot CRM system will be updated (Email, Name, Phone, and other fields), the contact’s field values in Selzy will be updated as well.
Following a separate instruction, you can also set up a Selzy and HubSpot integration to automatically add new contact data from HubSpot to your Selzy contacts list. These two integrations work independently and can be launched simultaneously.
Update the connection
If you made changes to Selzy or HubSpot (for example, created a new list or field), and you don’t see them in the integration settings, try updating the connection with Selzy or HubSpot.
When you need to update the connection:
- You created a new list or field in Selzy, and you want it to appear in the settings regulating the addition of contacts.
- You don’t see the HubSpot fields when customizing the fields for data transfer.
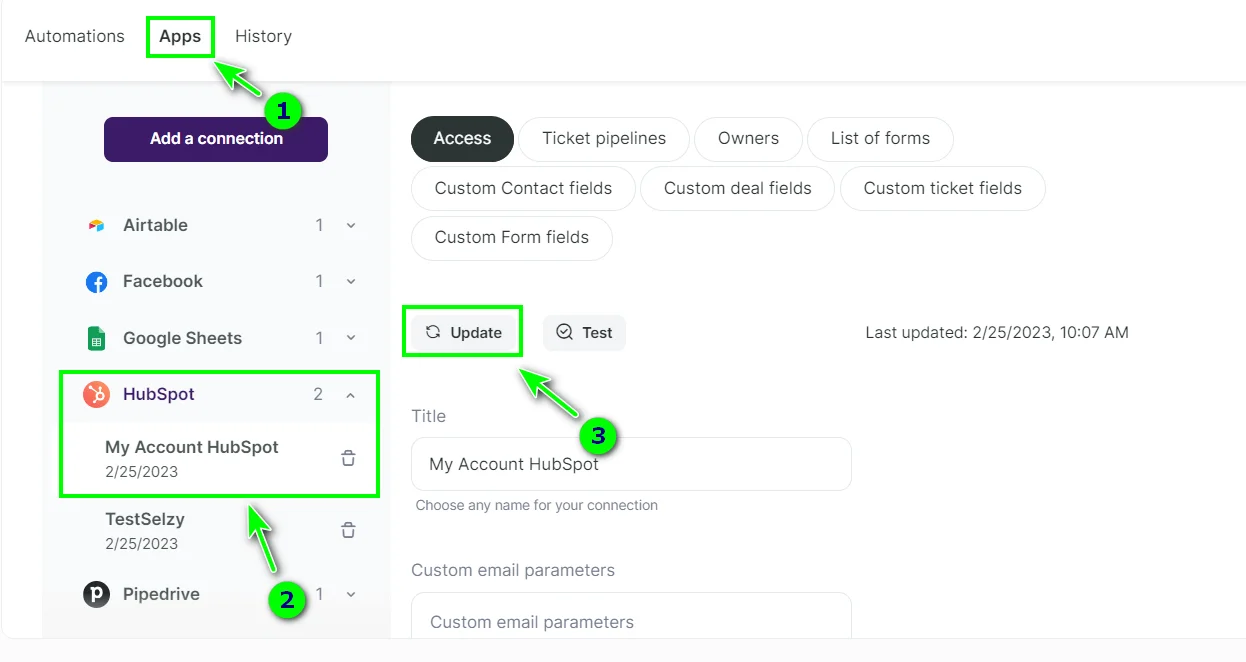
To update the connection, go to My integrations, then go to Apps and select HubSpot connection. Click Update:
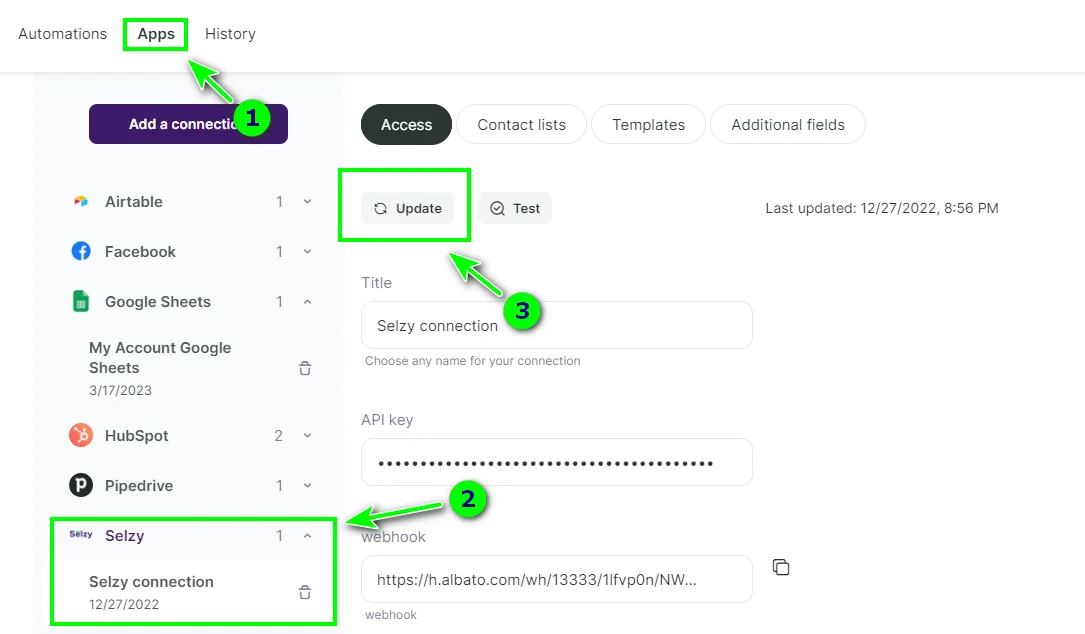
You can update the connection with Selzy the same way. Select Selzy connection and click Update:
Now the changes you made to HubSpot or Selzy will be reflected in the integration.