Google Analytics are important tool to analyze user behavior. After integrating these instruments with your campaign, you’ll be able to better assess the efficiency of your marketing campaigns and improve your results.
Google Analytics allow you to track the number of contacts collected from a particular campaign, how many of them continued surfing the website and proceeded to the cart, what the average purchase size is etc.
To integrate an analytics tracker system with your campaign, add UTM parameters to the links from your email. You can create a UTM tag yourself or configure it using Selzy tools applying the following parameters:
- Campaign Medium (a traffic type, use utm_medium) identifies the channel that brought the user in. For campaigns, it is an email (default value).
- Campaign Source (the source for your campaign, use utm_source) — it can be an email, either a triggered or a transactional one. The default value is Selzy.
- Campaign Name (the name of your campaign, use utm_campaign) — for example, the name of your promotional or strategic campaign in Latin letters without spaces and special symbols. The default value is the ID of your campaign.
- Campaign Content (additional information, use utm_content) — for example, if there are several blocks in your automated email series, you can tag each of them with a different UTM to compare their efficiency.
- Campaign Term (use utm_term) is used by marketing specialists for paid AdWords campaigns to note the keywords attracting traffic. In email campaigns, it can be used to give some additional info.
Here you can learn the main ways to add UTM parameters to your Selzy account.
Configuring the tracker from the Campaign Section
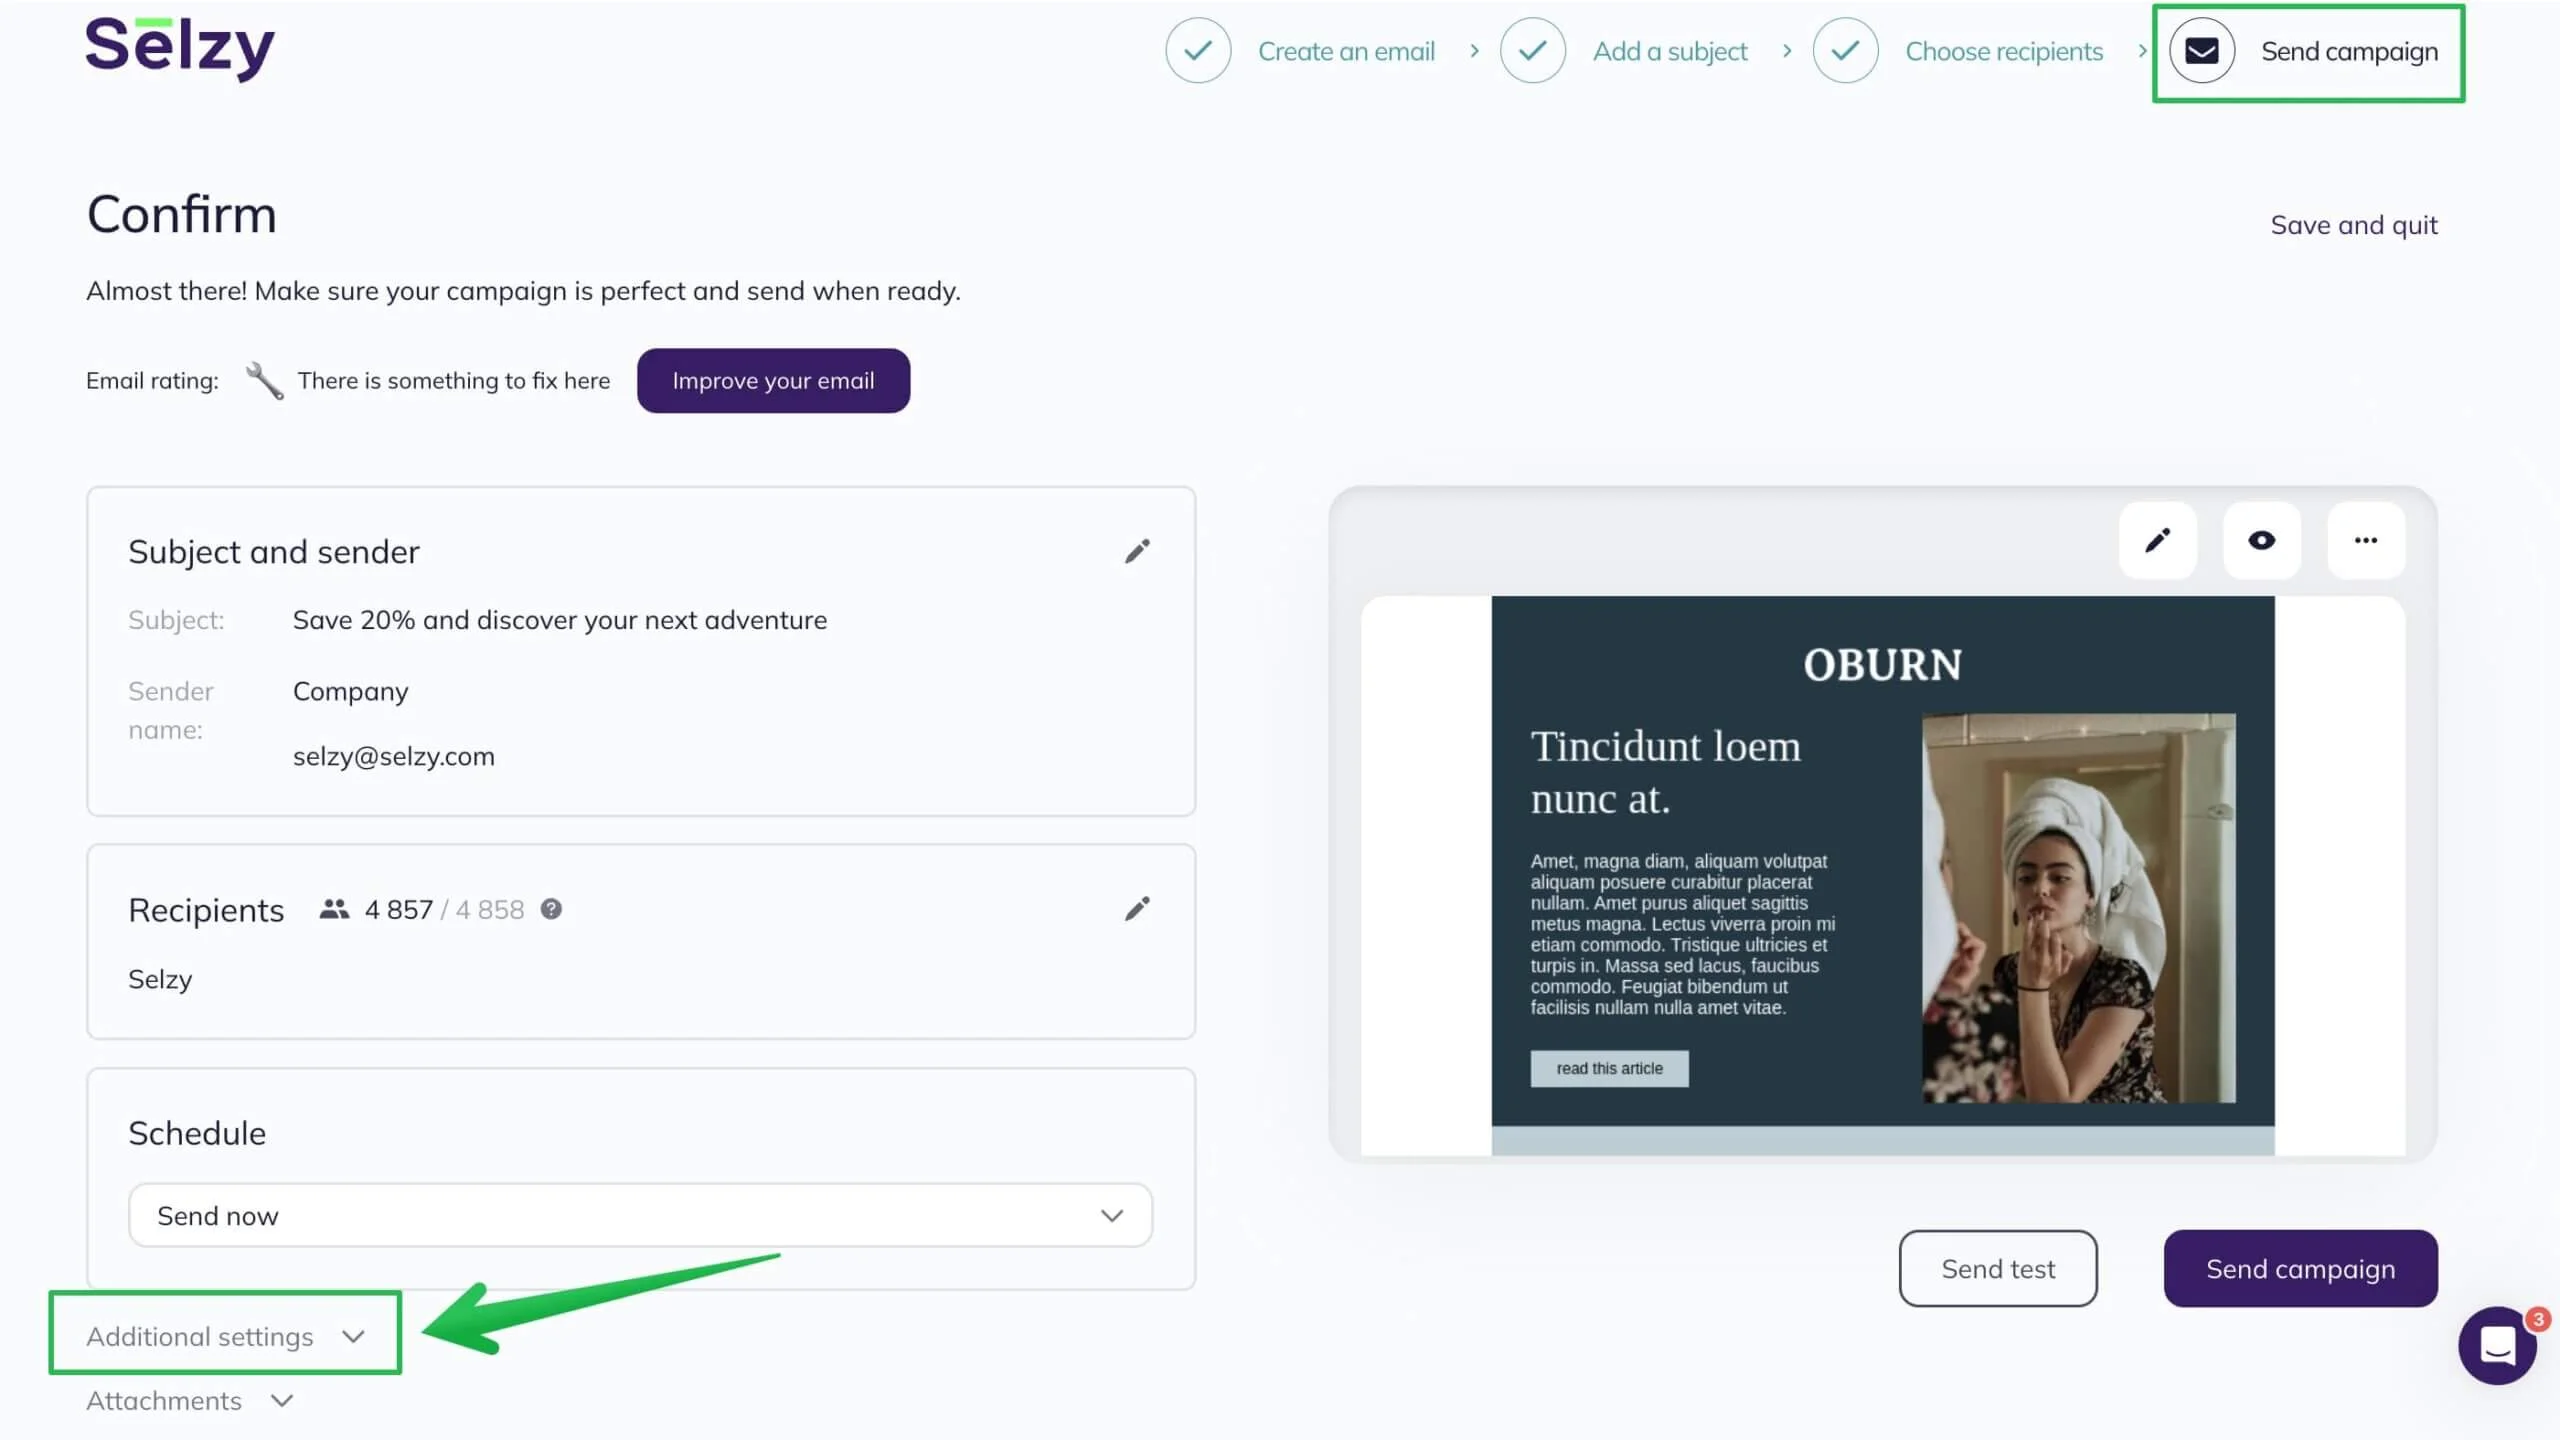
You can configure the tracker at the last step of your campaign creation while setting up its parameters for email delivery.
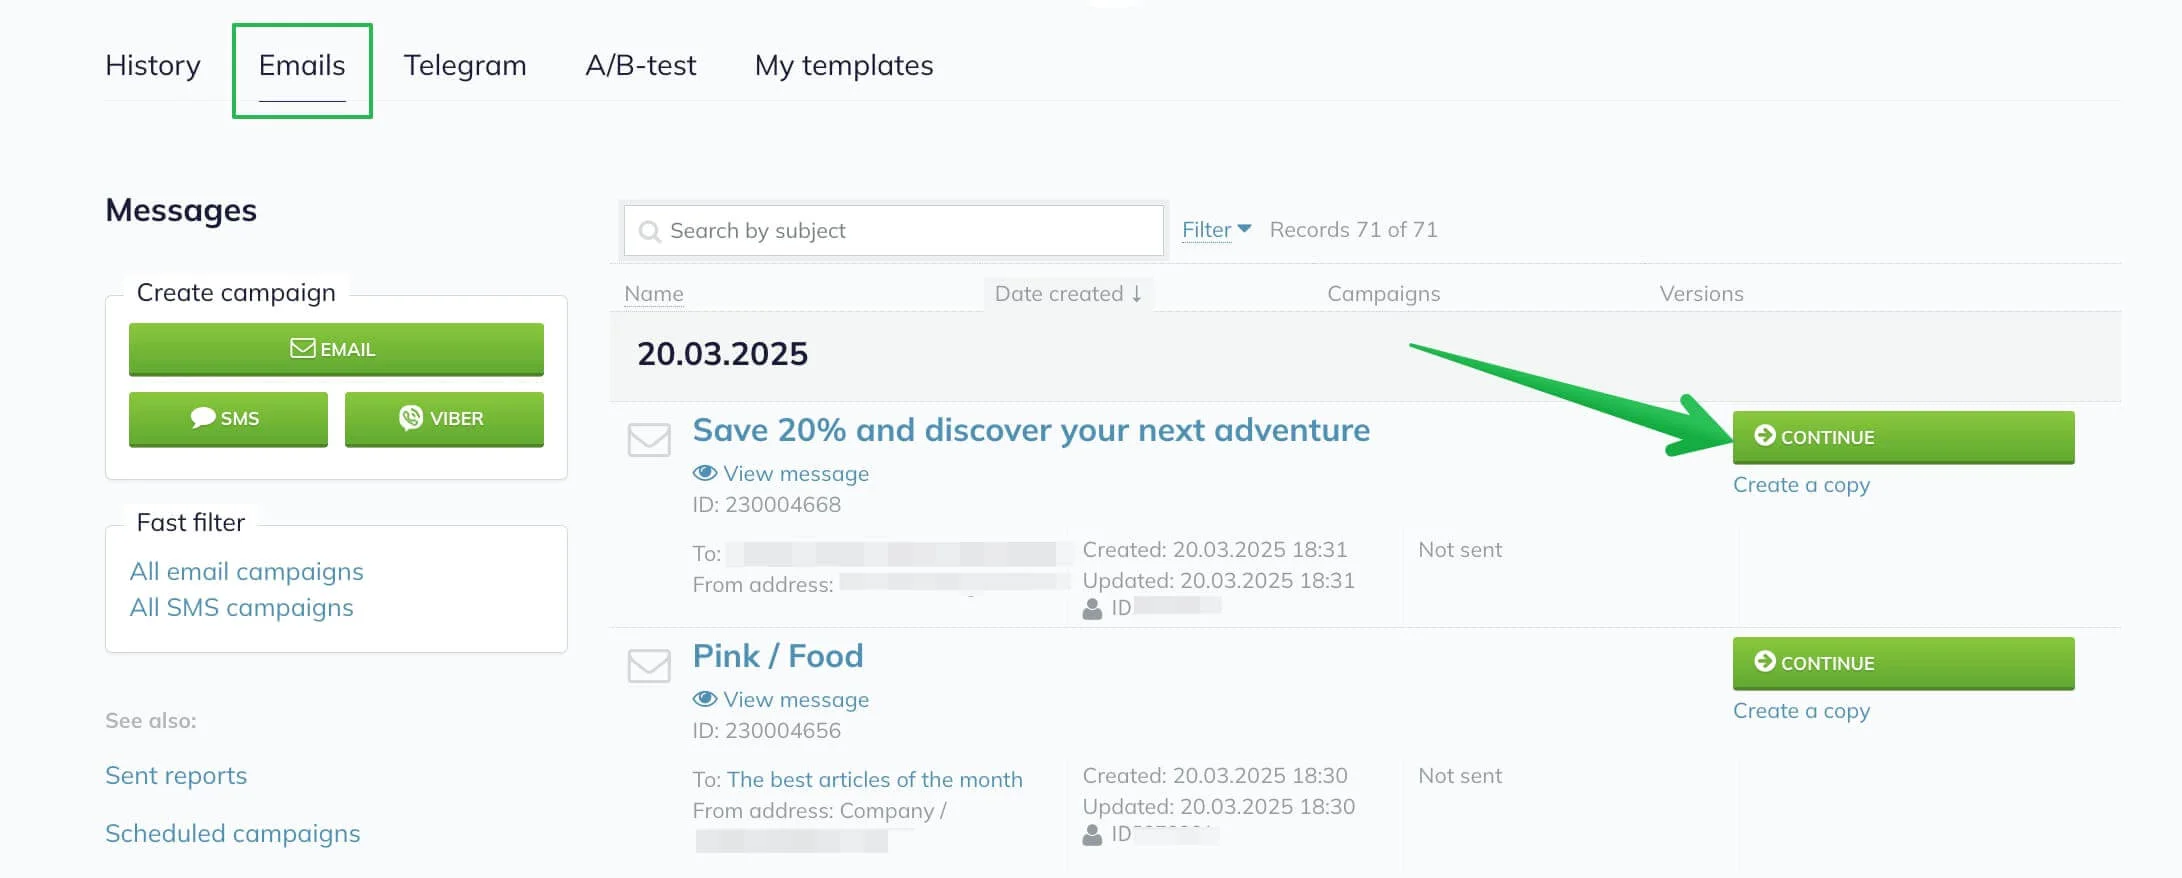
To proceed to the delivery step, create an email in the Campaigns-Emails Section.
If the campaign has already been created, click on the name of the campaign needed or the Continue button next to it in the Campaigns-Emails Section.
At this step, click on the Additional Settings option.
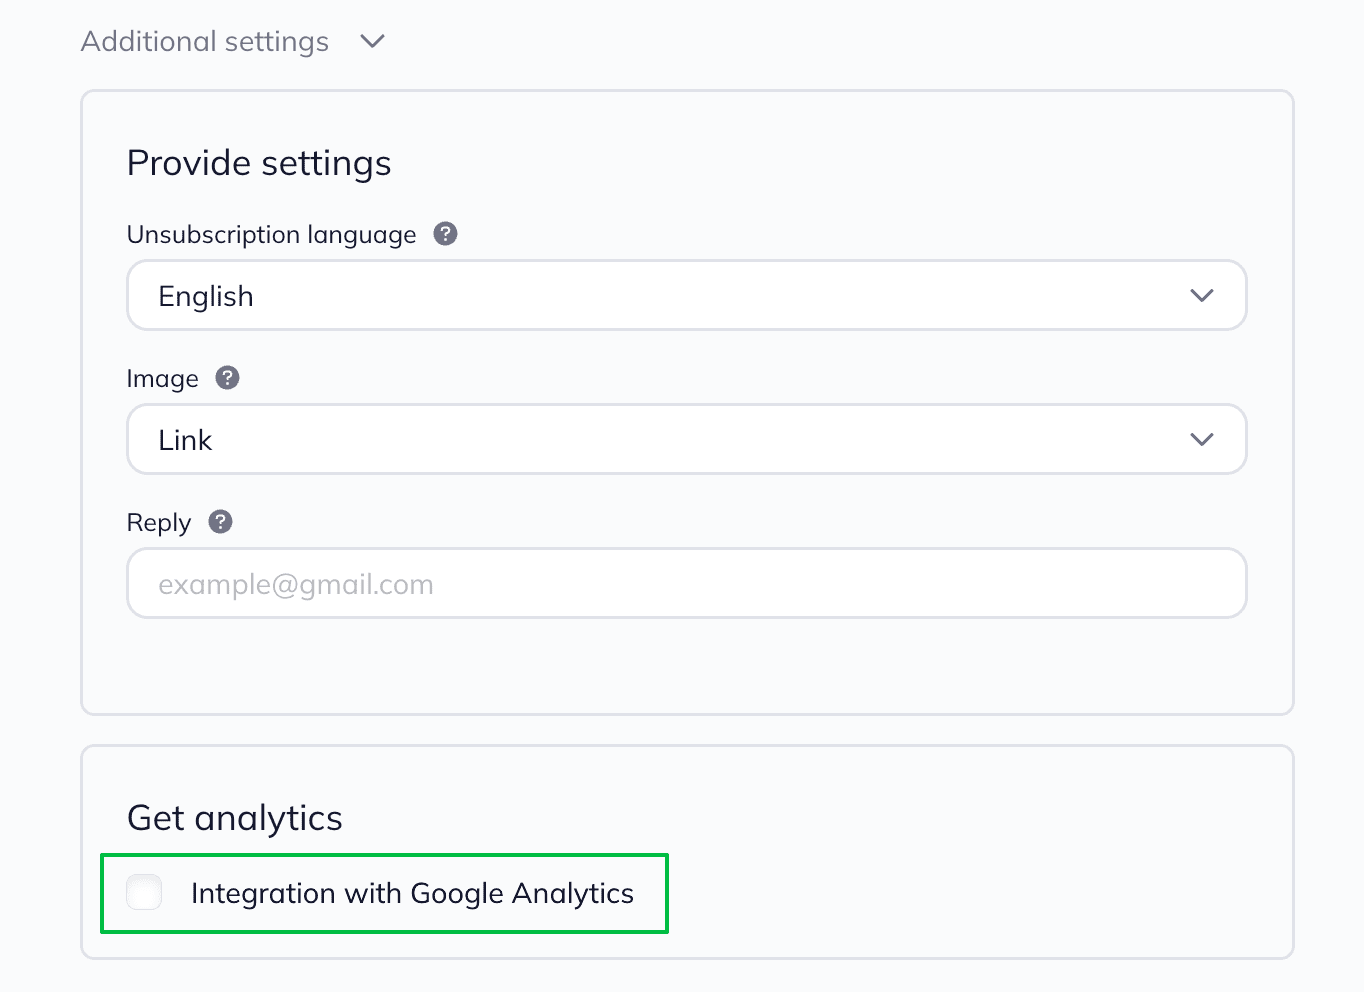
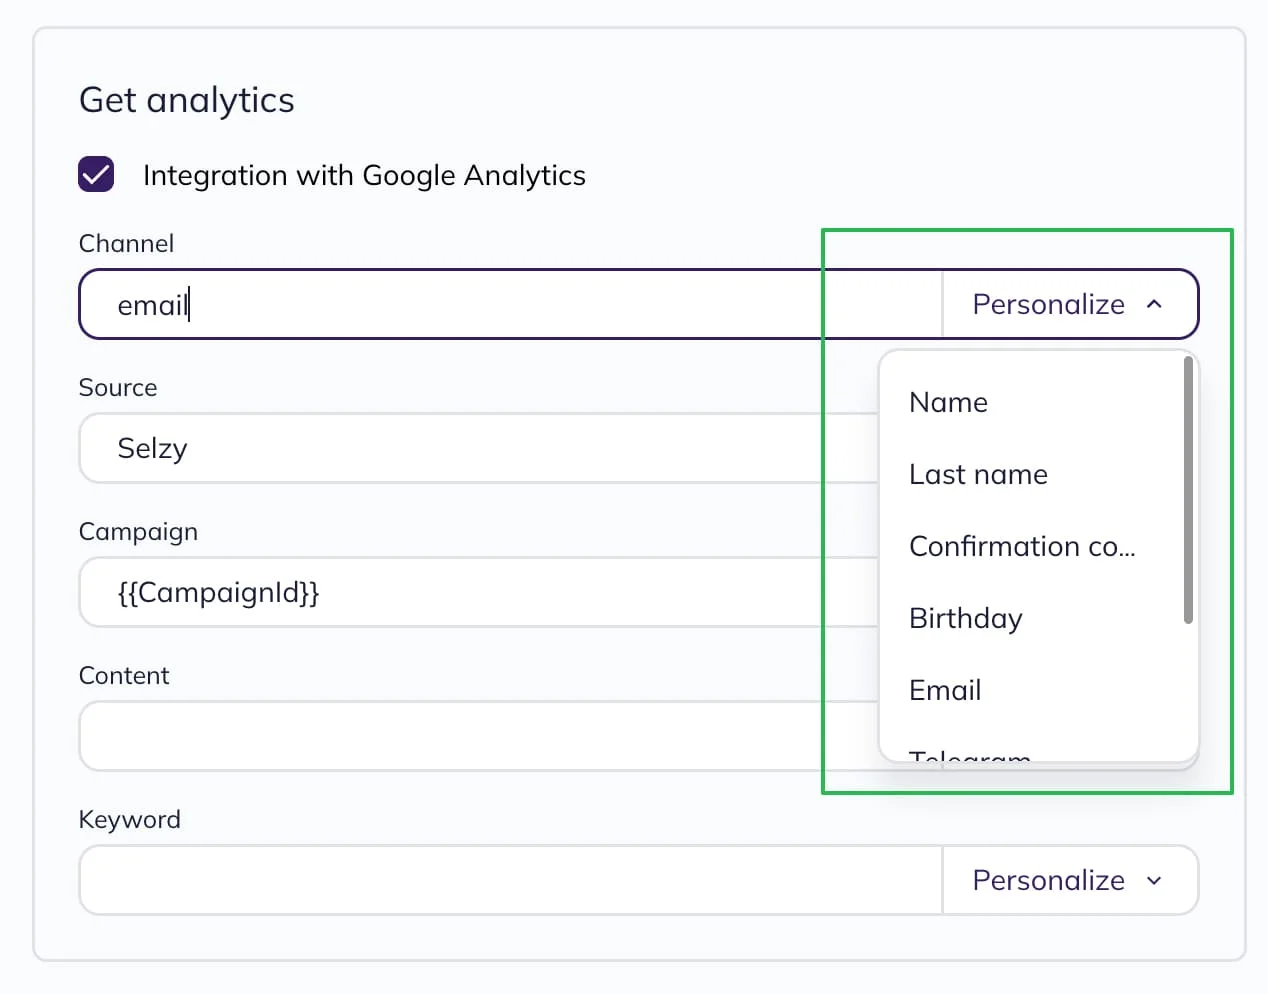
When in the Additional Settings Section, tick [v] Integration with Google Analytics.
Then you will see a block with fields for your UTM parameters. Please, add your tags there.
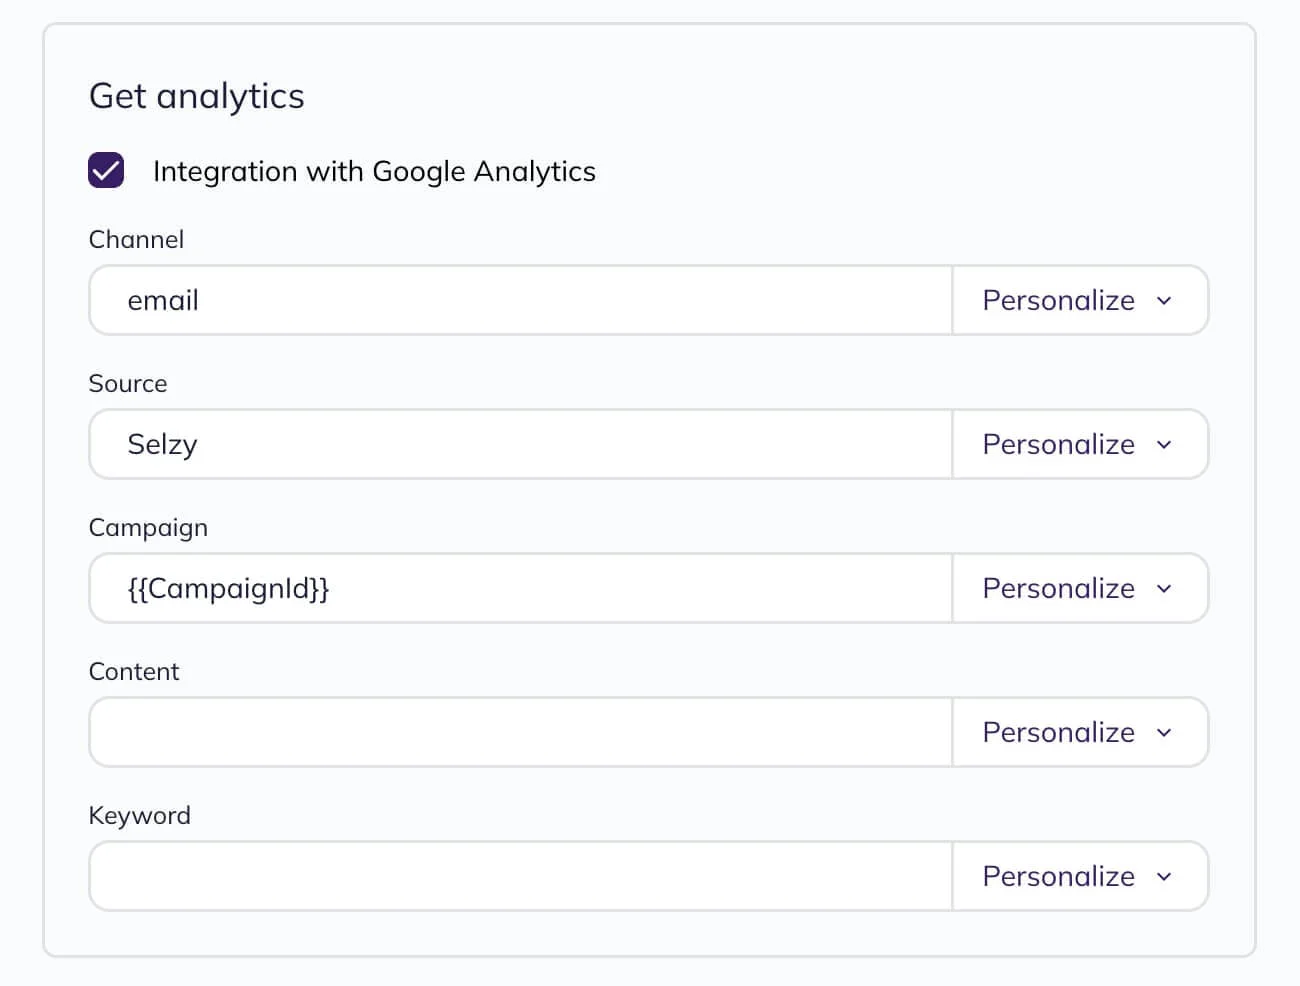
Your parameters can be personalized, for example, by giving a short and clear name to the campaign in the Campaign field rather than a digital ID, such as Promo_black-friday, as well as by giving a short description of the campaign or the name of the list in the Content field when you send several similar campaigns at once.
To see default personalized tags, click on the Personalize button next to a parameter field you need.
To finish configuring the parameters, click on the Save and Quit button or the Send Campaign button.
After doing this, you have the same UTM tags added to all the links in your email.
If you want to use your own UTM tags, create your tagged links in a URL Builder and add them to your campaign’s template. In this case, we recommend deactivating the default Selzy tool for adding UTM parameters, otherwise the system might override your parameters.
Configuring the tracker from the Automation Section
You can add links tagged with UTM parameters in automated series as well.
This is how to add UTM tags for the whole series, and for separate nods.
Configuring UTM parameters for an email series
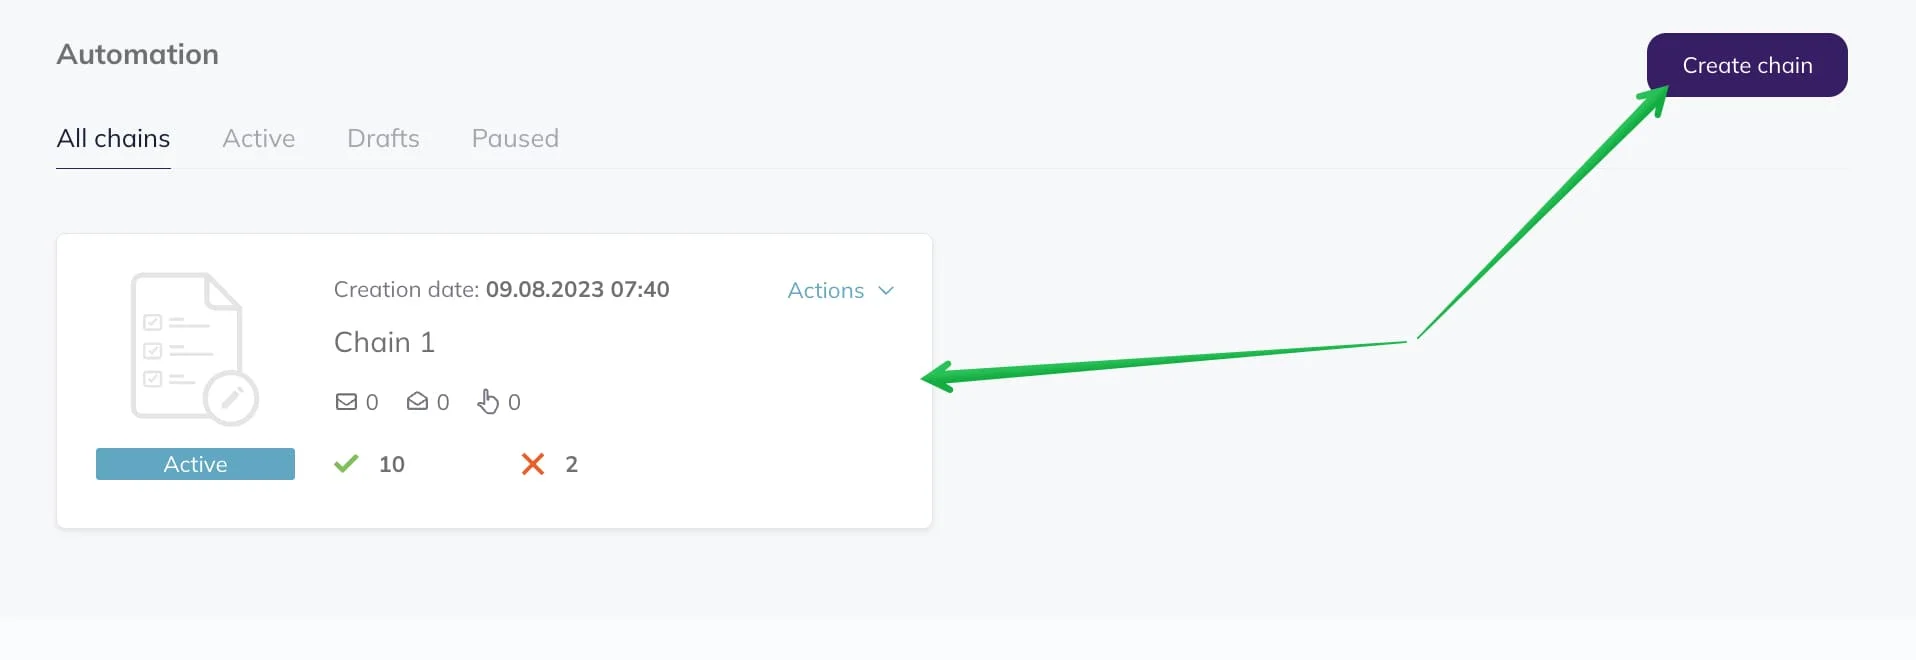
Go to the Automation Section and create a new email series by clicking on the Create Chain button, or by clicking on the name of the already existing email series.
How to set trigger-based email
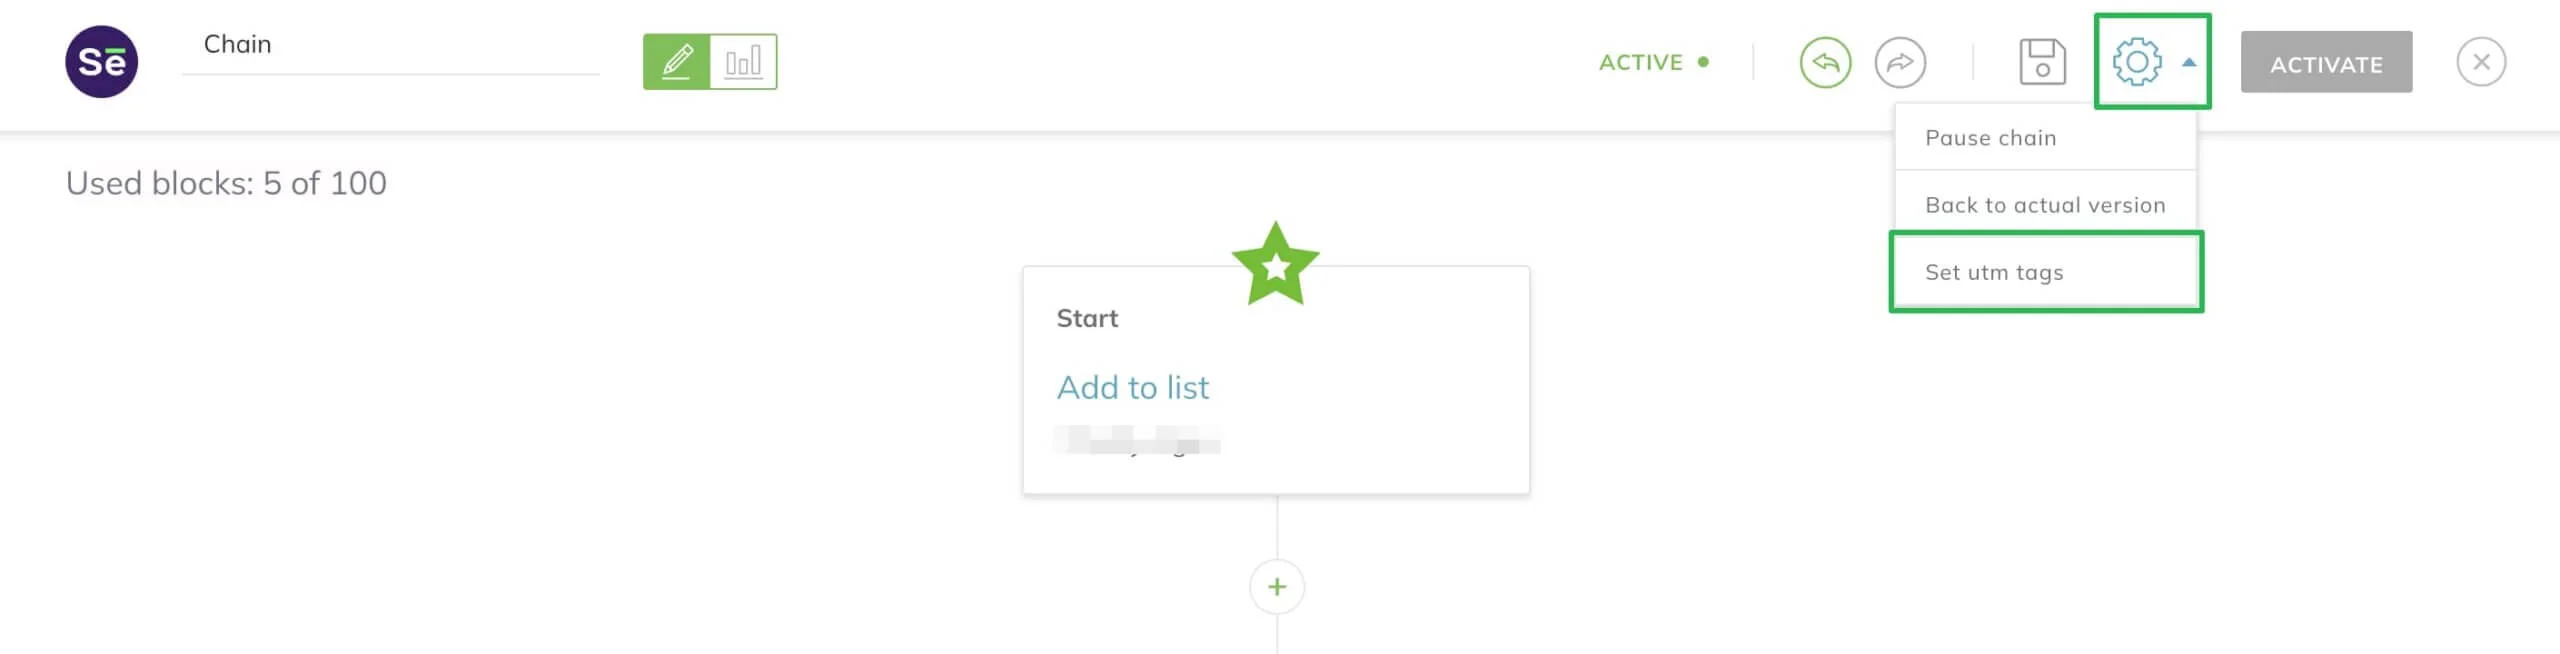
In the series, click on the gear sign on the right-hand side and choose the Set UTM Tags button.
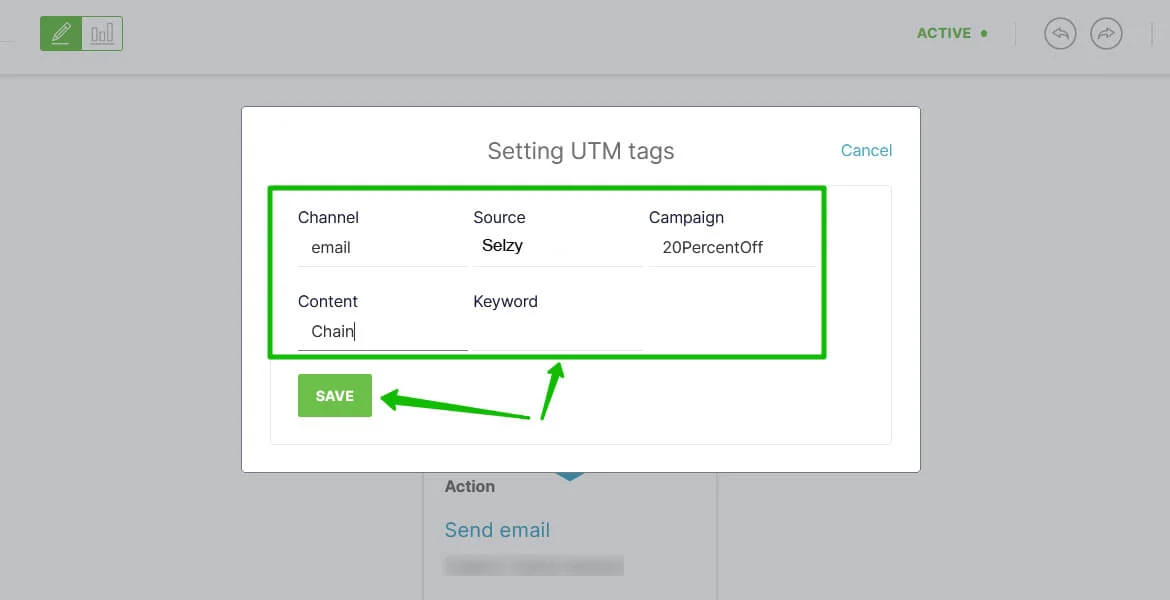
Choose the tags you need and click on the Save button.
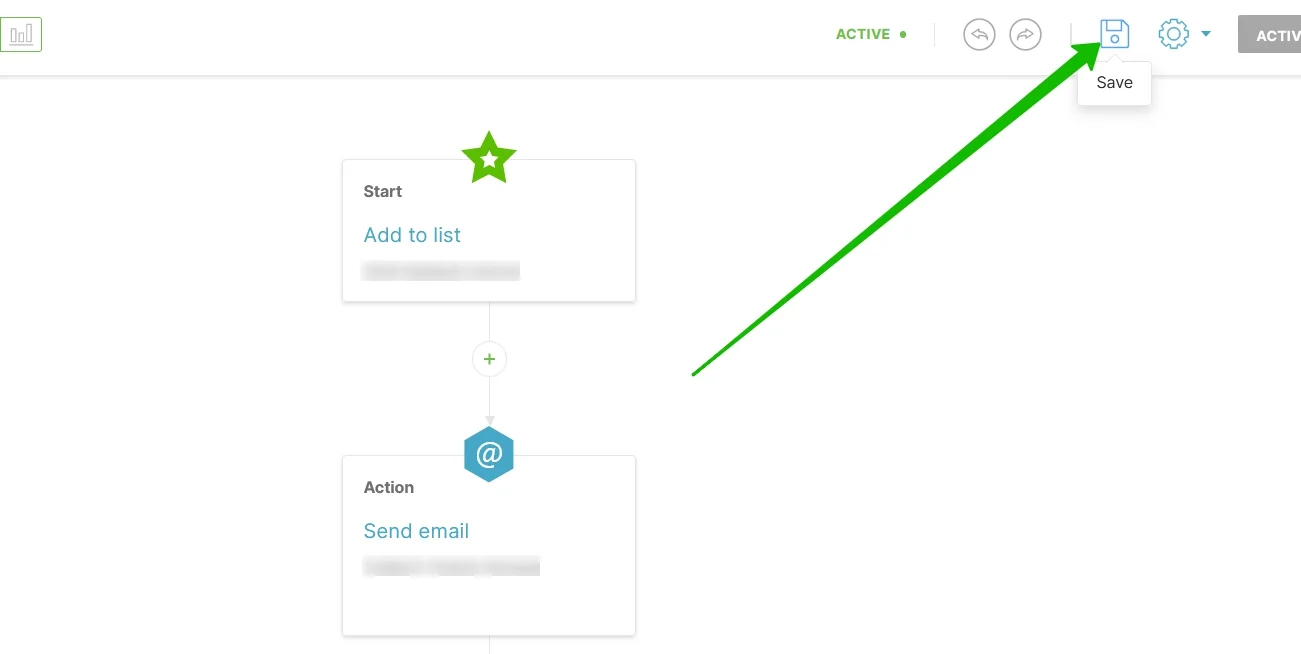
Save the series after you have made your changes by clicking on the Save icon at the top of the page.
Configuring UTM parameters for separate blocks
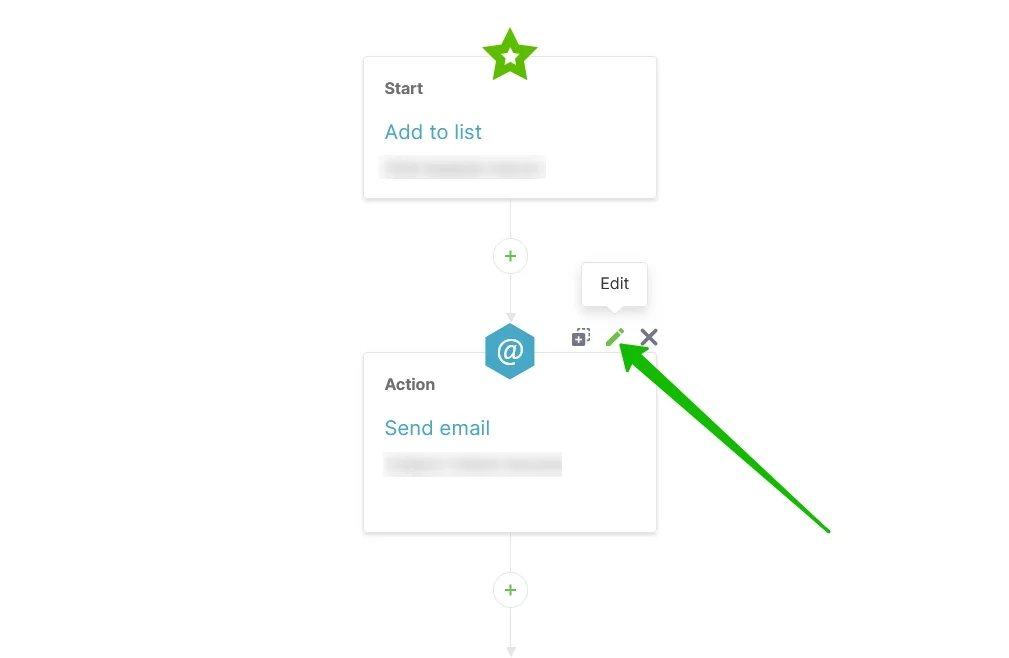
To set up the tags for the Send Email option, go to the series, move your cursor onto the block and click on the Edit sign above it.
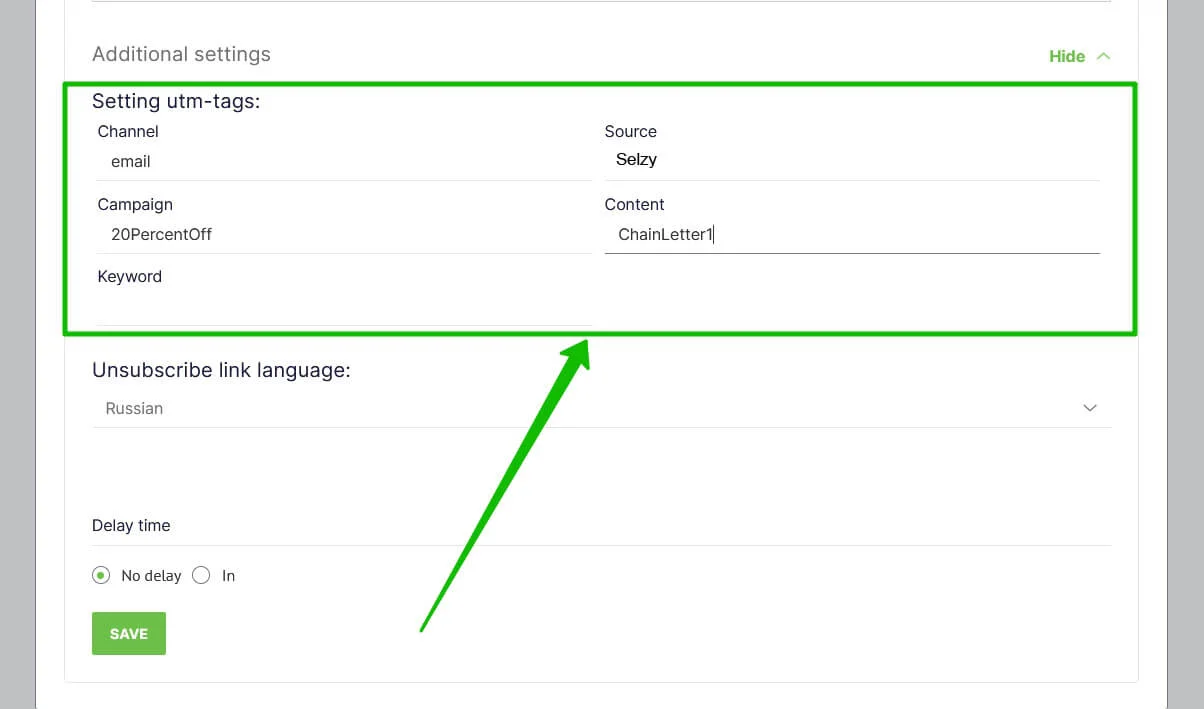
In the appeared window click on the Show button. Add your tags to the respective fields and click on the Save button. To track the efficiency of a particular letter, use the Content parameter.
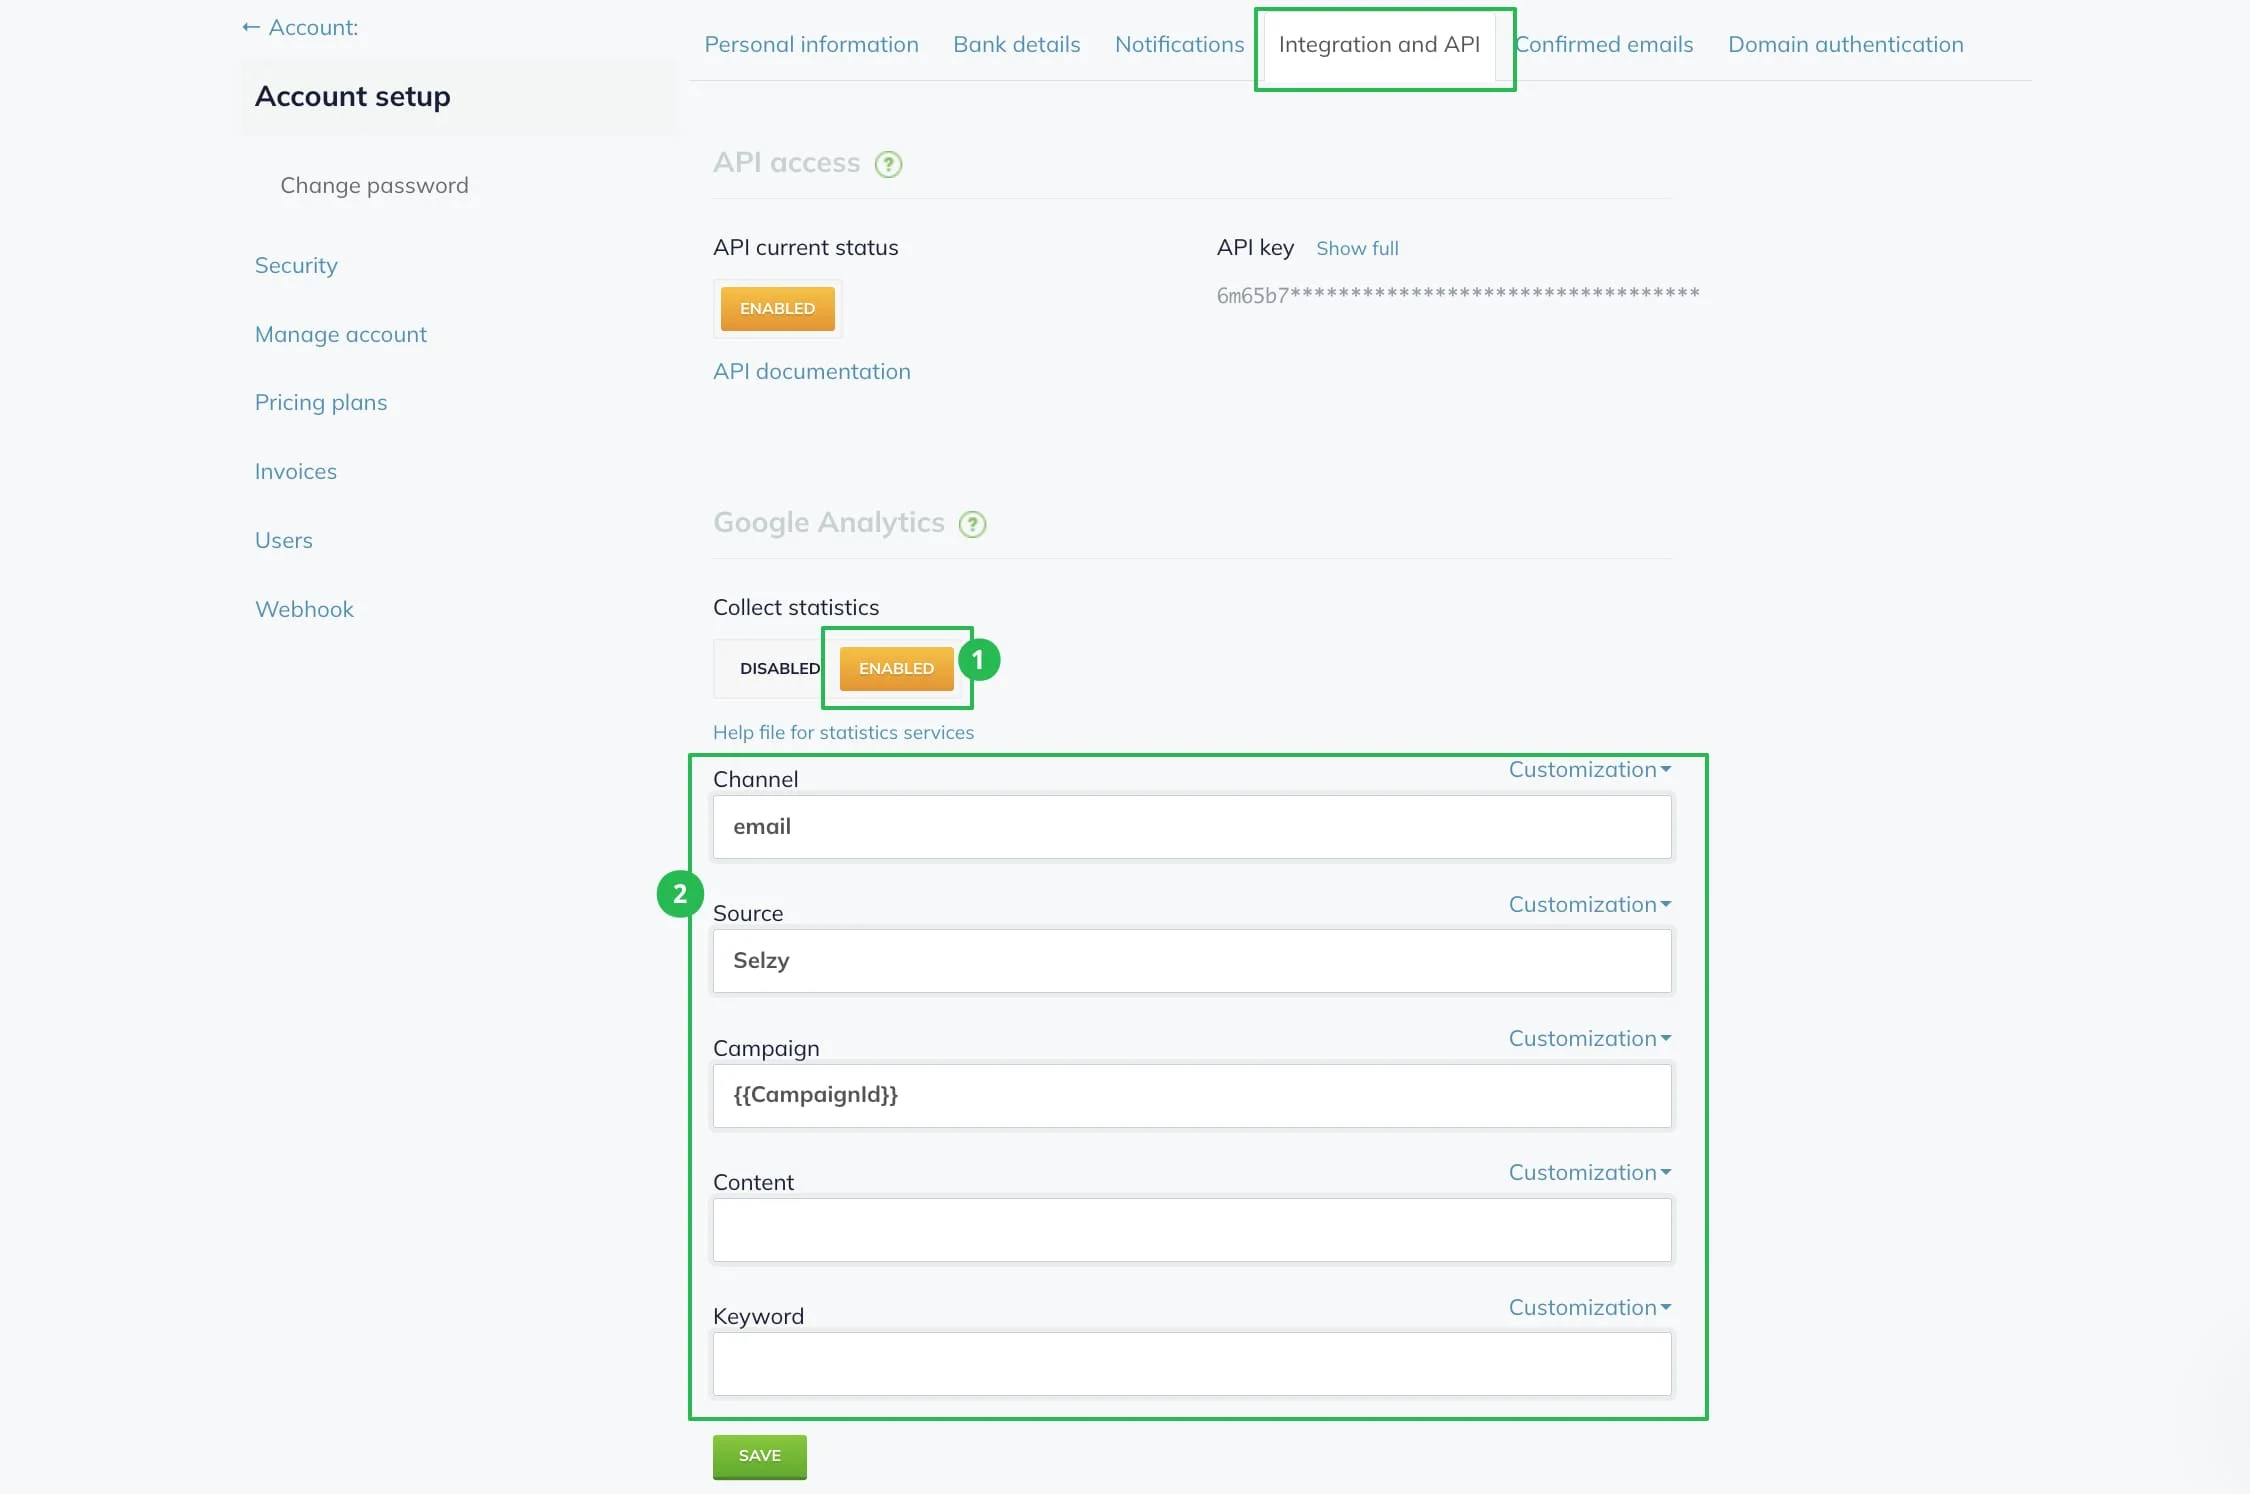
Configuring the tracker from Dashboard
You can also configure automated tagging for all the campaigns you send by adding them to your account settings. In this case, you won’t have to set up the tags for each particular email.
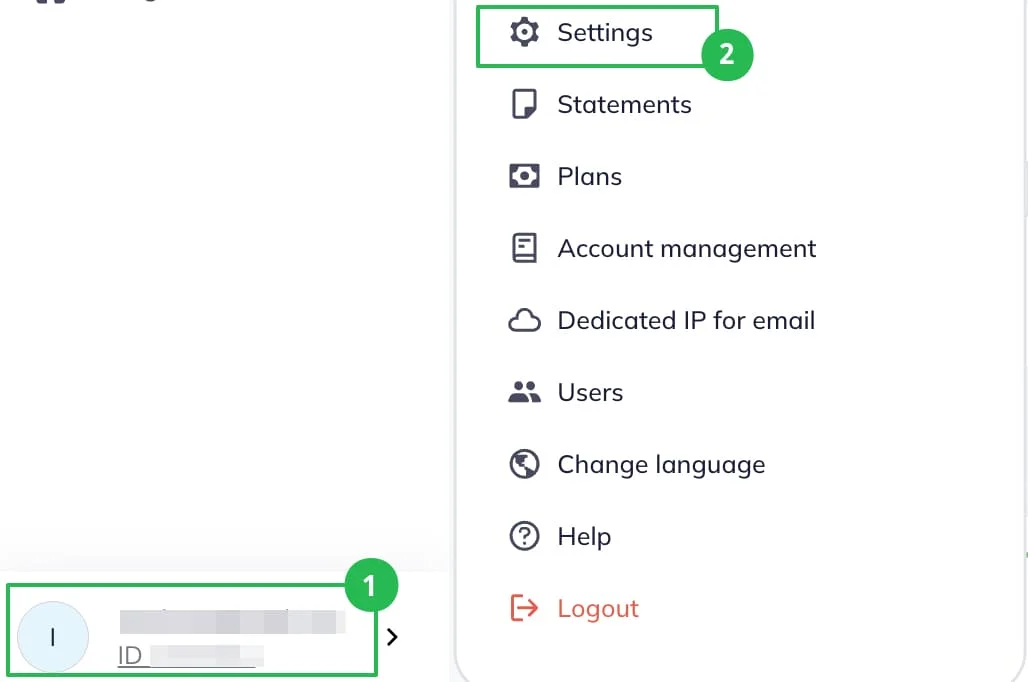
To add tags to all your campaigns, go to the Settings Section. To do this, click on your account’s Login and choose Settings.
Choose the Integration and API tab. At the bottom of the page, click on the Enabled button in the Google Analytics option.
Add your tags to the respective fields and click on the Save button.
You can personalize your tags. To see the available personalization parameters, click on the Customization button next to the tag fields.
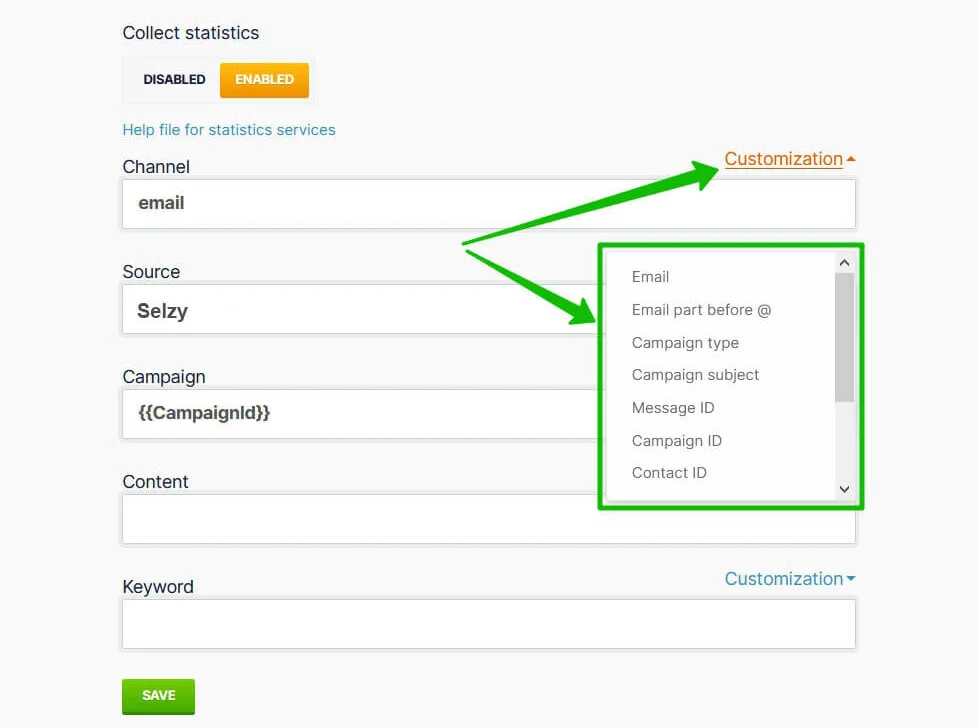
The tags from your account settings will be used for all your campaigns.
However, if you add other tags to the settings for a particular campaign, they will be used instead of the account ones.


